 Yes, that’s correct, a $3.00 scanner. A recent post on Hackaday detailed the clever, and almost embarrassingly inexpensive 3D scanner project called the 3D(ollar) Scanner.
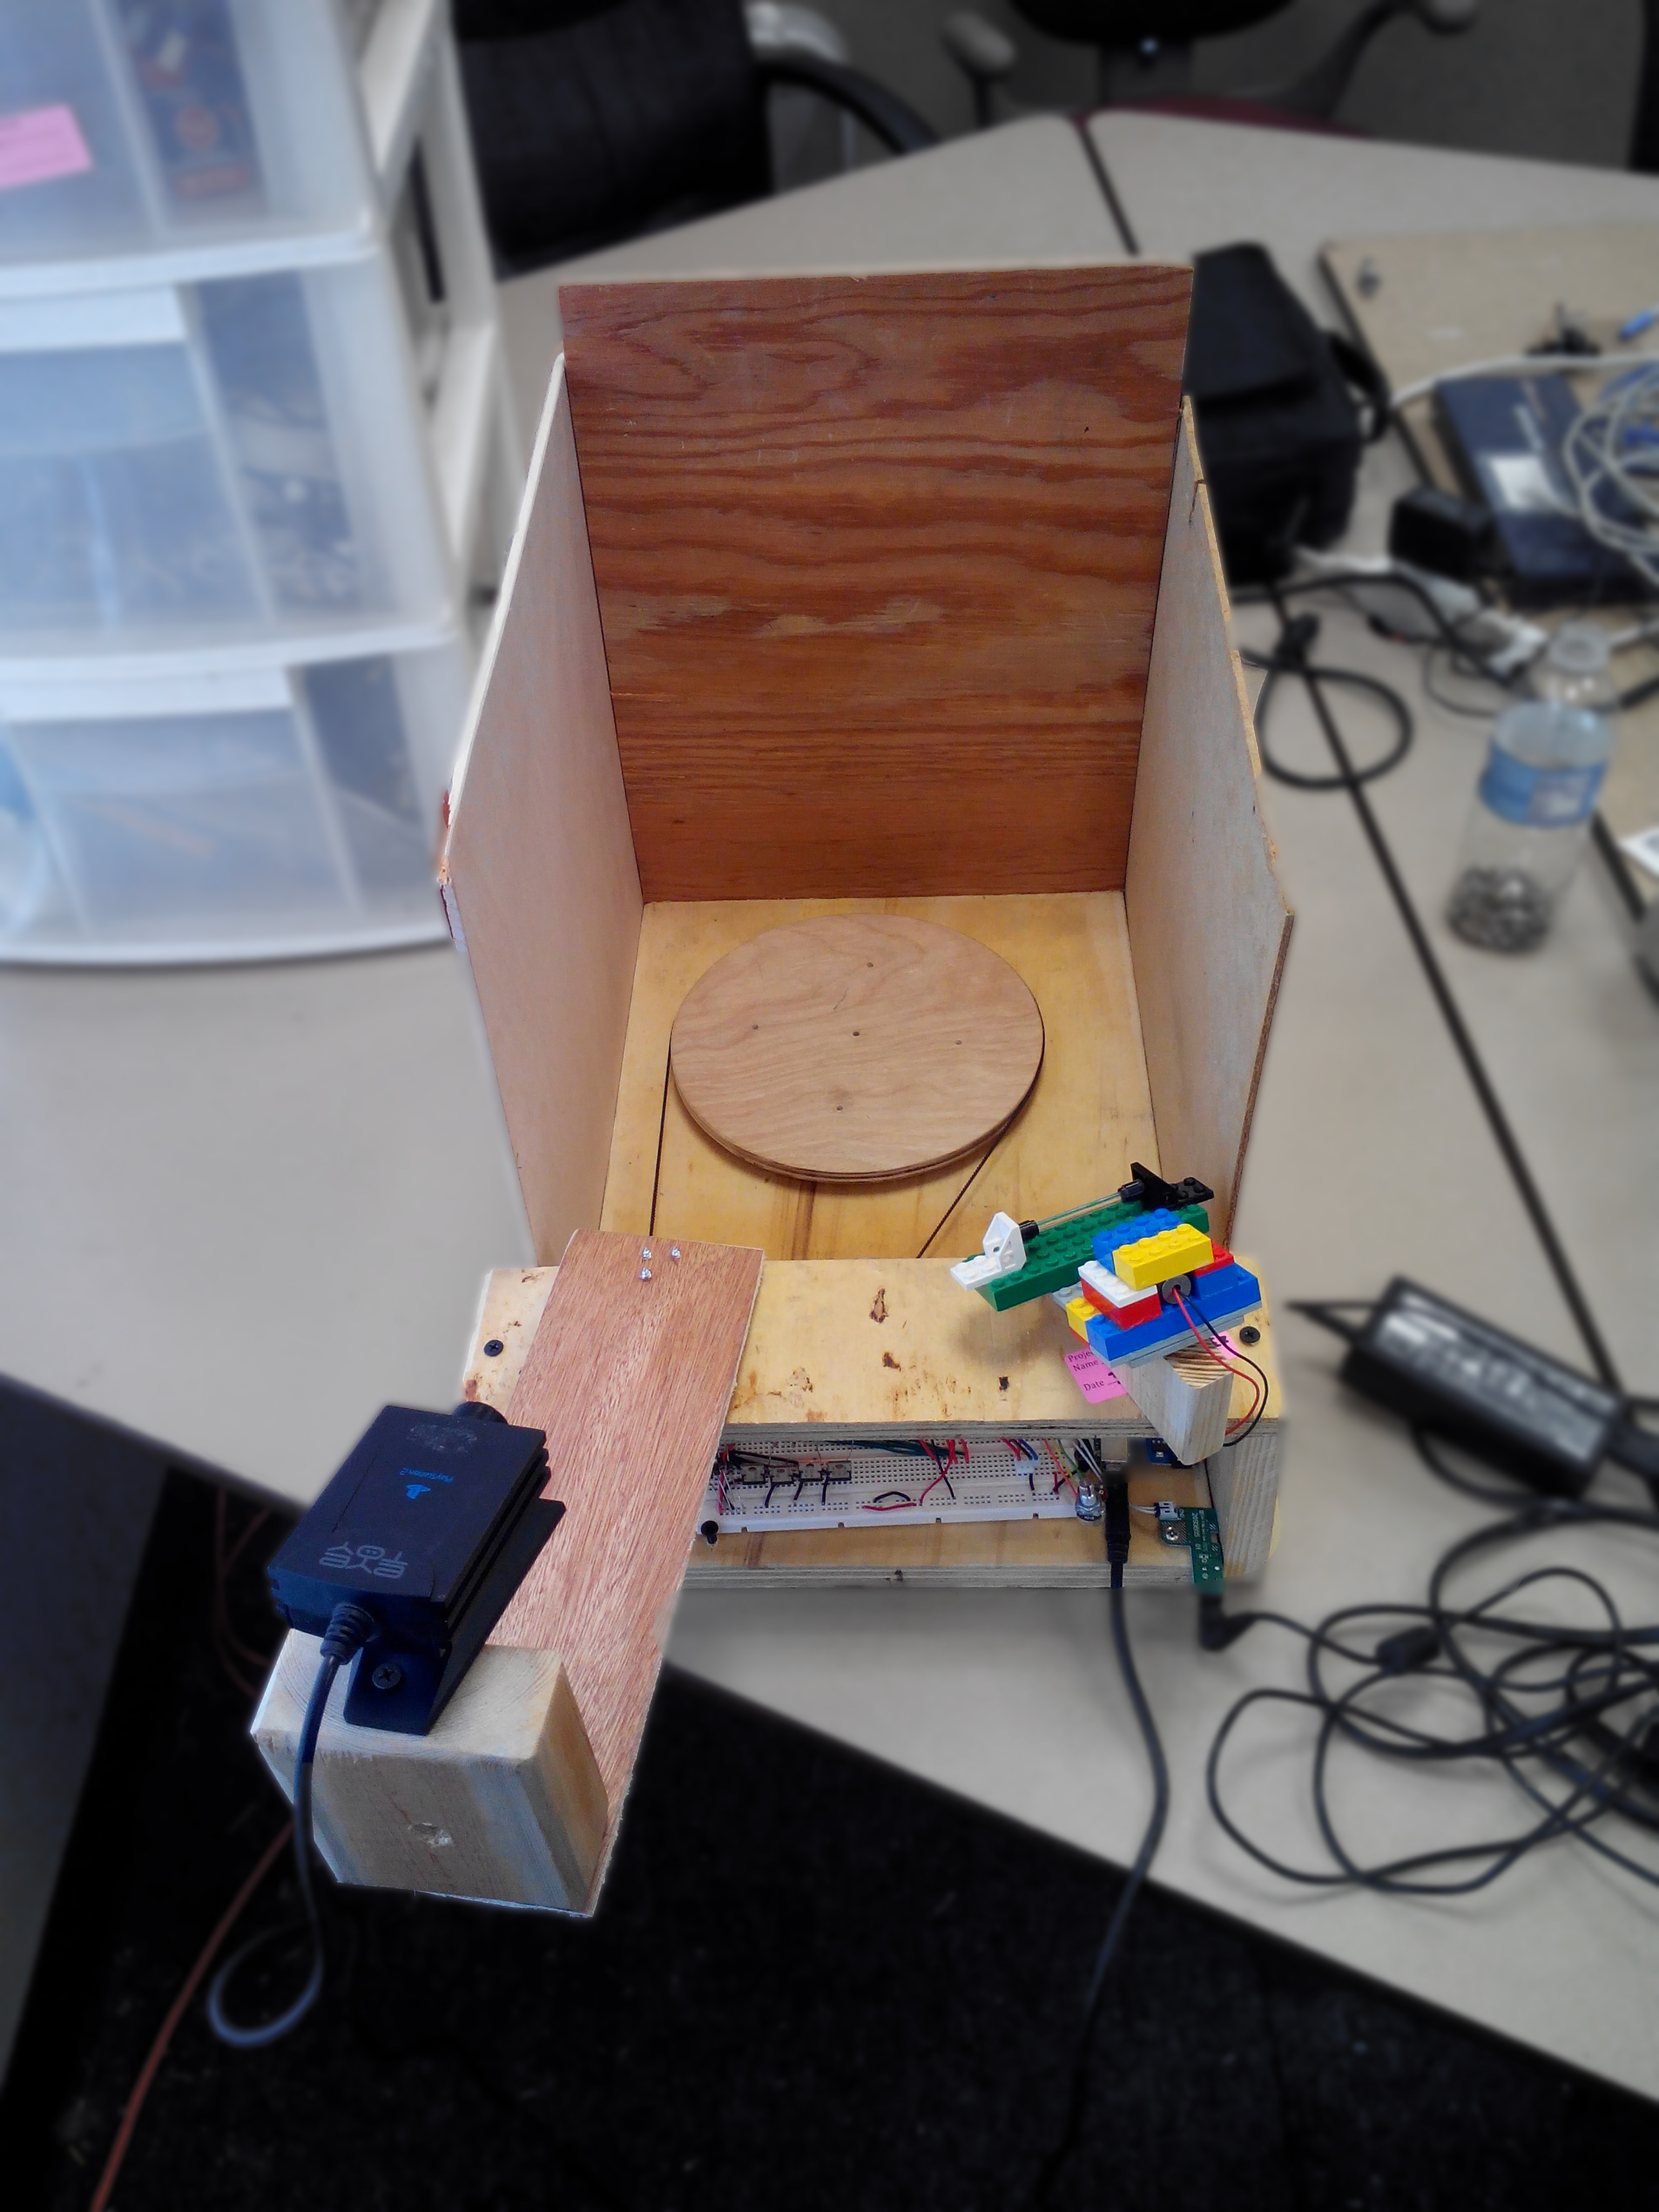
Hackaday member Joshua Crawley recently posted a project for building a working 3D scanner that only cost him $2.73 to make, thanks to salvaged parts and an inexpensive Lazy Susan. The Lazy Susan is attached to a simple stepper motor drive and slowly rotates 360 degrees while a laser beam shines on an object. A webcam records the image and feeds the data directly to a computer as a point cloud.
You can see Crowley discussing his build in depth here:
While Crawley’s 3D(ollar) Scanner is heavily based on this Instructables build, he was able to create his own version of a working 3D scanner more affordably, while also enabling point cloud generation for any vertical camera position. This means that the scanner can determine the size of an object, allowing you to 3D print it to the same exact scale. Crawley insists that his project is the only 3D scanner build that can do this.
The build itself is very simple, but clearly requires more than $3. Granted, as Crowley did, most of the parts can be salvaged pretty easily or picked up at an extremely low price from thrift stores. But the $3 price tag has helped the 3D(ollar) scanner stand out in a crowded group of cheap 3D scanner hacks. Whereas his point cloud solution – the real reason you need to check out his build – may not have. I guess even makers and hackers need to consider marketing sometimes.
Crowley plans to continue to work on his inexpensive 3D scanner and wants to include the ability to output point clouds and STL files so that anyone can easily scan an object and immediately send it to be sliced for 3D printing. This is shaping up to be a pretty impressive little hack, especially considering how he essentially built it from trash.
You can see all the details and more pictures for the build over on Hackaday, and you can find all of his plans, files and code over on GitHub.