3D Printing Industry reviews the INTAMSYS FUNMAT PRO 410 3D printer.
Developed by Shanghai-based INTAMSYS (founded 2012), the FUNMAT PRO 410 is an industrial-grade FFF system characterized by its large build volume and high-performance 3D printing capabilities.
As is the case with the rest of the INTAMSYS portfolio, the FUNMAT PRO 410 is definitively a high-temperature 3D printer. Built for engineering-grade parts in sectors such as aerospace, automotive, and energy, the system’s value is derived largely from its extensive material capabilities. The FUNMAT is capable of processing a wide variety of high-performance filaments such as PEEK, PEKK, ULTEM, PPSU, PP, PC, and a number of carbon fiber-reinforced composites.
Beyond just printing virtually any polymer-based material on the market, the FUNMAT PRO 410 also offers a dual-extrusion printhead, a sizable build volume of 305 x 305 x 406mm, and a plethora of quality-of-life features you’d expect from a printer in the price range.
A truly industrial-grade build
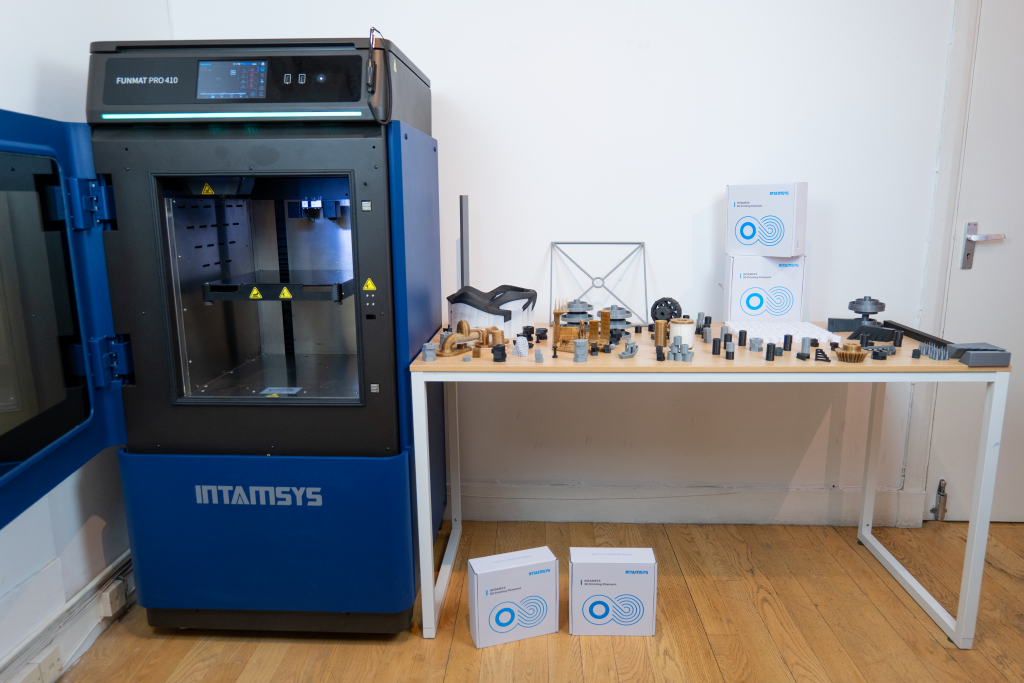
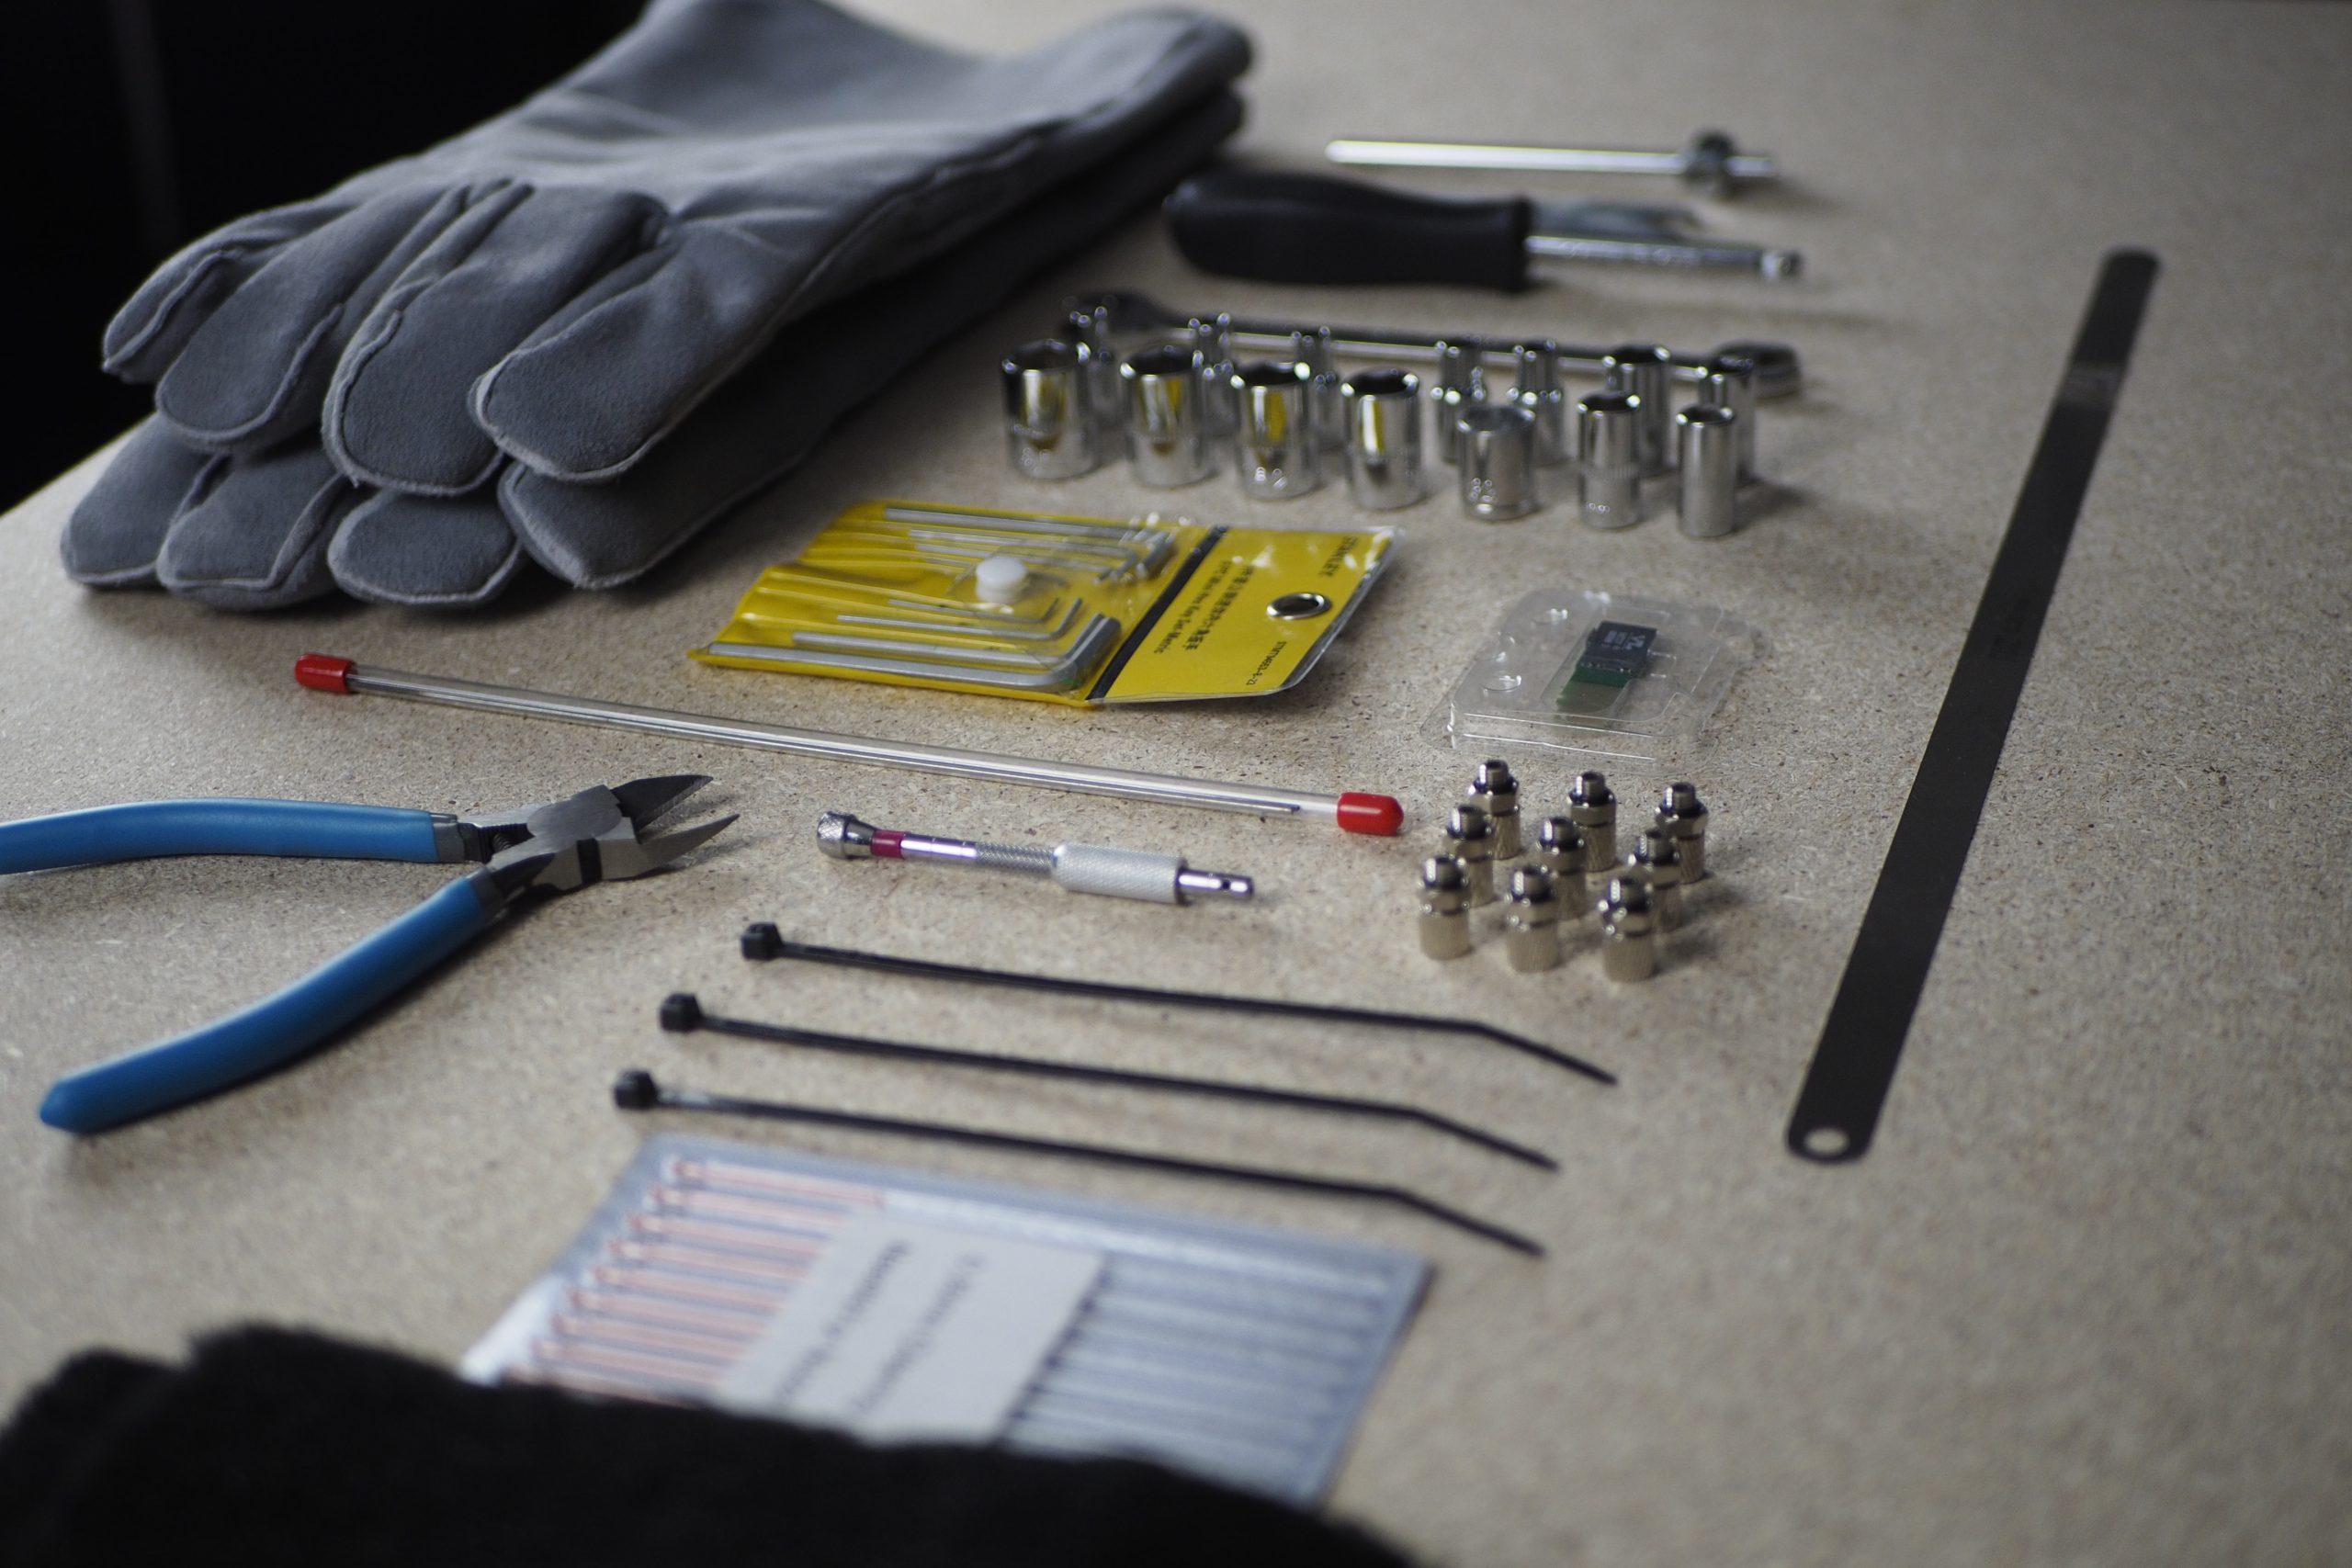
INTAMSYS aims to merge quality and reliability with the FUNMAT PRO 410, and this is evident right at the unboxing stage. The system comes very well-packaged in a robust wooden shipping crate with all of the maintenance tools you’ll need to keep it up and running for years.
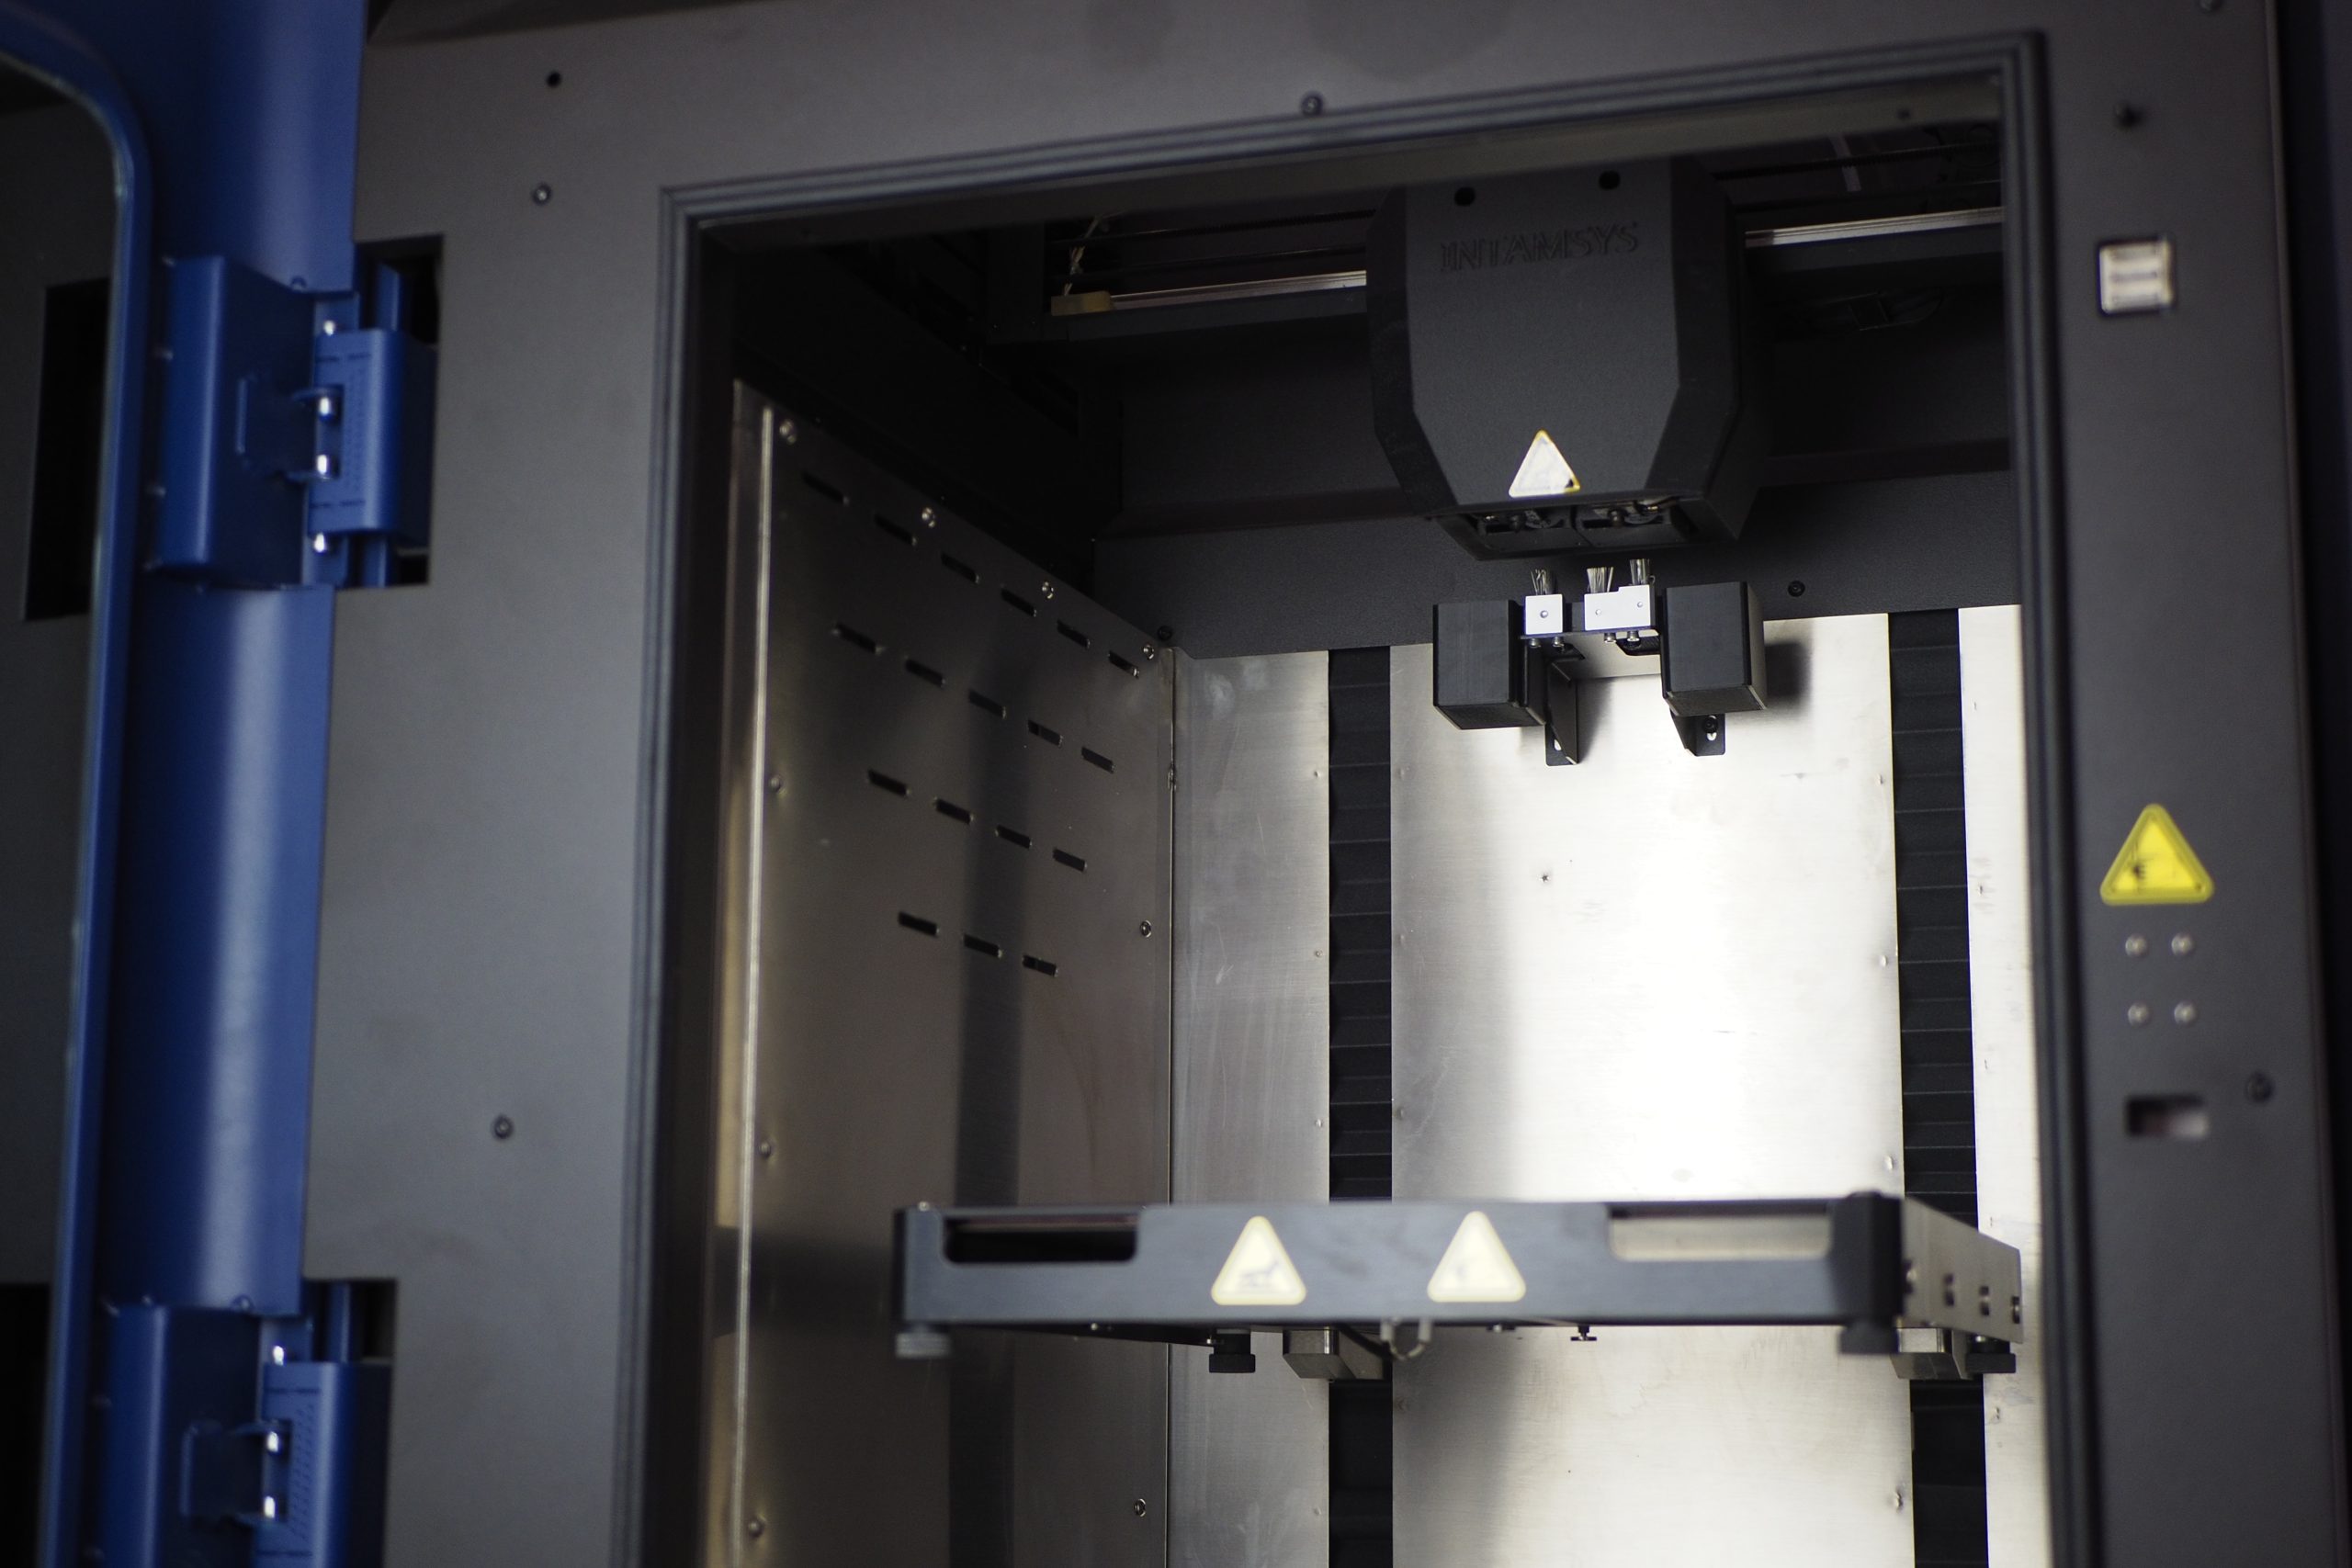
The simple yet sturdy all-metal frame comes fully enclosed with a door on both the front and the top. We found the double access point design to be particularly handy on larger builds as it’s not always convenient to just reach in and handle the print from the front. It’s worth noting that the printer is on the larger side, measuring 728 x 684 x 1480mm and weighing in at 220kg. As such, it’ll need its own dedicated workspace on the shop floor.
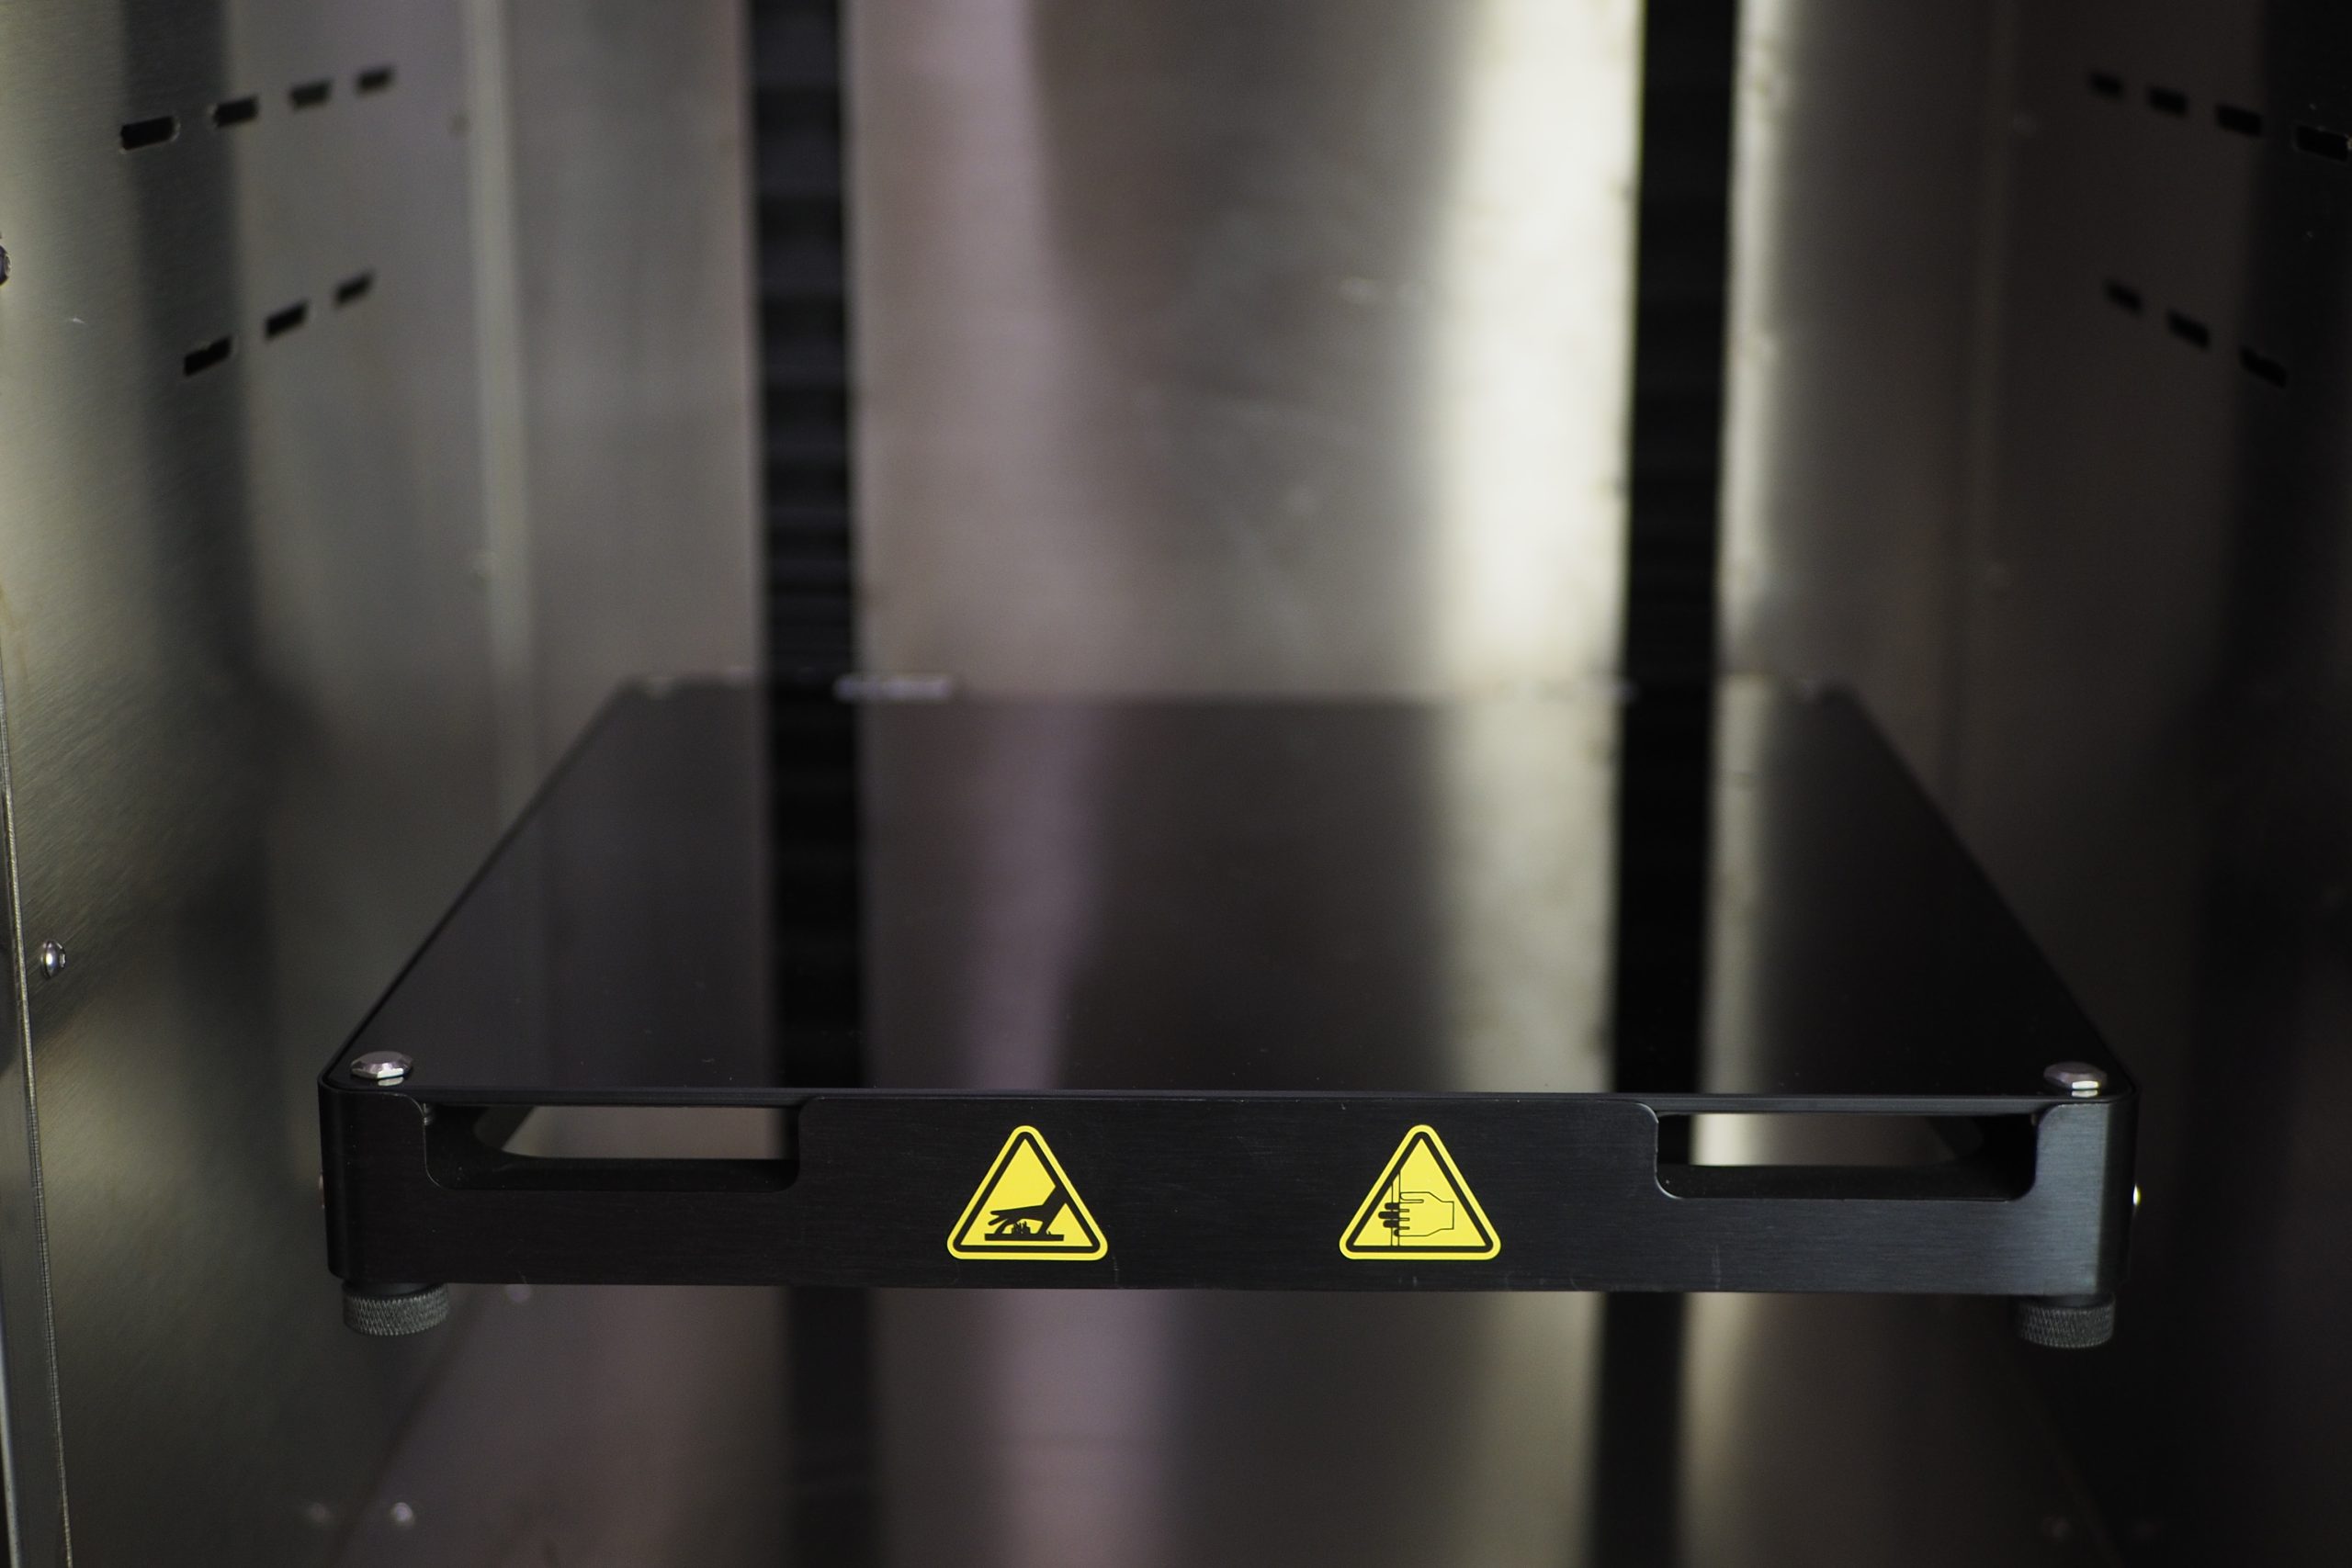
The build chamber itself can be heated up to 90°C and sports an active carbon H13 HEPA filter for safe indoor operation. However, the FUNMAT PRO 410 should still always be used in a well-ventilated area. The bed can also be heated up to 160°C, which is crucial when it comes to avoiding warping and delamination issues on the undersides of prints. INTAMSYS’ print surface of choice is a magnetic, removable glass plate, making part retrieval a simple procedure.
On the connectivity front, users are given the choice between an SD card, Wi-Fi, and ethernet. The system even comes complete with additional features like a filament jam/absence warning and power failure recovery, making the day-to-day 3D printing workflow all the more pleasant.
Your choice of high-temperature filaments
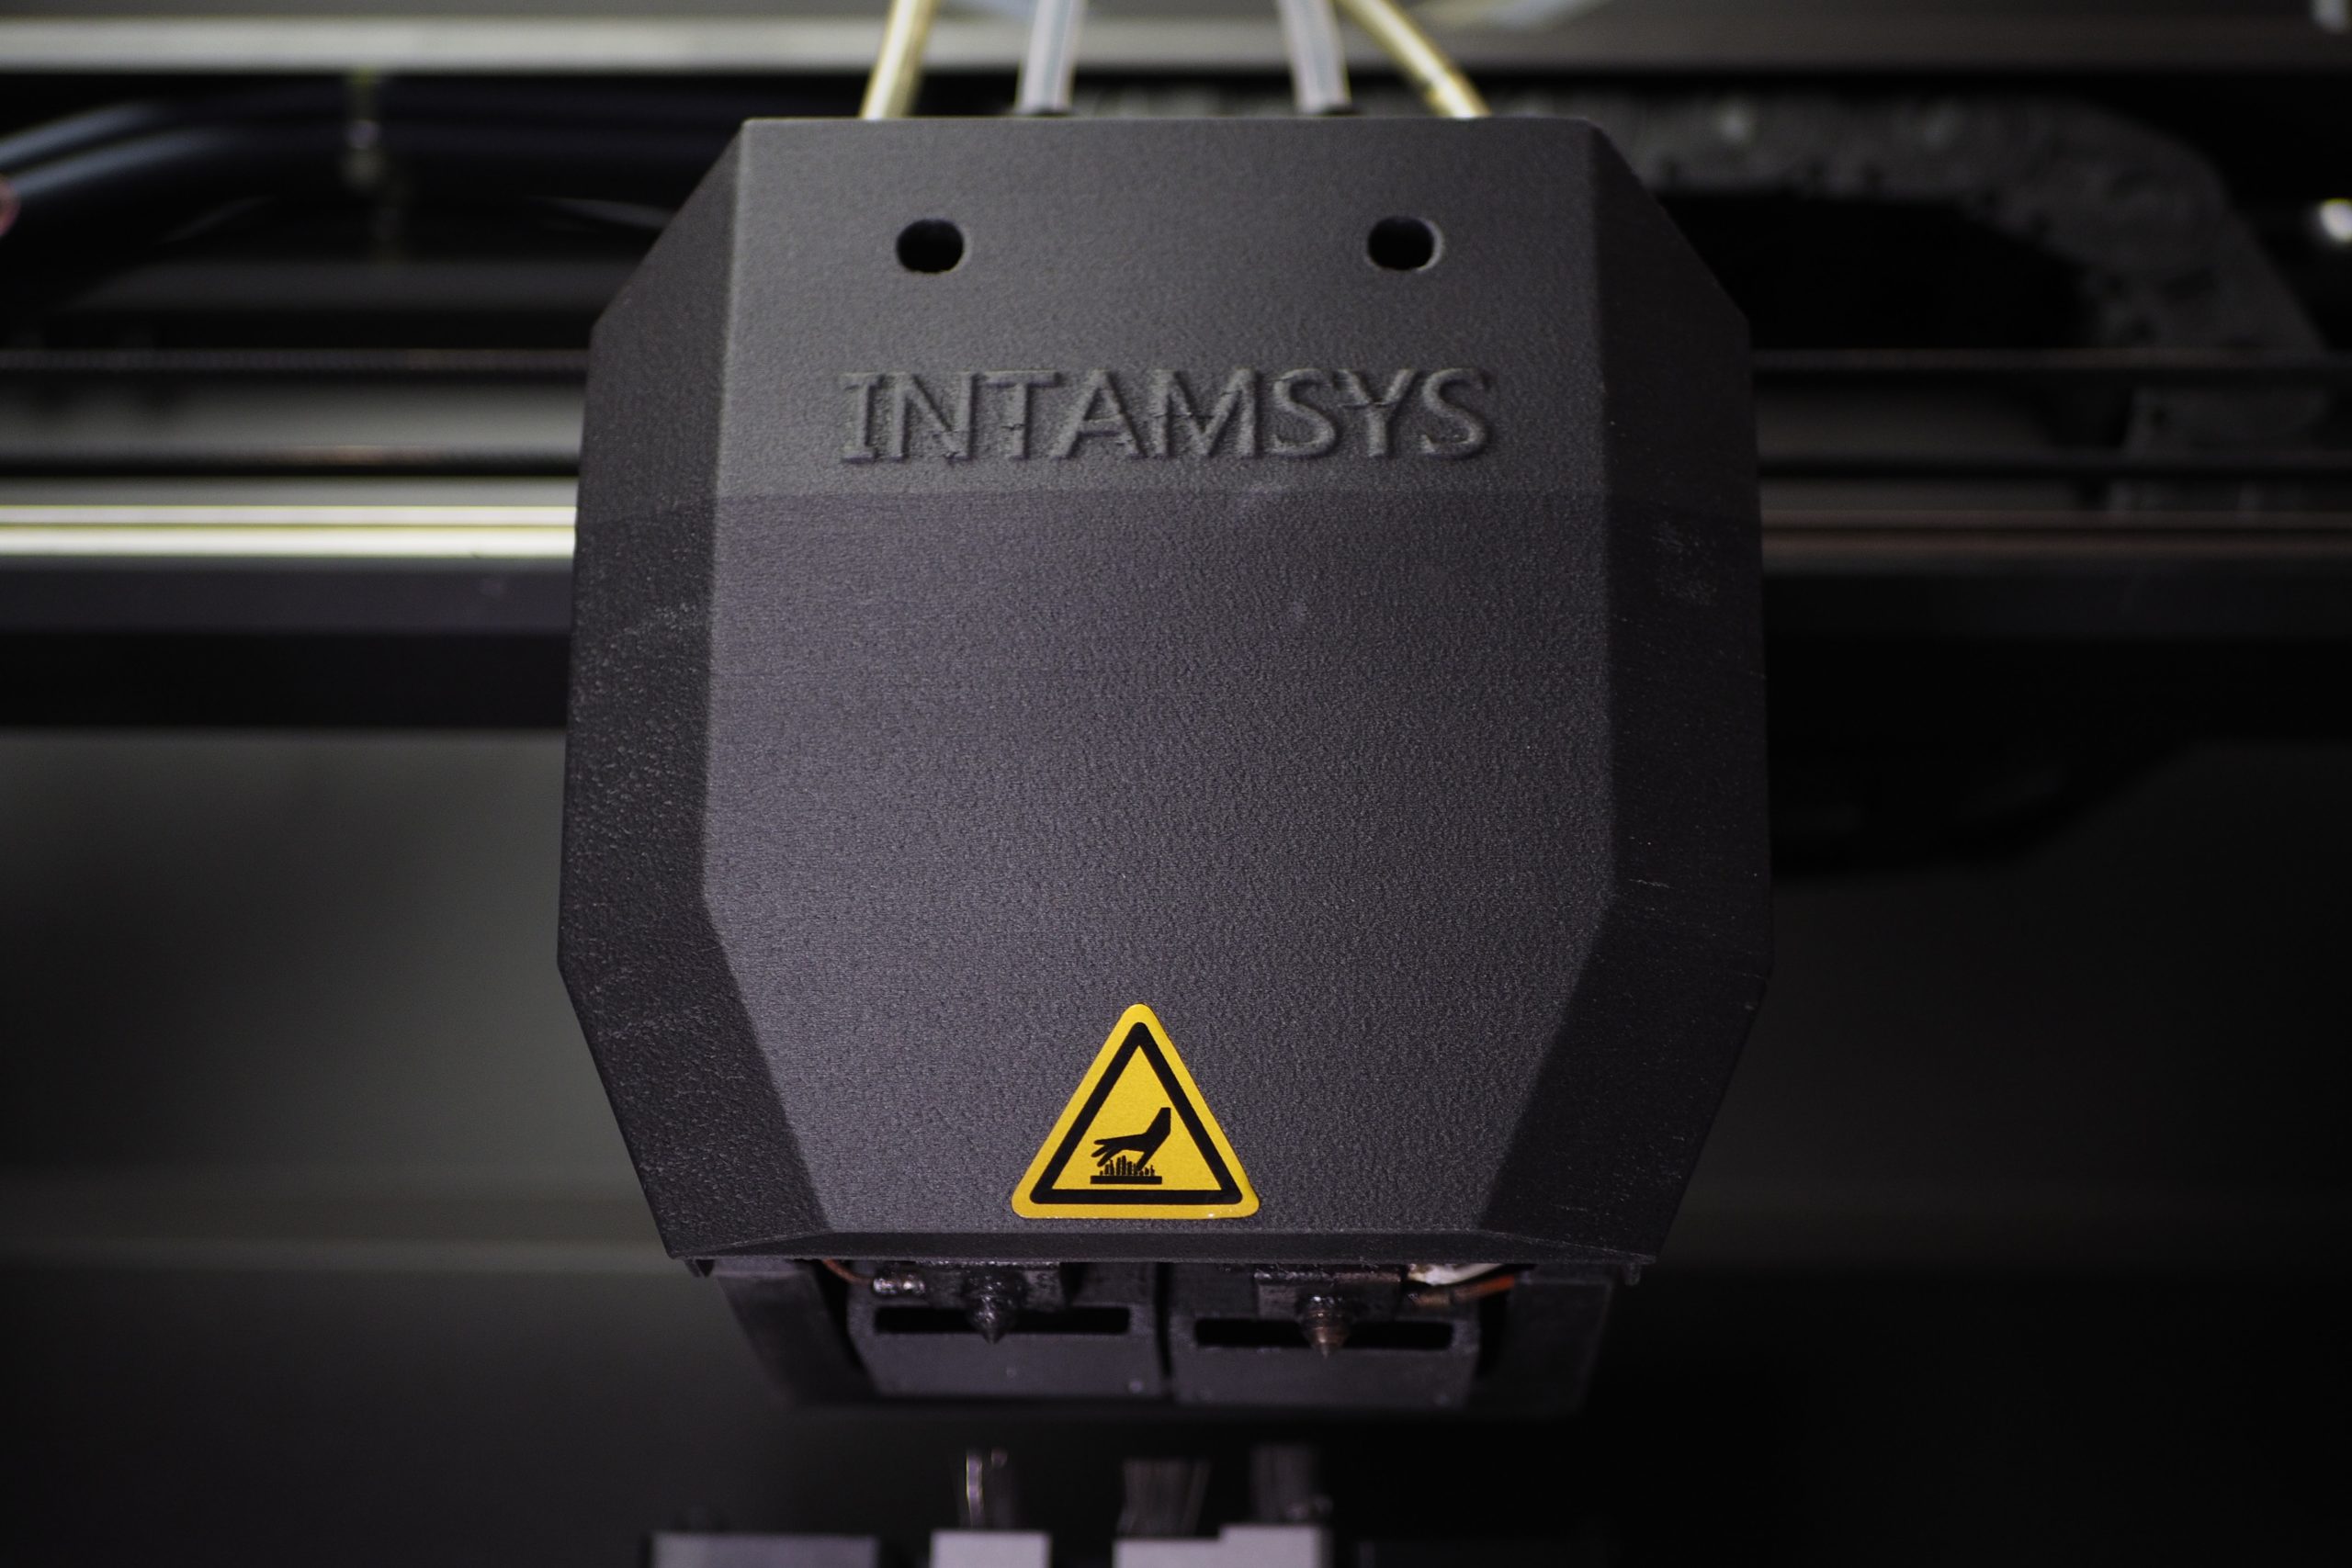
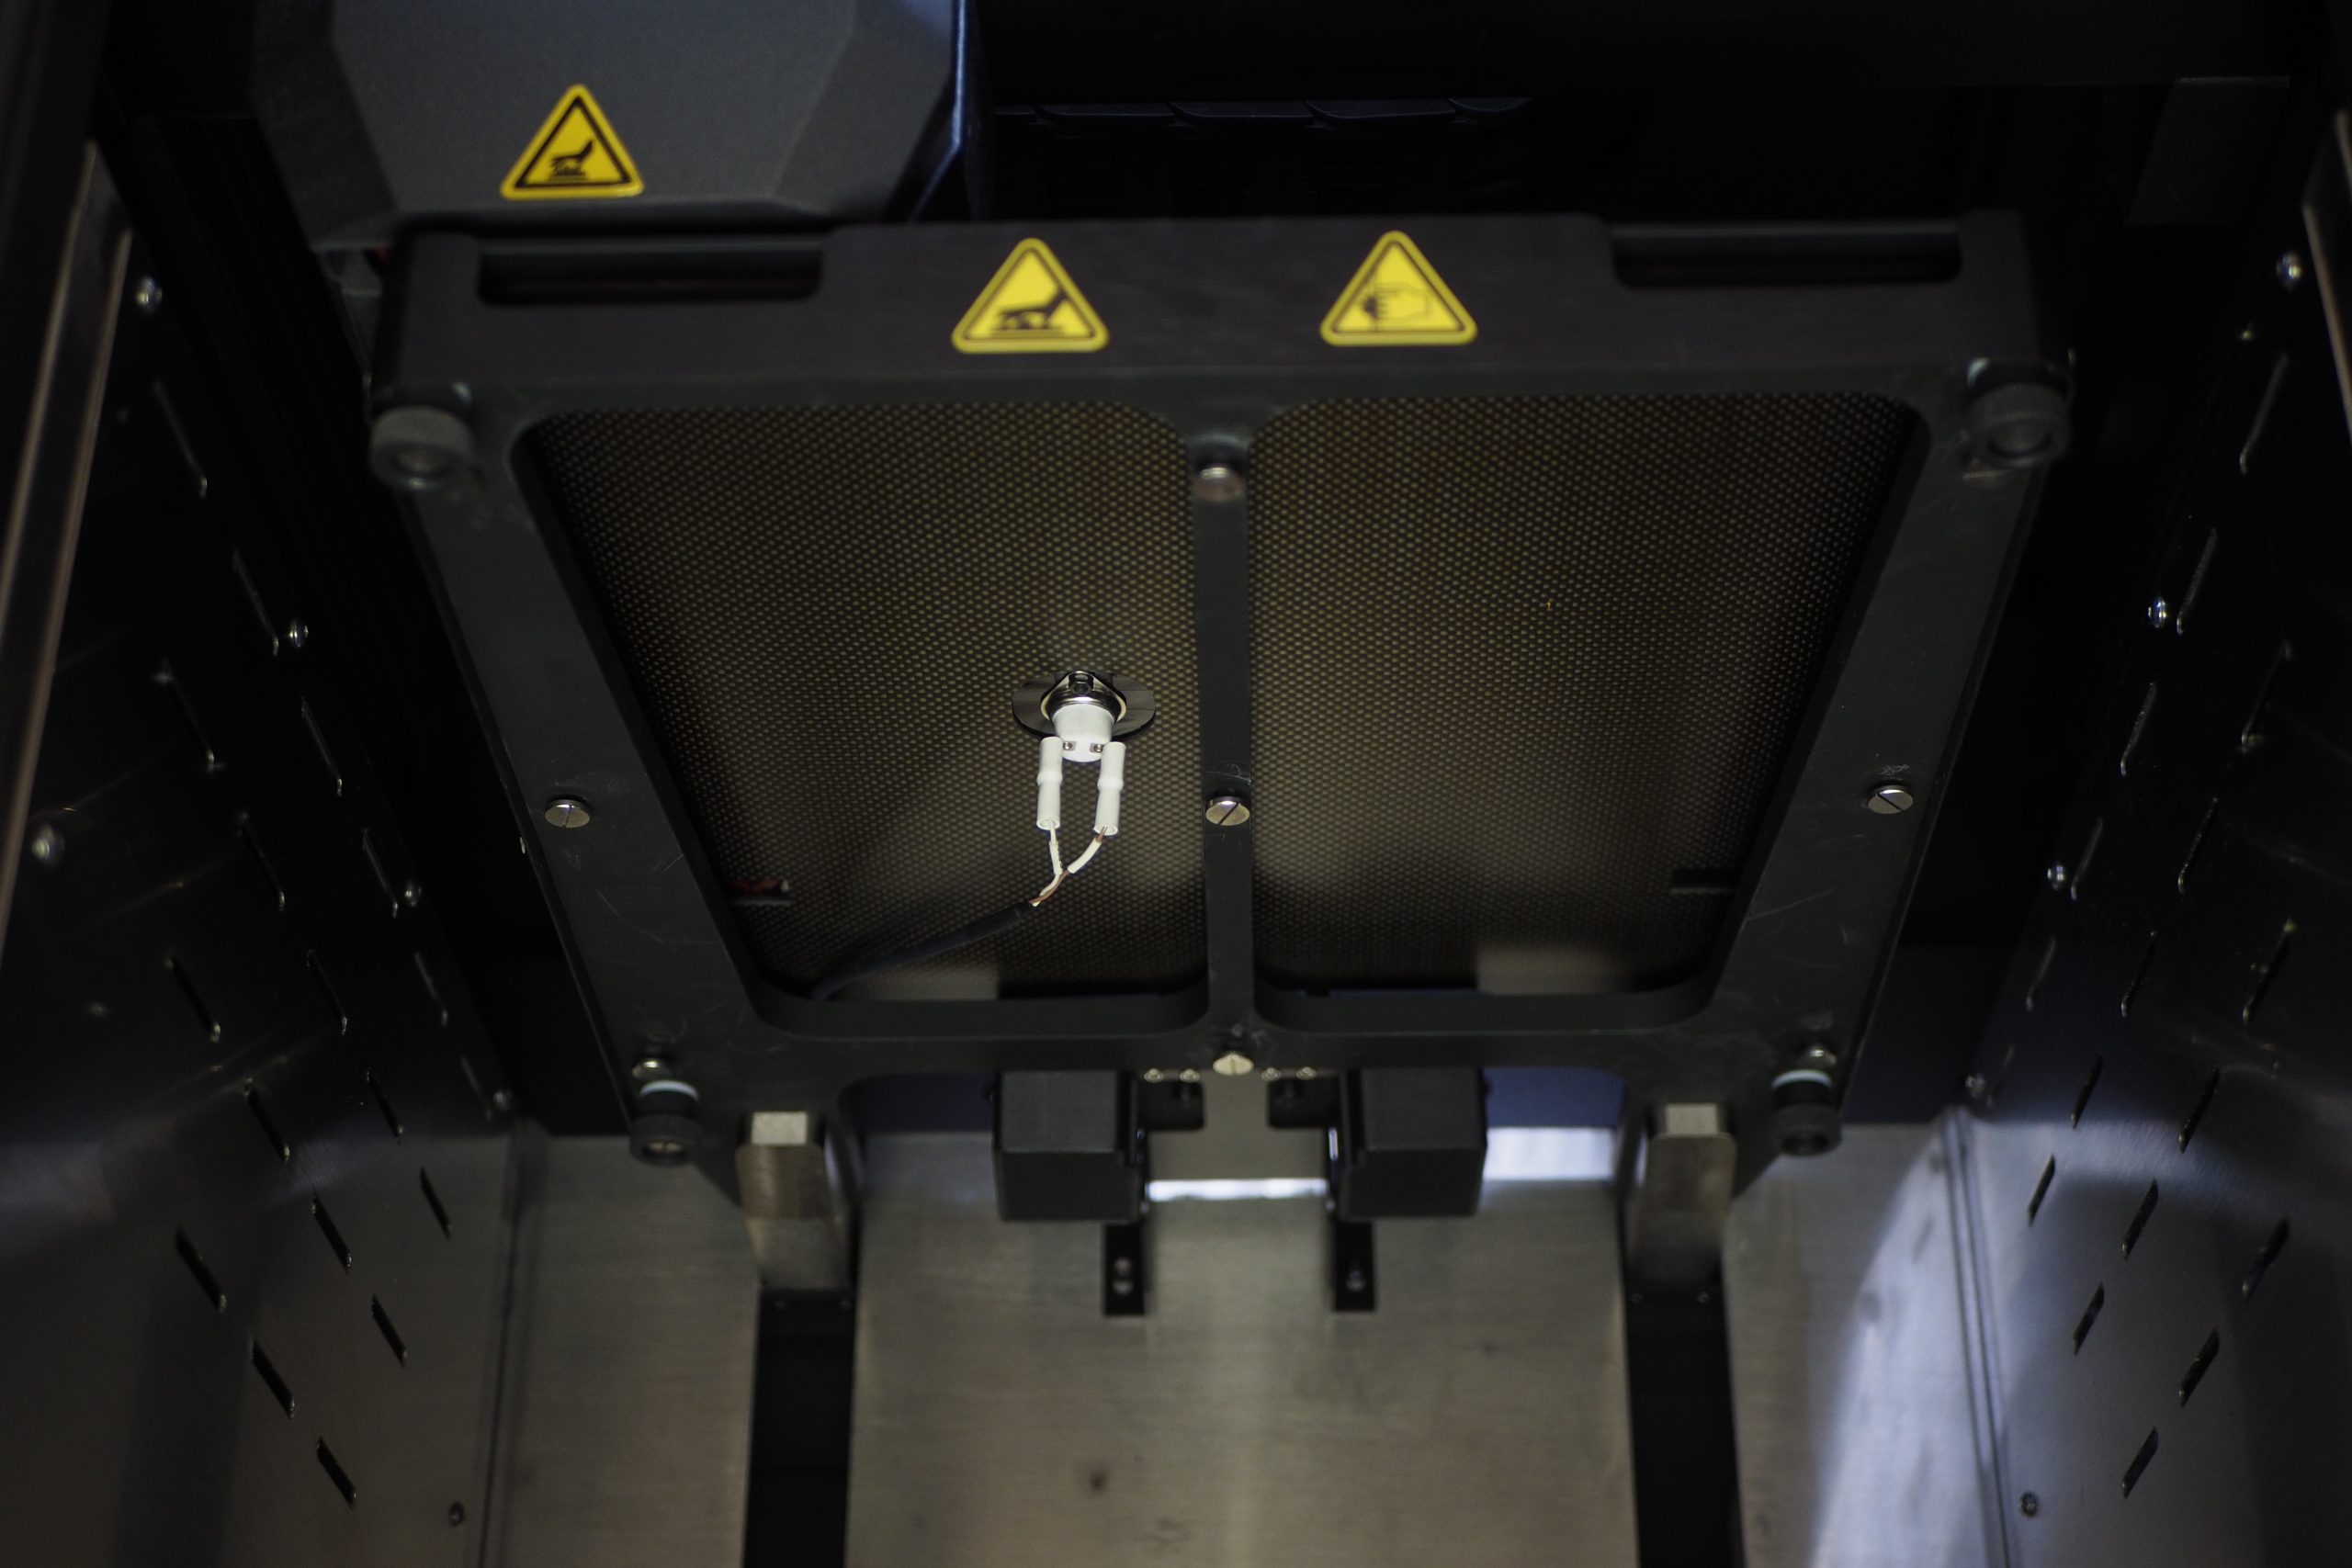
To print with high-temperature filaments, a high-temperature nozzle is necessary, and this is really where the FUNMAT PRO 410 shines. The system’s printhead is equipped with a dual extrusion setup, a custom liquid cooling assembly, and a CuCrZr nozzle with a maximum temperature of 500°C. Additionally, INTAMSYS has chosen to integrate two San Ace 40T Wide Temperature Range Fans to cool the filament once it’s been extruded and there are two purge tanks to facilitate nozzle cleaning.
The printhead is a direct drive system, meaning the motor which supplies the filament to the nozzle is mounted directly in the printhead itself (although the filament chamber also has two motors to aid with material feeding). While this may result in slower speeds when compared to a Bowden extruder system, it means the FUNMAT is also better equipped to handle complex and flexible filaments, which is the priority on an industrial-grade printer such as this.
The list of compatible filaments is an extensive one and includes ASA, BOVH, HIPS, PVA, PP, PA, PEEK, PEKK, ULTEM, carbon fiber composites, and more.
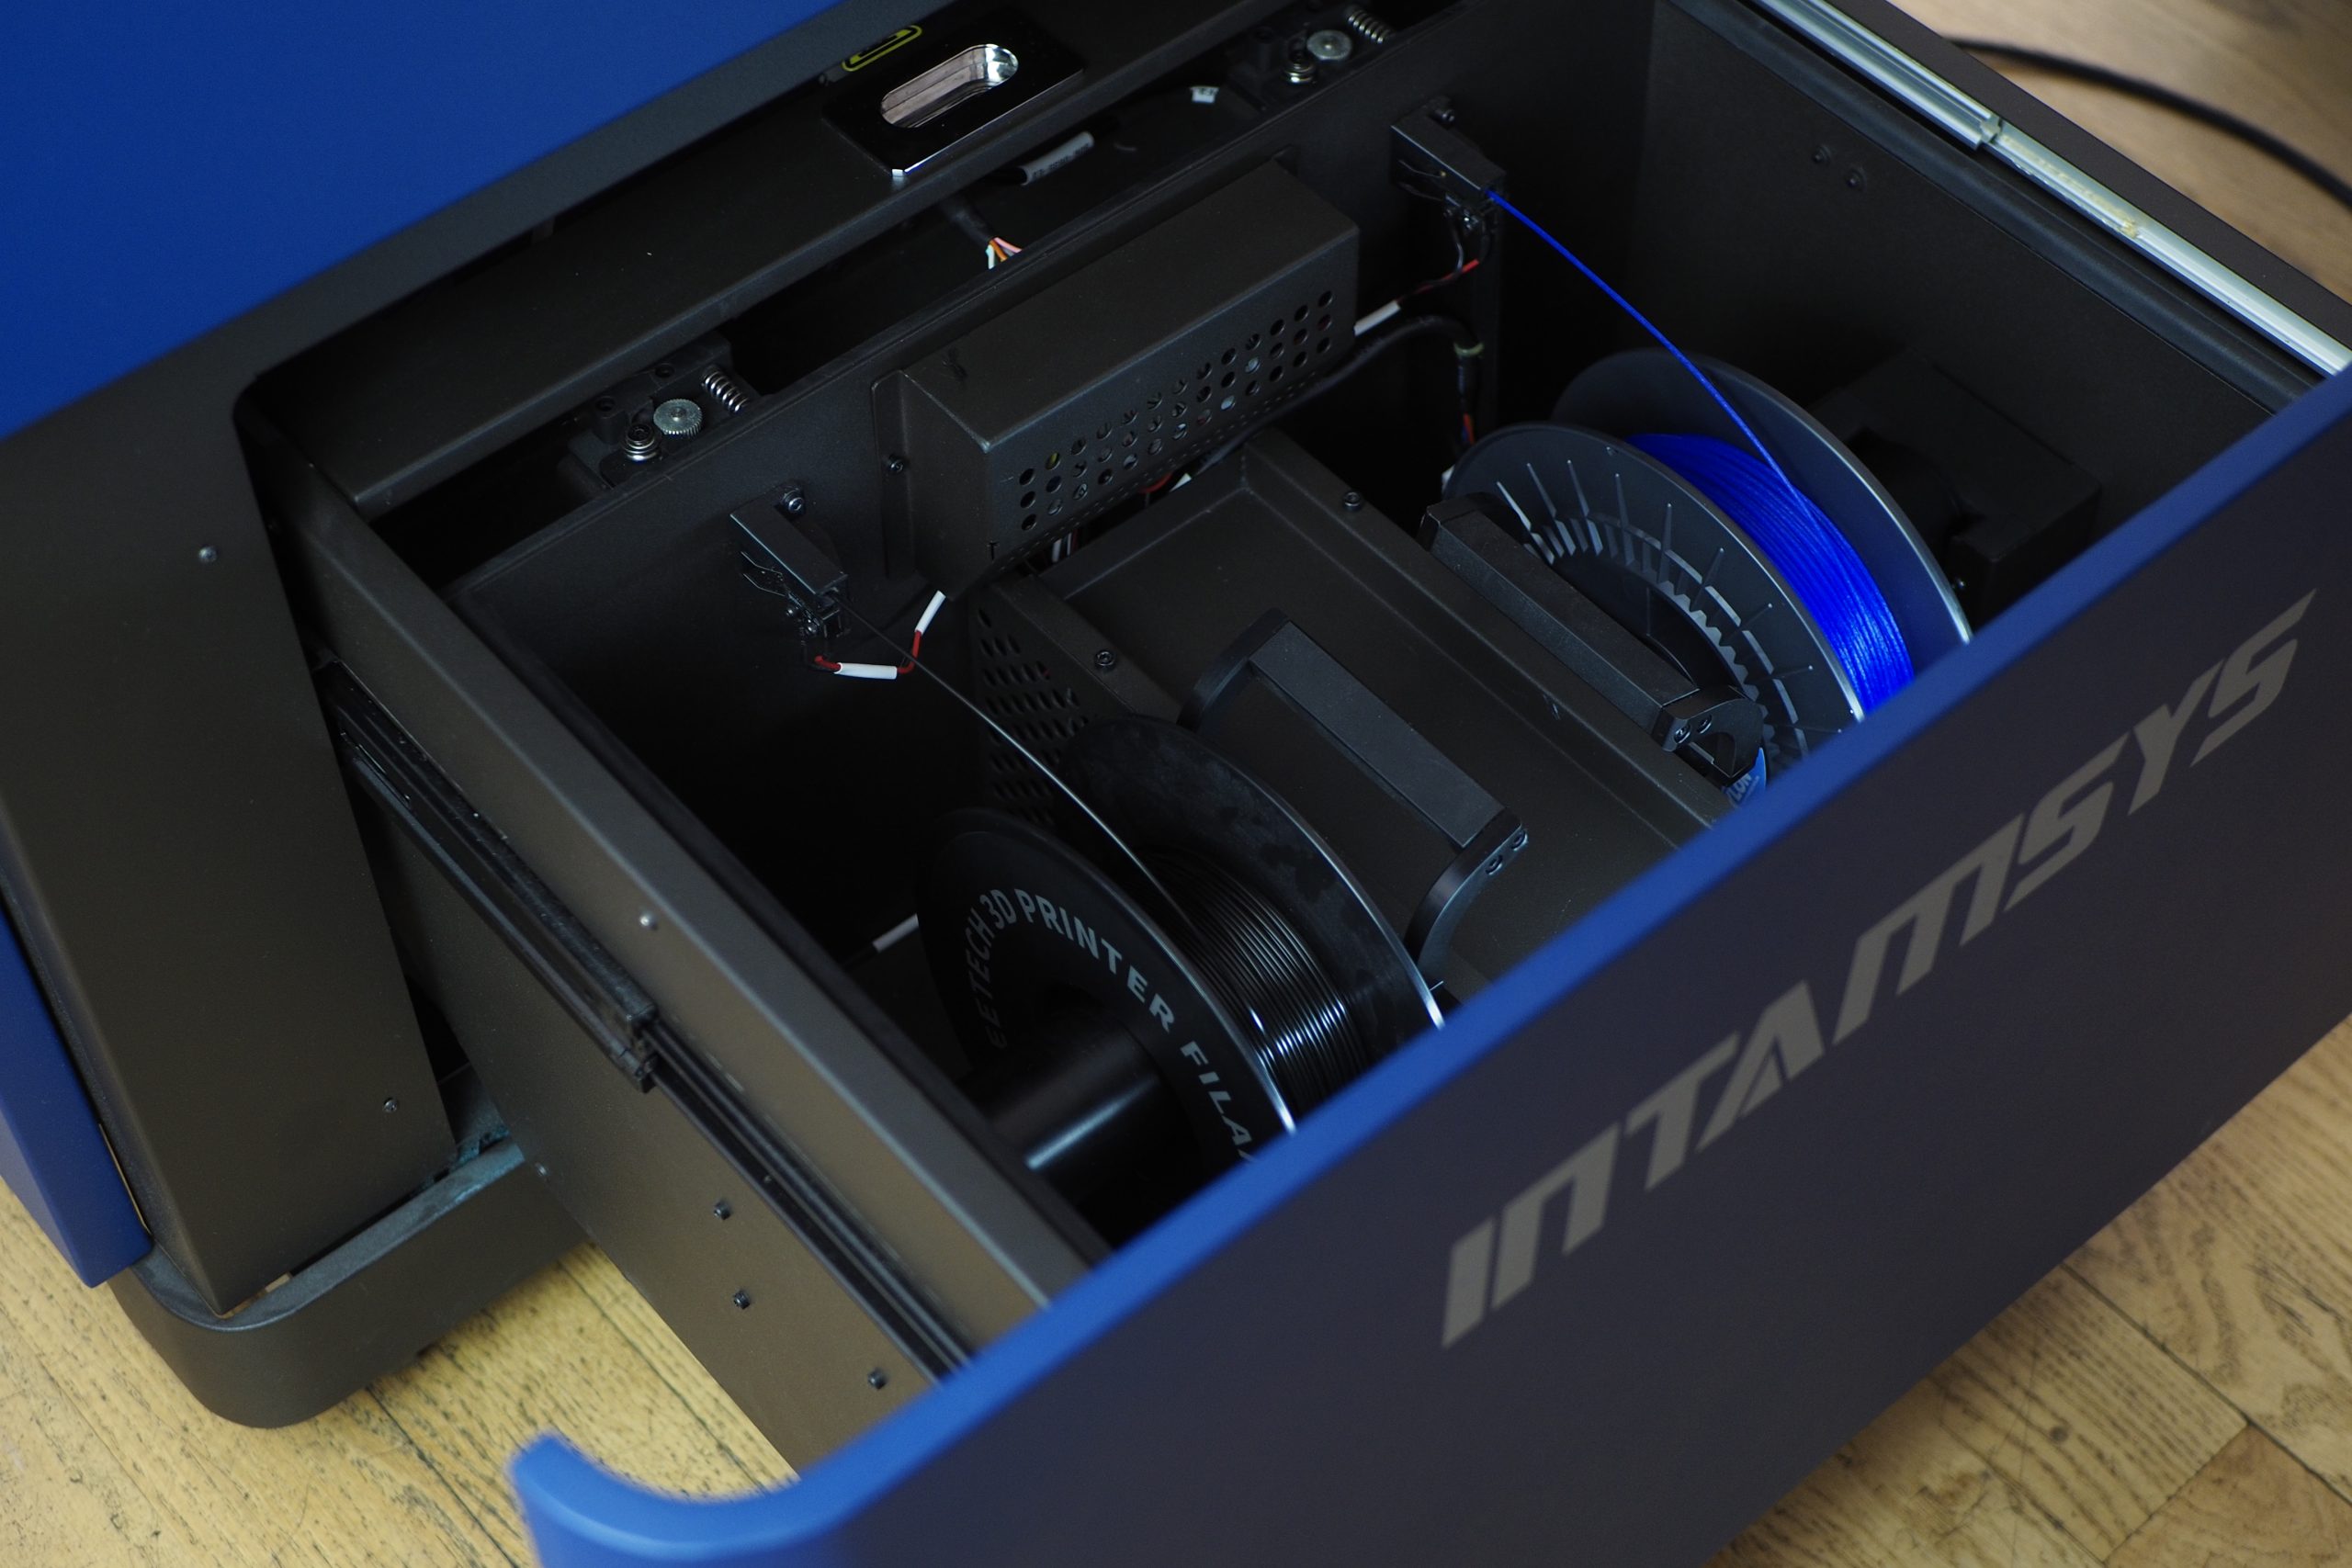
One very noteworthy feature of the FUNMAT is the heated filament chamber – something we don’t always see on high-temperature printers. Housed underneath the build chamber, the filament chamber is a humidity-controlled environment that’s used to store up to two material spools at a time. It can be heated up to 70°C and ultimately serves to prevent the active filaments from absorbing any moisture, vastly improving print performance over the long term. We found this addition to work like a charm and can only hope other industrial-grade OEMs follow suit.
To level or not to level
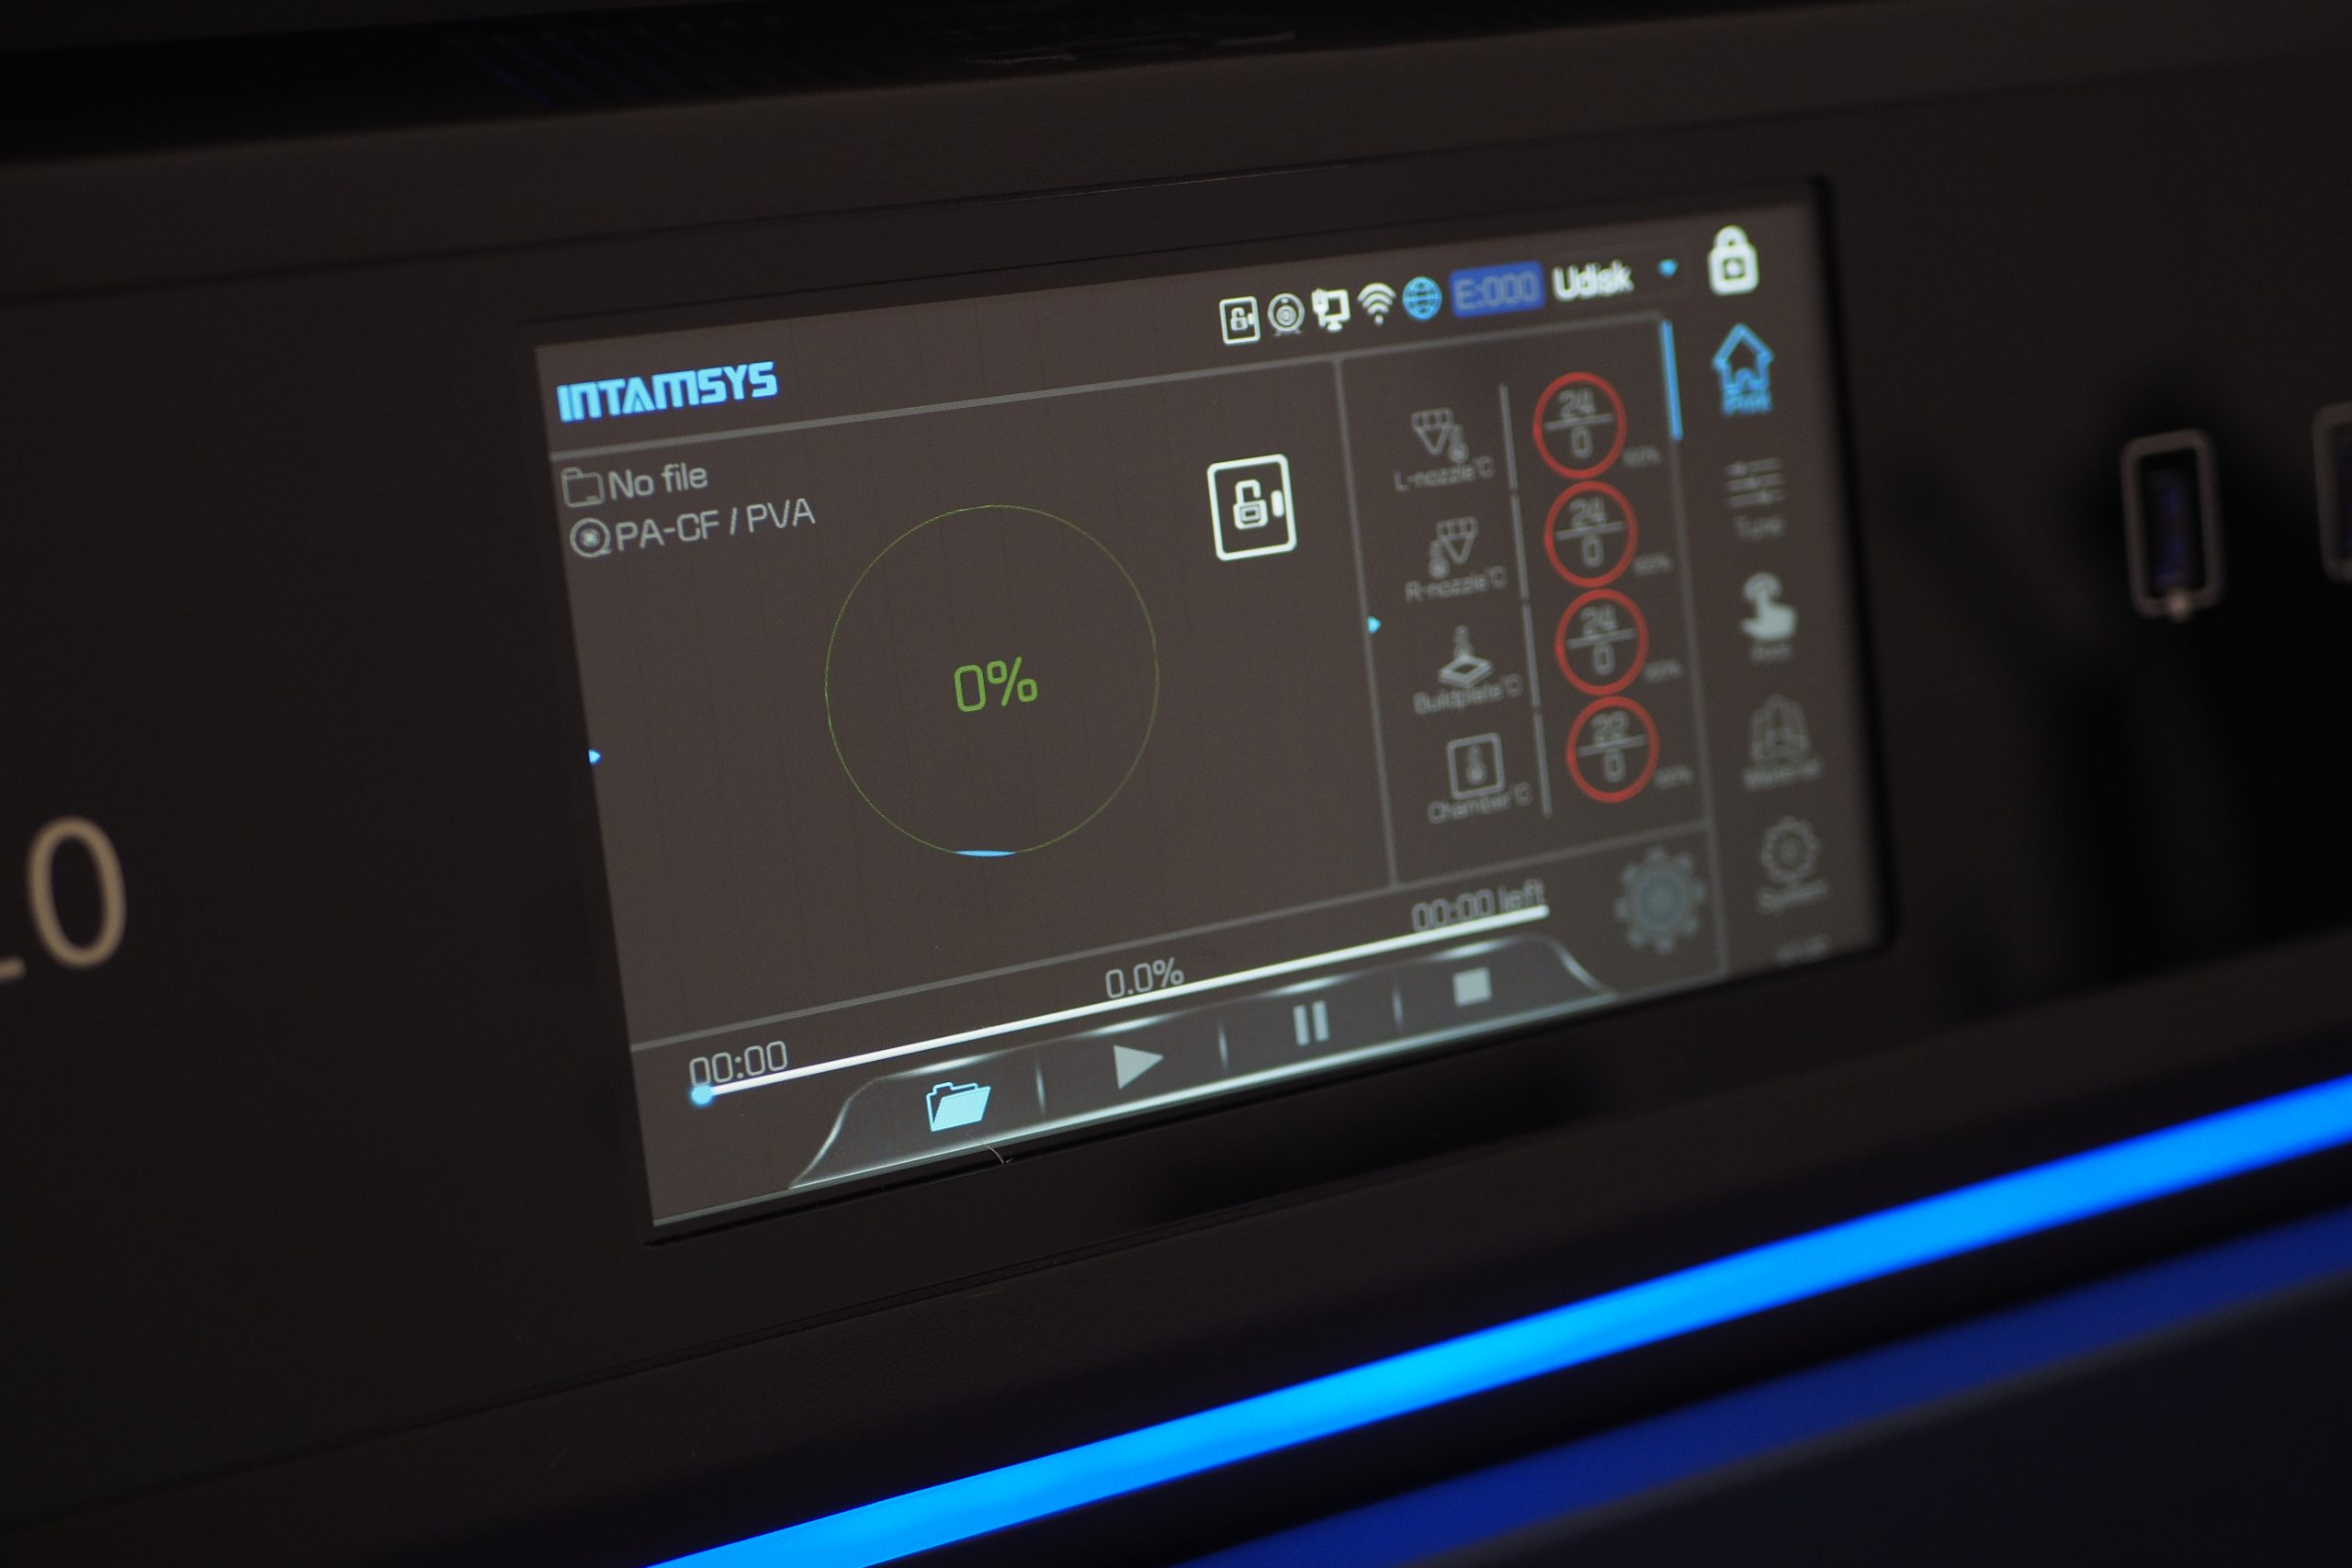
When it comes to operating the FUNMAT, the 7” full-color touchscreen on the front provides all of the functionality you need, including bed calibration, filament loading, and build management. The system is wrapped in a highly refined user interface with intuitive menus and several different language options. The FUNMAT has one of the most sophisticated control systems we’ve tested here at 3D Printing Industry, so it’s about what you’d expect from a printer of this caliber.
A properly leveled build plate is essential if you want high-quality 3D prints, with the general rule of thumb being to leave a gap as thick as a sheet of paper between the nozzle and the print surface. The FUNMAT PRO 410 comes with a leveling sensor installed directly in the printhead as standard, and users can choose between two different bed leveling methods: manual and automatic.
The manual method, guided by the touchscreen, sees users adjust four spring-loaded knobs underneath the build plate, each of which modifies the flatness of the bed. While the process is fairly long and arduous, it works well so we recommend manually leveling the bed at least once before starting any prints.
On the other hand, the automatic leveling method leverages the sensor installed in the printhead. With the help of the metal leveling ruler provided in the box, the system measures the positions of three different points on the build plate, allowing the printer to determine the relative position of the platform to the true XY plane. It then uses this offset to perform real-time compensation by raising or lowering the Z-axis during the printing process. This method works best once a manual calibration has already been done so it’s best to combine the two for optimal results.
Overall, the bed calibration system works as intended but it isn’t perfect. We found it to be time-consuming, so the FUNMAT could do with the addition of a piezoelectric sensor to make the workflow fully automated, or a live Z-offset button to adjust the nozzles during printing. The sensor would completely eliminate the need to slide any metal sheets under the nozzle, resulting in a truly user input-free process. It would also enable an automatic leveling step to be implemented before each print, further improving the first layers of builds.
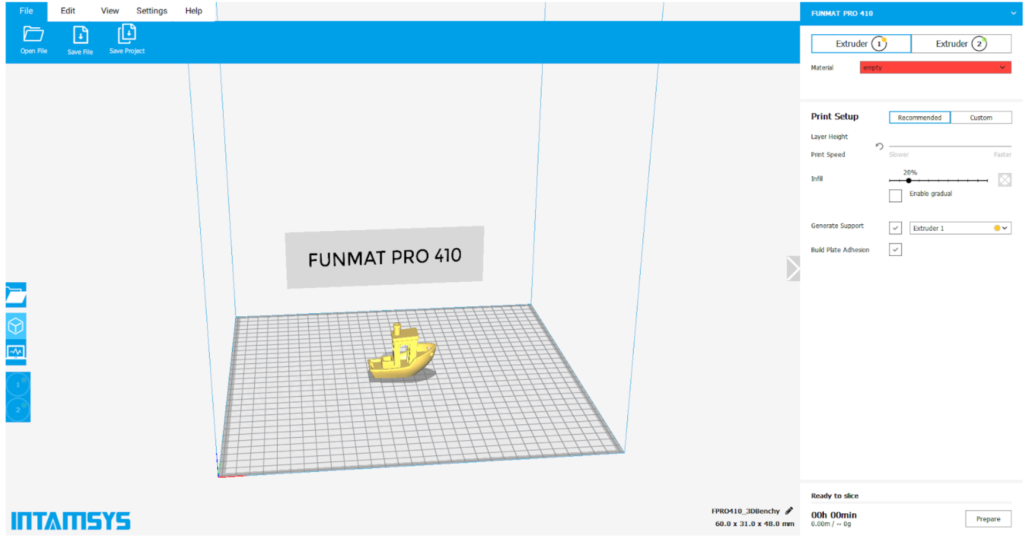
The INTAMSUITE slicer
INTAMSYS provides its own slicing software for use with the FUNMAT PRO 410: INTAMSUITE. The slicer is a reskinned version of the widely-used Cura, donning the light blue color scheme of the INTAMSYS brand.
As such, it comes complete with all of the functionality you’d expect of a run-of-the-mill FFF print preparation program. This includes basic translation, rotation, and rescaling operations, as well as an easy-to-use and intuitive UI for build parameter refinement. The automatic supports are fit for purpose the majority of the time and there’s also an expert mode for those that wish to closely control the outcome of the build.
Owing to the dual extrusion architecture of the FUNMAT, the system is able to 3D print support structures using soluble filaments such as PVA, HIPS, and BVOH. To complement this functionality, the INTAMSUITE slicer also features advanced support generation settings. After selecting which extruder will be the support extruder, users are able to modify support infills, support interfaces, support roofs, support floors, and more.
Unfortunately, technical performance is really where the INTAMSUITE slicer falters, as we ran into some significant lagging during day-to-day use on several different high-end PCs. While the program is still usable, the performance issues become even more prevalent when there are multiple 3D models on screen at once, so series production may be a chore if you have the same experience we did.
Benchmarking the INTAMSYS FUNMAT PRO 410: 77/100
It’s time to see what the FUNMAT PRO 410 can really do. We jump right in with 3D Printing Industry’s own benchmarking model, which consolidates many of our smaller print tests into one comprehensive part. We usually print this test in PLA to compare results between printers, but we also often try a higher-performance filament to see how the machine fares.
Naturally, we opted for a PEEK variant this time around. PEEK is one of the better-known thermoplastics in the PAEK family of high-performance polymers. The material combines high strength and biocompatibility with chemical resistance and excellent thermal stability, making it a jack-of-all-trades choice for all manner of high-performance applications in critical industries such as aerospace and healthcare.
We assign each of the individual sections of the benchmarking model a weighted score based on factors such as dimensional precision, surface quality, and structural integrity. The FUNMAT earned an overall 3D Printing Industry score of 77/100 – a good industrial-grade 3D printer is a 75+.
The overhang portion of the test is designed to determine the angles at which the system is able to print without the use of support structures. The FUNMAT managed to clock in a maximum overhang angle of 50° without any problems, which is fantastic for a material as difficult to print as PEEK.
Similarly, the bridging test is intended to evaluate a system’s ability to 3D print horizontally into the void. While the FUNMAT only managed to print up to a bridge length of just 20mm before the structures started curving, this is still an impressive result that we’re very happy with.
Finally, we take a look at the retraction test, which gives us an idea of the 3D printer’s extrusion capabilities. With high-temperature materials like PEEK, it’s not unusual for even the best printers to struggle with this test, but the FUNMAT held its own admirably. The spikes certainly had some significant stringing between them but the structures themselves were fabricated successfully at the correct heights.
We also wanted to see how the FUNMAT PRO 410 would handle circular structures, so we 3D printed a circular trajectory test. By studying the normal distribution of the concentric circles’ diameters (20mm, 65mm, 100mm), we can say that the printer offers sufficient repeatability when the mean of the difference is under 0.1mm and the standard deviation is under 0.05mm. Our measurement devices are accurate to ±0.015mm.

The FUNMAT displayed decent repeatability here, with an average offset of 0.085mm for the X-axis and 0.139mm for the Y-axis, resulting in an average of 0.112mm for both axes. While this is a little high for an industrial-grade system, the average standard deviation came in at only 0.0415mm, which is excellent.
Digging deeper, we can attribute the discrepancy between the X and Y axis to the fact that both axes are individually controlled by a sinusoidal function. This kind of function has ‘dead points’ where the velocity of the printhead falls to zero, but its inertia causes it to overshoot and lose precision. The results for the X-axis are better than those for the Y-axis because the latter has to carry more weight, resulting in greater inertia. As such, when printing parts where dimensional precision is a priority, it’s best to print those critical dimensions along the X-axis where possible.
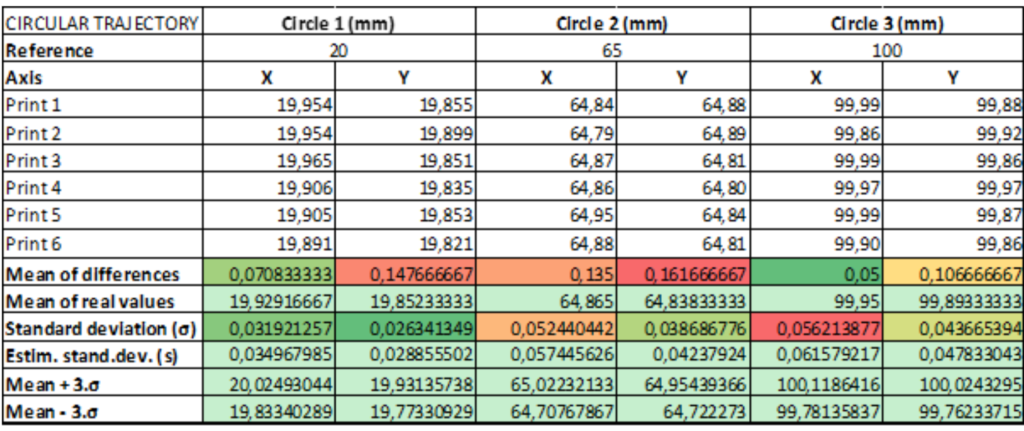
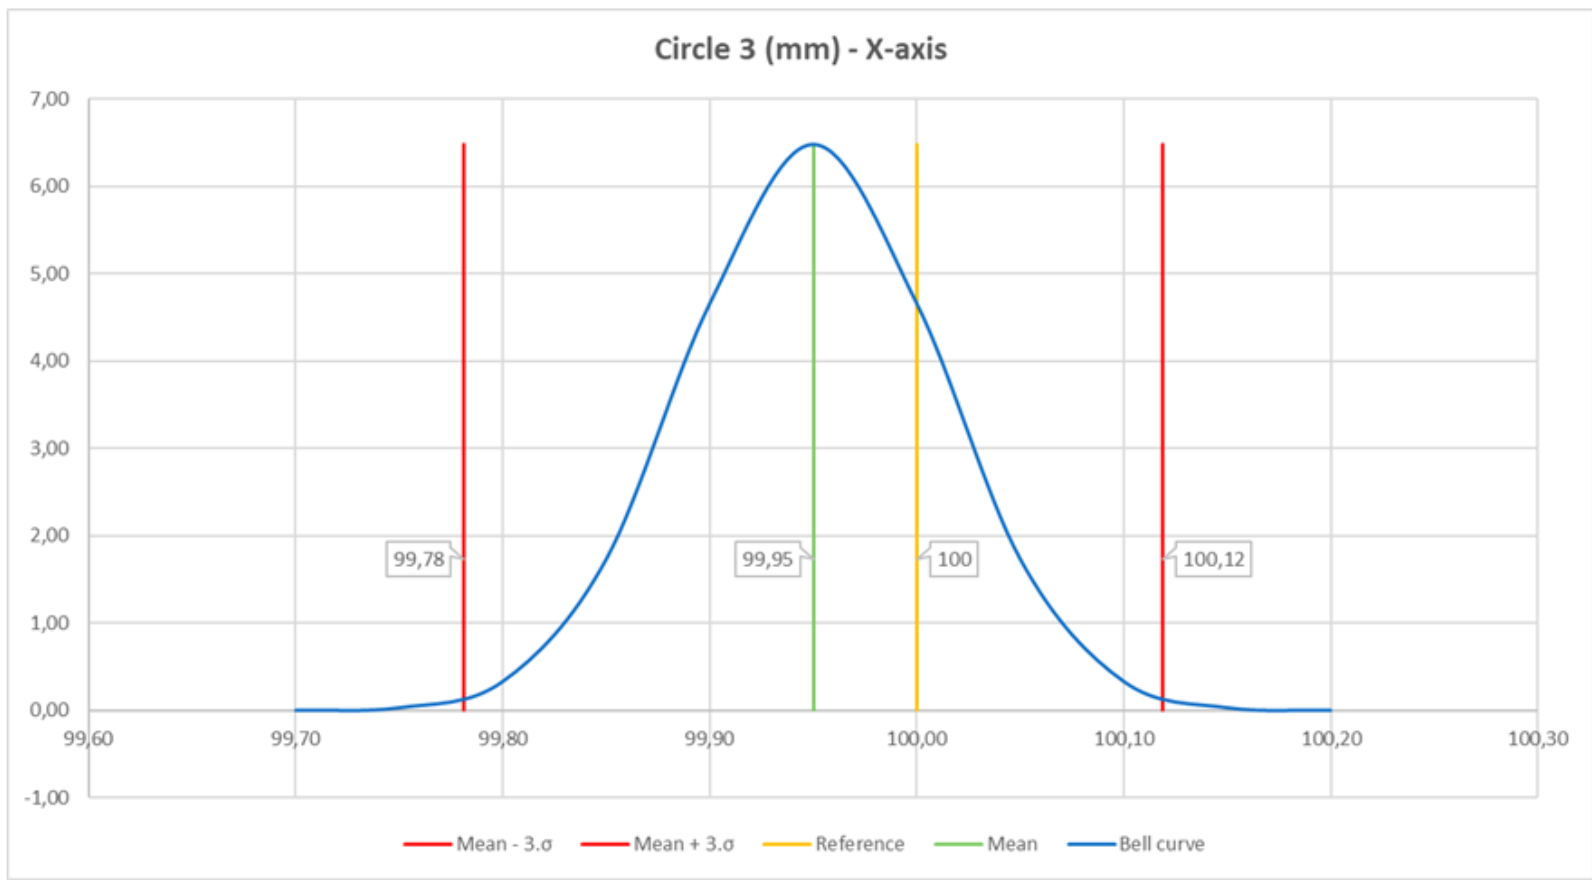
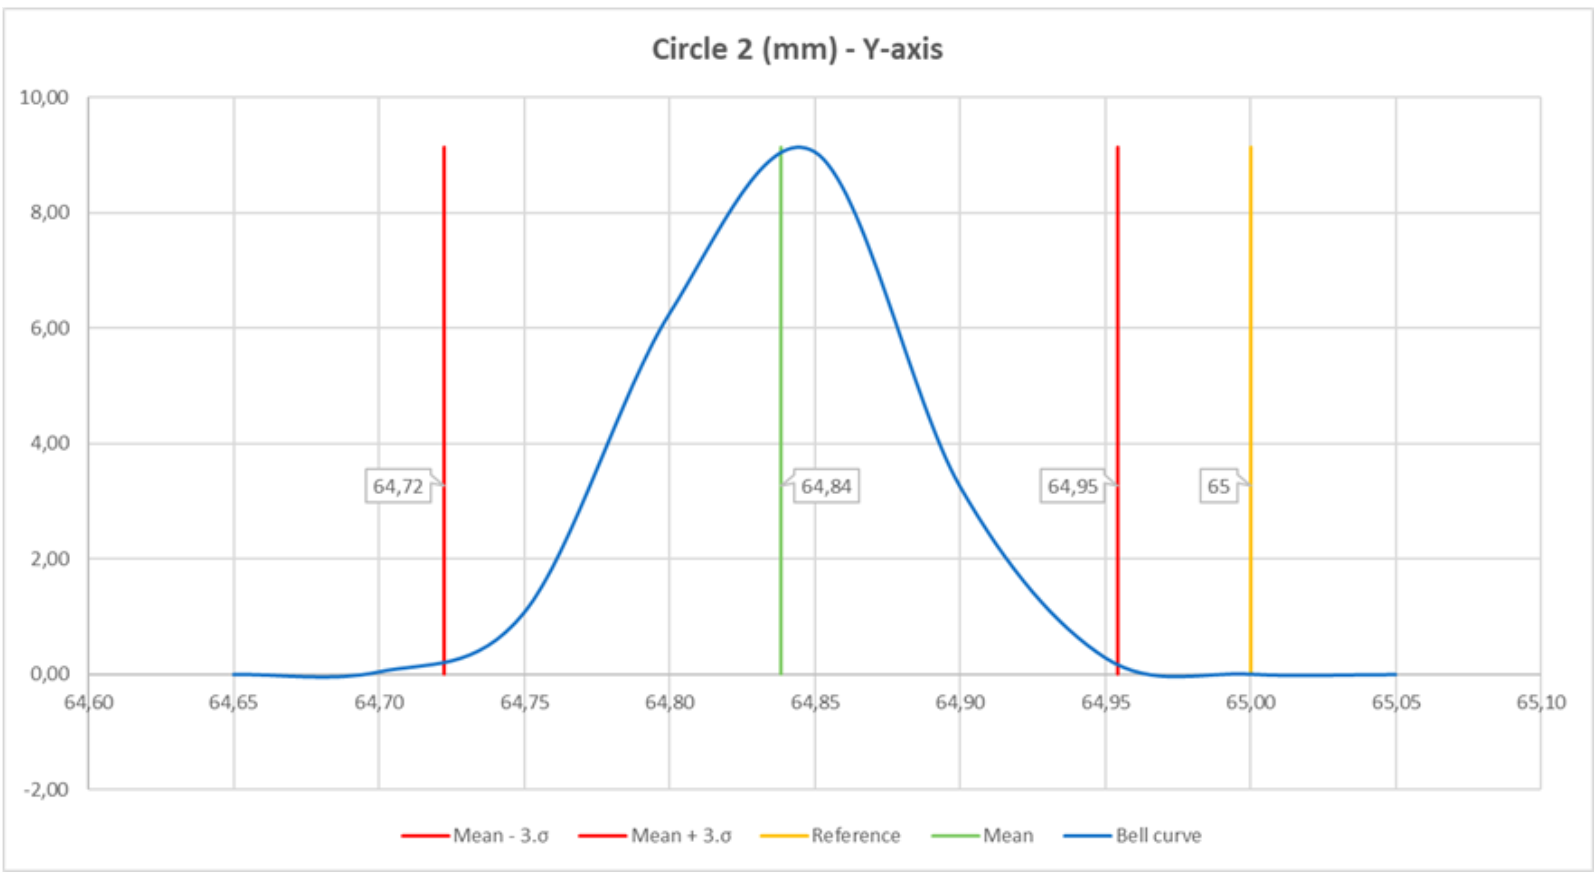
Below you’ll find the bell curves for the best and worst circles in the test – Circle three for the X-axis and Circle two for the Y-axis. In the best case, 99.6% of the 100mm circles manufactured by this 3D printer will be between 99.78mm and 100.12mm. In the worst case, 99.6% of the 65mm circles fabricated by this 3D printer will be between 64.72mm and 64.95mm.
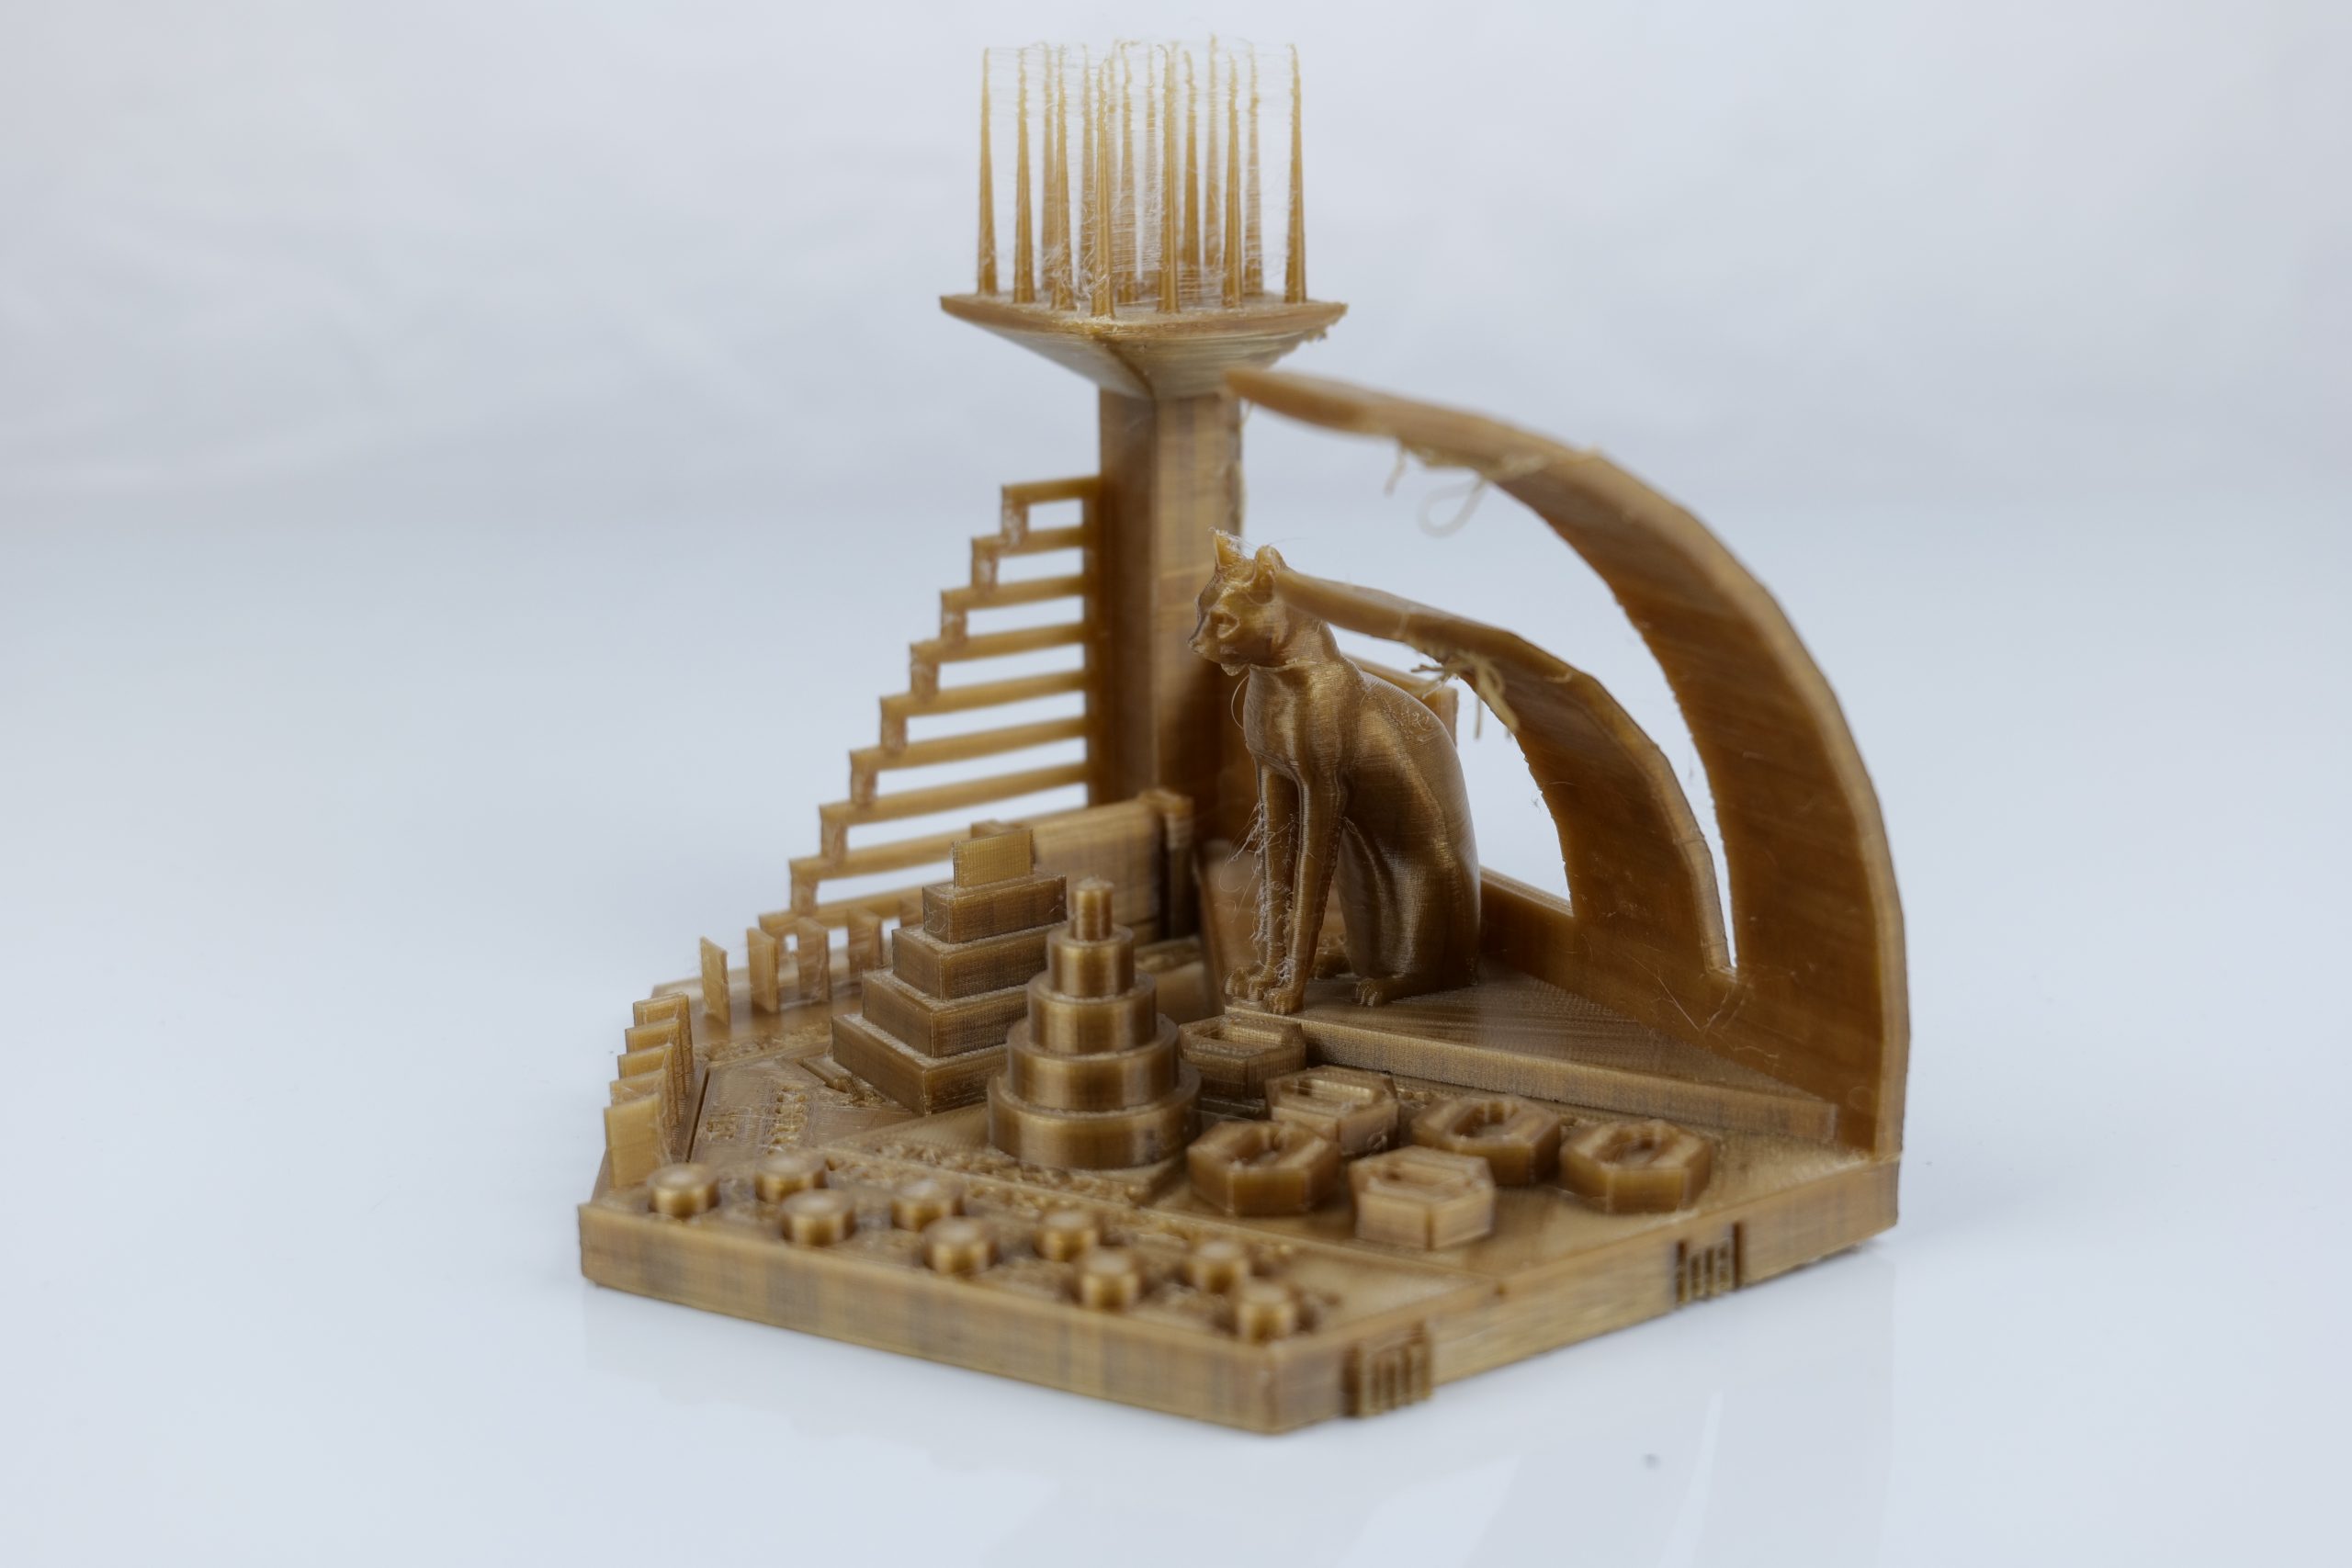
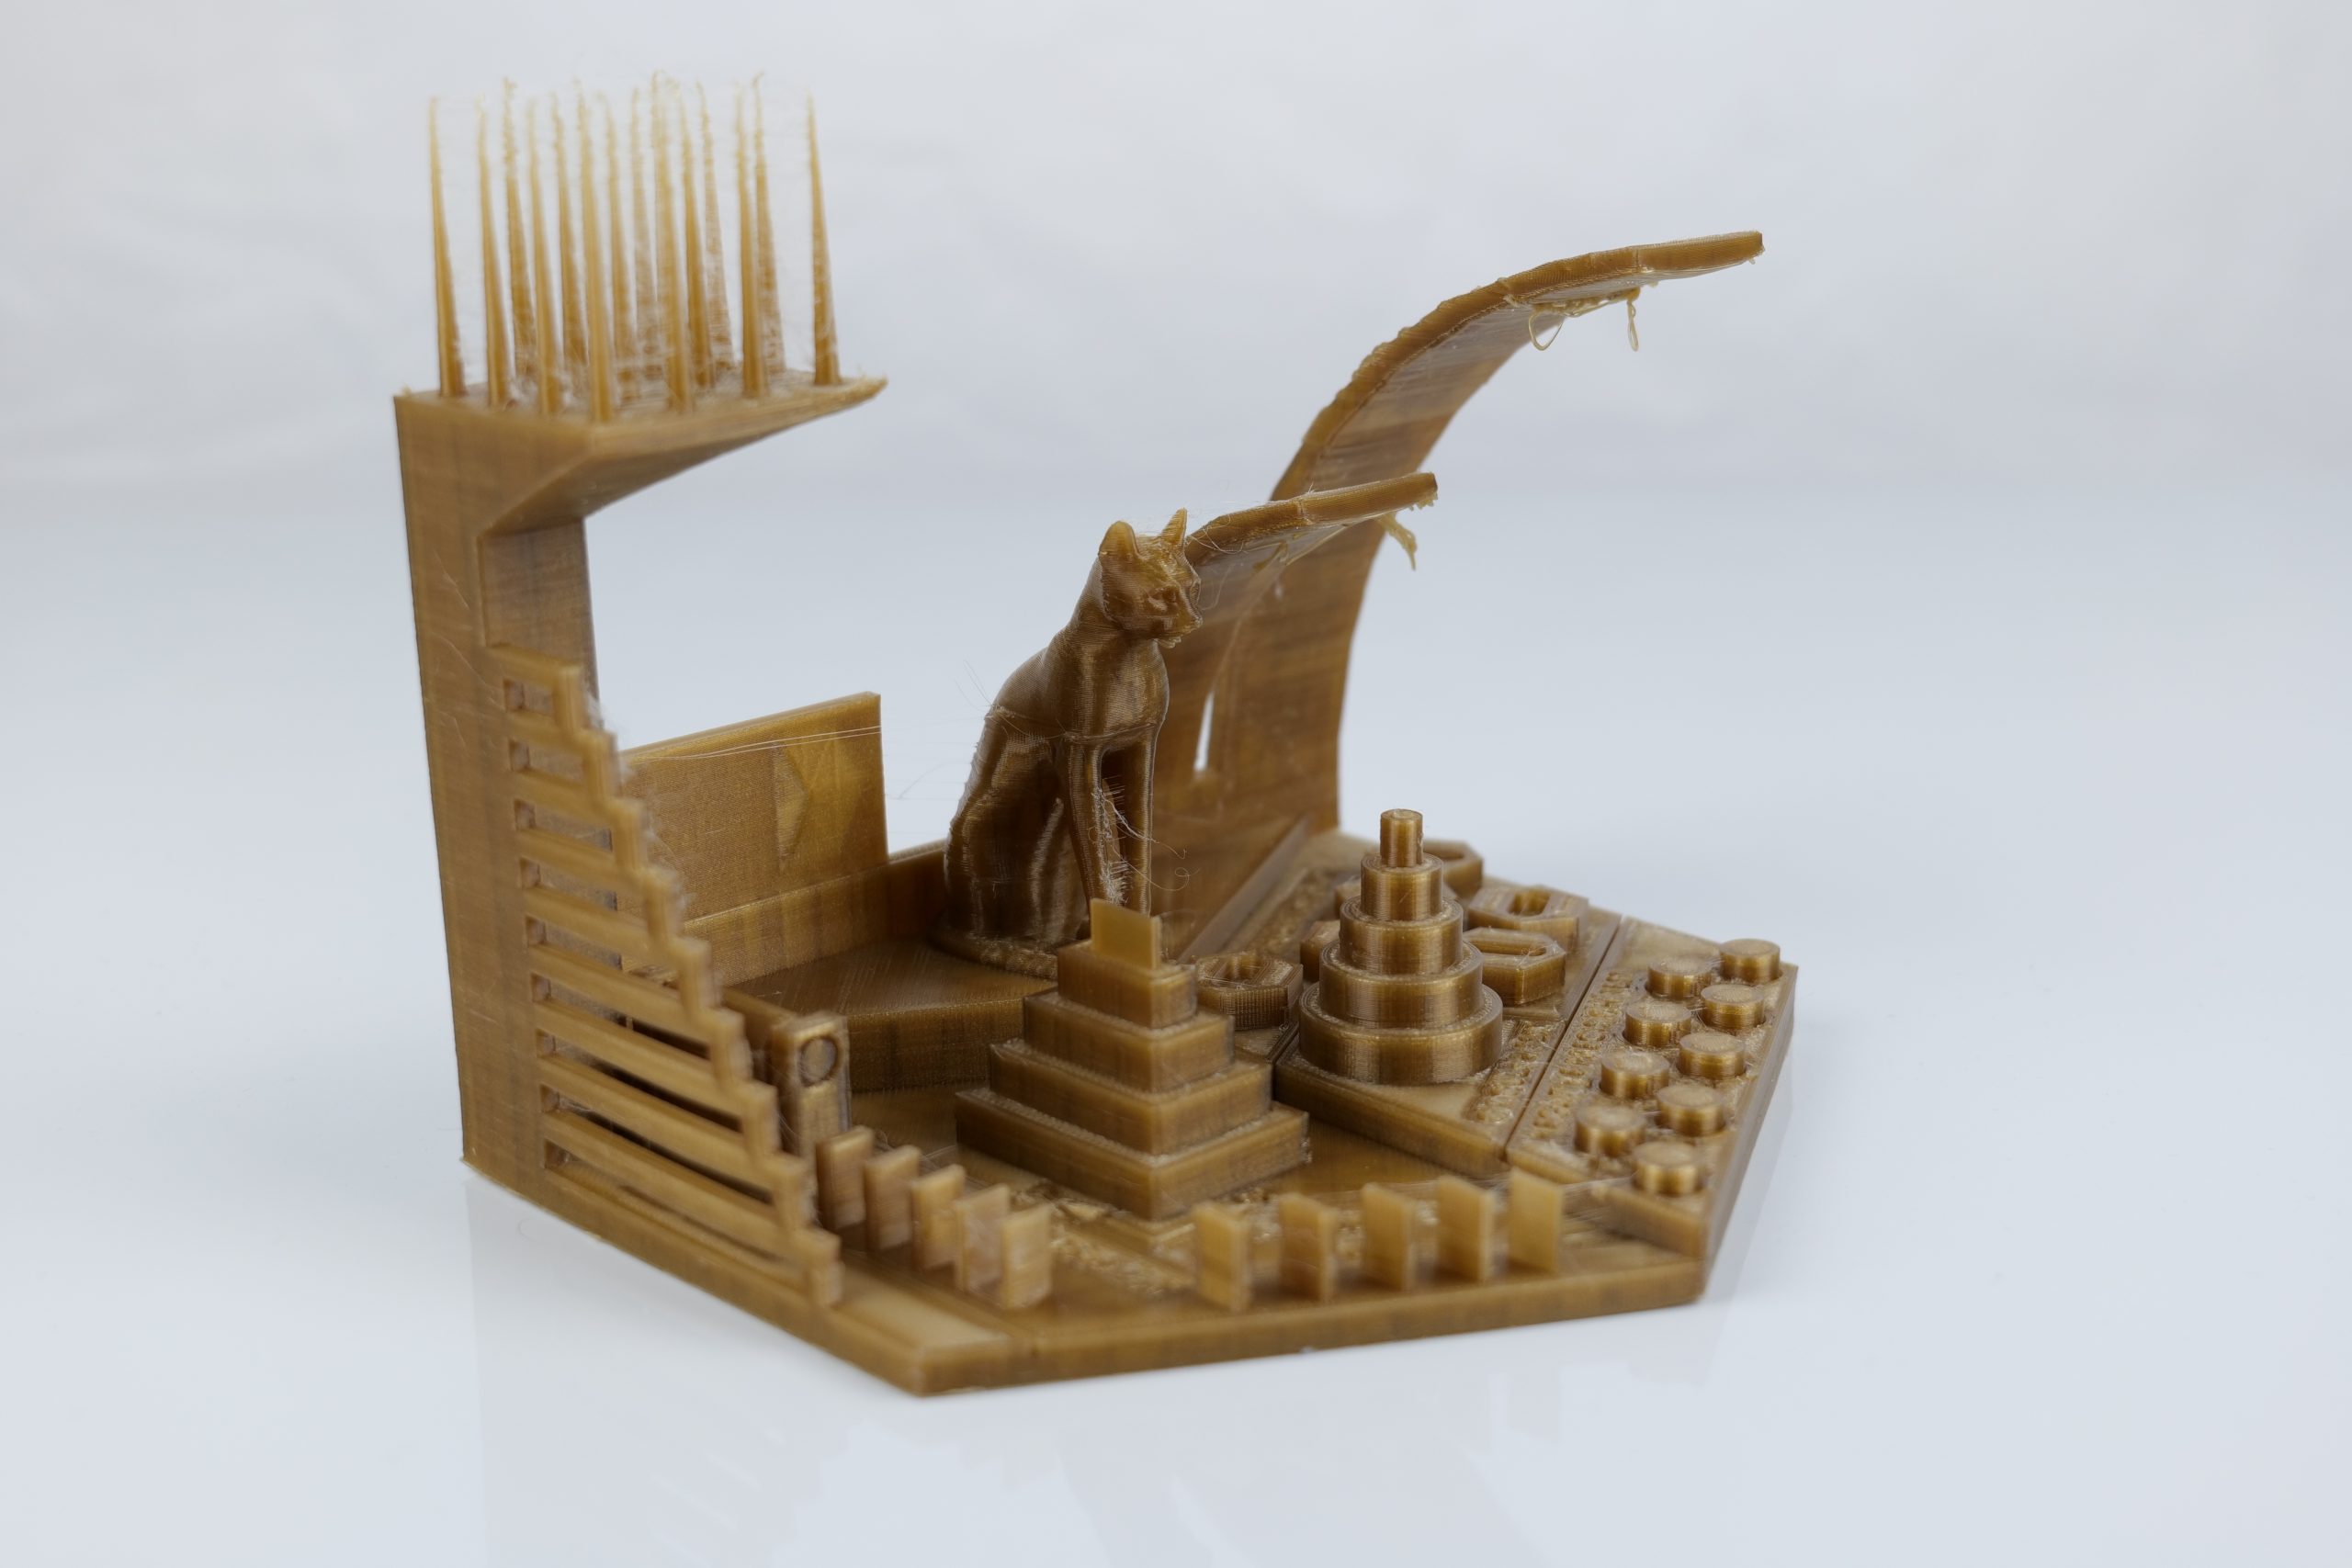
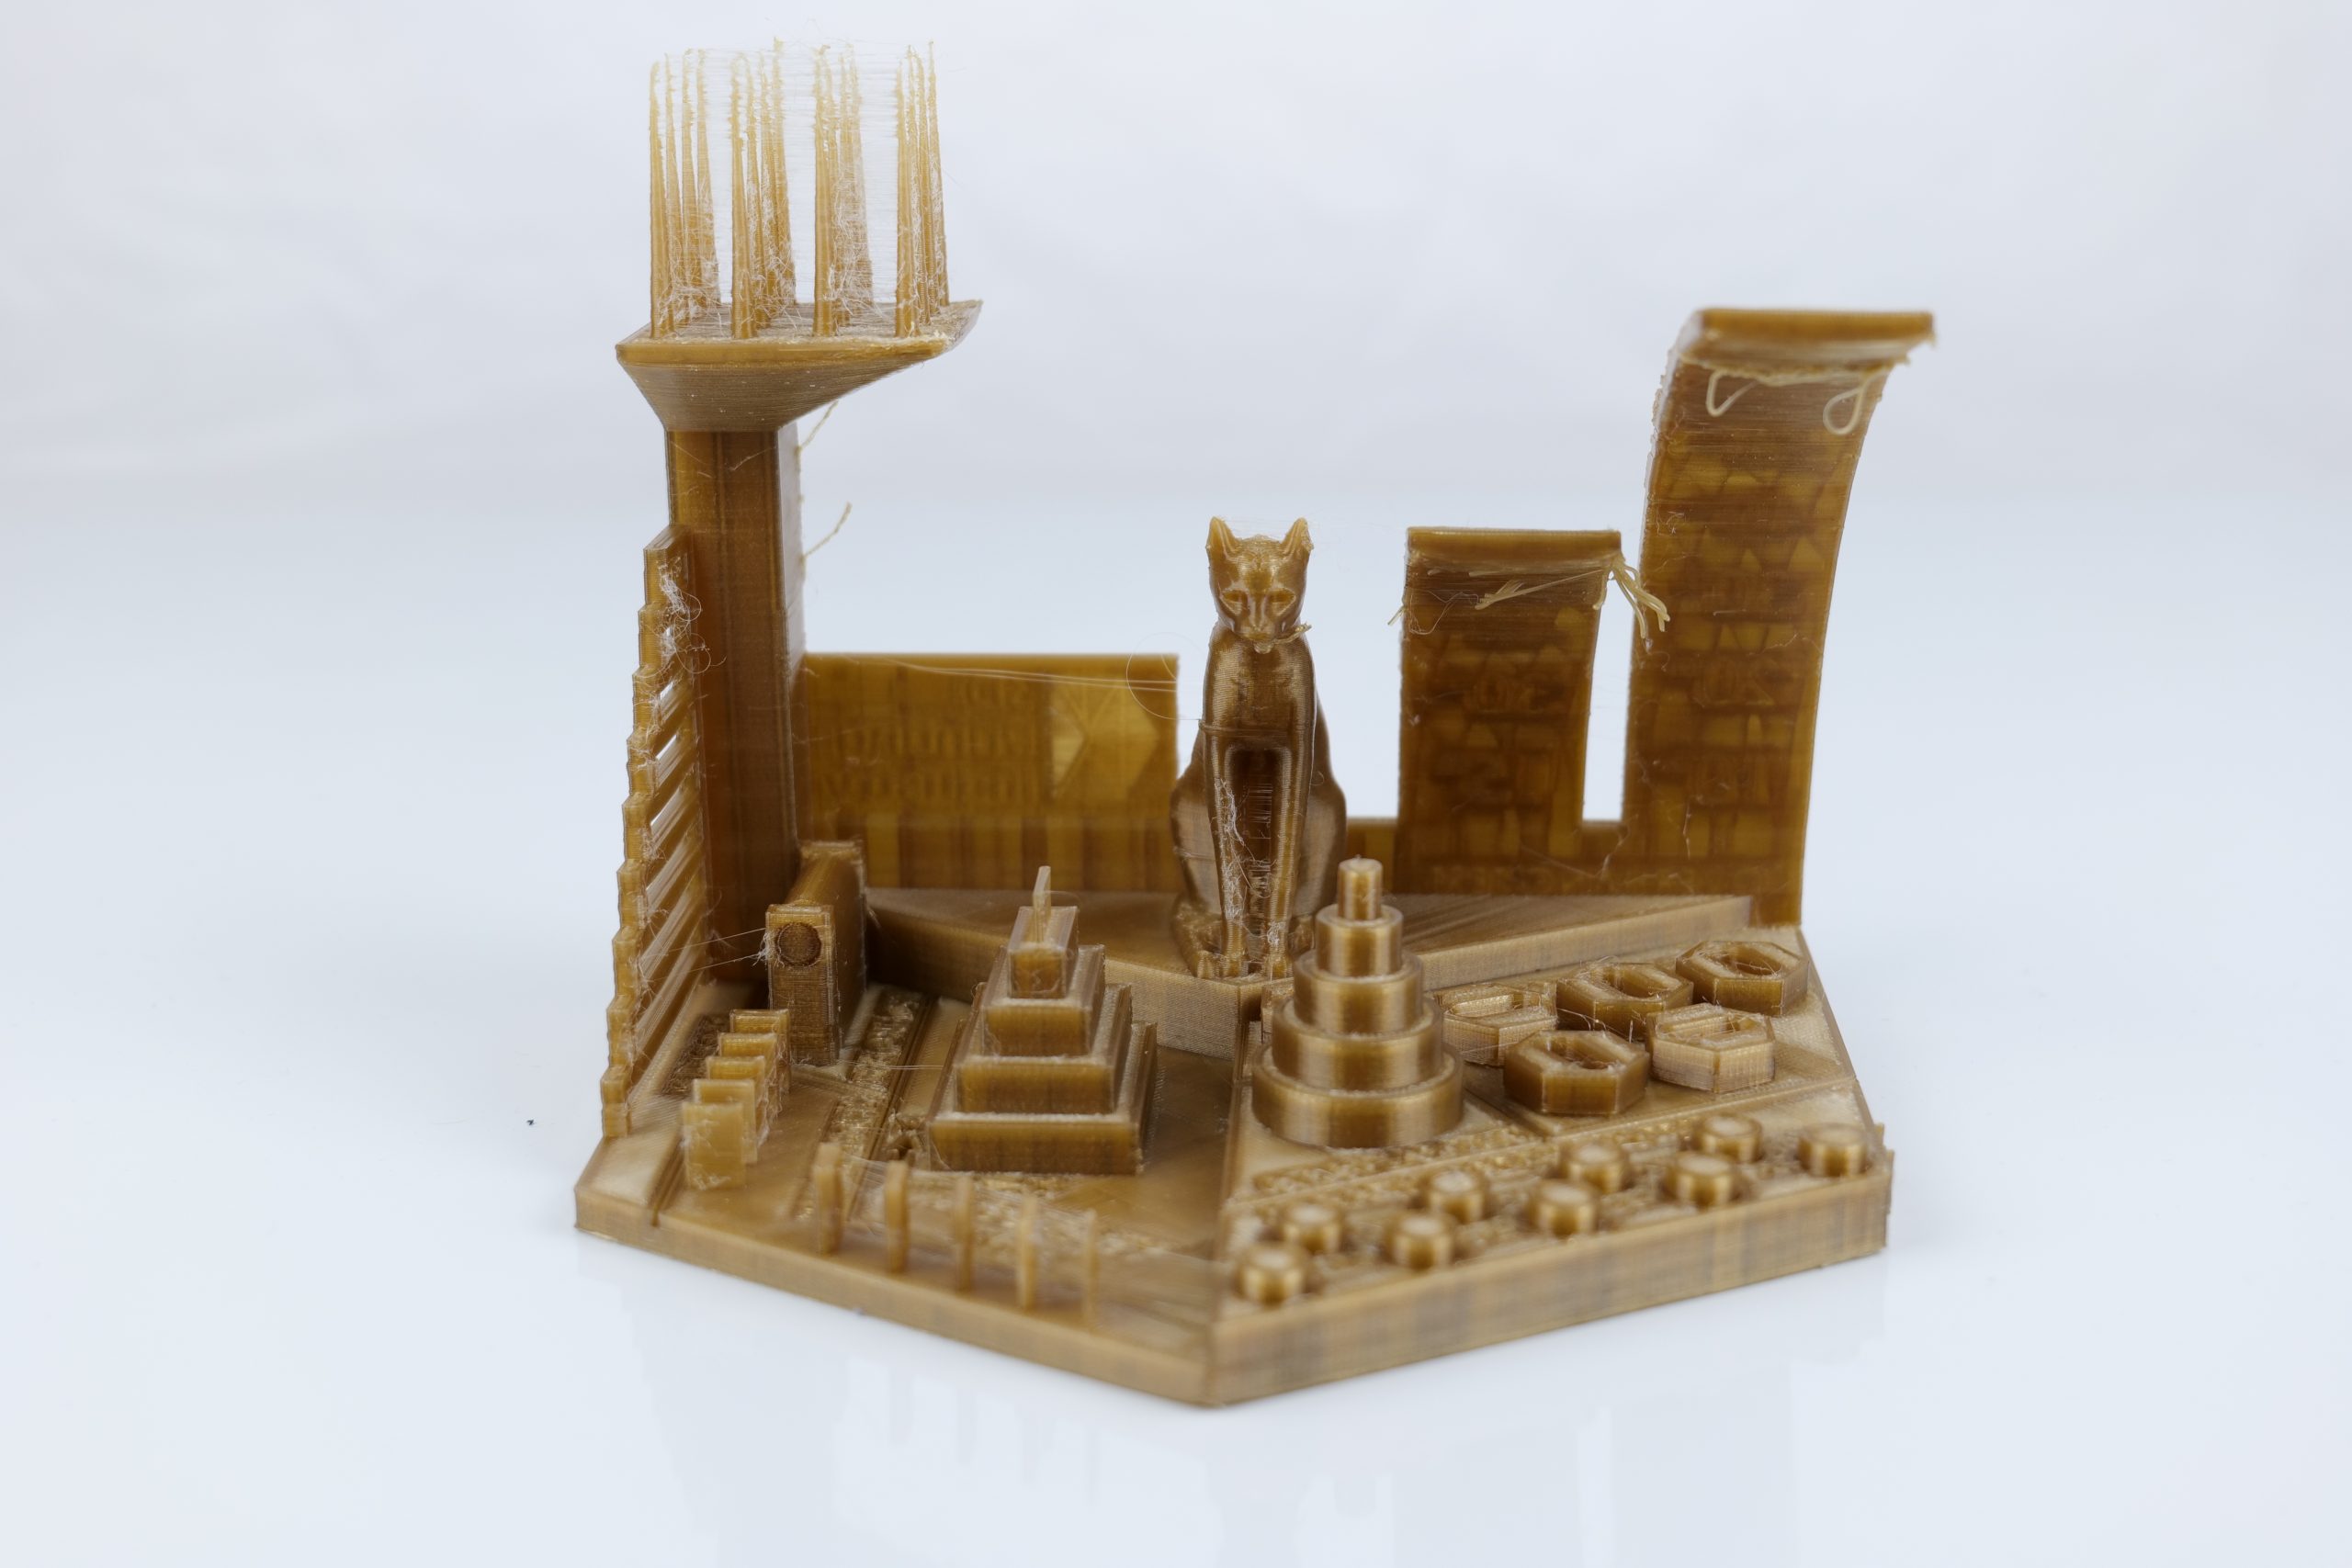
Real application tests: PEEK, PC, and PA-CF
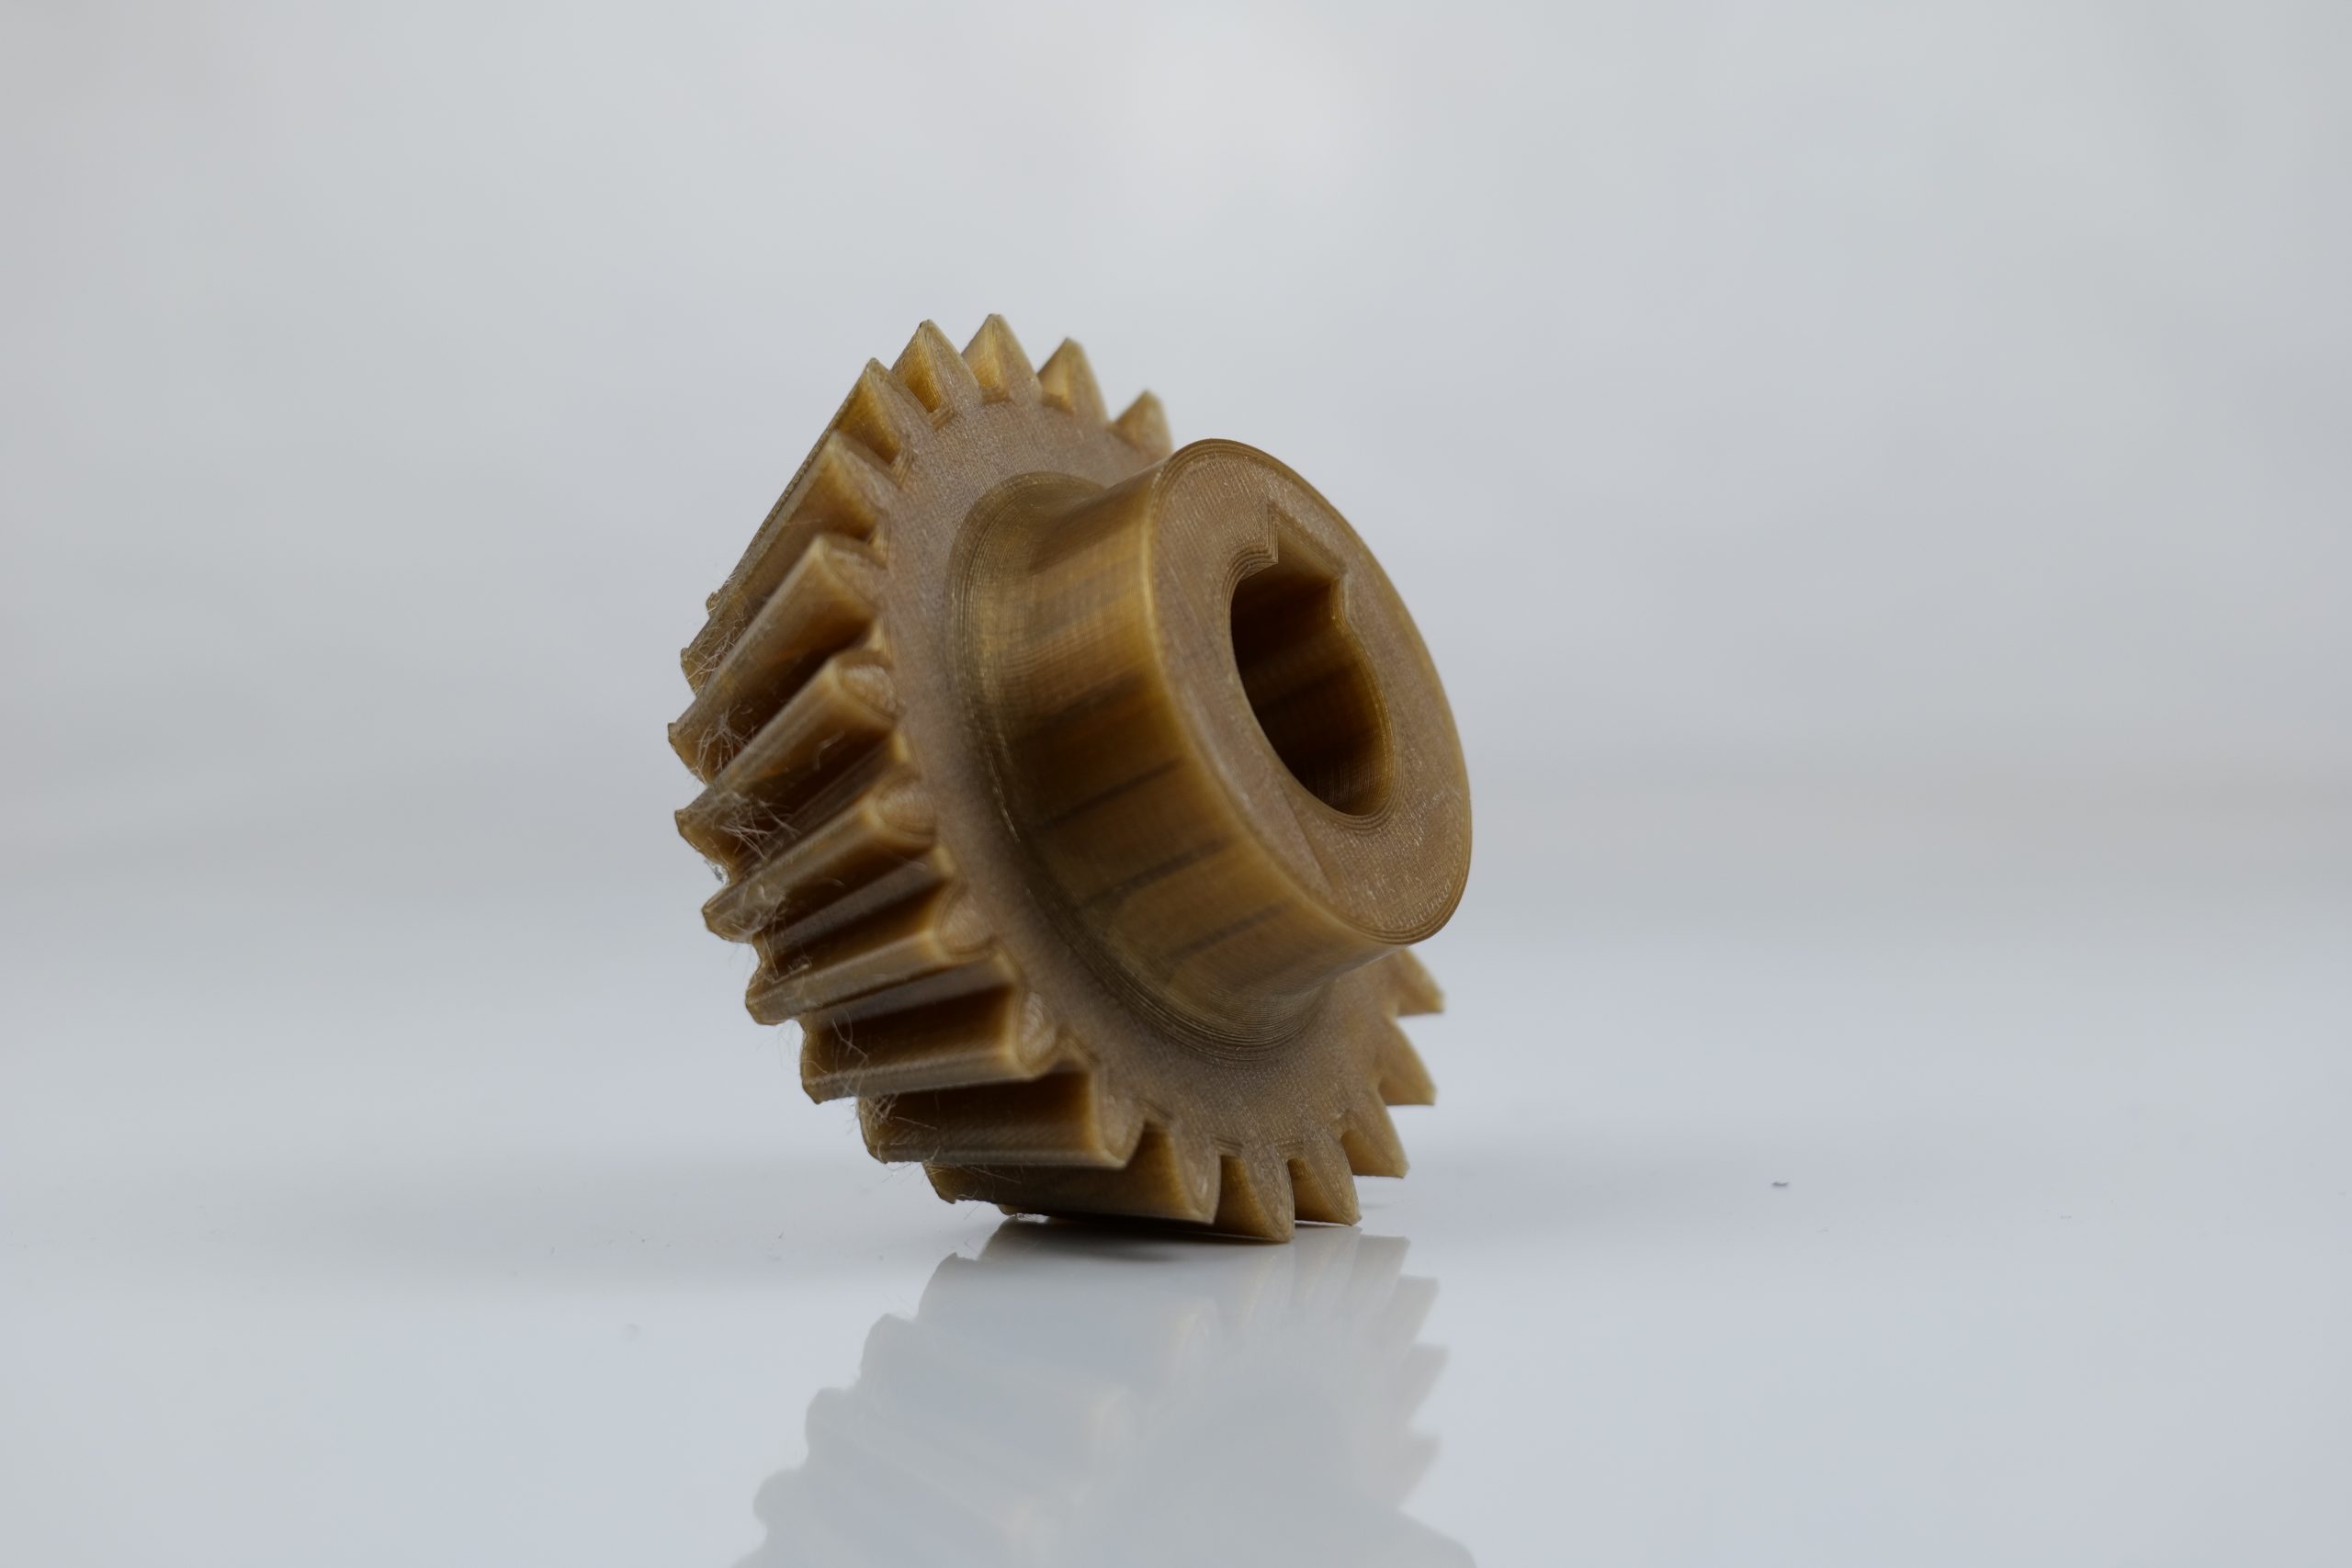
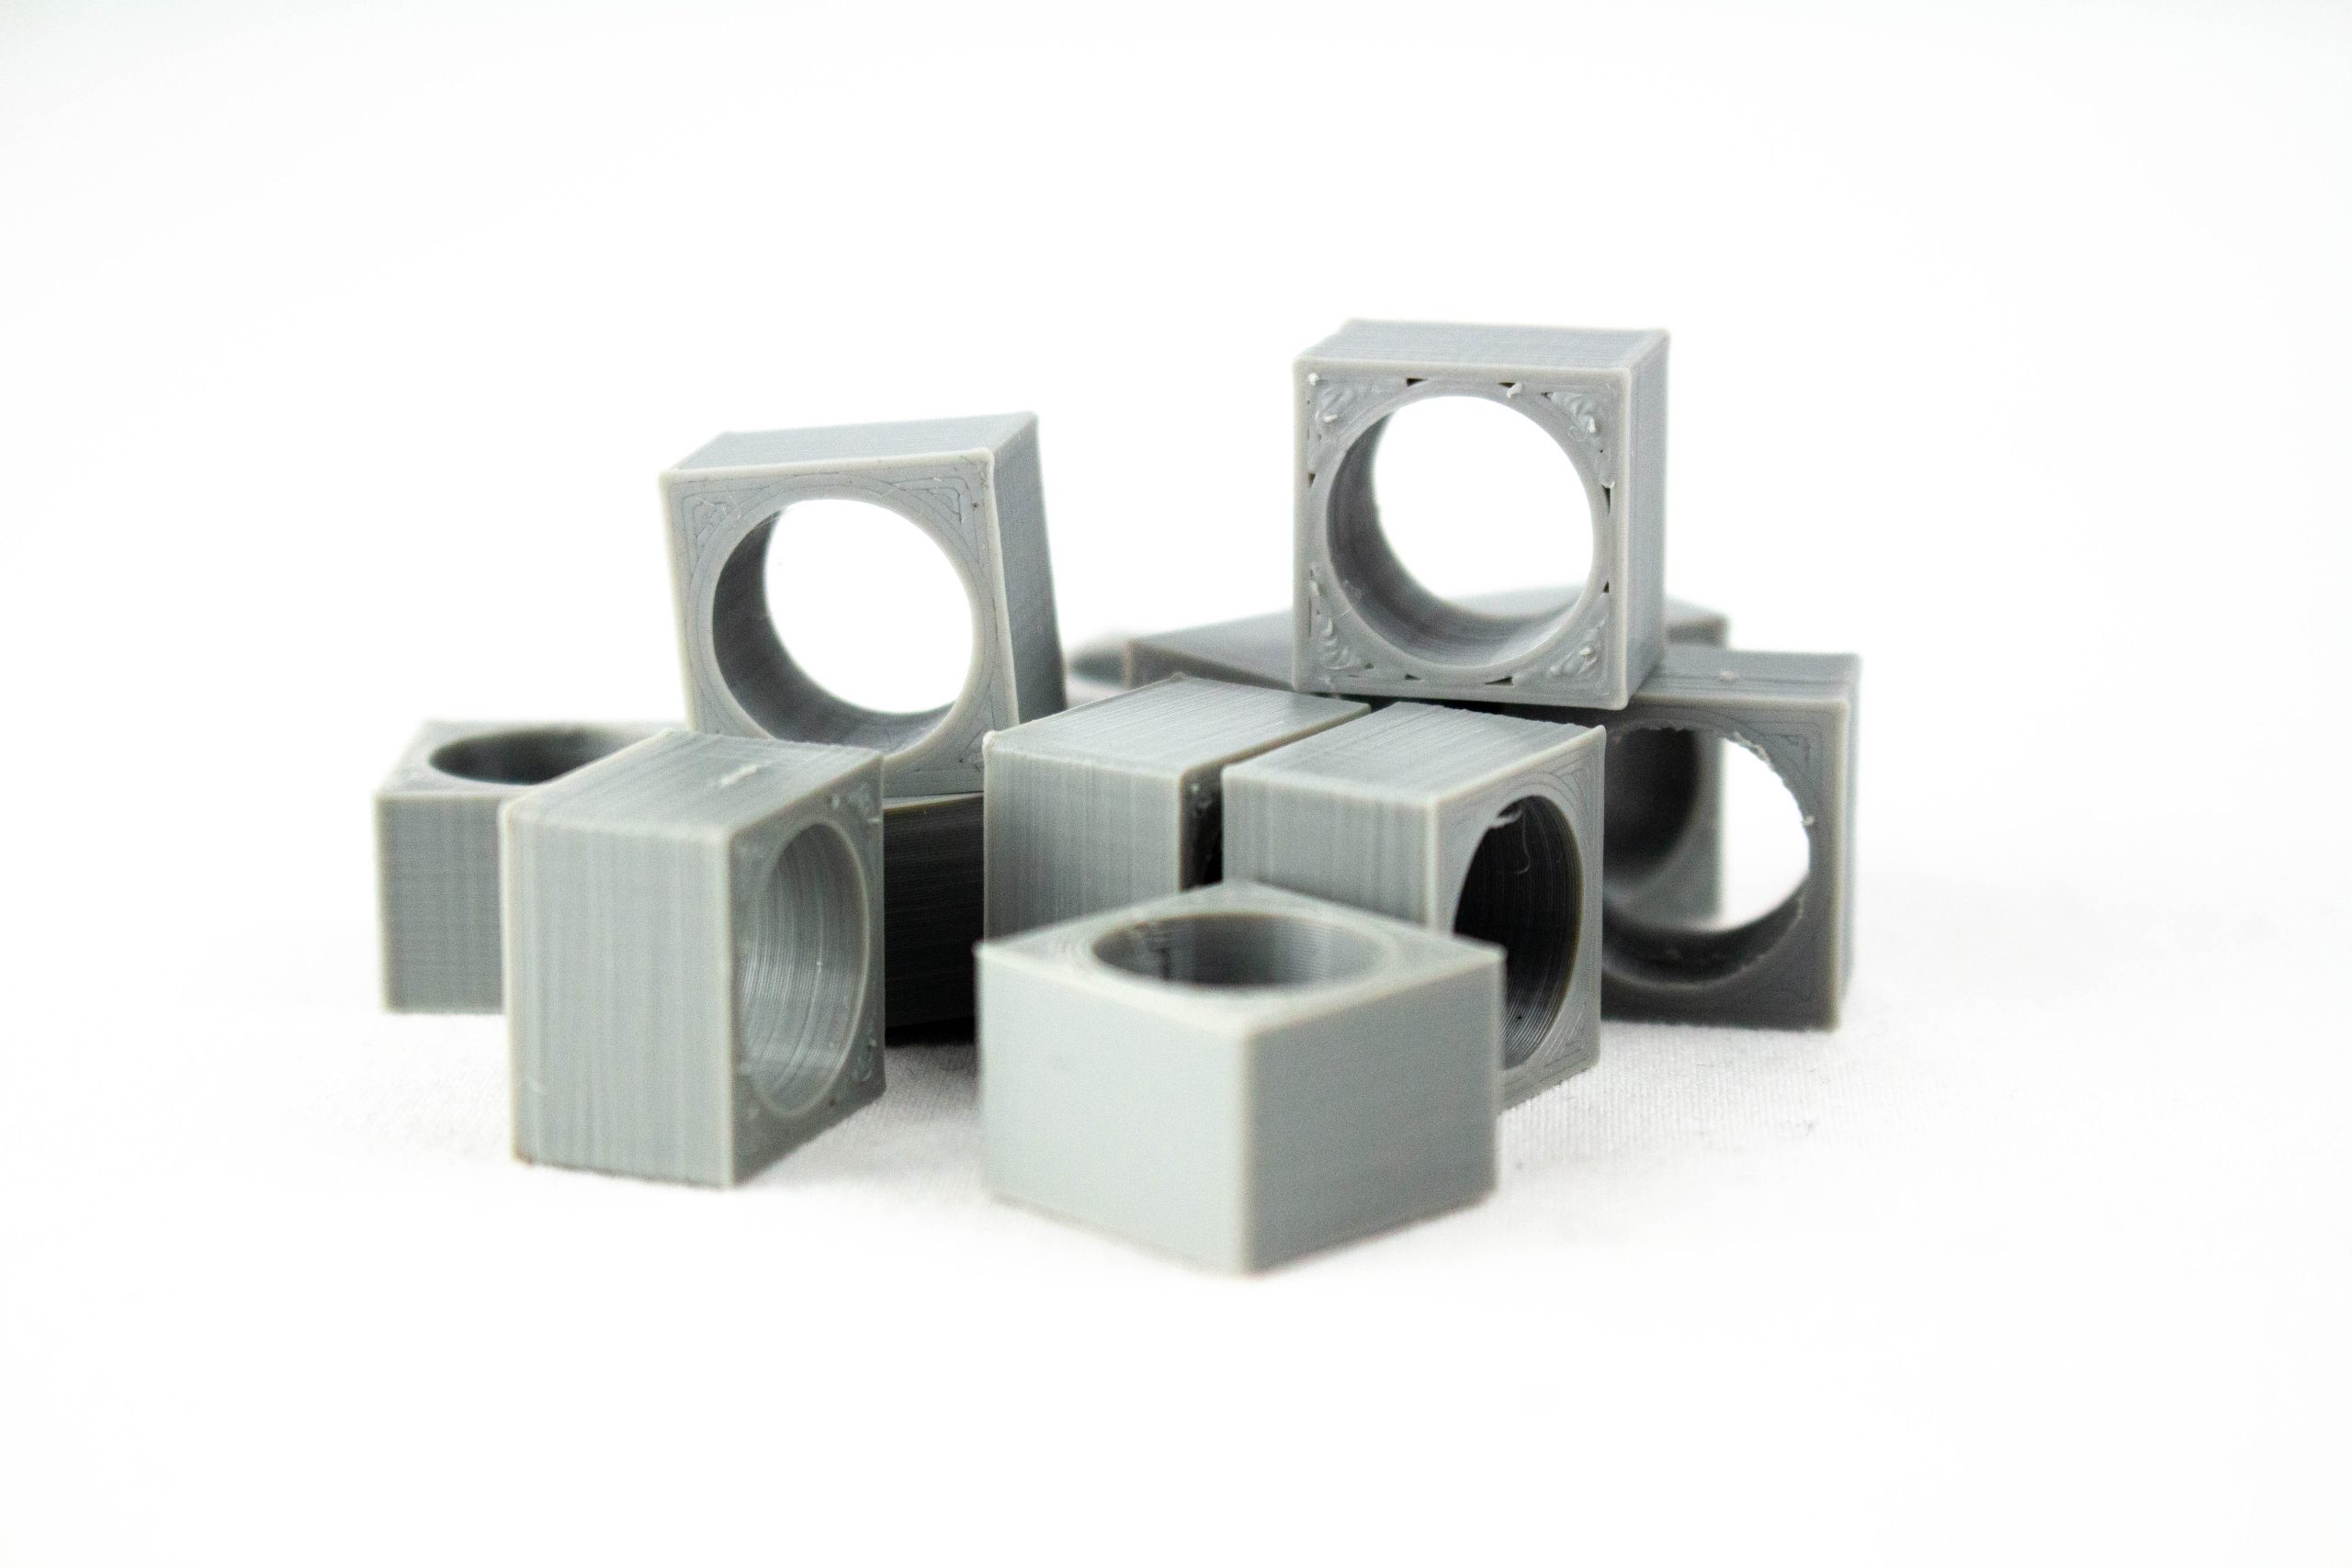
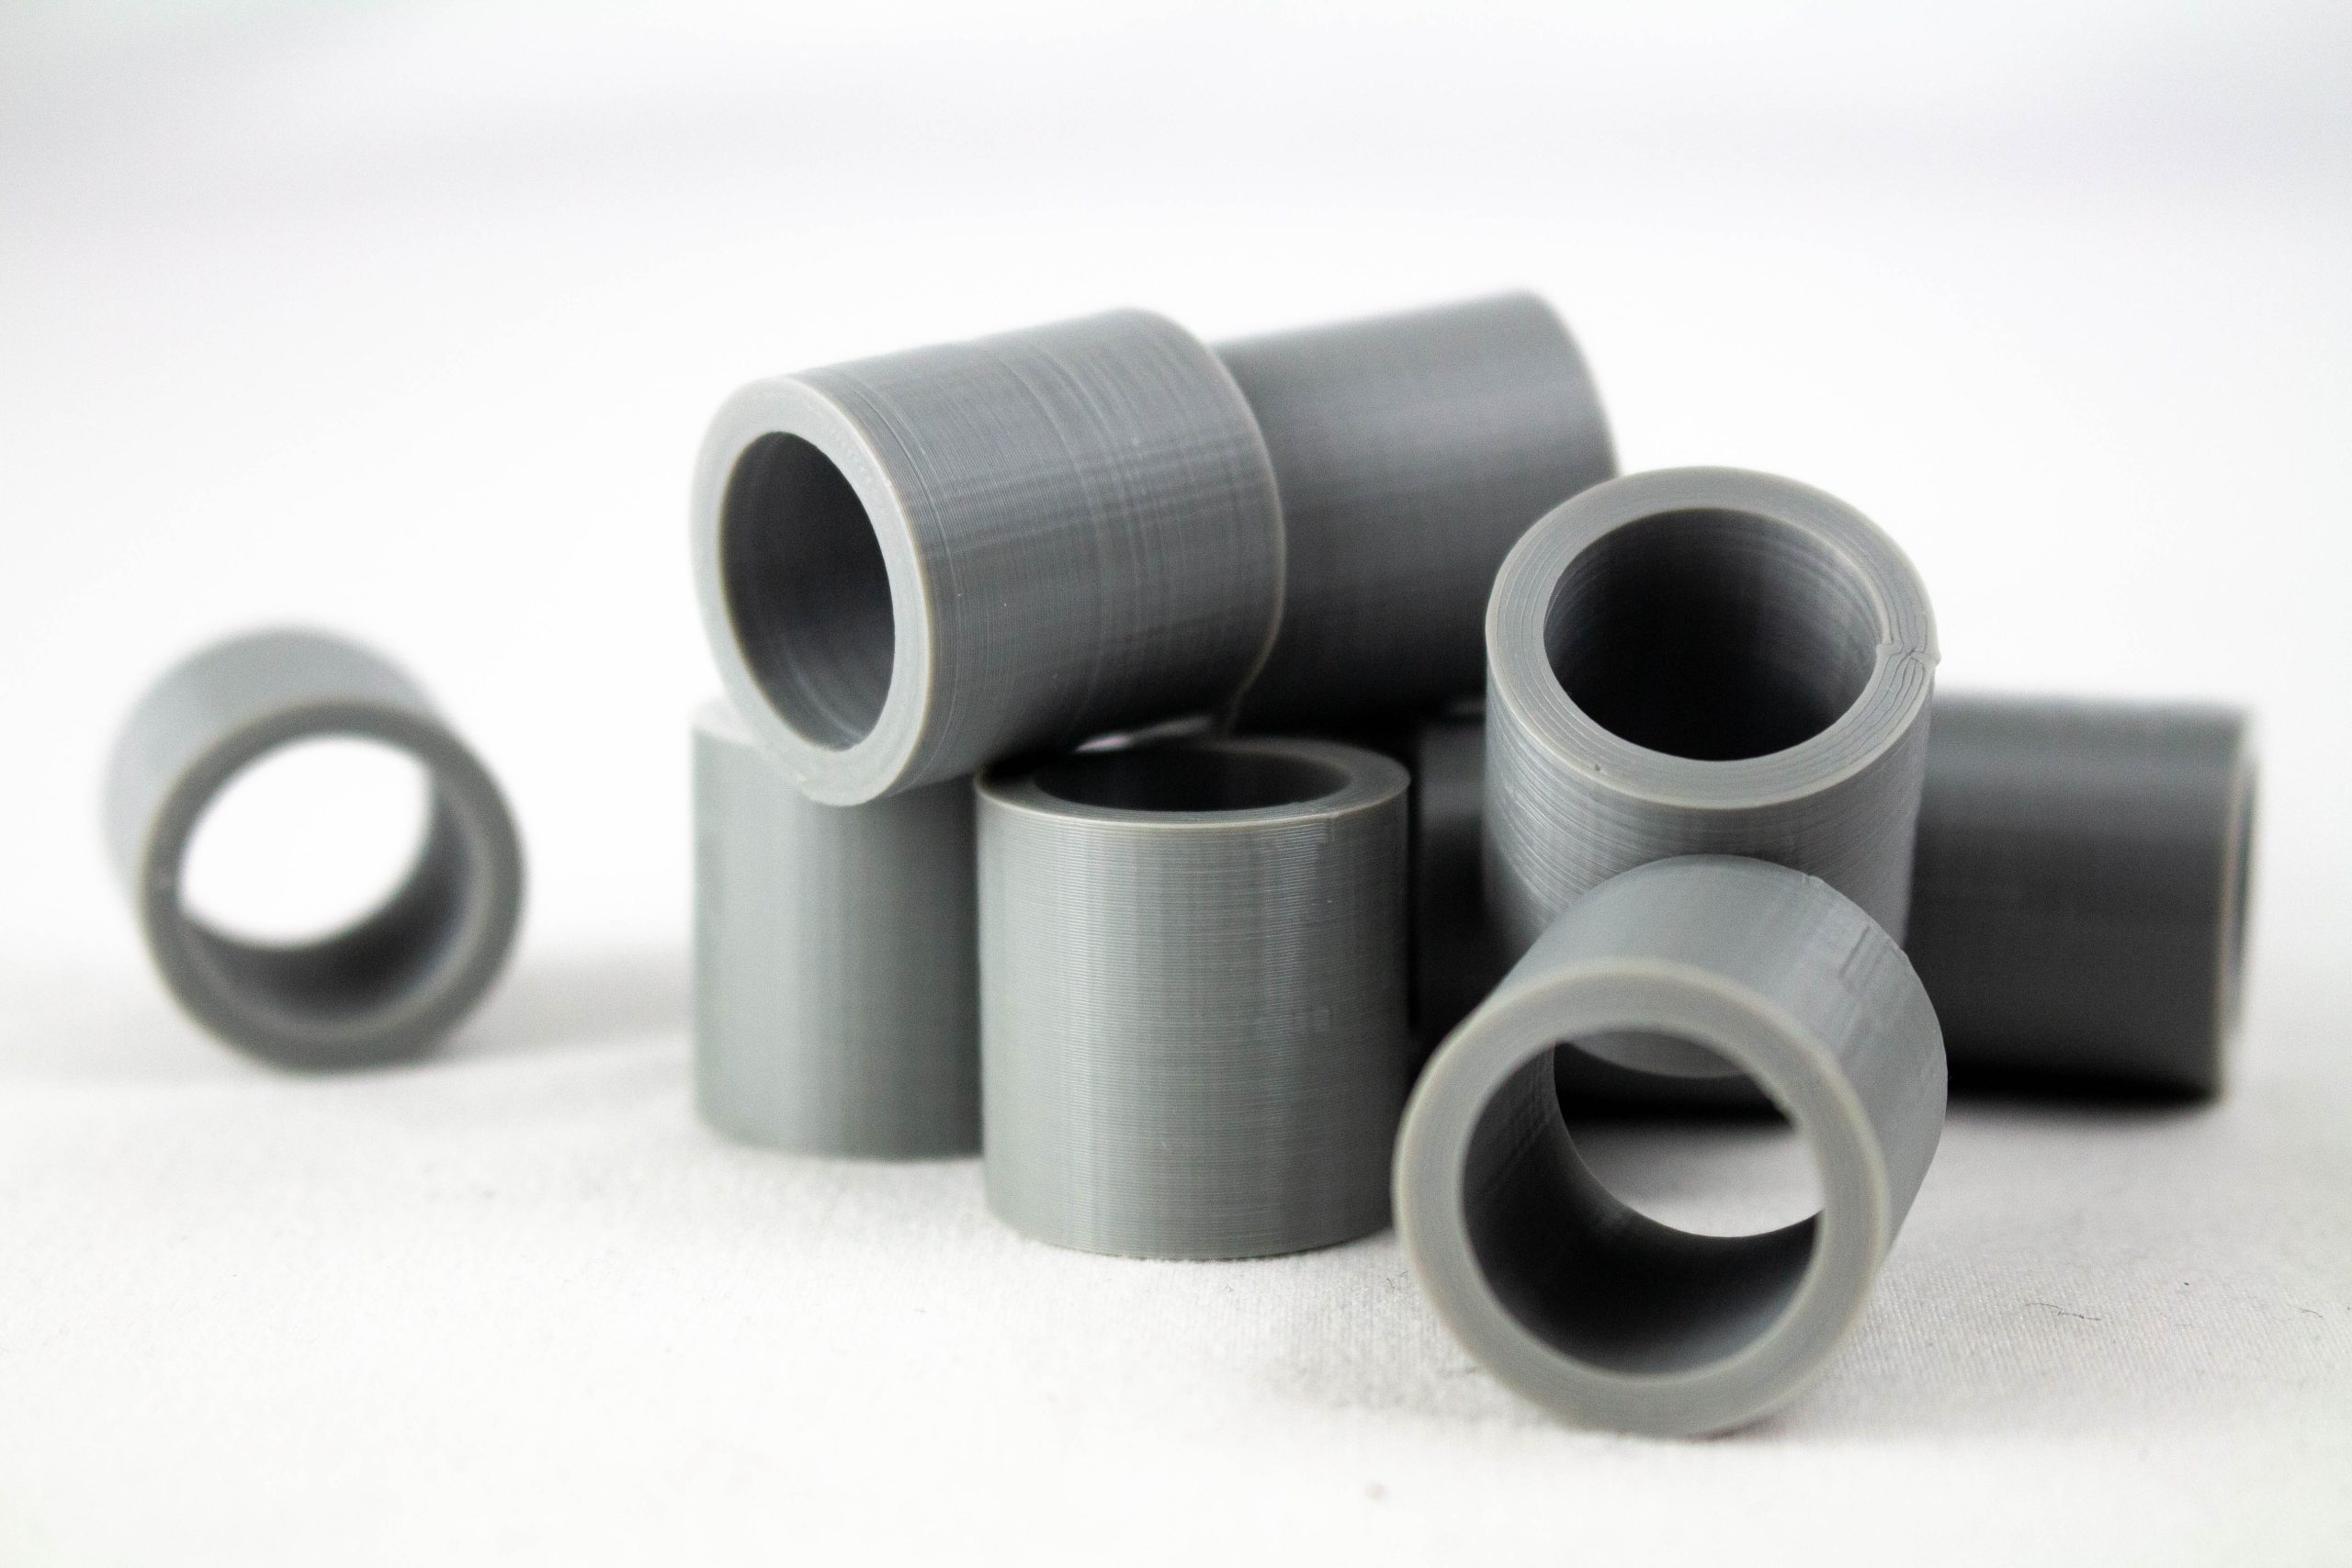
Moving on, we used our PEEK filament to 3D print three industrial parts you’d typically find in an aerospace or automotive manufacturing facility: a turbine, a piping element, and a bevel gear. The turbine and piping element were 3D printed with the help of SP5000, a soluble support material that dissolves in ethyl acetate, while the bevel gear was printed without any supports and the door of the FUNMAT left open.
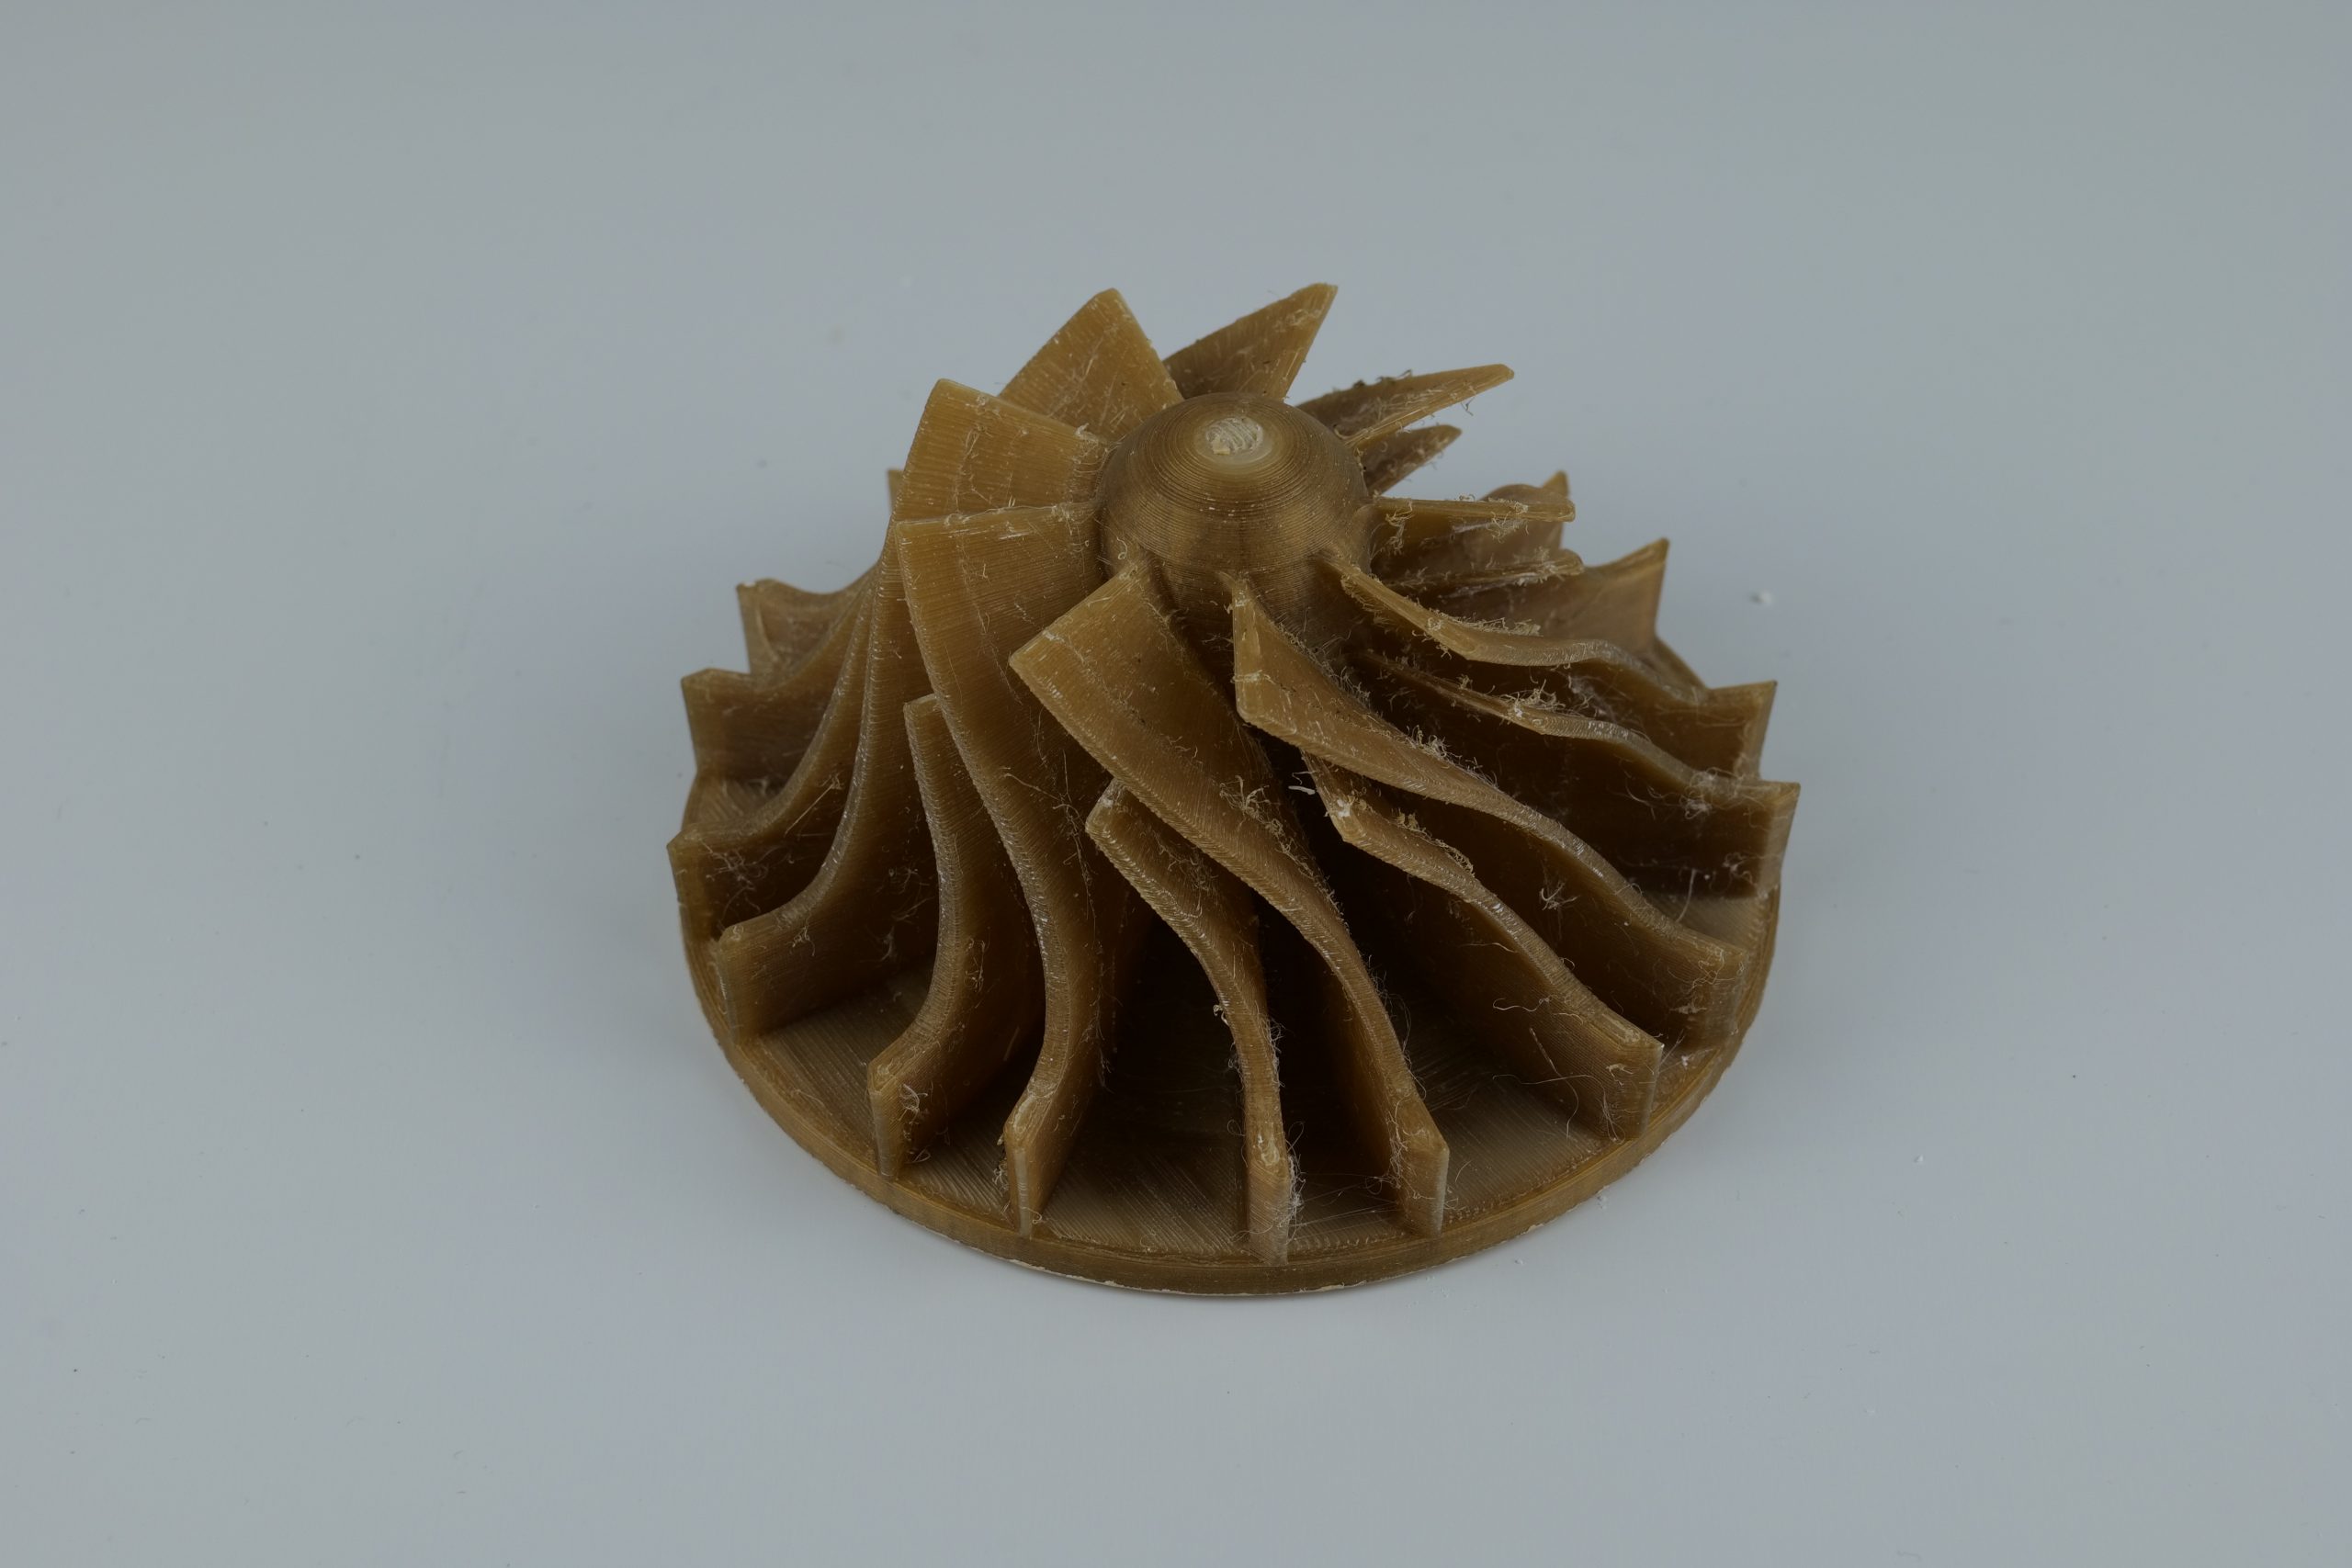
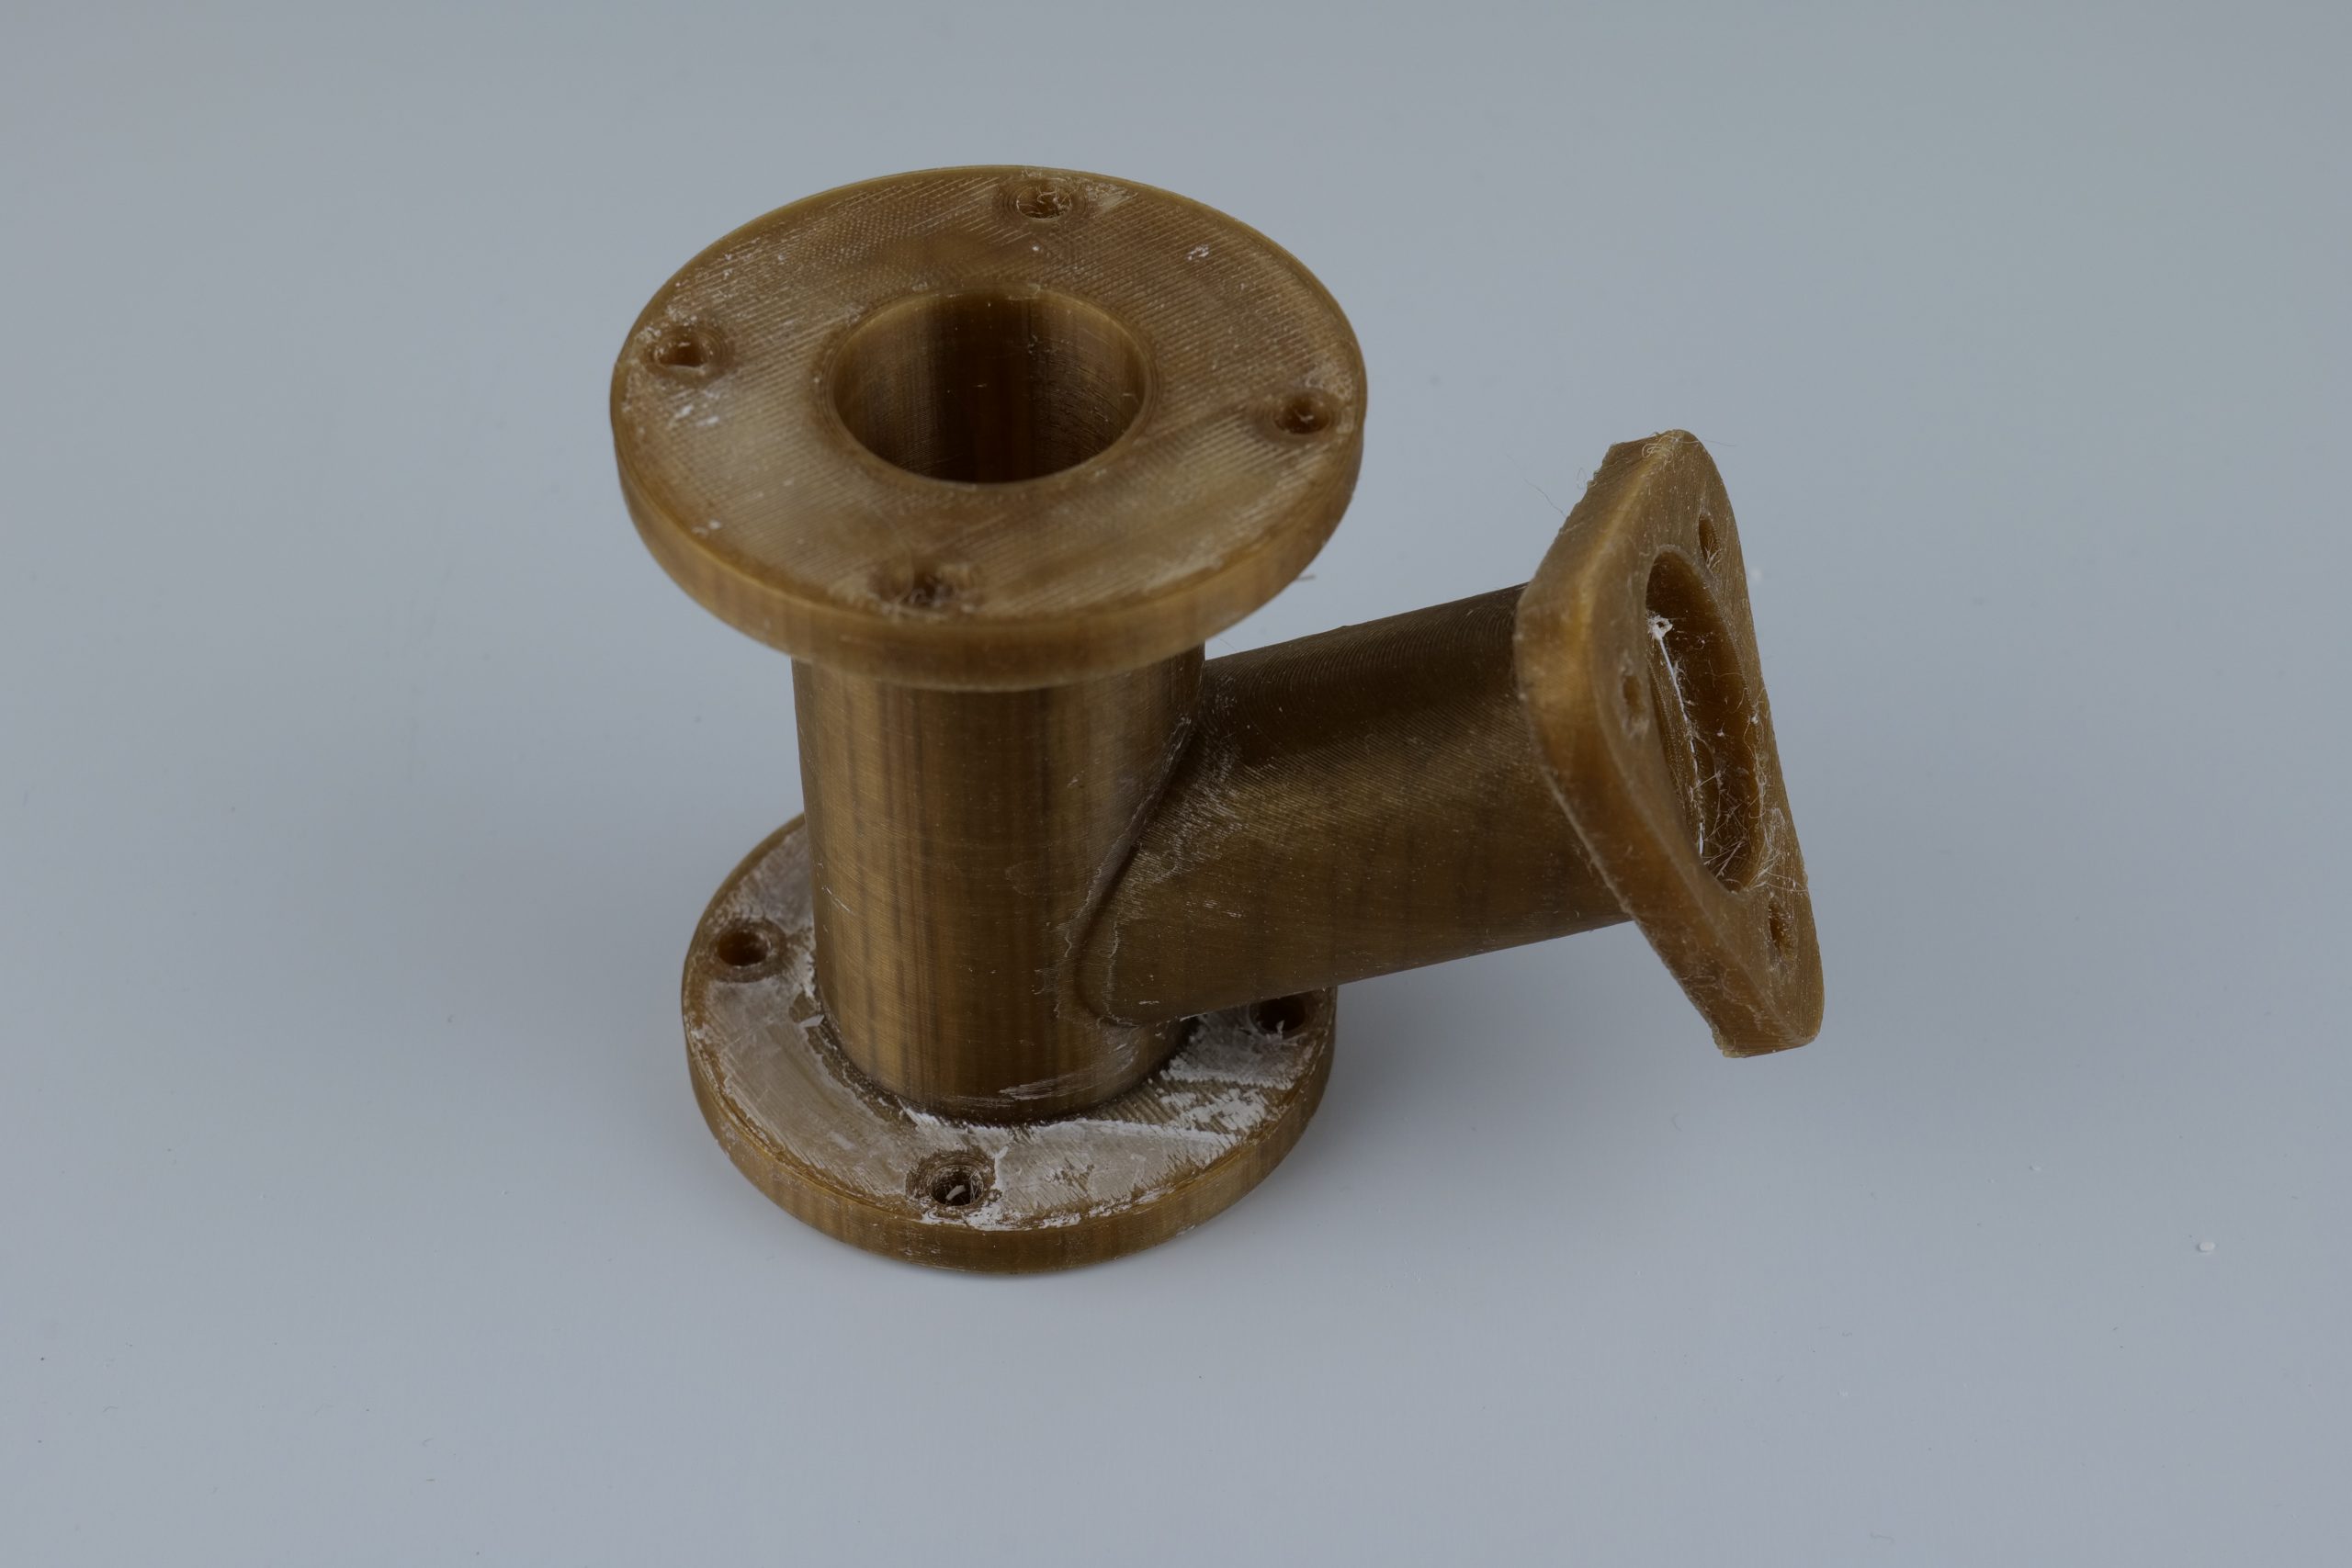
The system fabricated both the turbine and pipe to a very high overall quality, with smooth surfaces and excellent layer bonding. However, even after submerging the parts in ethyl acetate for over 24 hours, we had to remove much of the SP5000 support material using a cutter, resulting in a white residue on the surfaces of the components. We attributed this to our own processing parameters as we used a gap of 0.00mm between the parts and the supports – perhaps leaving a gap of 0.10mm would have resulted in cleaner interfaces.
On the other hand, the bevel gear was printed flawlessly – the high-strength component could certainly be used as part of a functional prototype or end-use assembly. There’s not much to say other than the fact that the FUNMAT PRO 410 prints PEEK and it prints it well. A big win for INTAMSYS.
Next up, we 3D printed a set of Funktion-One Res 2 ground stacks using polycarbonate (PC) filament.

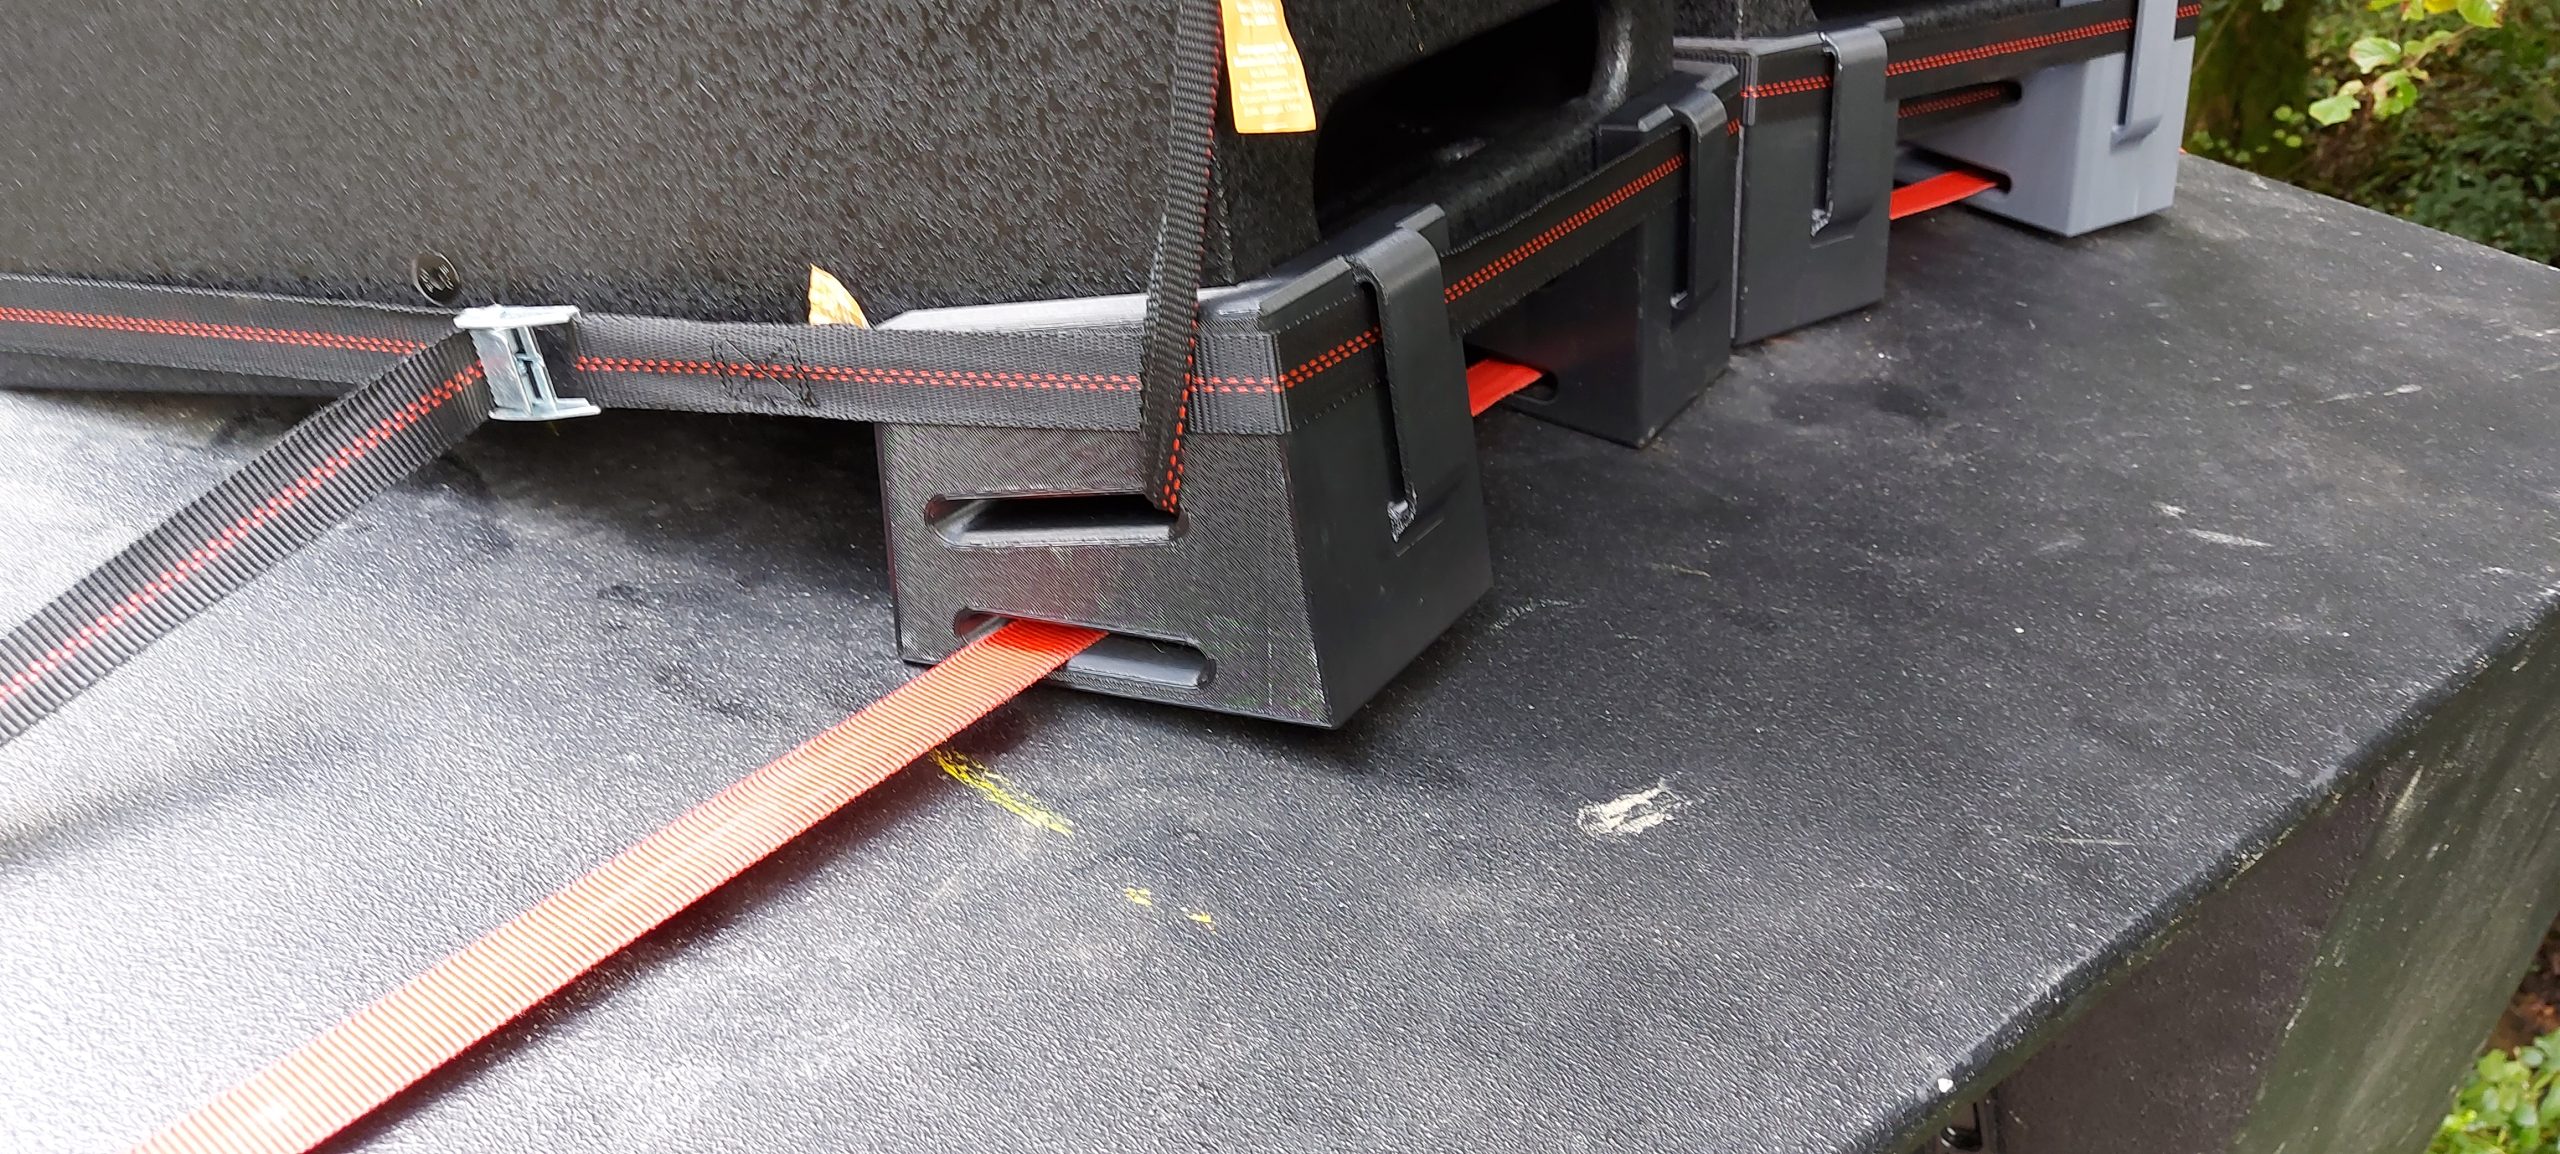
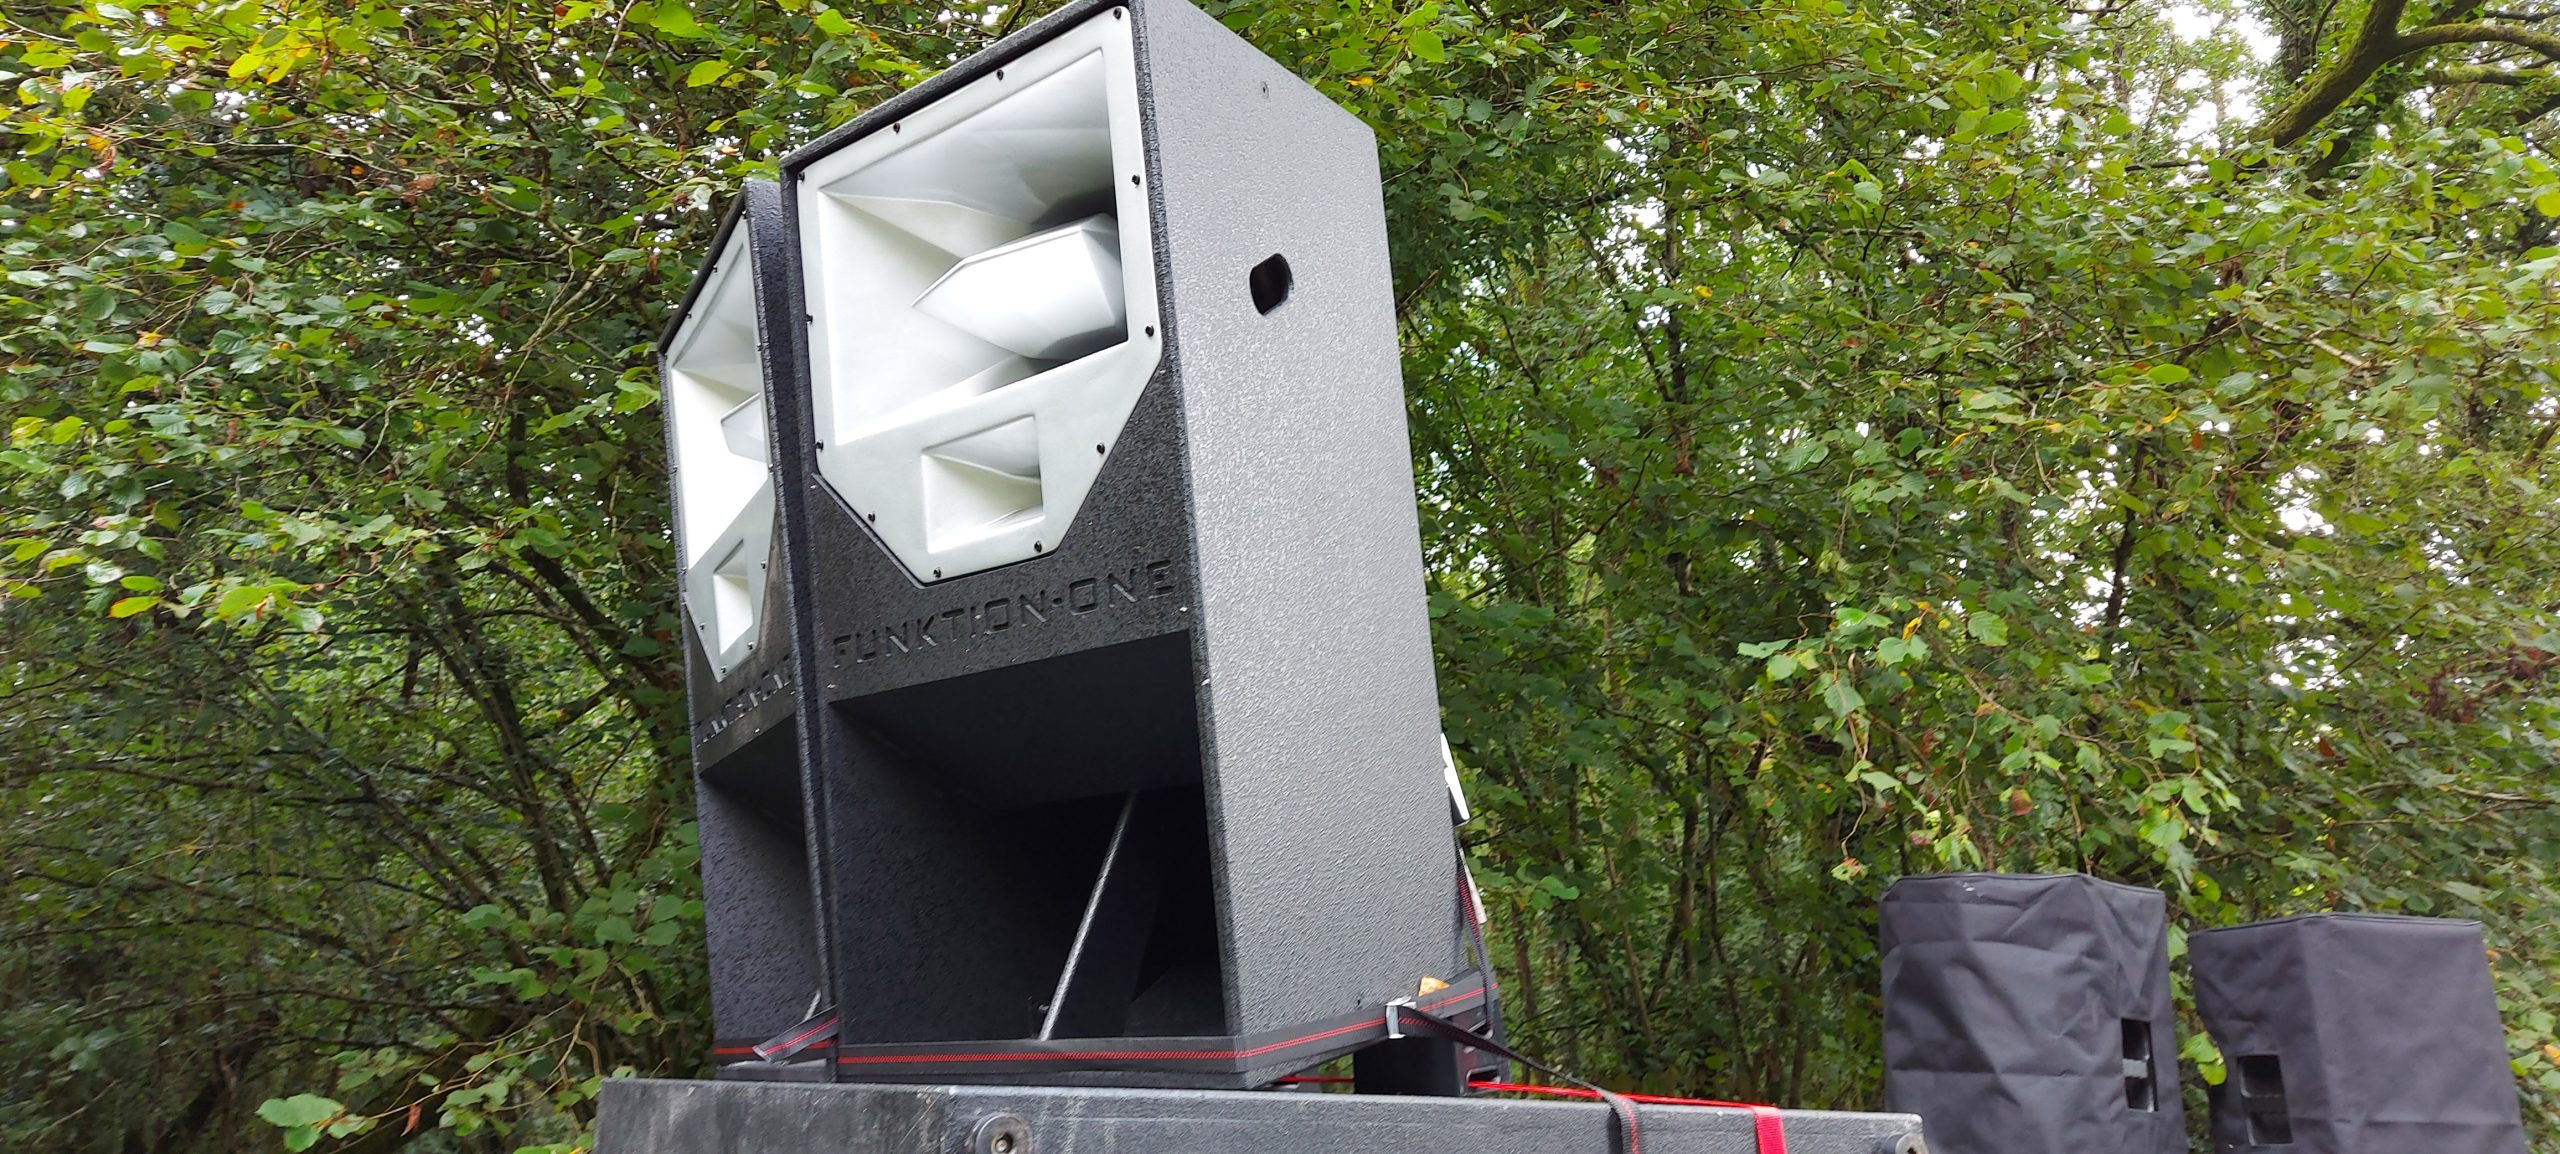
The ground stacks are designed to angle the sound system at 9.8° in order to improve the sound dispersion over short distances, allowing the top of the speaker to deliver high frequencies to those standing closest to the stage. In our case, we needed these stacks to handle both the weight of the speaker (48kg) and the force of the straps used to hold them in position. The FUNMAT impressed here as our printed parts featured excellent surface qualities and no defects, and ultimately proved to be fit for purpose.
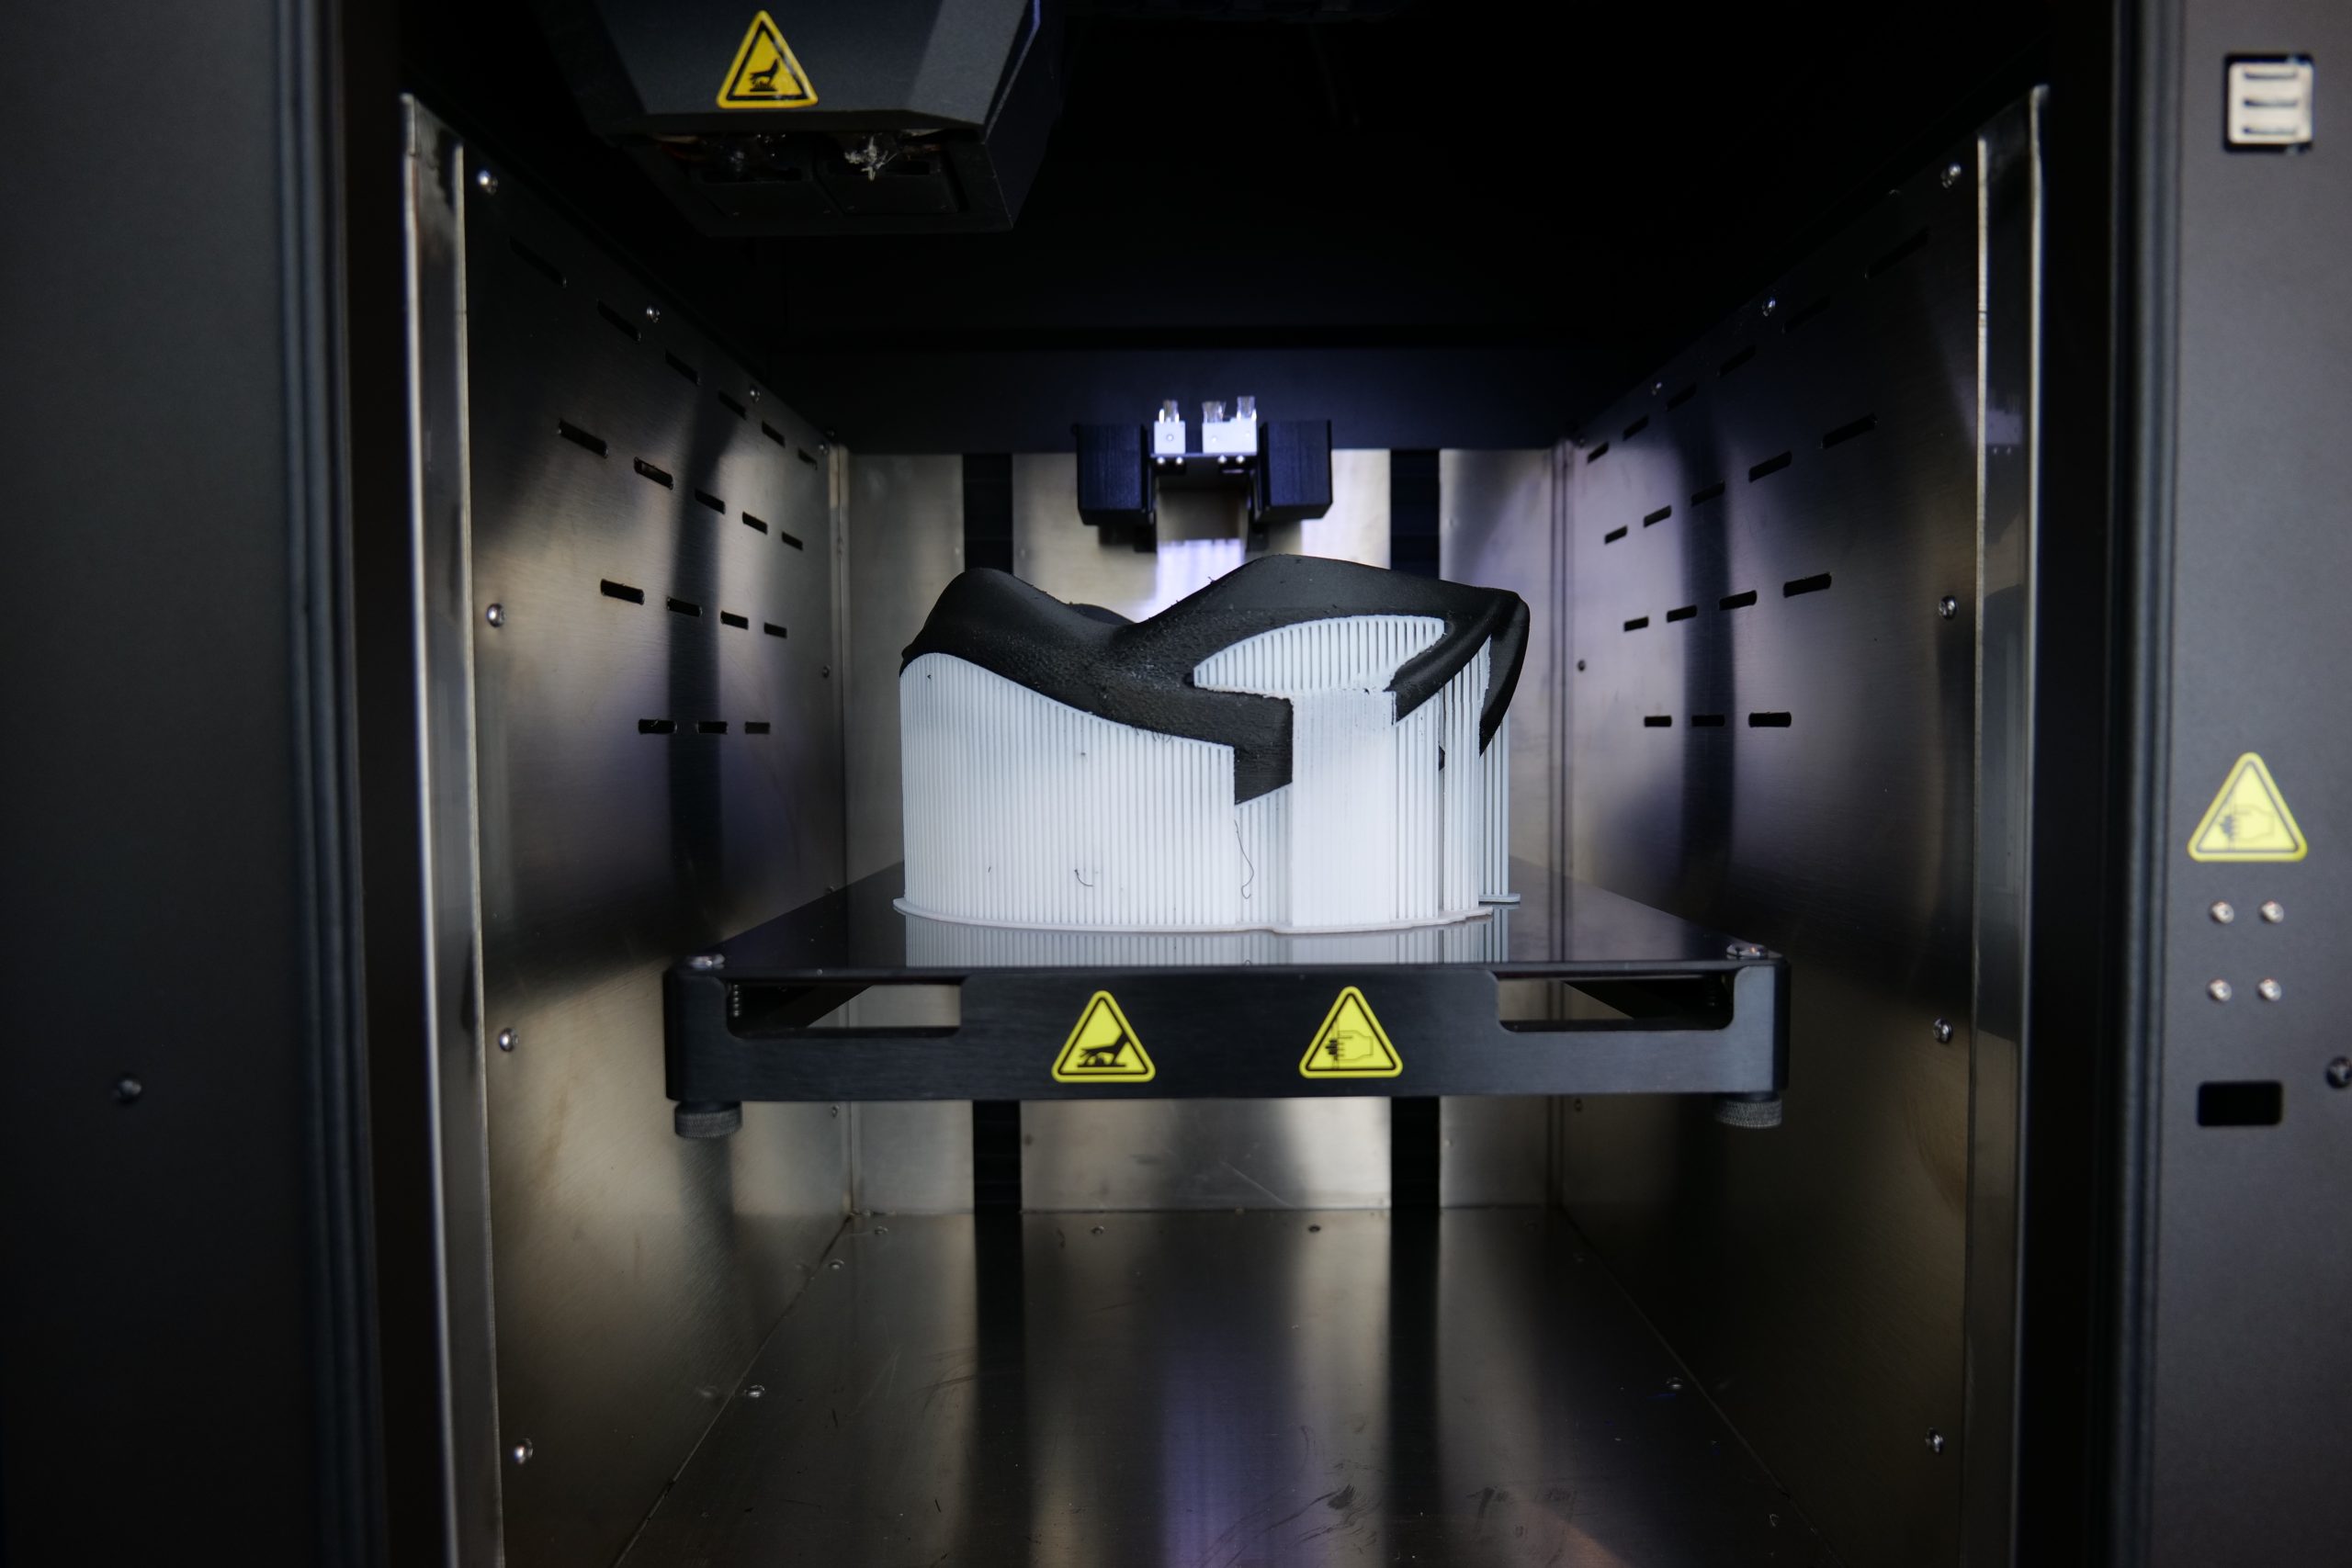
We concluded our testing with three carbon fiber-reinforced polyamide (PA-CF) prints: a set of speaker wedges, a bicycle helmet (with HIPS soluble supports), and a planetary gear system.
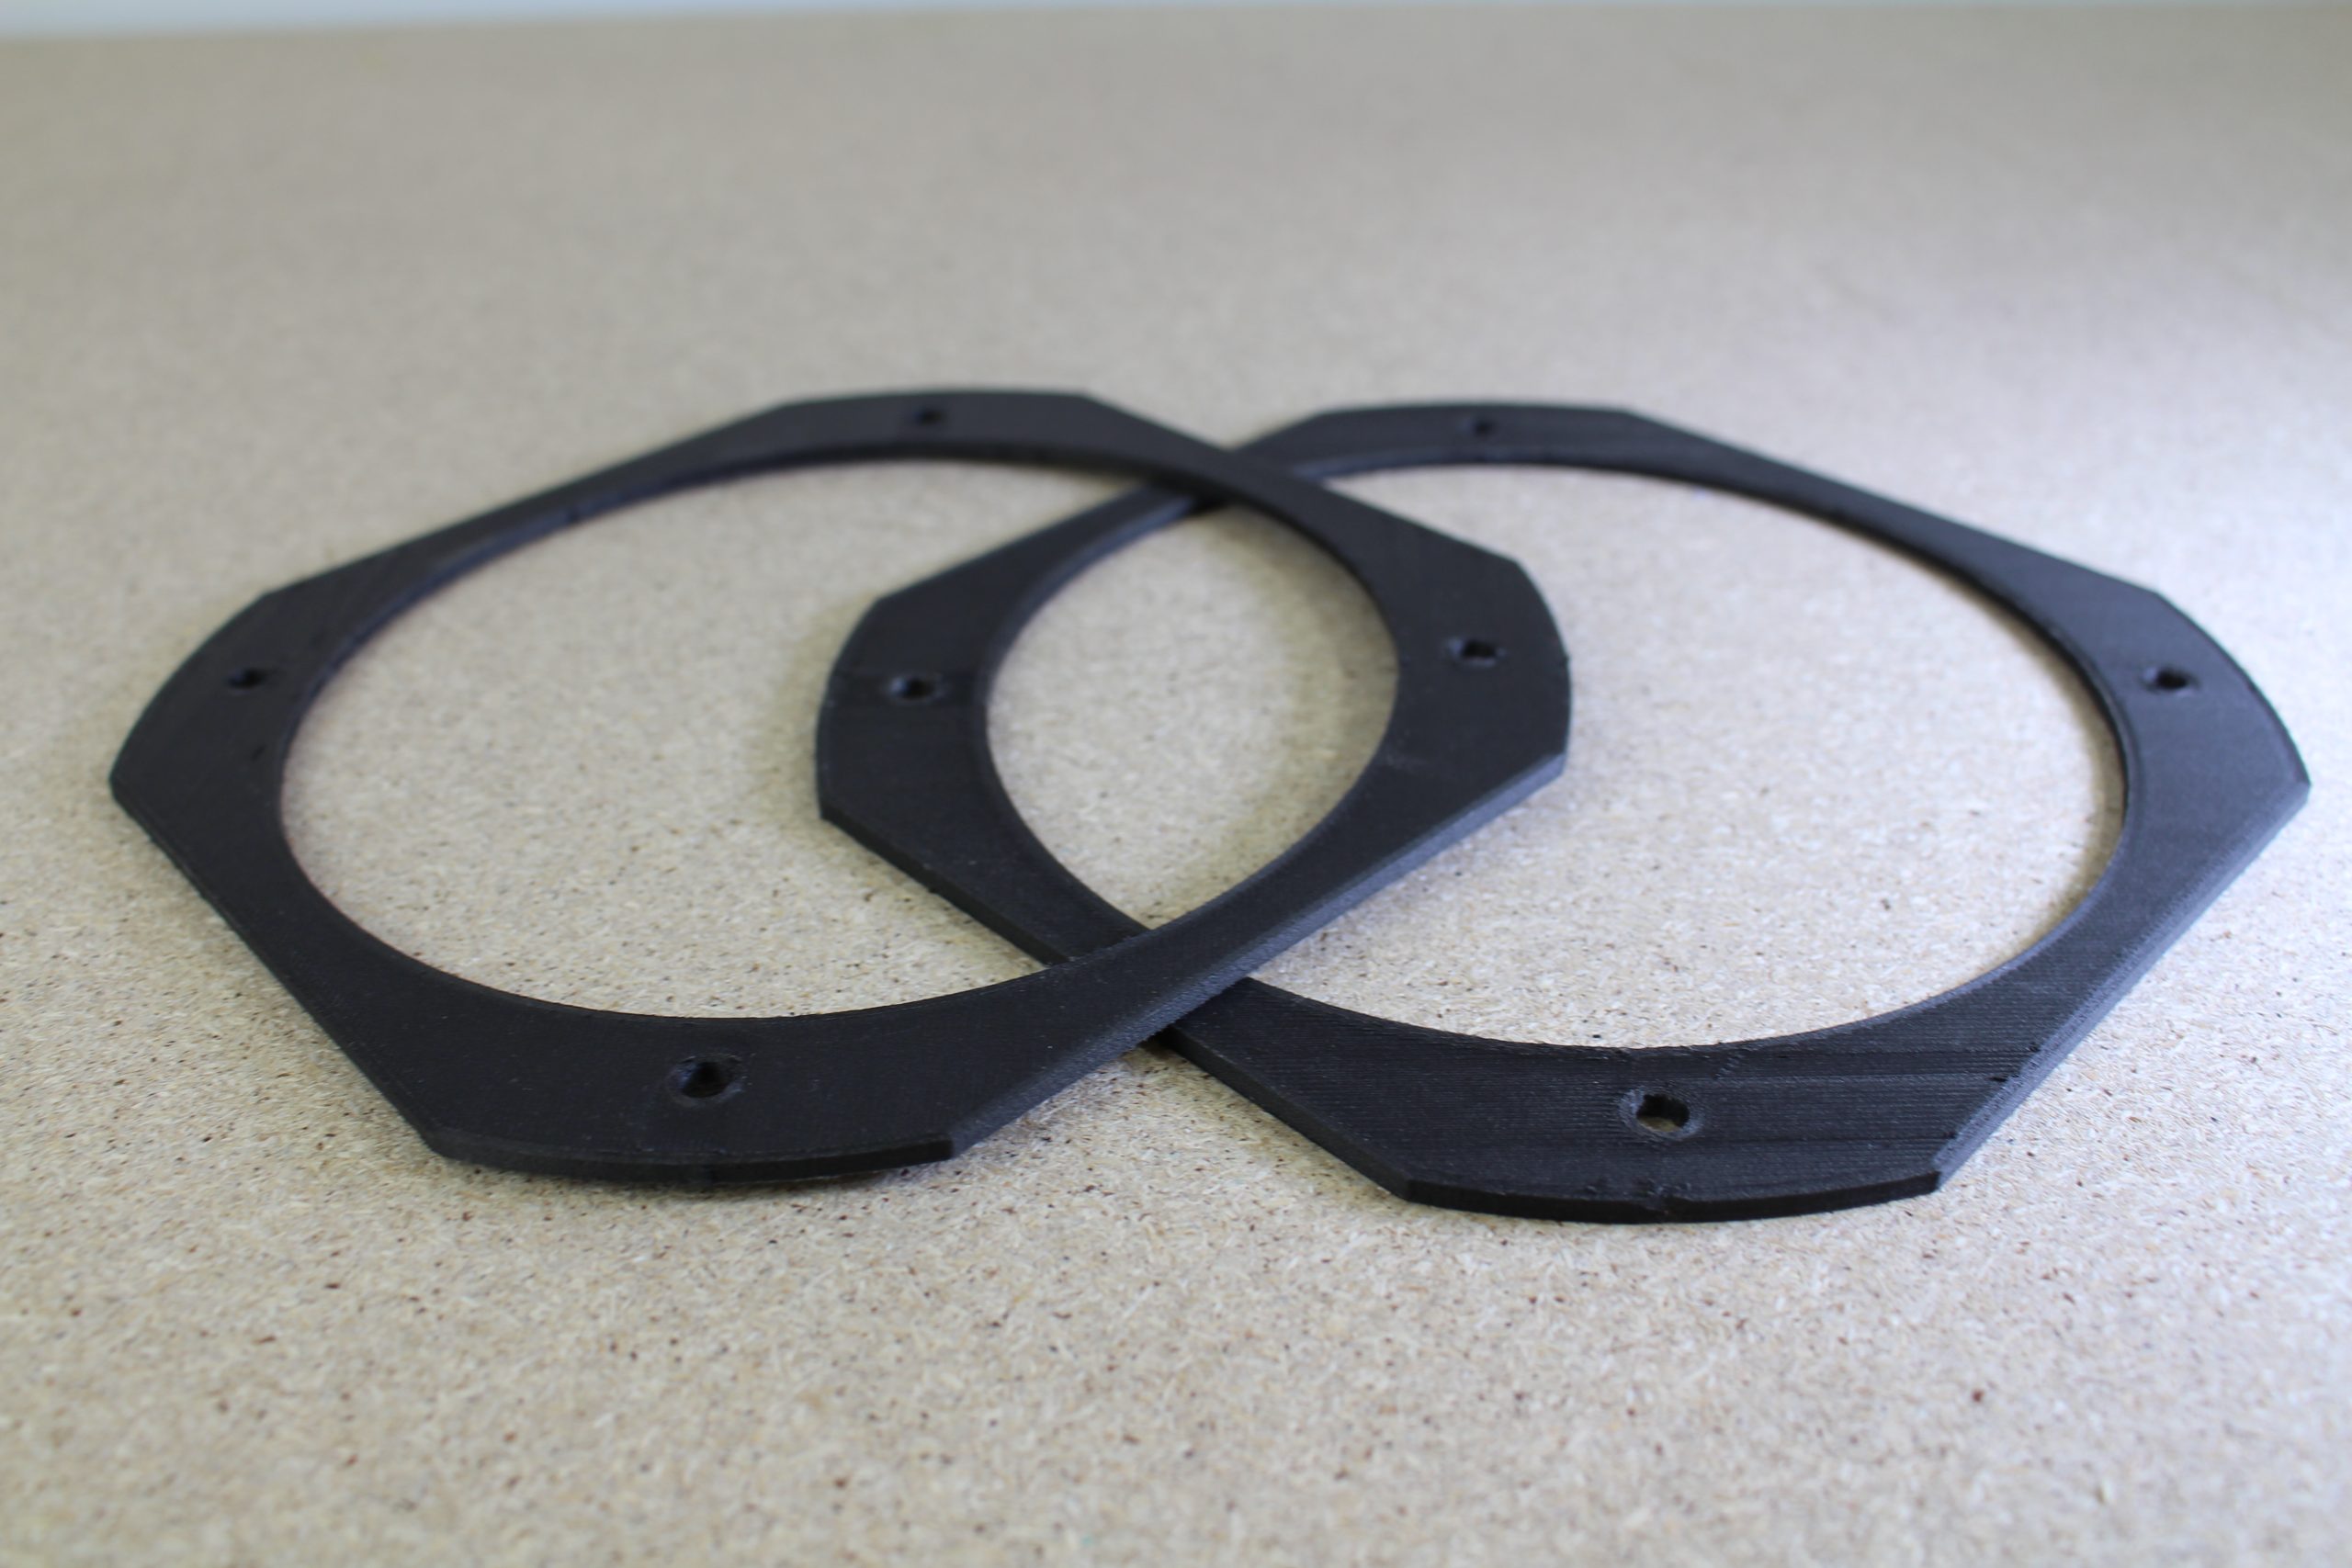
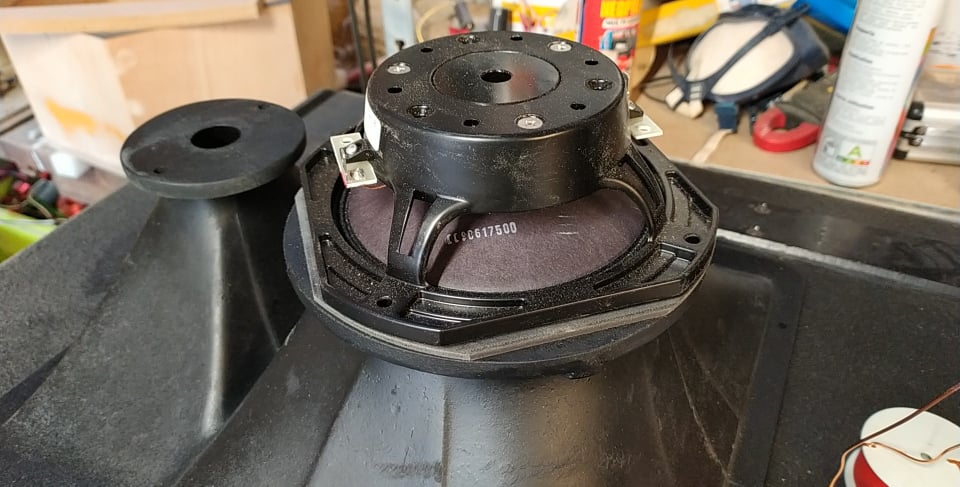
The 3D printed speaker wedge is an internal component designed to offset a speaker by 3mm so that it doesn’t make contact with the phase plug. We opted for PA-CF due to the slight flexibility of the material, which enables it to form a vacuous seal when the casing of the speaker is tightened. The FUNMAT printed the composite wedge with ease and the part worked perfectly.
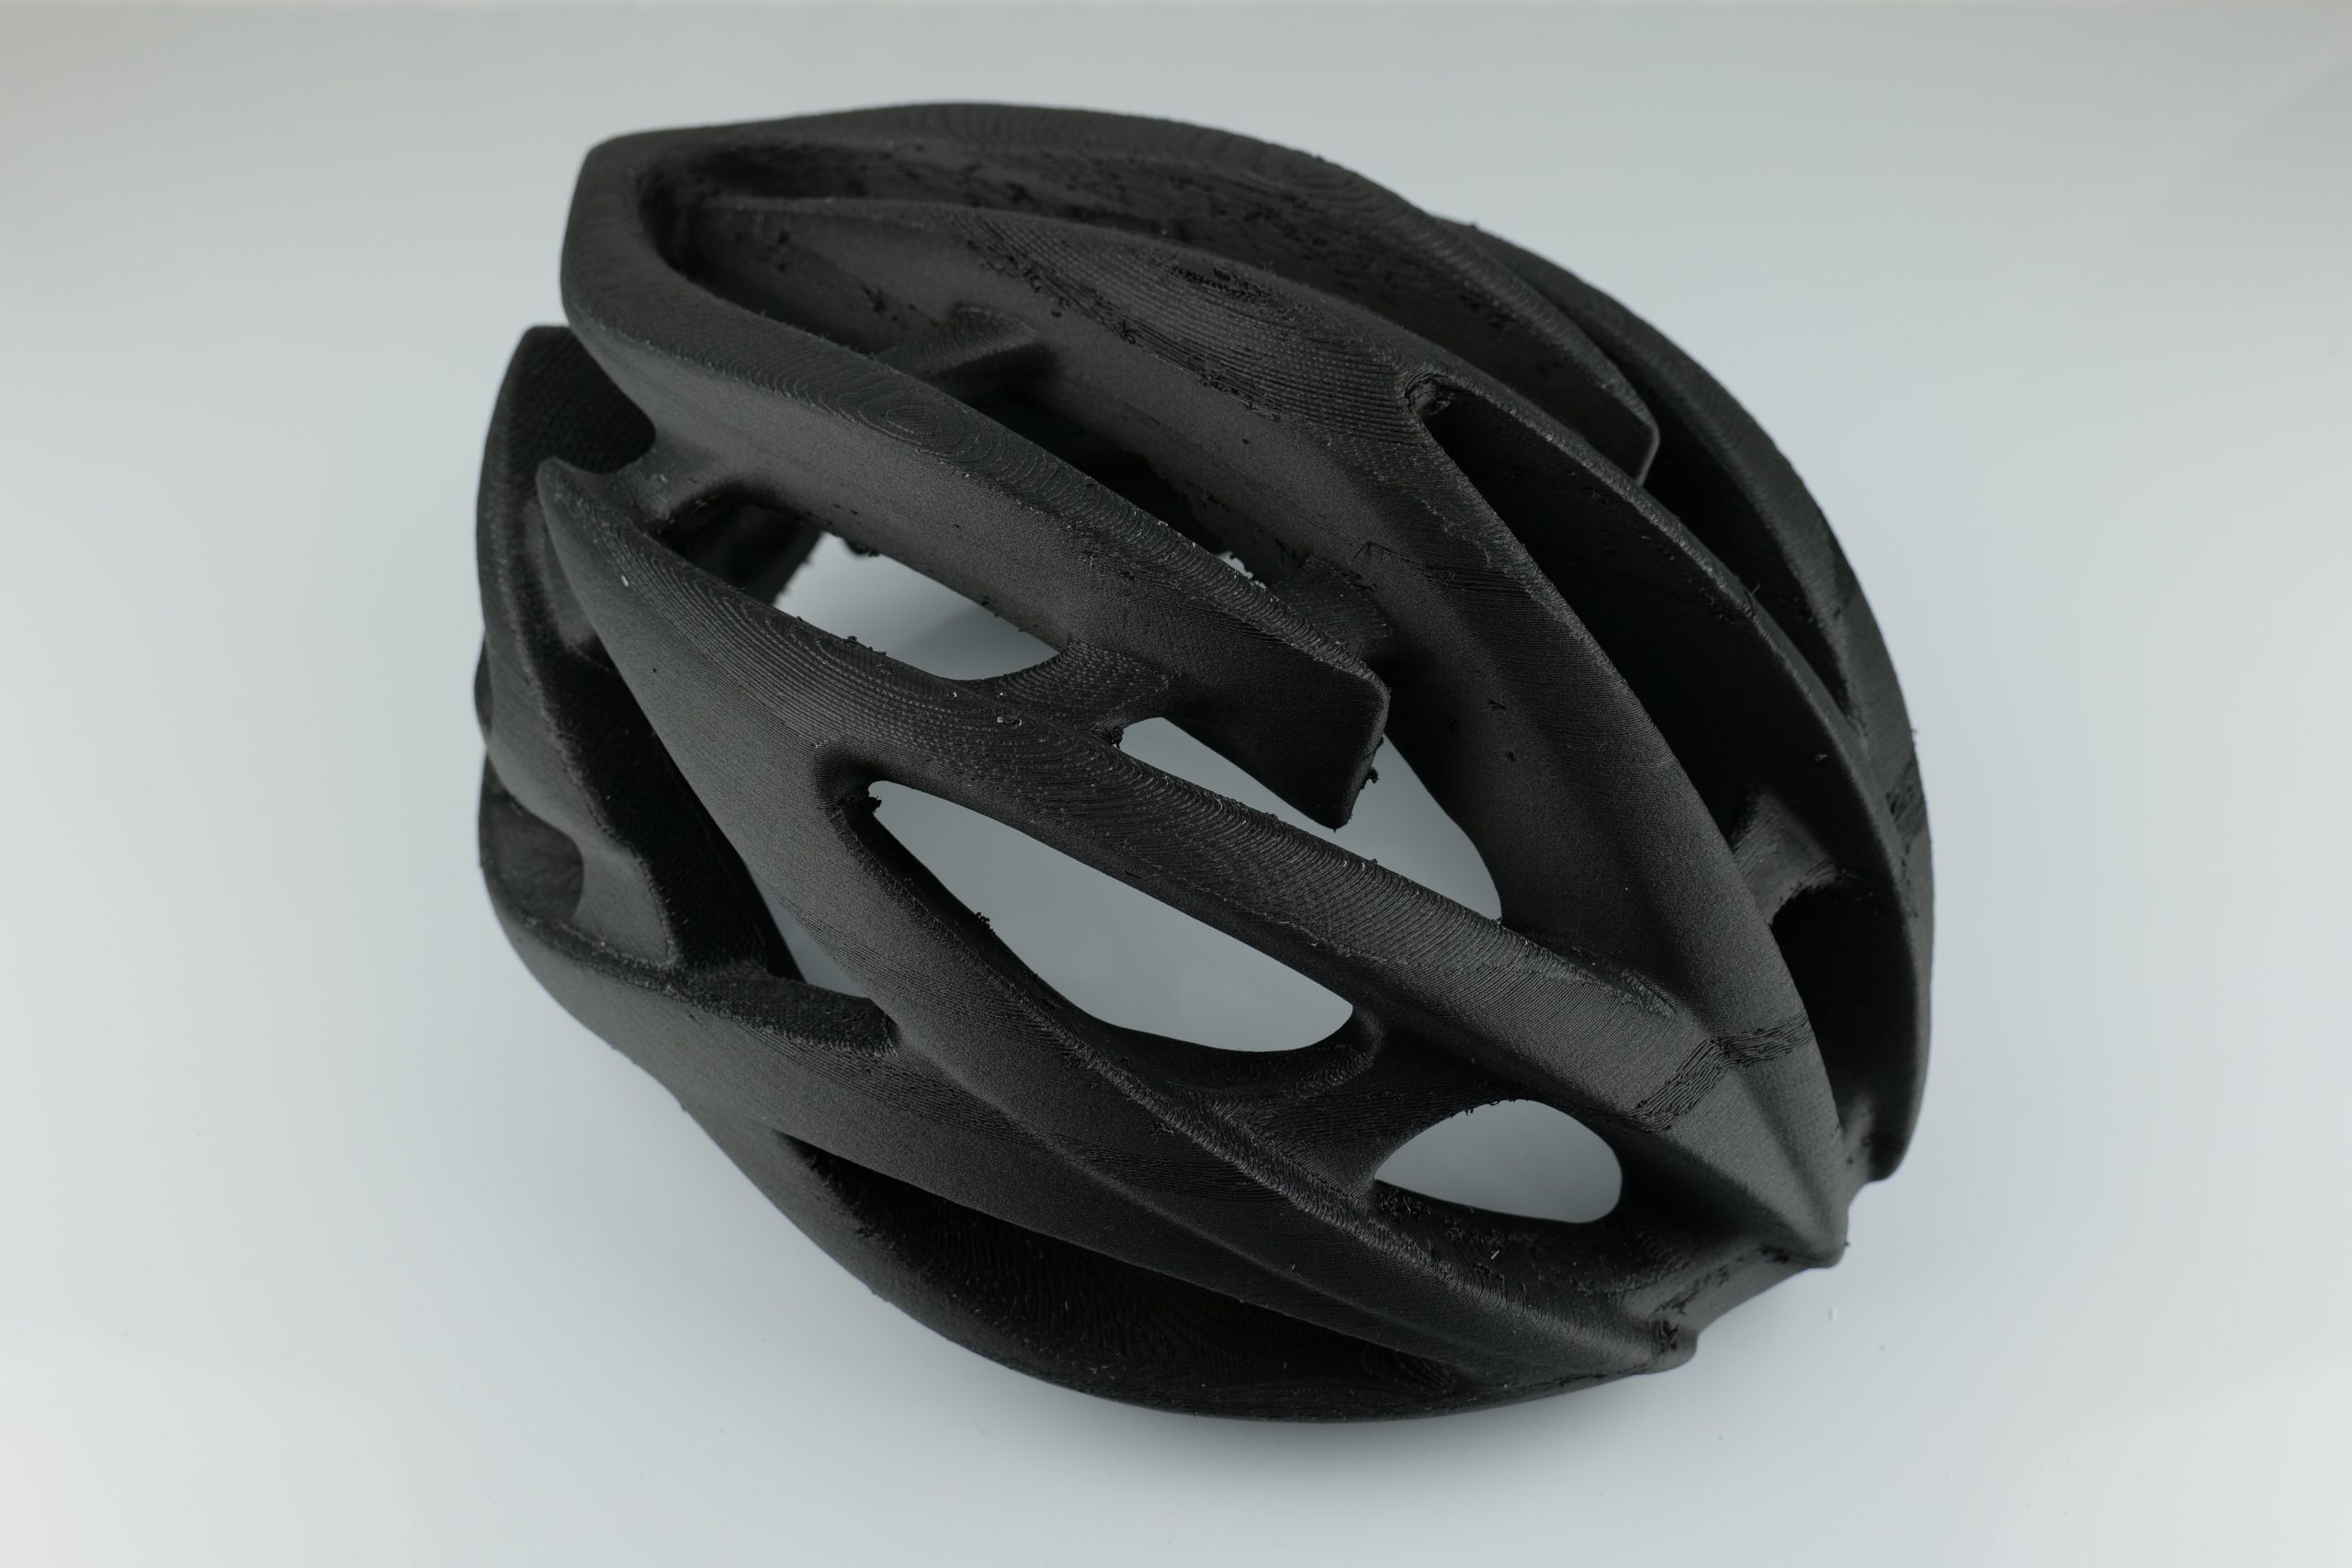
Similarly, we opted for PA-CF for the bicycle helmet due to its strength and impact resistance, which enables the material to absorb shocks without fracturing. While the helmet did require a little post-processing, the surface quality was excellent and the part had minimal defects. The interfaces between the PA-CF and the HIPS supports were also extremely clean with no material bleeding.
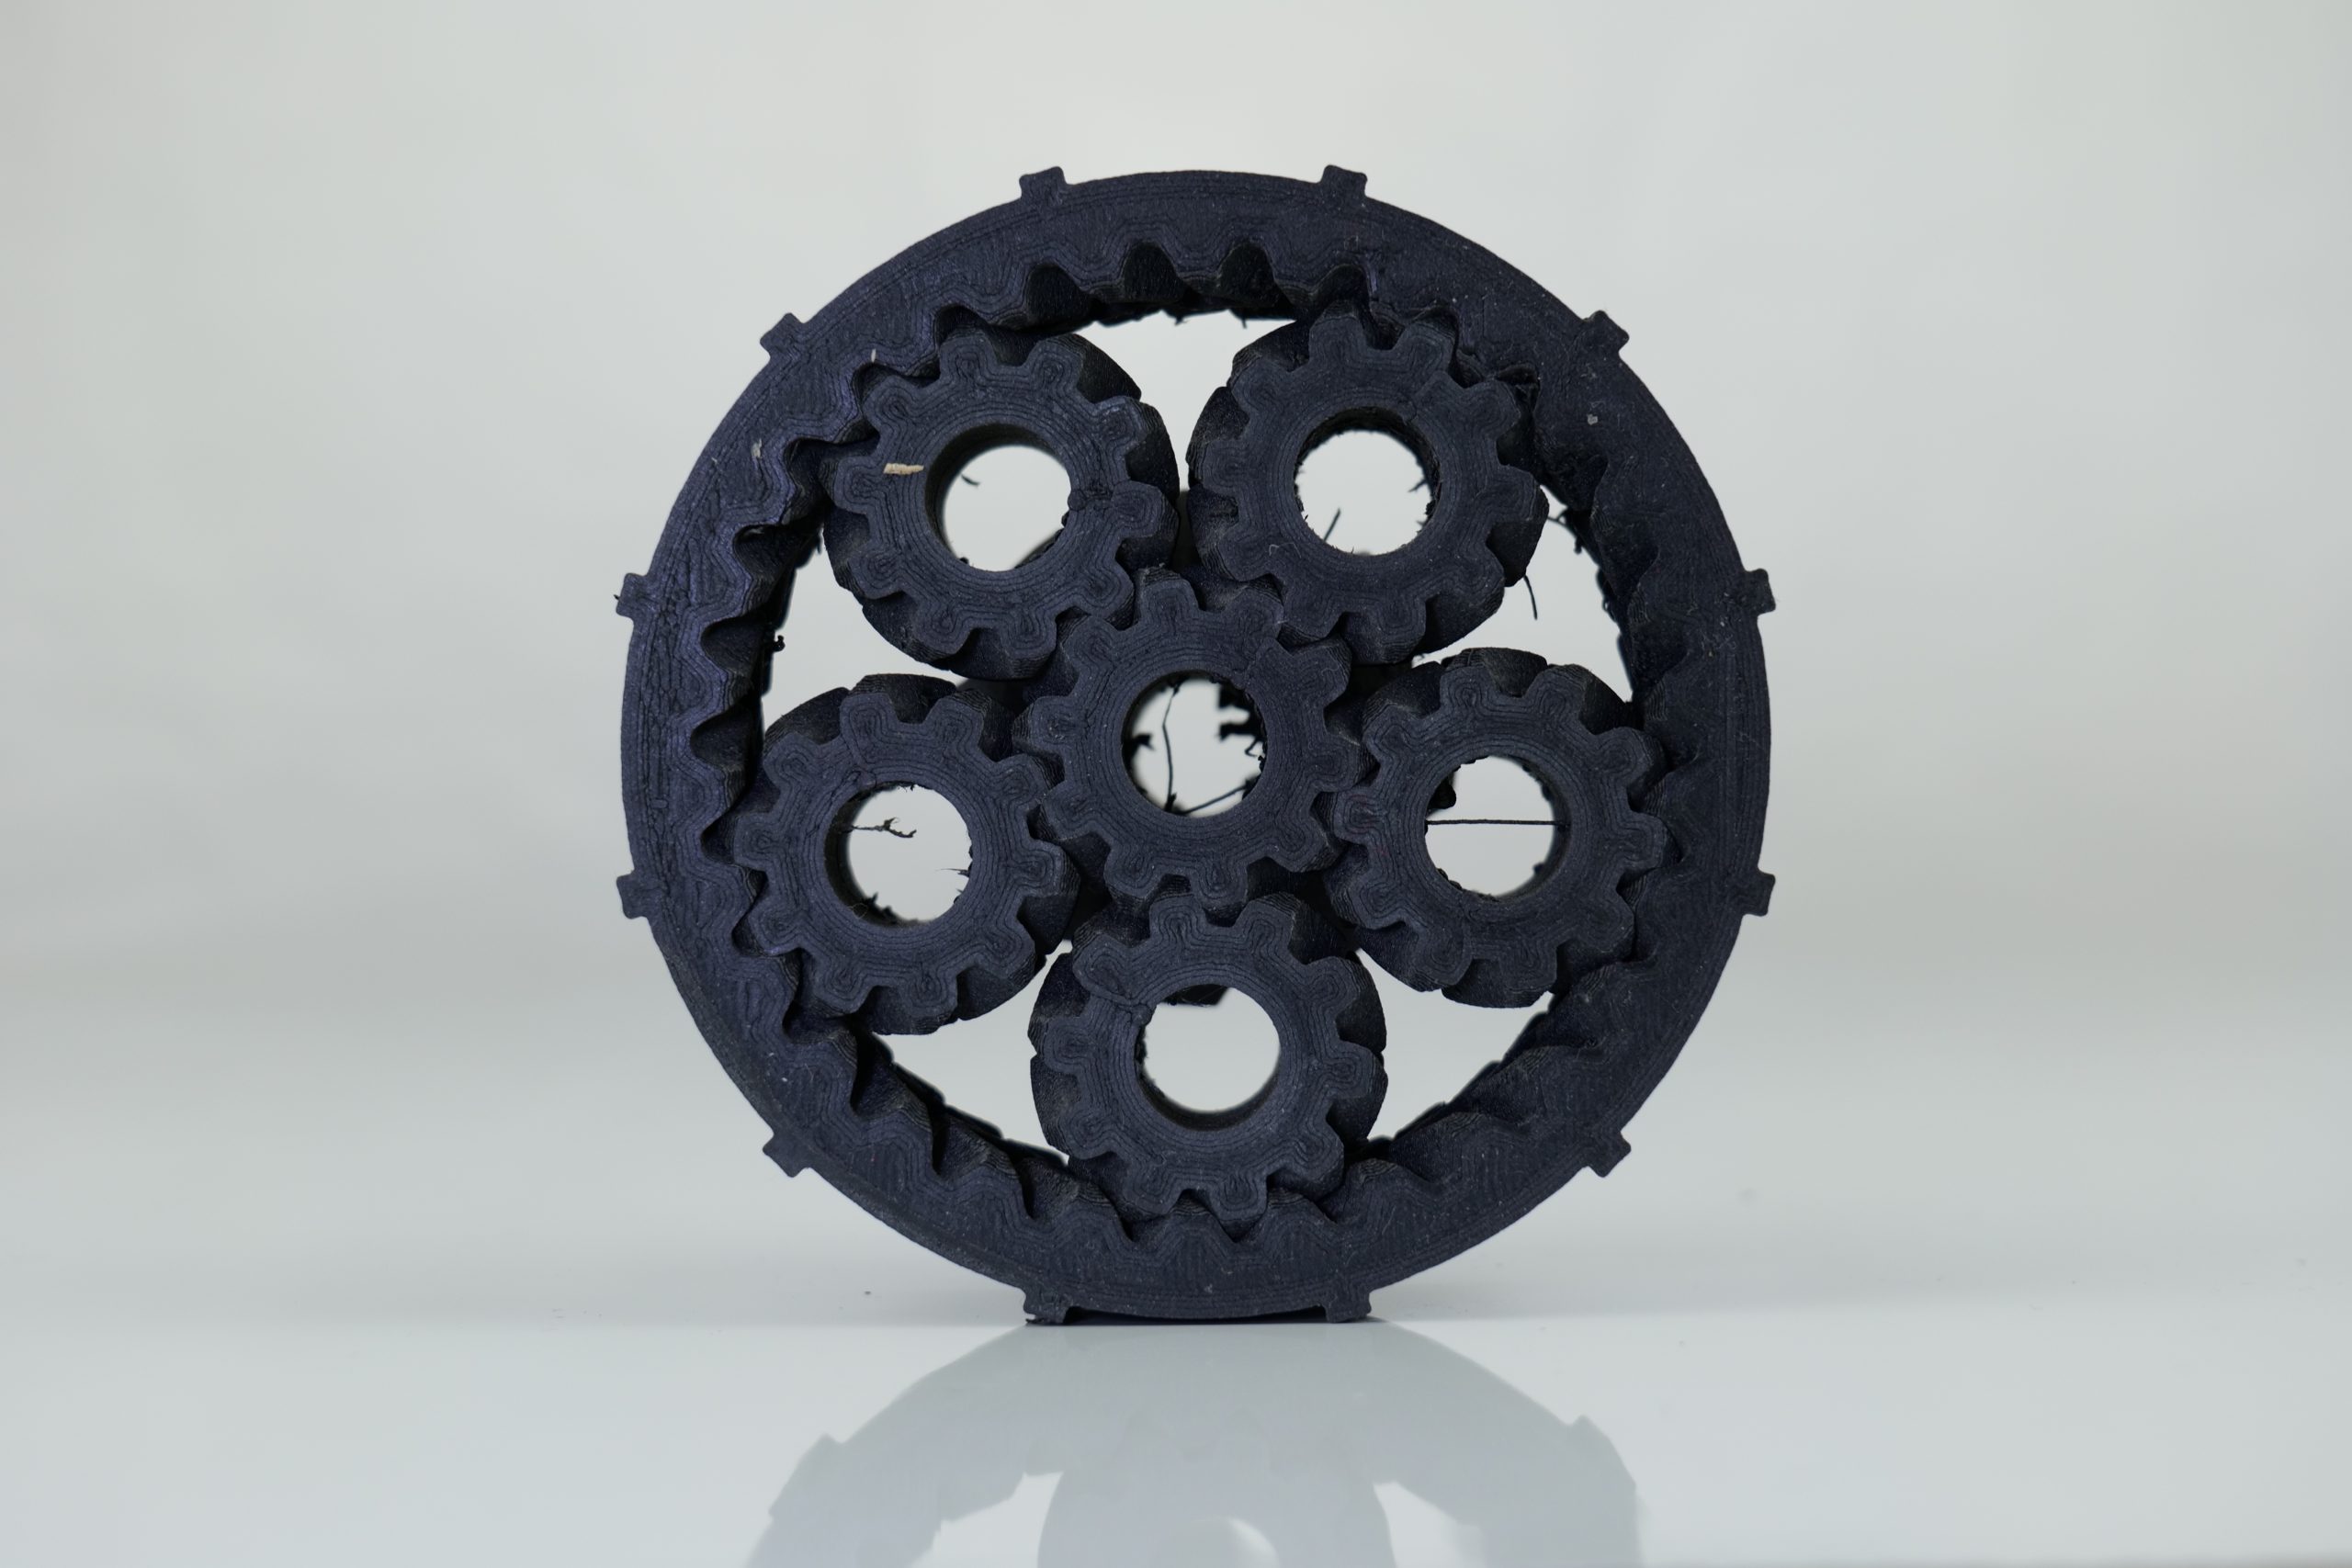
Finally, we have the 3D printed planetary gear system. Mechanical assemblies such as this one allow us to determine just how tight the tolerances of the 3D printer are, as the ease of assembly and overall fluidity of the system can be judged very easily. The FUNMAT PRO 410 did an excellent job with this print, as each of our gears had clean surfaces and meshed well with the rest of the assembly, resulting in a fully functional gear system.
The verdict
When all is said and done, the INTAMSYS FUNMAT PRO 410 has proven itself to be an industrial-grade powerhouse. Combining a respectable build volume with excellent print quality, the system is a great choice for professional and industrial users looking to 3D print high-performance parts with engineering-grade materials.
We have to give props where it’s due, as INTAMSYS has very clearly placed a major focus on refining the user experience here. The 3D printer’s control system is as sophisticated as can be and the inclusion of a dedicated filament chamber means there’s no need for any third-party add-ons – the FUNMAT is truly ready to use straight out of the box.
Much like any product out there, the system does of course have its shortcomings. The bed leveling procedure could do with a few tweaks for both ease of use and time savings, while the company’s INTAMSUITE slicer seems to suffer from unfortunate performance issues.
Still, the multitude of intelligent design considerations make the machine a great choice for those seeking a high-temperature 3D printer. If you’re in the market for a no-nonsense, reliable method of 3D printing PEEK, carbon fiber composites, and other industrial materials, we can safely say the FUNMAT PRO 410 has got you covered.
Technical specifications
| Build volume | 305 x 305 x 406mm |
| Extruders | Two |
| Max nozzle temp | 500°C |
| Max bed temp | 160°C |
| Max chamber temp | 90°C |
| Max filament chamber temp | 70°C |
| XYZ resolution | 16µm, 16µm, 1.6µm |
| Layer thickness | 0.05 – 0.5mm |
| Print speed | Up to 300mm/s |
| Dimensions | 728 x 684 x 1480mm |
| Weight | 220kg |
| Connectivity | SD card, Wi-Fi, ethernet |
| Touchscreen | 7″ |
Buy the INTAMSYS FUNMAT PRO 410 here.
Special thanks to 3D printing reseller iMakr who sent us the INTAMSYS FUNMAT PRO 410 to review.
Subscribe to the 3D Printing Industry newsletter for the latest news in additive manufacturing. You can also stay connected by following us on Twitter, liking us on Facebook, and tuning into the 3D Printing Industry YouTube Channel.
Looking for a career in additive manufacturing? Visit 3D Printing Jobs for a selection of roles in the industry.
Featured image shows the INTAMSYS FUNMAT PRO 410 3D printer. Photo by 3D Printing Industry.