
The 3D Printing Industry team reviews the 3DMakerpro Mole, a 3D scanner handheld 3D scanner that uses near-infrared (NIR) structured light to capture 3D models of medium-sized objects. The Mole is designed to be affordable, portable, and easy to use, making it a great choice for anyone who wants to explore the possibilities of 3D scanning.
The Mole is manufactured by 3DMakerpro, a Chinese company that develops and sells portable 3D scanners for various applications. Founded in 2015, the company has a team of over 100 R&D staff and has won several awards for its innovative products. The company aims to enable everyone to create their own 3D world with professional and cost-effective 3D scanners.
The Mole fits within the manufacturer’s claim, coming in at just over $600, but how will it measure up to our tests in this review?
Main benefits of the Mole 3D scanner
The Mole 3D scanner offers a robust set of features for the price point. Performance and affordability should set it apart from other 3D scanners on the market.
Near-infrared (NIR) structured light allows users to create realistic and detailed 3D scans of objects without costing a fortune. It can even capture black objects without any problems thanks to this technology, and is also eye-safe.
The Mole 3D scanner is not limited to a maximum scan size; thanks to its handheld form factor, the Mole is capable of scanning objects of any size or shape. 3DMakerpro has also built an AI-based visual tracking algorithm into the software, eliminating the need for markers; and making the Mole a compelling and flexible offering.
The Mole 3D Scanner is accompanied by JMStudio, a user-friendly and intuitive software that guides users through the scanning workflow every step of the way. This makes the Mole 3D scanner highly accessible for anyone who wants to create their own 3D models without necessarily having prior experience or technical skills.
Overall the Mole 3D scanner is a great choice for hobbyists, designers, educators, and artists who want high-performance 3D scanning without breaking the bank.
Continue reading the review to see if the 3D scanner matches these claims.
Hardware and packaging of the 3DMakerpro Mole
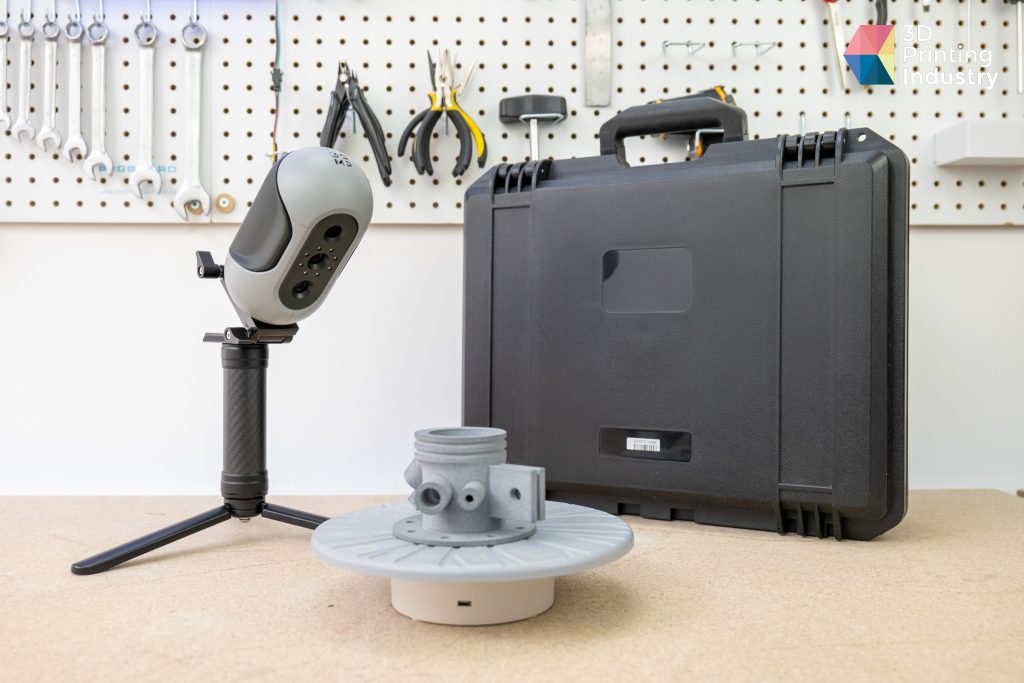
The Mole 3D scanner comes in a hard shell carry case that contains everything needed to start scanning: the 3D scanner itself, a turntable, a tripod, a USB stick, and all the necessary cables and adapters. We like the sturdy padded case and how it protects the 3D scanner and its accessories from damage and makes it easy to transport them.
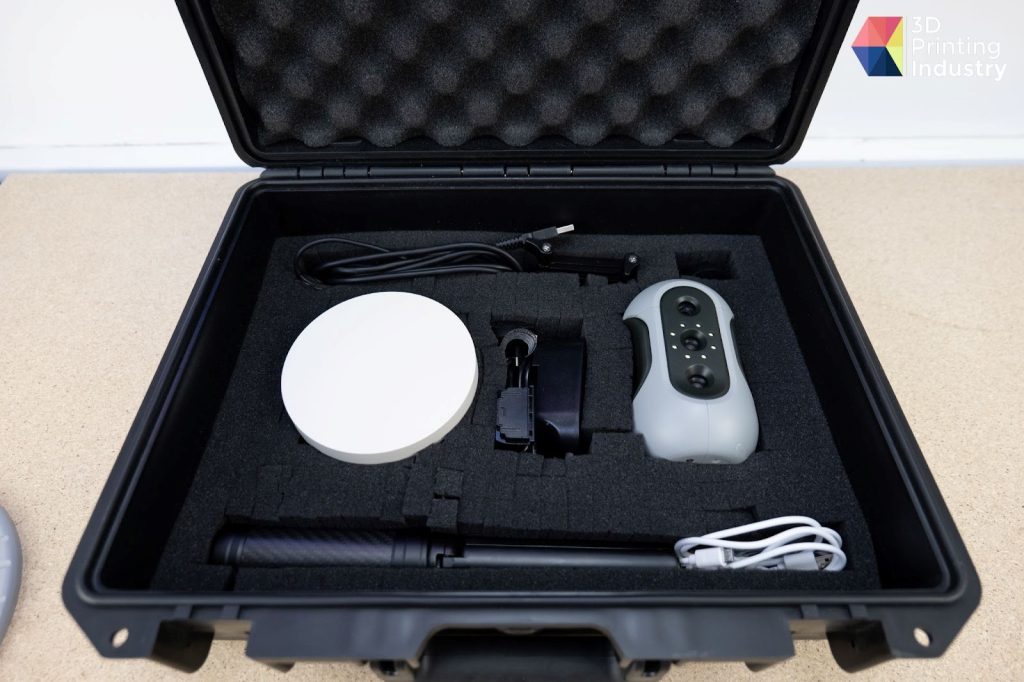
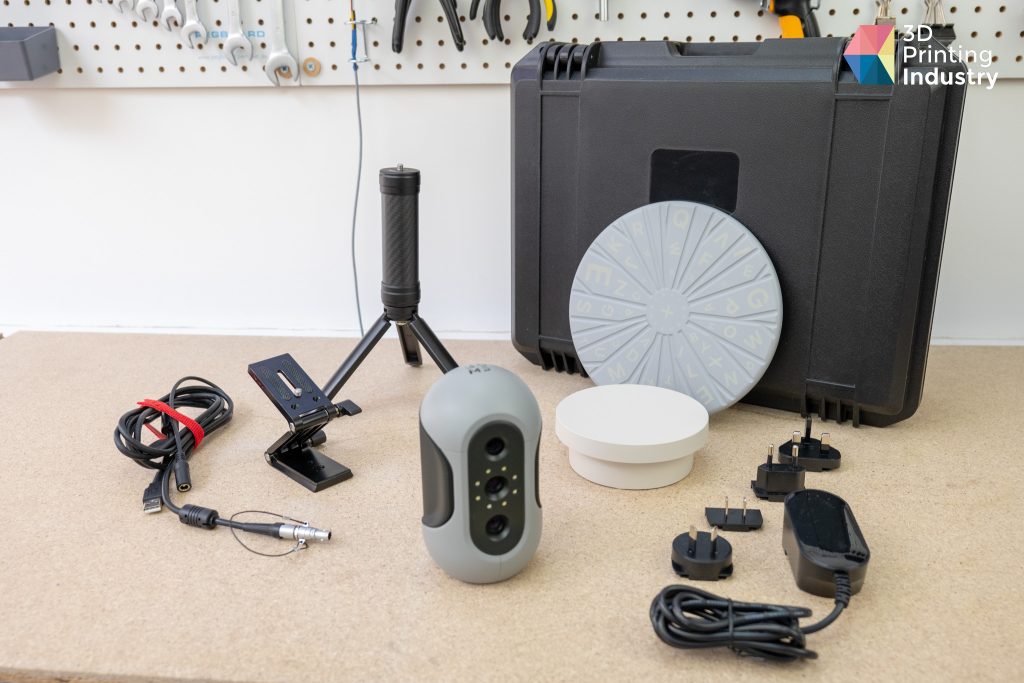
Packaging and Unboxing of the Mole 3D Scanner. Photos by 3D Printing Industry.
The Mole is a near-infrared structured light 3D scanner that offers high accuracy and resolution at a reasonable price point. It can capture the shape and texture of objects with a 0.05 mm scan accuracy and a 0.1 mm resolution. It can also 3D scan black objects, which are usually difficult for 3D scanners to handle.
Calibration and set up process of the 3DMakerpro Mole
The setup for the Mole 3D scanner is fairly simple and straightforward. All that is required is to plug in the cables, install the JMStudio software from the USB stick, and load the calibration file. The manual on the USB stick explains everything clearly and concisely. There is no need to do any manual calibration or use any markers, which is a big plus. However, this raises the question of how long it can stay calibrated if there is no way to re-calibrate it should the need arise.
The JMStudio software is very user-friendly and intuitive. It guides the user through the whole 3D scanning and post-processing workflow, from capturing to exporting. We like its different modes and settings to suit different scanning scenarios and preferences. We also like how it has a handy indicator to help us keep the optimal distance from the object while scanning.
There are two modes of scanning with the Mole 3D scanner: table scan and easy scan. Table scan mode requires the object to be placed on the turntable and scanned from a fixed angle with the 3D scanner on the tripod. The easy scan mode allows the scanner to be operated in hand-held mode, allowing the user to move it around the object freely. Both modes work well for different types of objects and sizes.
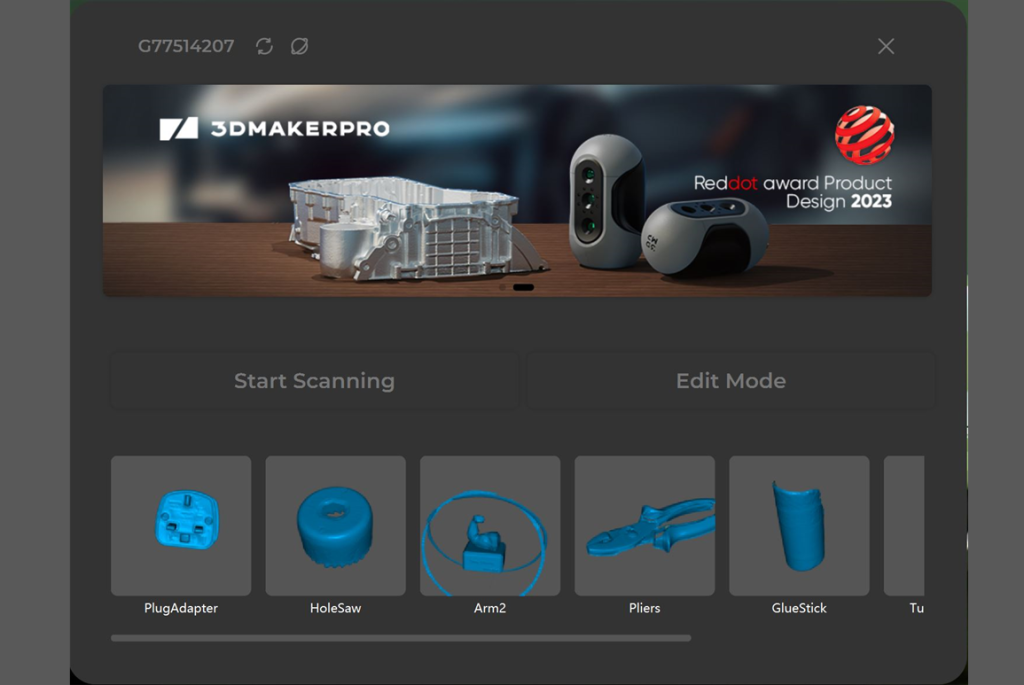

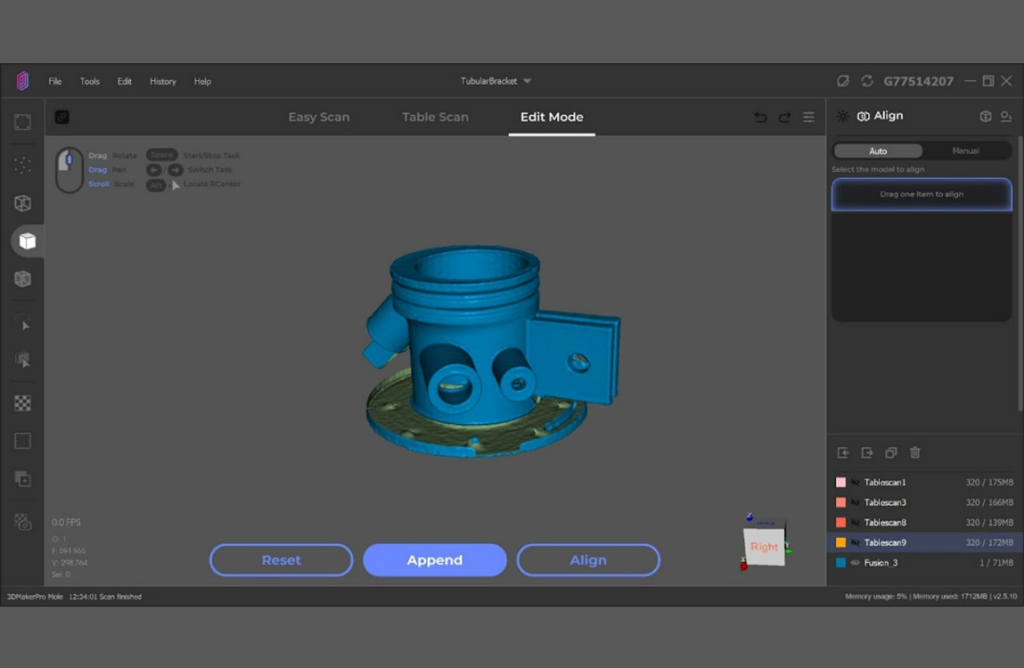
JMStudio software Landing page, User interface, and edit screen. Photos by 3D Printing Industry.
The Mole 3D scanner has impressive accuracy and resolution for its price range. It captures the shape, color, and texture of various objects with great detail and realism. It even scans dark objects without any problems, thanks to its NIR technology. The 3D scans are clean and smooth, without much noise or artifacts. The 3D scanner utilizes an AI visual tracking algorithm to eliminate the need for markers and marker setup.
After scanning, scans can be viewed and edited directly in the JMStudio software. The software has two modes for alignment: automatic and manual. The automatic mode works well in most cases, but some scans can struggle to align, requiring one to use the manual mode. Finally, 3D scans can be exported in various formats, such as OBJ, STL, or PLY. Scans can also be previewed in 3D before exporting.
Benchmarking the Mole 3D scanner
Here at 3D Printing Industry, we put the Mole 3D scanner through over 100 hours of rigorous testing for the purpose of this review. Similar to how we do our 3D printer reviews, we took the time to evaluate the 3D scanner’s performance and capabilities with various parts and 3D printed objects ranging from mechanical parts to model buildings. This simulates real-world scenarios and applications that a 3D scanner user might encounter, such as reverse engineering, quality control, product design, art, and education.
Scanning Complex Objects
To start off we chose models with a rough surface texture and non-symmetrical geometry. Due to the way the NIR 3D scanners work, having an item with porous or rough surface texture results in a higher amount of light being scattered, making it easier for the 3D scanner to capture the different features and geometry of an object. The lack of symmetry helps automatic alignment when combining multiple 3D scans to form a complete 3D model.
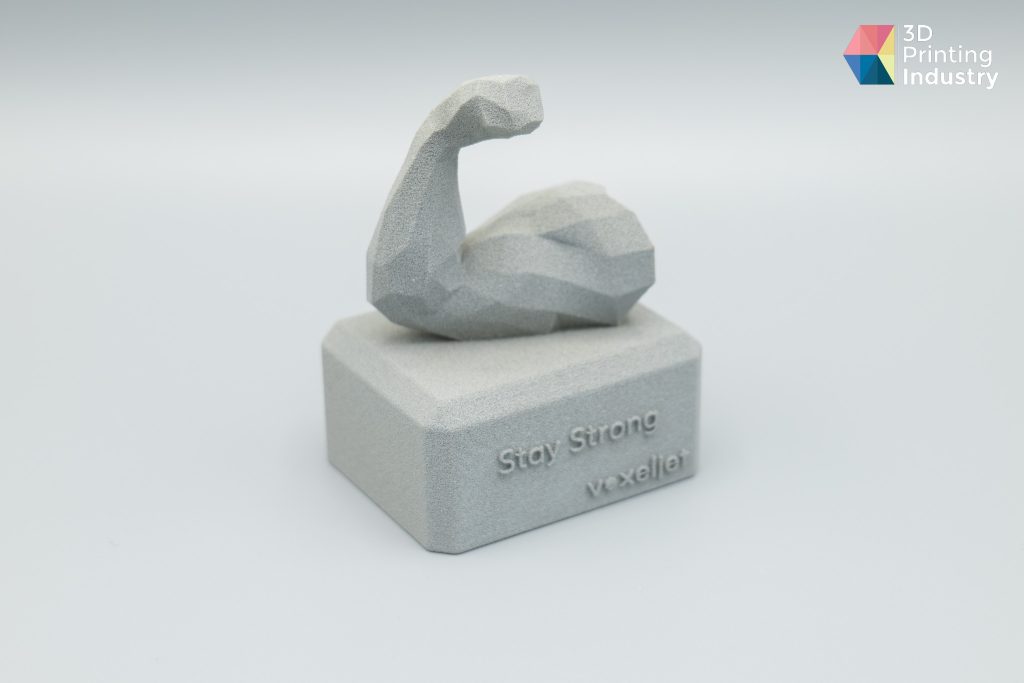
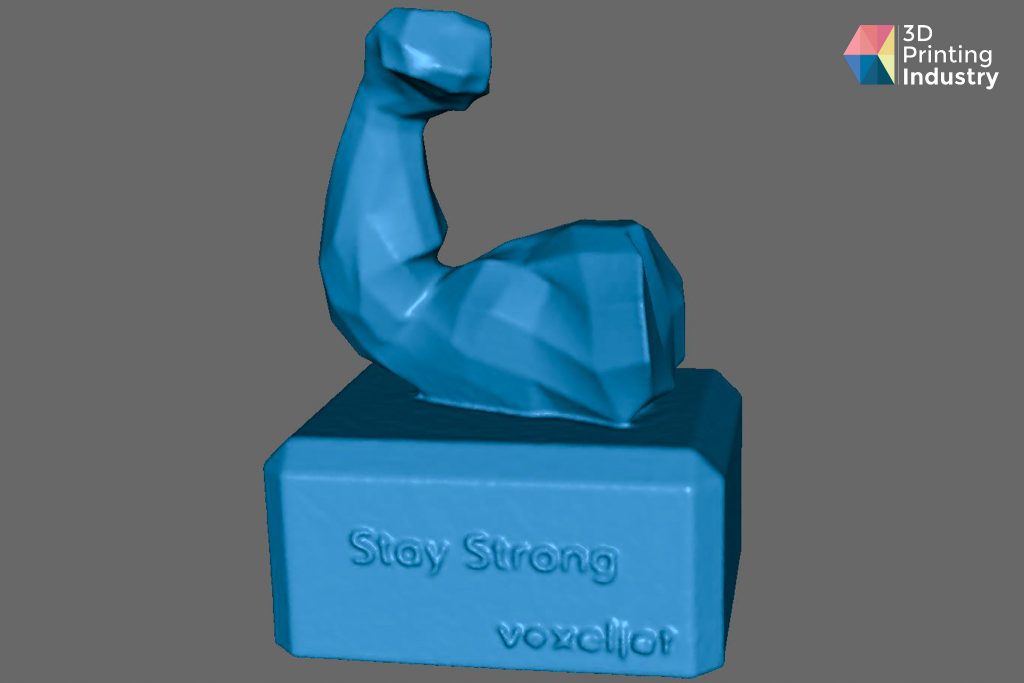
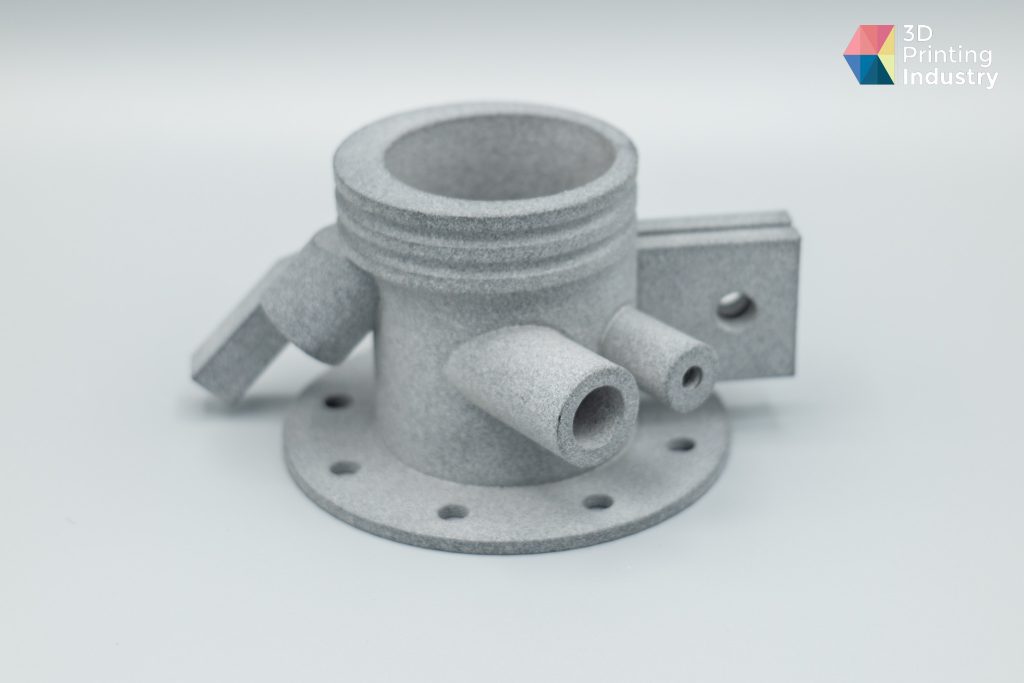


Stay strong voxeljet model and valve. Photos by 3D Printing Industry.
| Brightness | Sensitivity | Scan quality | Scan Mode | No. of scans |
| 2 | 5 | Fine | Geometry | 4 |
As can be seen, both the voxeljet “Stay Strong” model and the valve have scanned quite well, preserving a lot of detail. This is due to the SLS parts having a rough non-reflective surface and no line of symmetry resulting in good 3D scans. The only area that hasn’t come out well is the text on the trophy, which has become blurred. This is common as small details and sharp corners become rounded during conversion from a point cloud to a 3D mesh.
Another test part with a rough surface and non-symmetrical geometry was the steering mount designed using topology optimization. This process utilizes mathematical methods and simulation technology to create the most efficient design for a given task. This leads to parts with complex and organic-looking geometry that minimizes the use of material while maximizing part strength. It is full of features such as holes, branches, and web-like reinforcements, making it a challenge for a 3D scanner to successfully capture all of it.
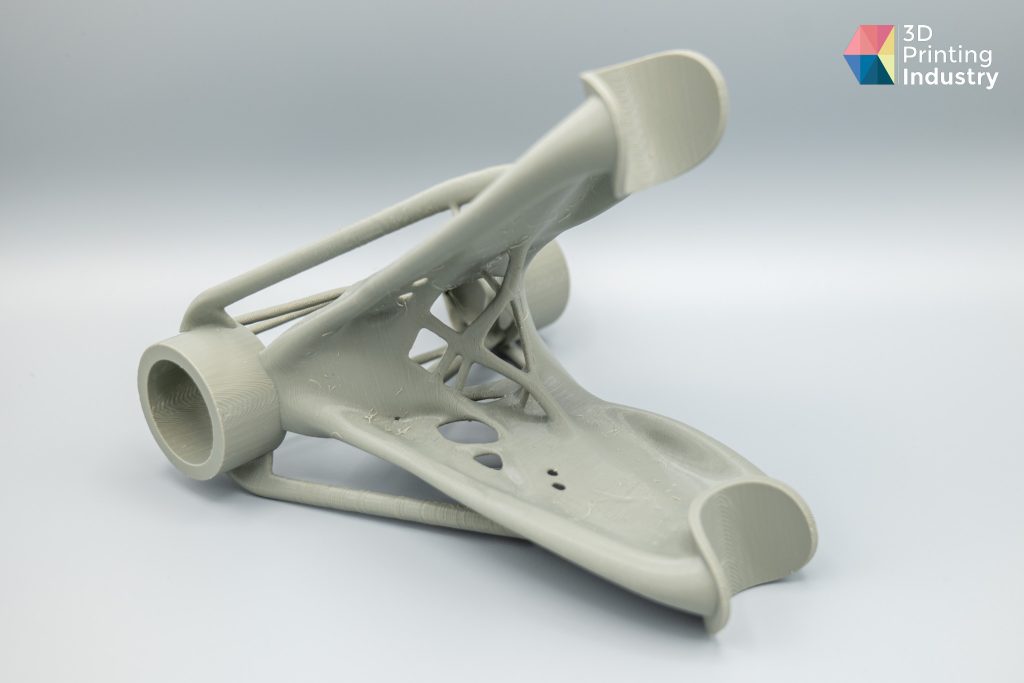
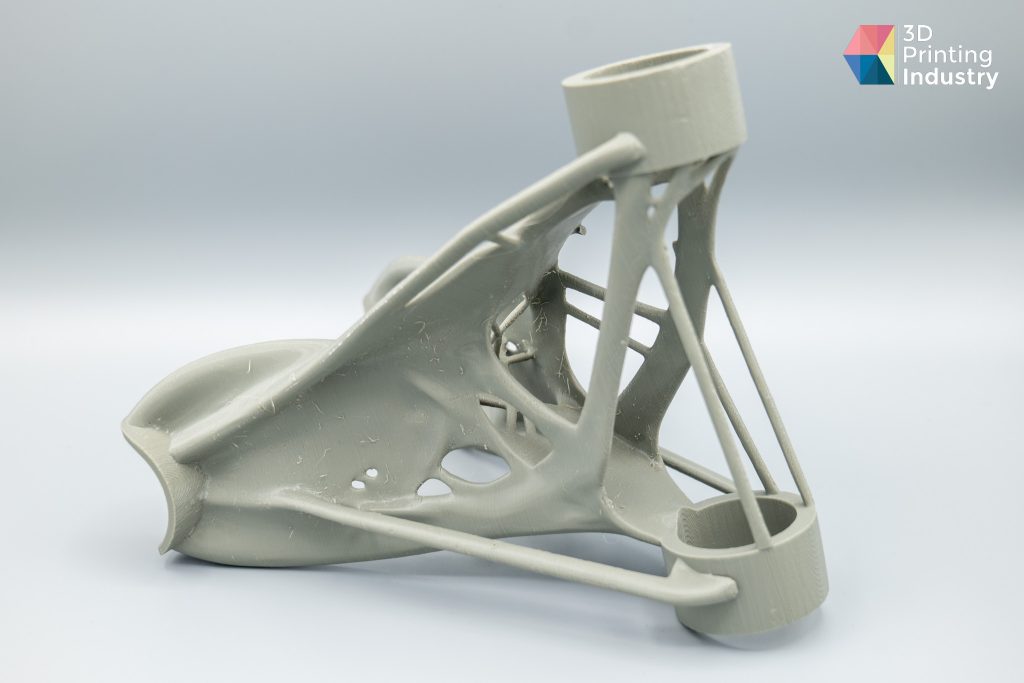
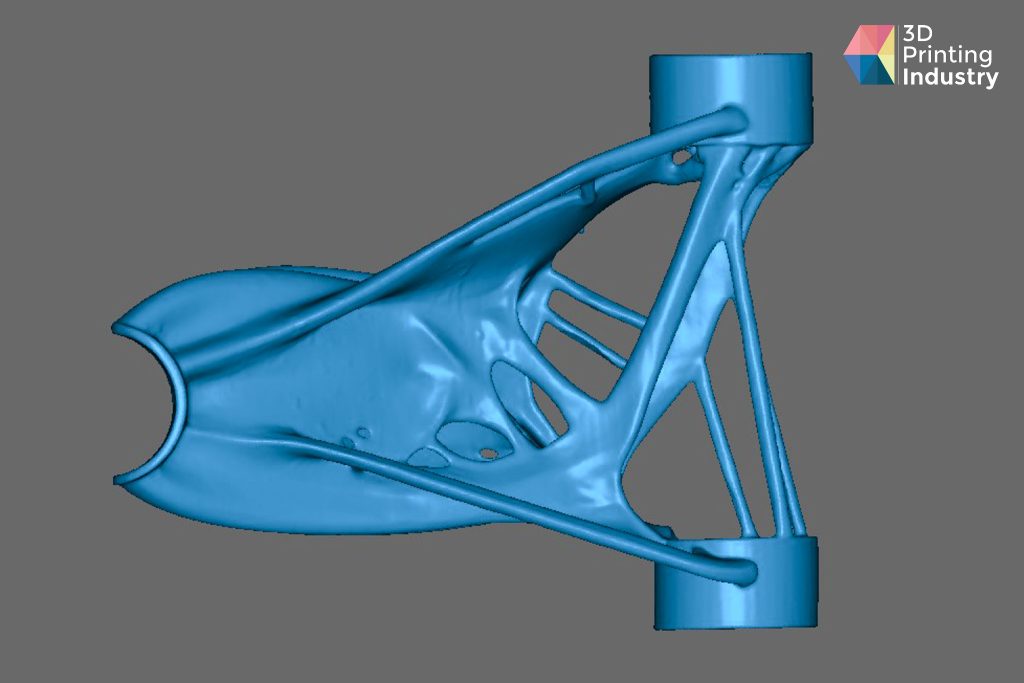

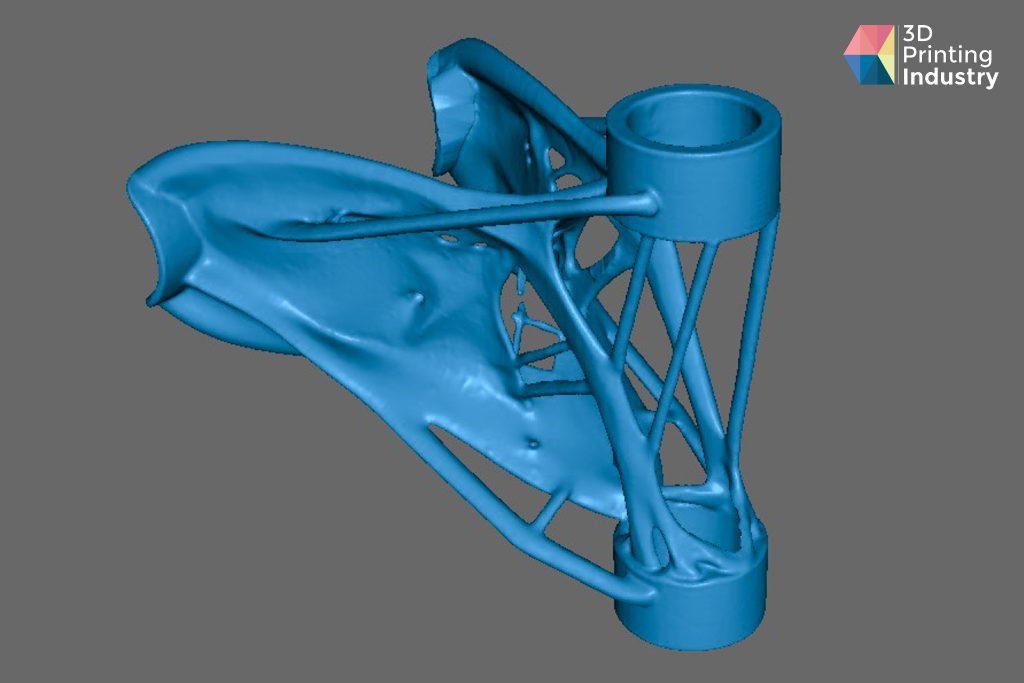
Steering mount. Photos by 3D Printing Industry.
| Brightness | Sensitivity | Scan quality | Scan Mode | No. of scans |
| 3 | 10 | Fine | Geometry | 4 |
We were extremely impressed with how well the Mole 3D scanner handled this test. As can be seen from the photos, the 3D scanner captured all of the complex geometry and successfully aligned multiple 3D scans to form a 3D model of the original part. We believe that the rough surface and non-symmetrical geometry were a big factor in this success, similar to previous tests.
This shows that the Mole 3D scanner is a good, cheap option for applications such as reverse engineering, 3D modeling, and product design.
Digitization of everyday objects
Next, we selected a pair of pliers and a plug adapter to 3D scan with the Mole 3D scanner to test how easy it is to digitize everyday objects and prepare them for 3D transformation. These parts have various surfaces, materials, and colors, some being matte while some are glossy, which should pose a good challenge for the Mole.
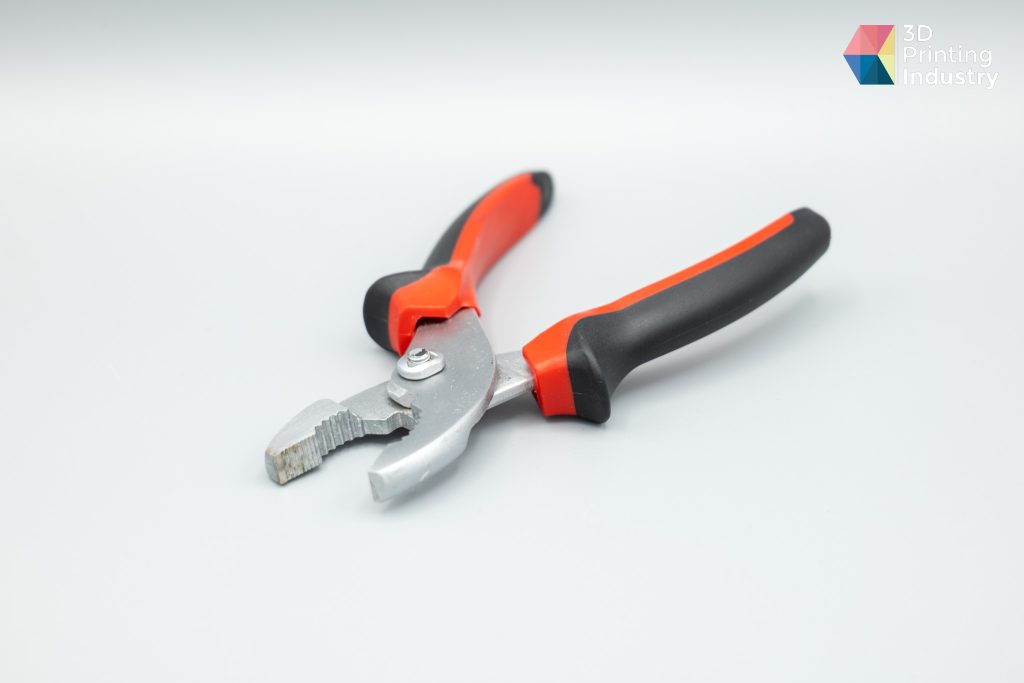
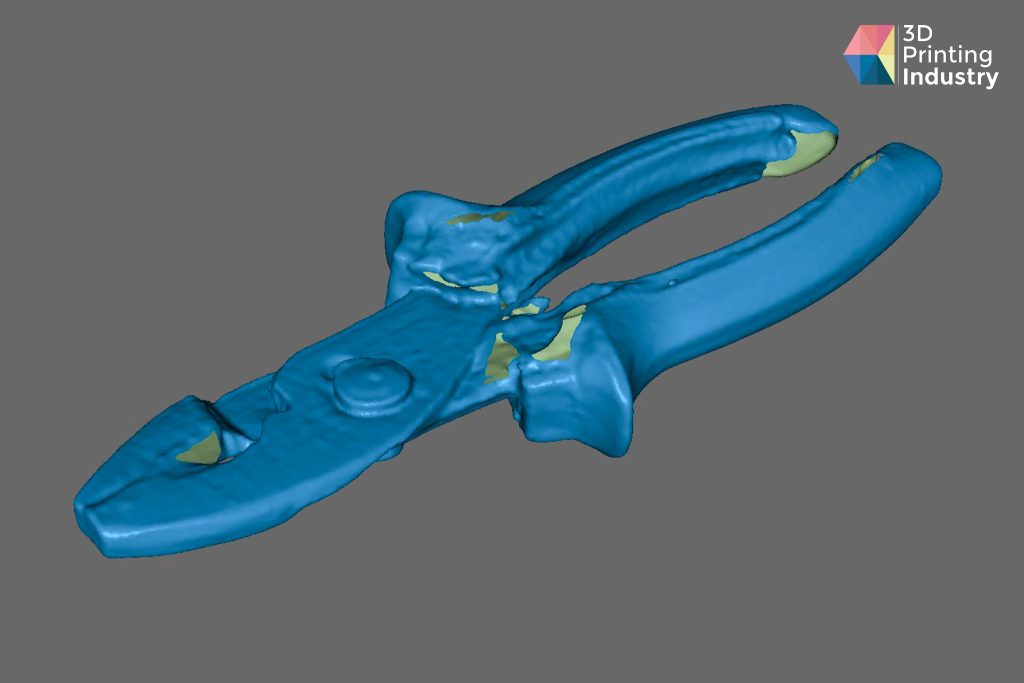
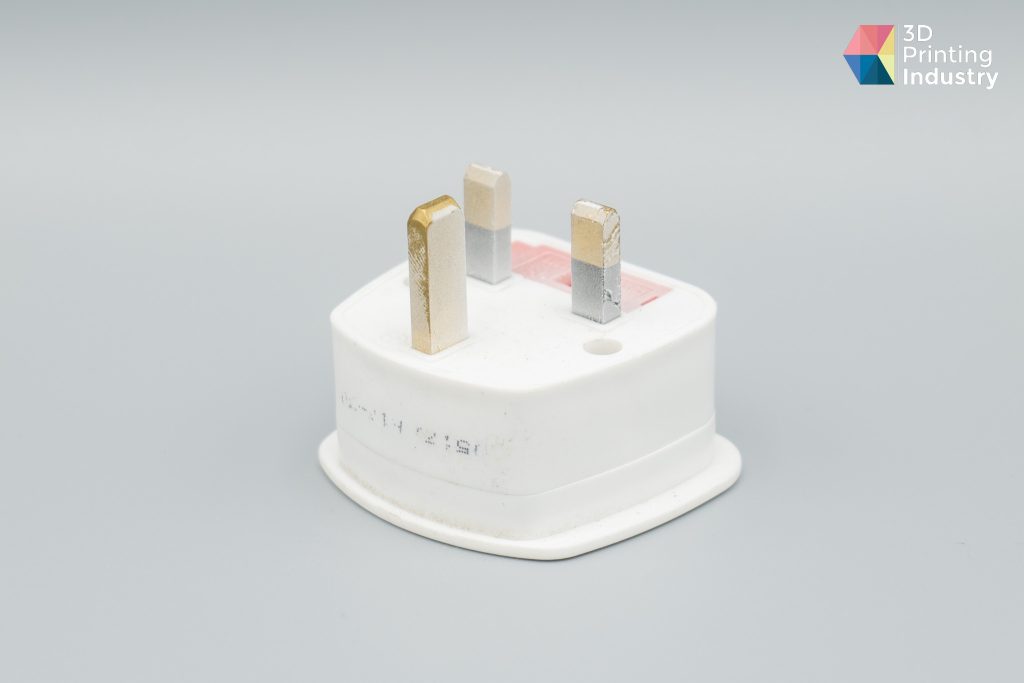
Pliers and UK to EU plug adapter. Photos by 3D Printing Industry.
| Brightness | Sensitivity | Scan quality | Scan Mode | No. of scans |
| 4 | 5 | Fine | Geometry | 9 |
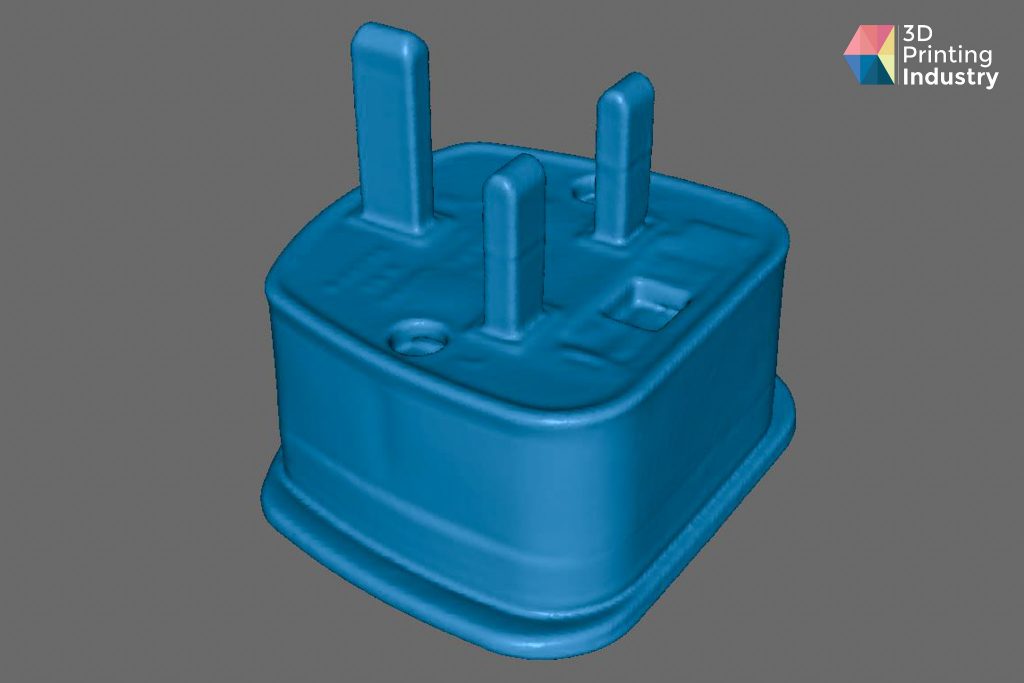
The Mole 3D scanner struggled with glossy metallic surfaces present on these objects, which is a characteristic of most NIR 3D scanners as the light is reflected off of the shiny surfaces. After using some texture spray we were able to successfully 3D scan both of these objects. The pliers didn’t come out all that well, as the mesh was full of holes and missing details due to issues with merging scans. The plug adapter, on the other hand, scanned quite well, which we were pleased with.
However, we ran into an issue when aligning multiple 3D scans together to create a complete 3D model. In previous tests, automatic alignment was sufficient to produce good results, but not this time. As such, we had to rely on the other alignment option in JMStudio, the manual alignment. In this mode, one has to select three common points between different 3D scans to help the software align them. In our experience, this was very inconsistent in producing desired alignment, indicating a flaw in how the software handles alignment on certain models.
Small Details and Sharp Geometry
The next series of tests assess how well the Mole 3D scanner can capture small details and how well the software can preserve them. For this, we selected a hole saw for its sharp teeth and a model of the Florence Cathedral for its intricate details.
The first test was the hole saw. As can be seen in the images, the hole saw 3D scan did not process well. The point cloud came out very nicely, but when it was processed by the software, holes on the bottom became closed, and the sharp teeth became rounded. This is due to the software converting point cloud data into .stl format, which results in data loss as the mesh is interpolated and simplified. Unfortunately, there is no way to access settings to minimize the loss of quality in JMStudio.
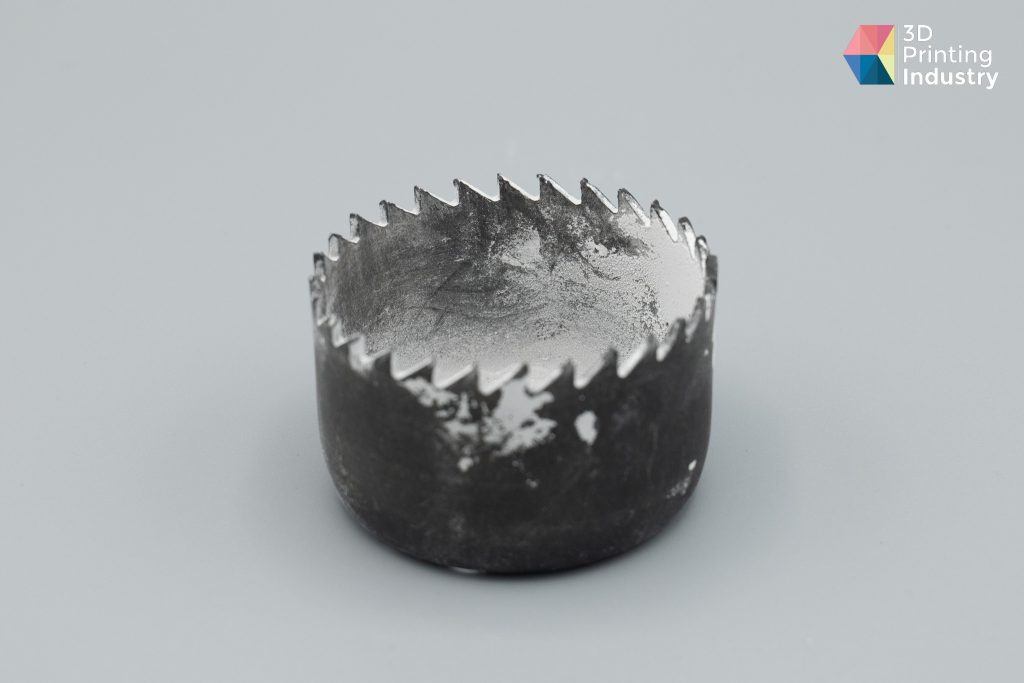
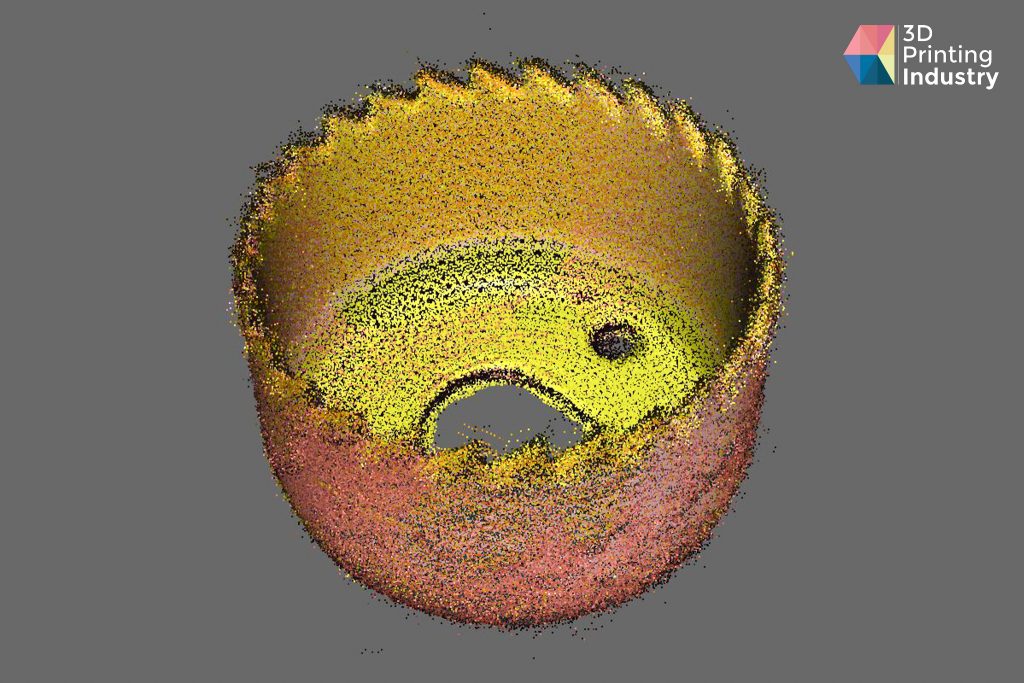
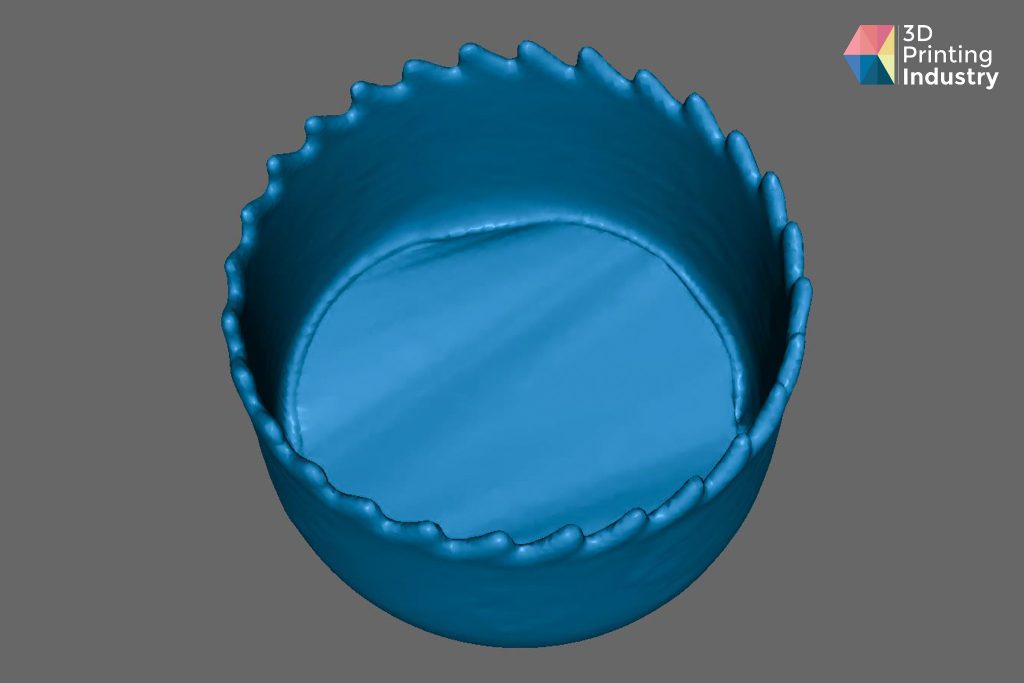
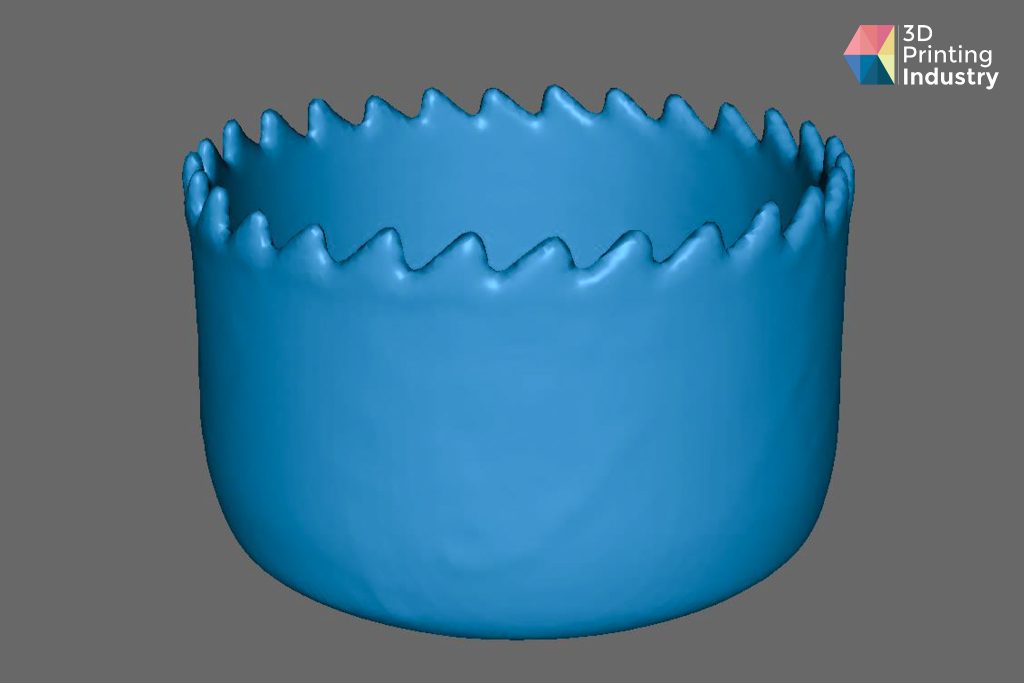
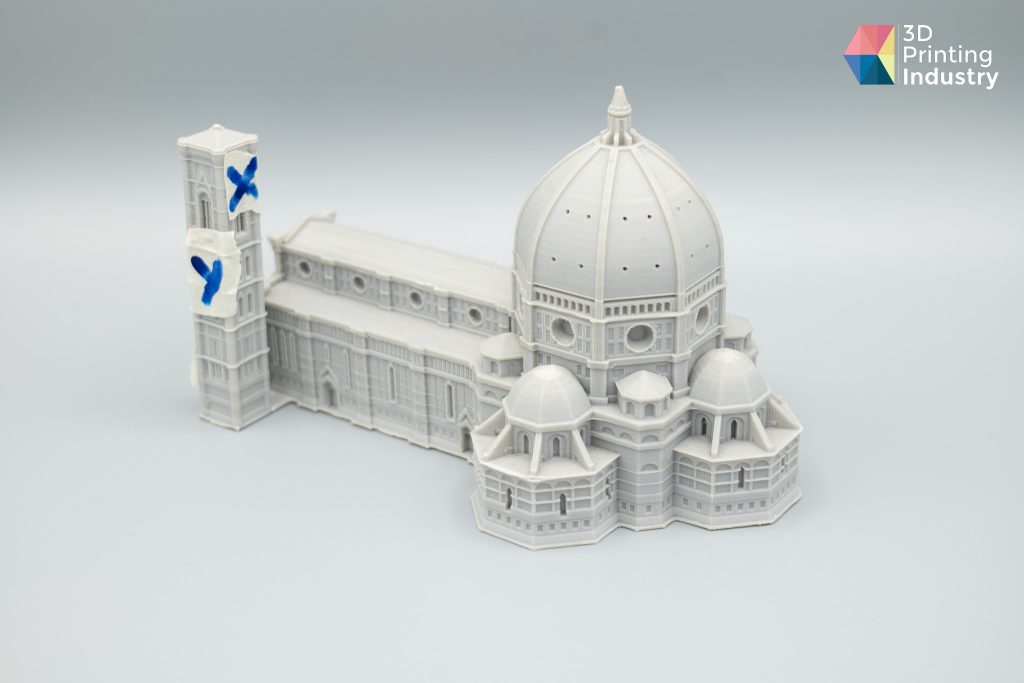
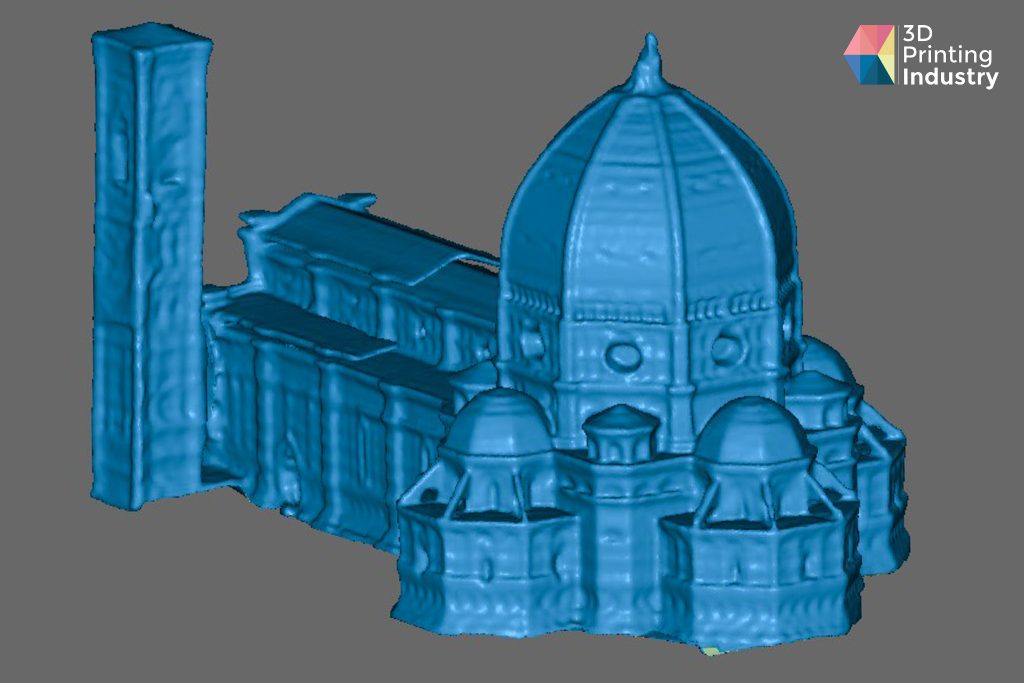
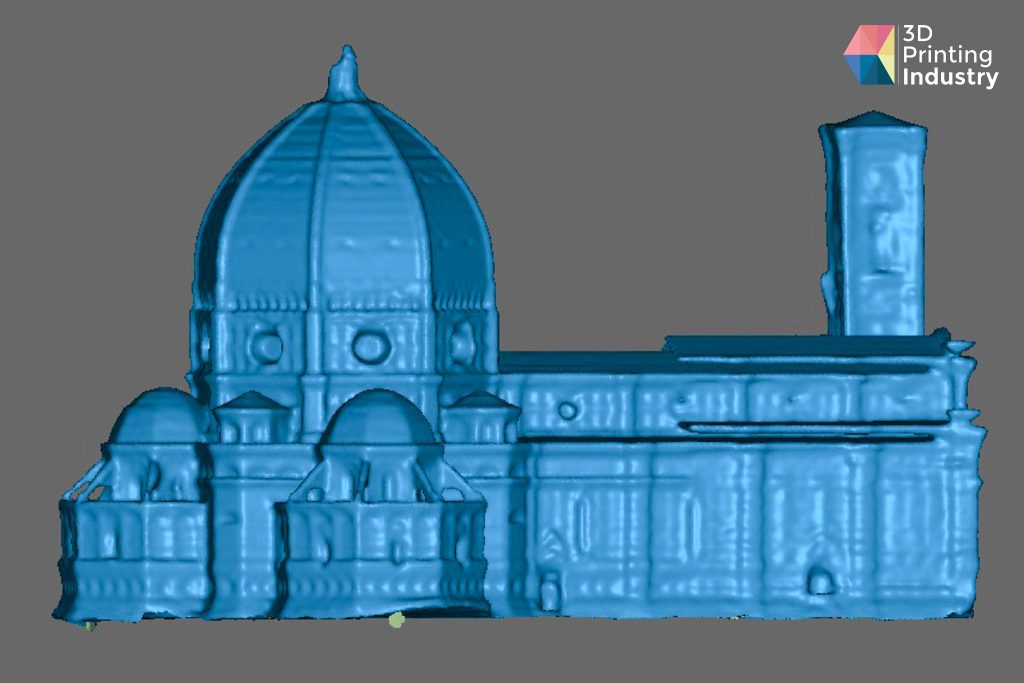
Hole saw and Florence Cathedral. Photos by 3D Printing Industry.
| Brightness | Sensitivity | Scan quality | Scan Mode | No. of scans |
| 4 | 10 | Fine | Geometry | 6 |
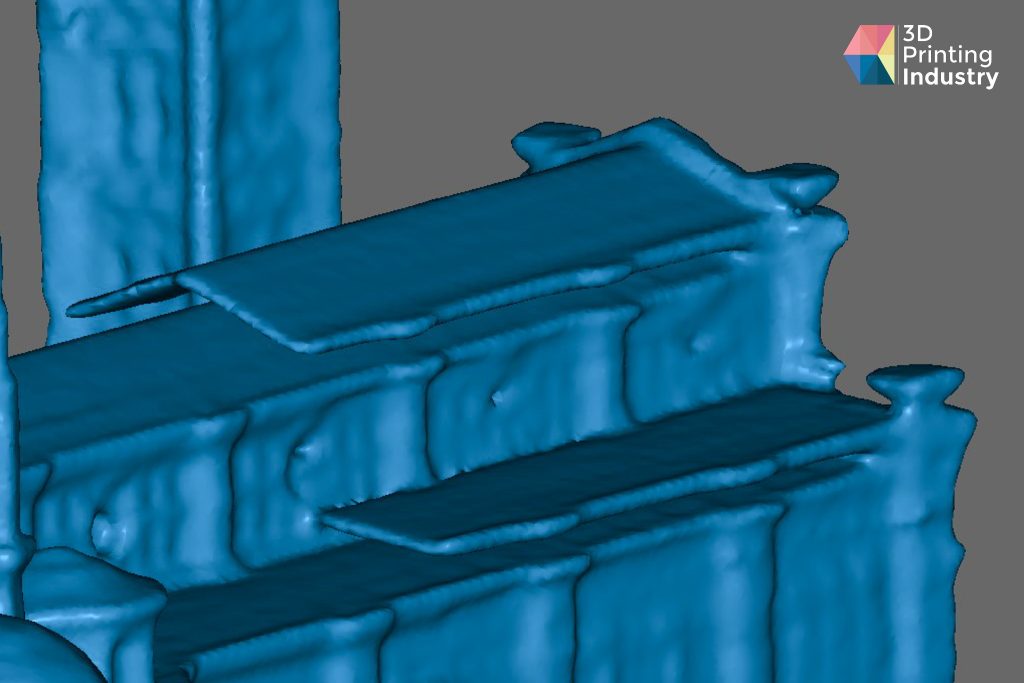
The cathedral 3D scan took a lot of work to complete. The main reason for the 3D scanner struggling with this model was the loss of tracking, as there were many repeating features on this model. This led to difficulties going around corners and successfully capturing the tower section of the model.
To complete this 3D scan, we resorted to using makeshift markers as recommended by customer support. The addition of markers helped us successfully scan the cathedral but led to a loss of detail in the areas where markers were placed. After the multiple 3D scans were put together, the end result lacked the intricate detail present in the original model and had some artifacts from merging, such as the duplicated roof. This shows that the scanner will likely struggle with picking up intricate details and models with repeating features due to its AI visual tracking algorithm.
How It Scans Dark Objects
The Mole 3D scanner is advertised to be able to handle the scanning of dark objects through its use of NIR technology. Black objects are usually tricky to scan due to their high light absorption, which interferes with how 3D scanners collect scan data. To test this we prepared a series of parts and models that were 3D printed with black filament.
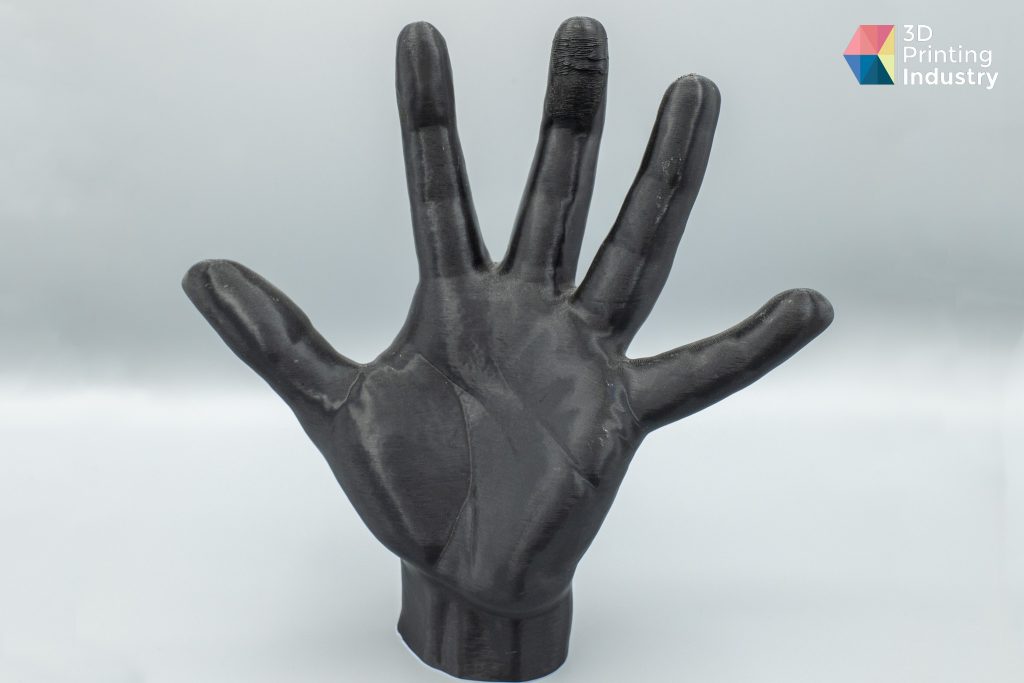
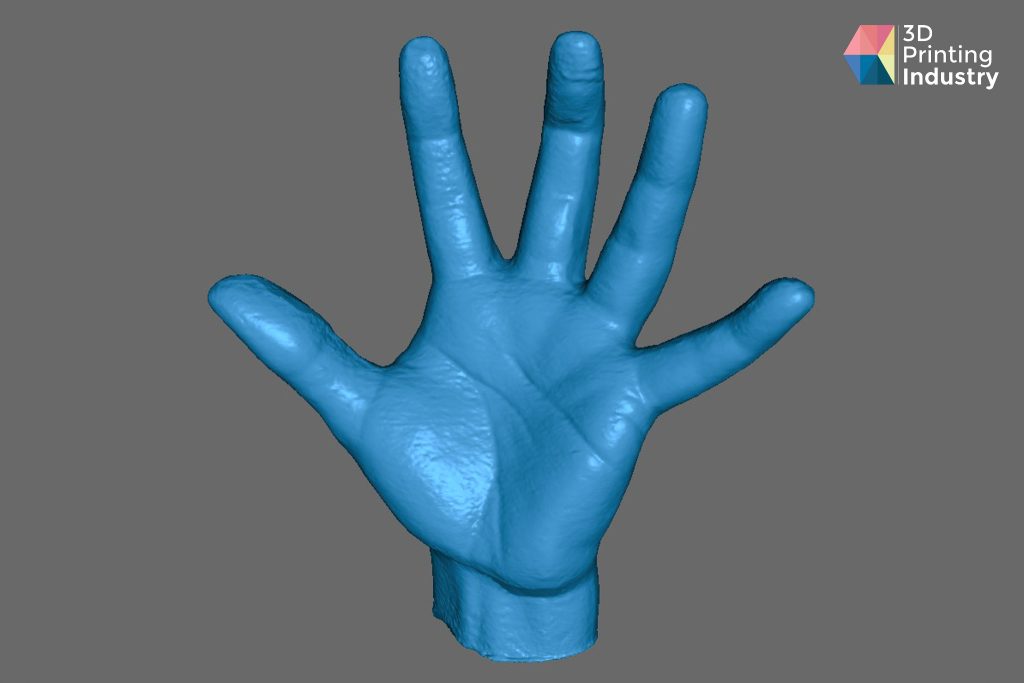
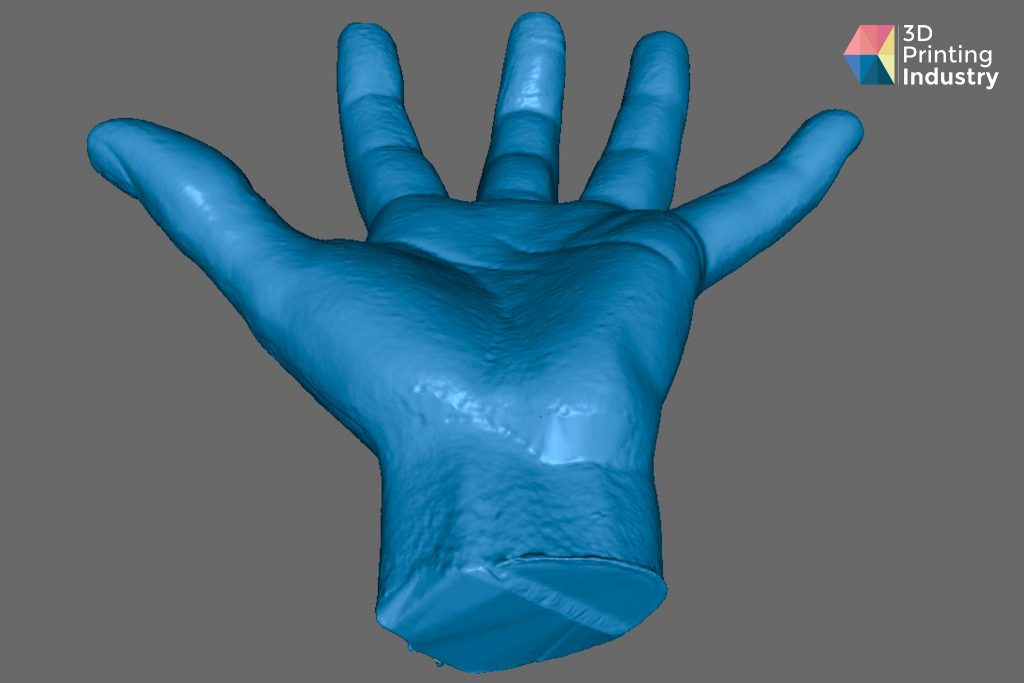
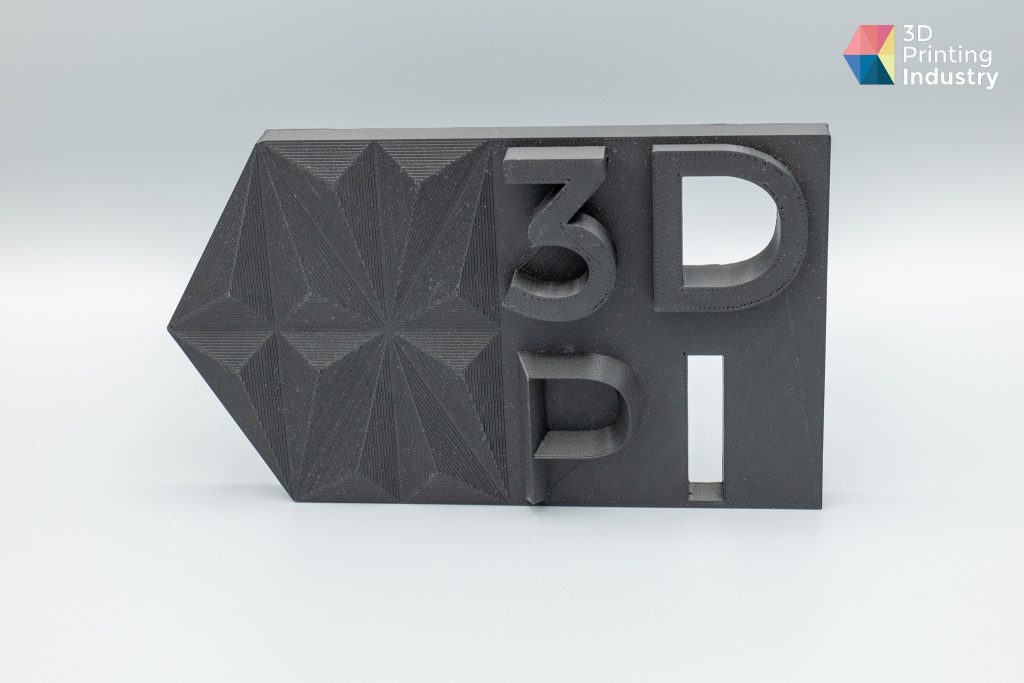
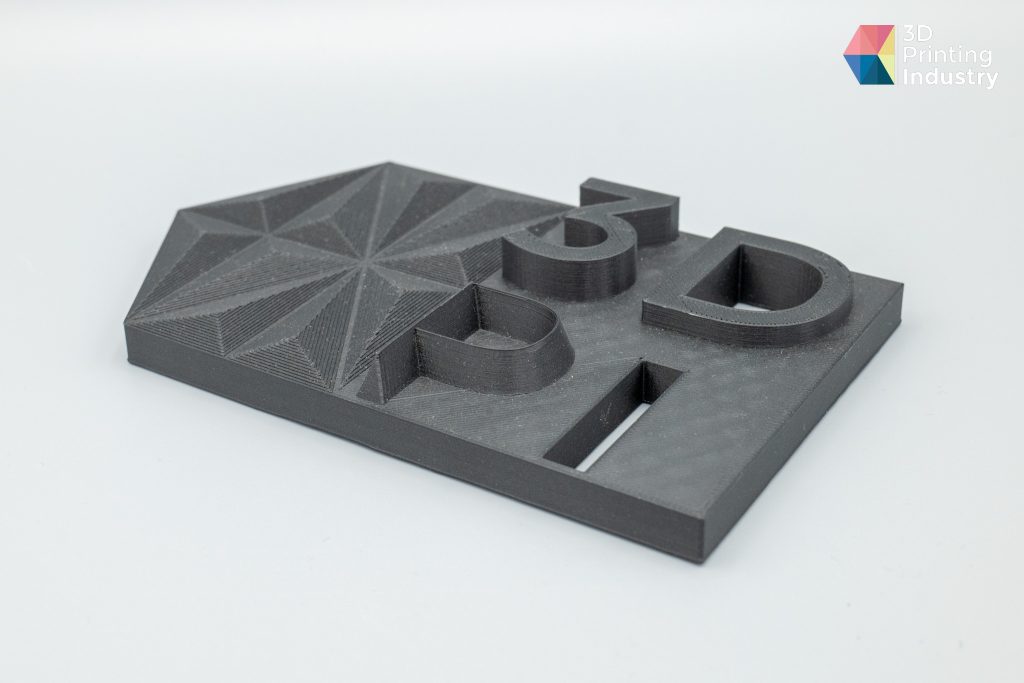
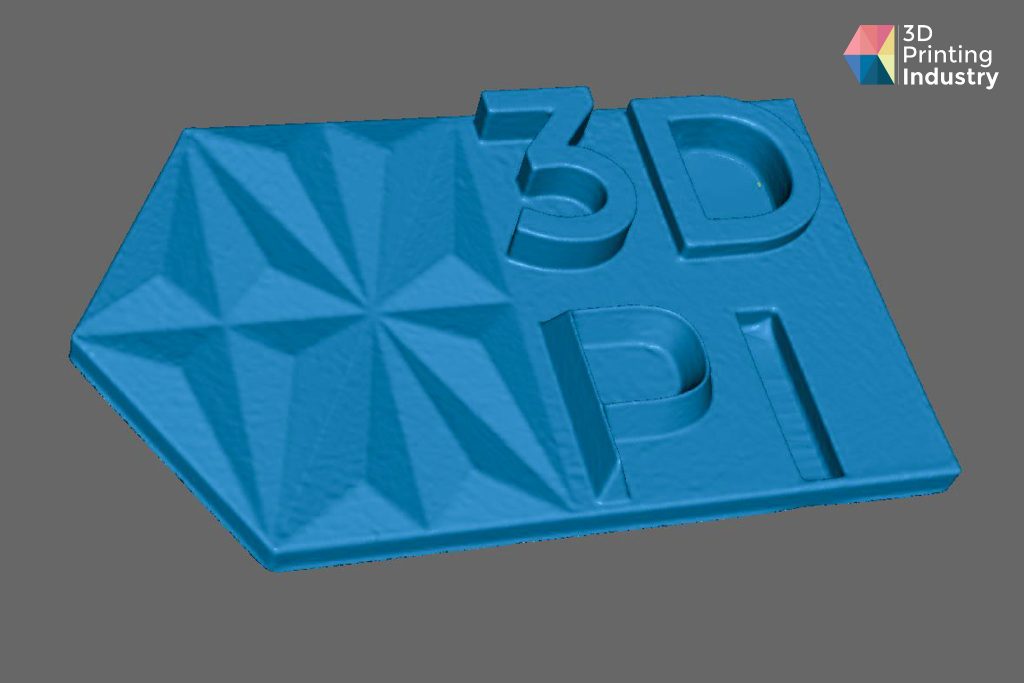
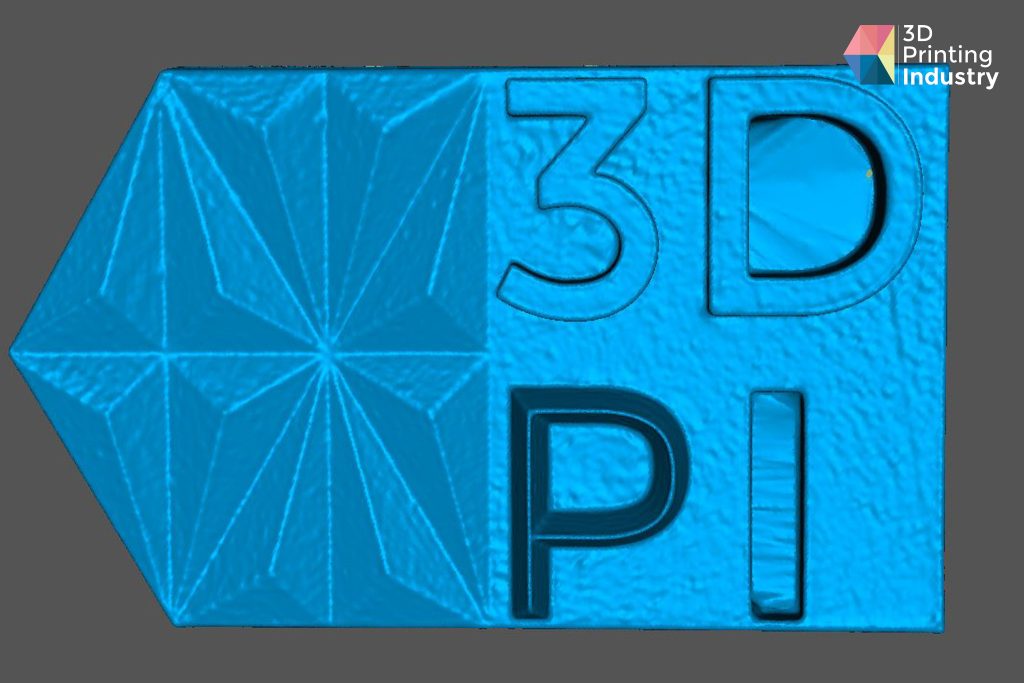

3D printed hand, 3DPI testing tile and black pipe mount. Photos by 3D Printing Industry.
| Brightness | Sensitivity | Scan quality | Scan Mode | No. of scans |
| 3 | 10 | Fine | Geometry | 4 |
Based on our tests it handles black objects very well, capturing a lot of detail and geometry on the 3DPI test tile and the hand 3D print. The only issues we had were with the pipe mount due to aligning, as we think the software was getting confused with which surface was the top and which one was the bottom resulting in incorrect merging of multiple 3D scans.
How It Preserves Texture
For the next test we decided to try out the texture scan mode that the Mole 3D scanner offers. 3D texture scanning can be useful to create realistic 3D models of textured items such as clothing, sporting goods, shoes, and more for prototyping applications.
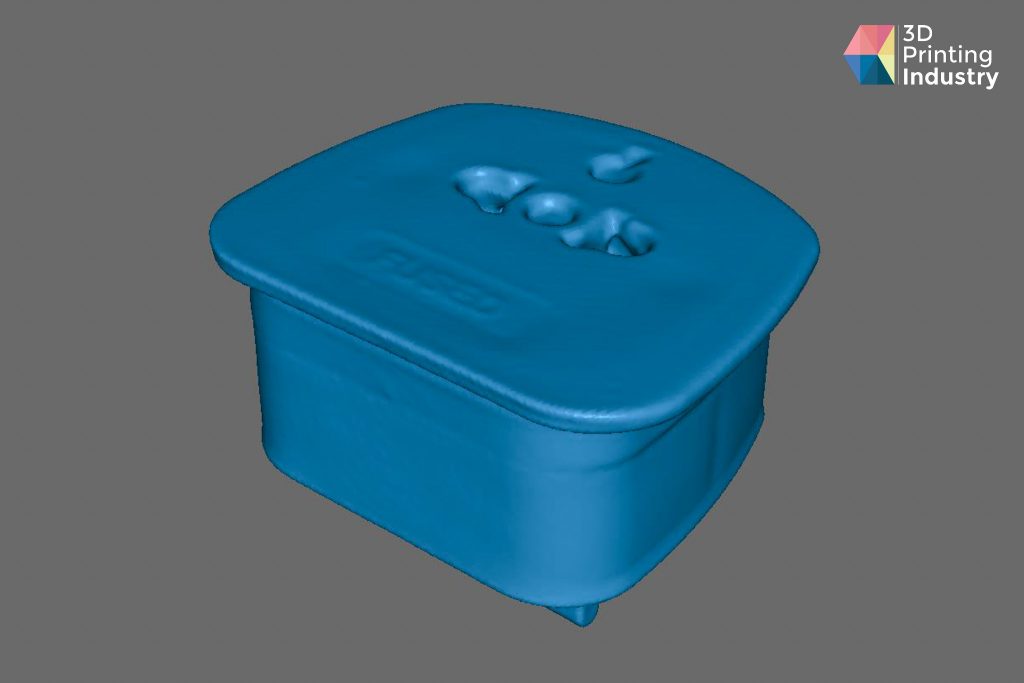
For this test, we selected this Polaroid sunglasses case for its woven texture to assess how the Mole 3D scanner handles textures and colors.
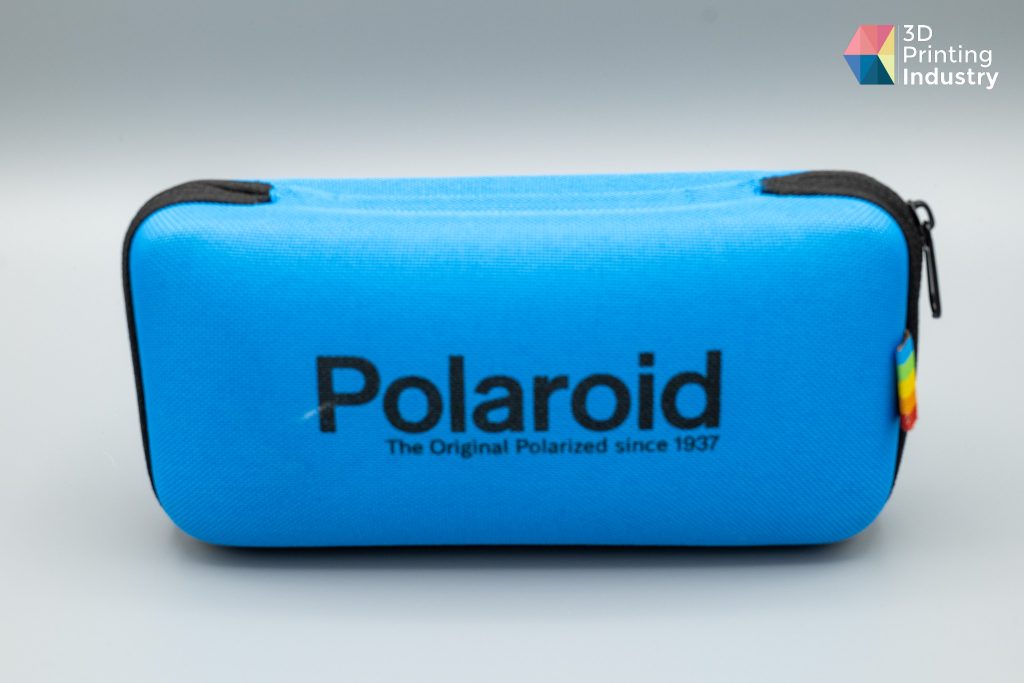
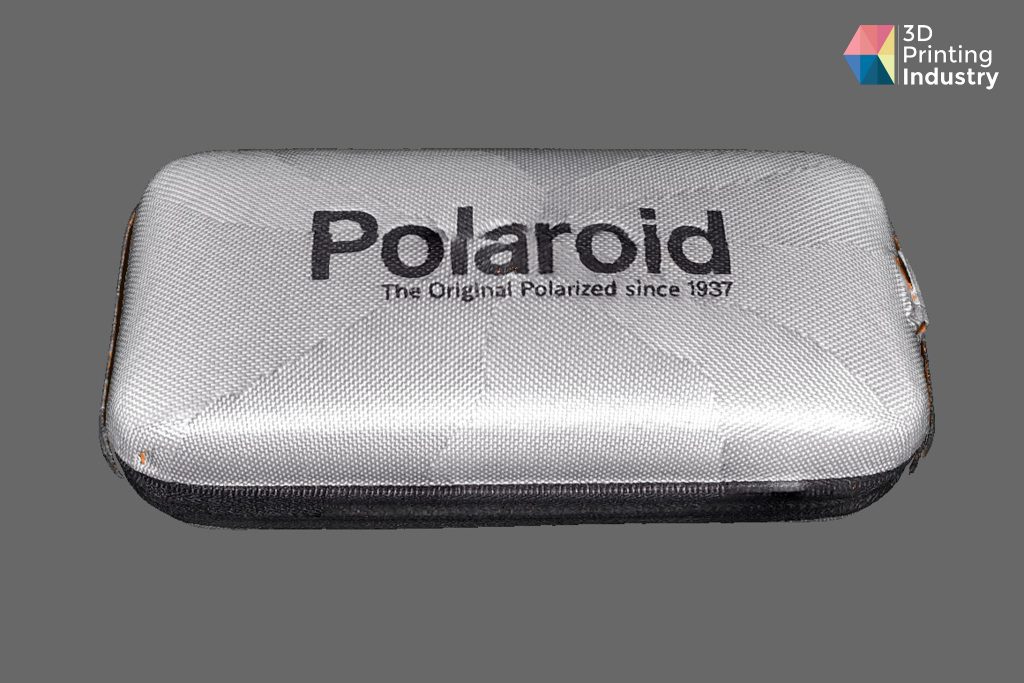
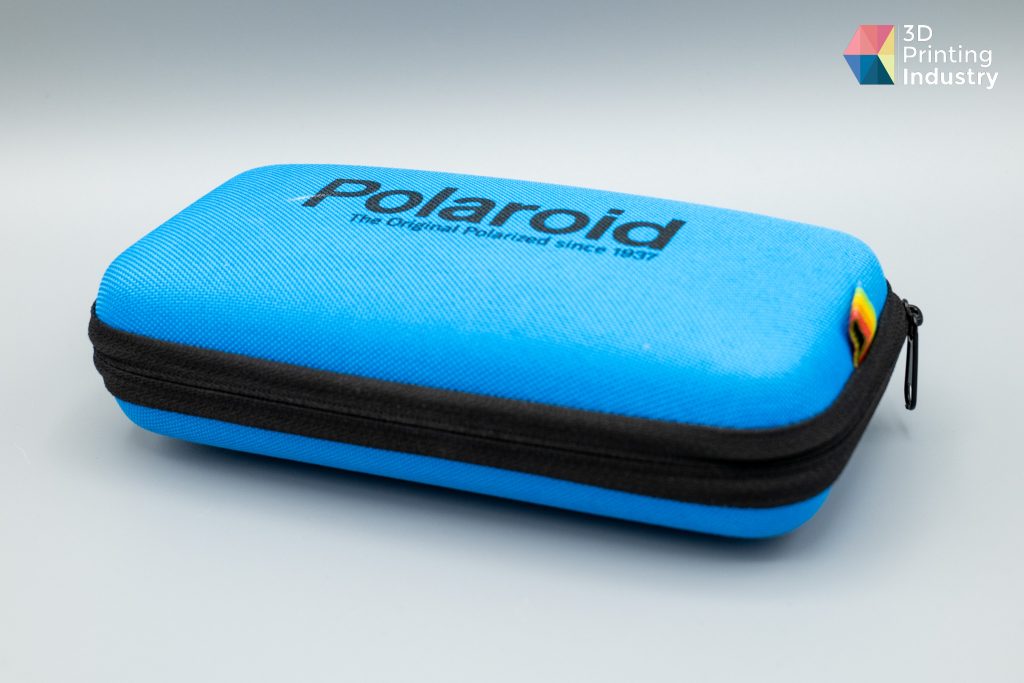
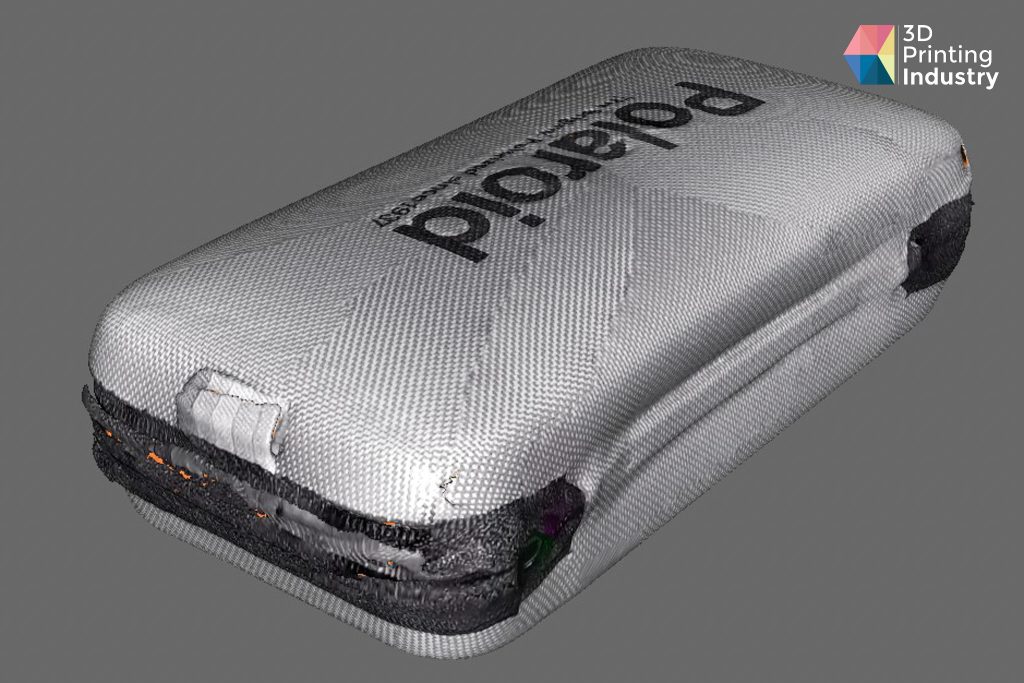

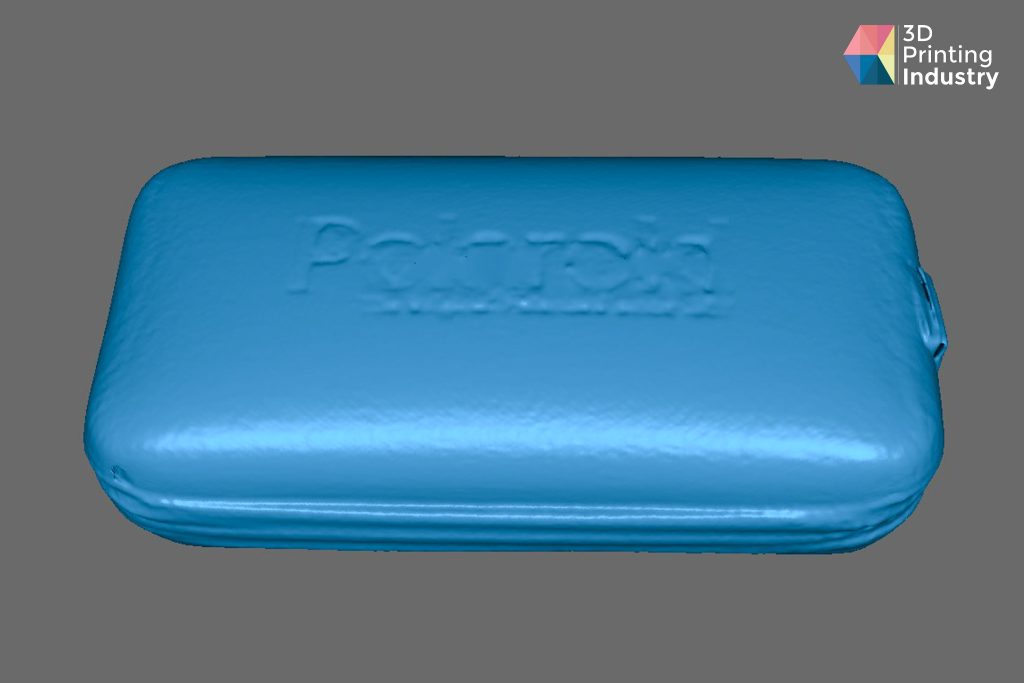
Sunglasses case and the sunglasses case texture 3D scan. Photos by 3D Printing Industry.
| Brightness | Sensitivity | Scan quality | Scan Mode | No. of scans |
| 3 | 10 | Fine | Geometry & Texture | 7 |
The case looked reasonable, with the overall shape and texture having been captured with good detail. The only flaw was the text not being properly aligned. We could only produce a black-and-white scan as we did not have the color kit required to capture full color.
This showcases how the Mole 3D scanner can be used to help with online retail by capturing textures and colors with the color kit add-on for full-color scans, which is part of the luxury combo.
How It Enables Part Replication
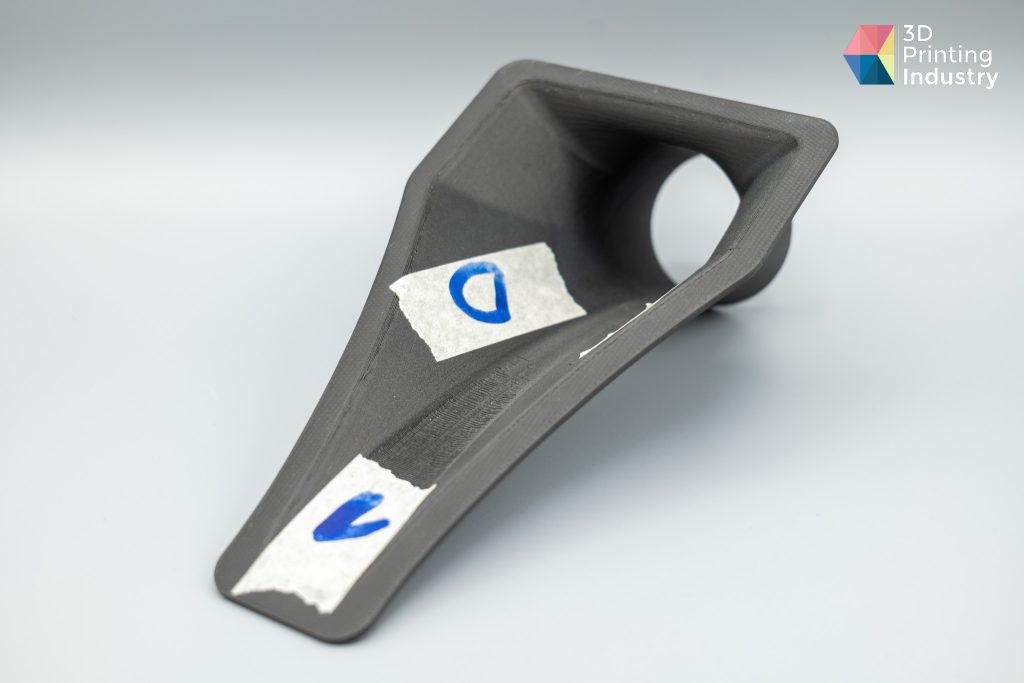
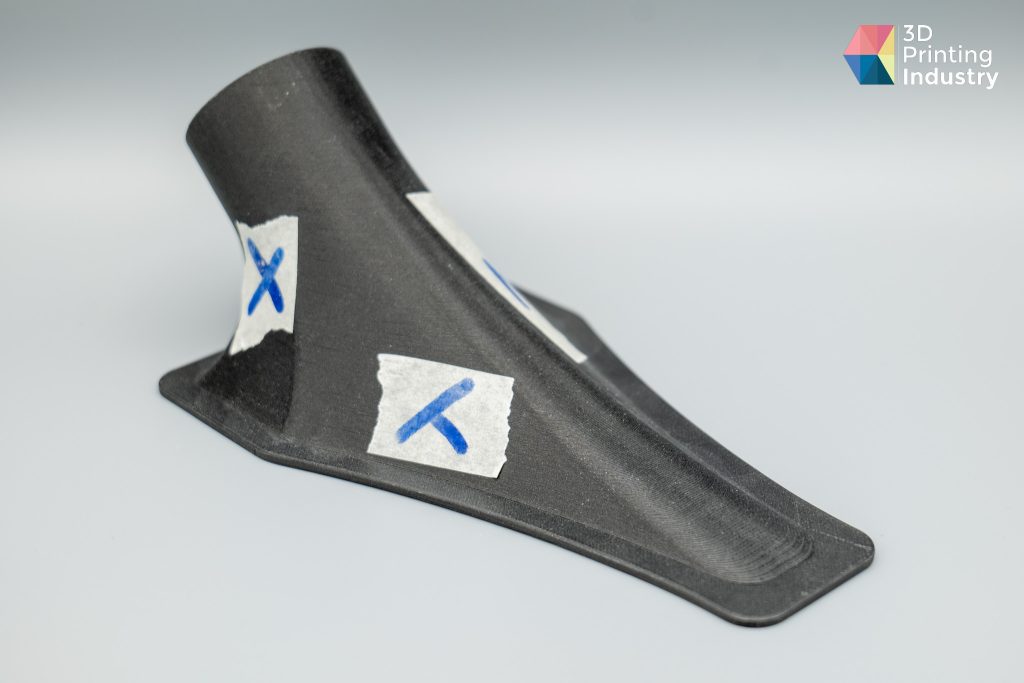
To finish off our testing we chose a motorcycle triple clamp with complex geometry and features to test how well the Mole 3D scanner can be used for applications such as reverse engineering in a professional setting and recreation of scanned models through 3D printing. We used texture spray to ensure the best results, as the part has a very shiny metallic surface.
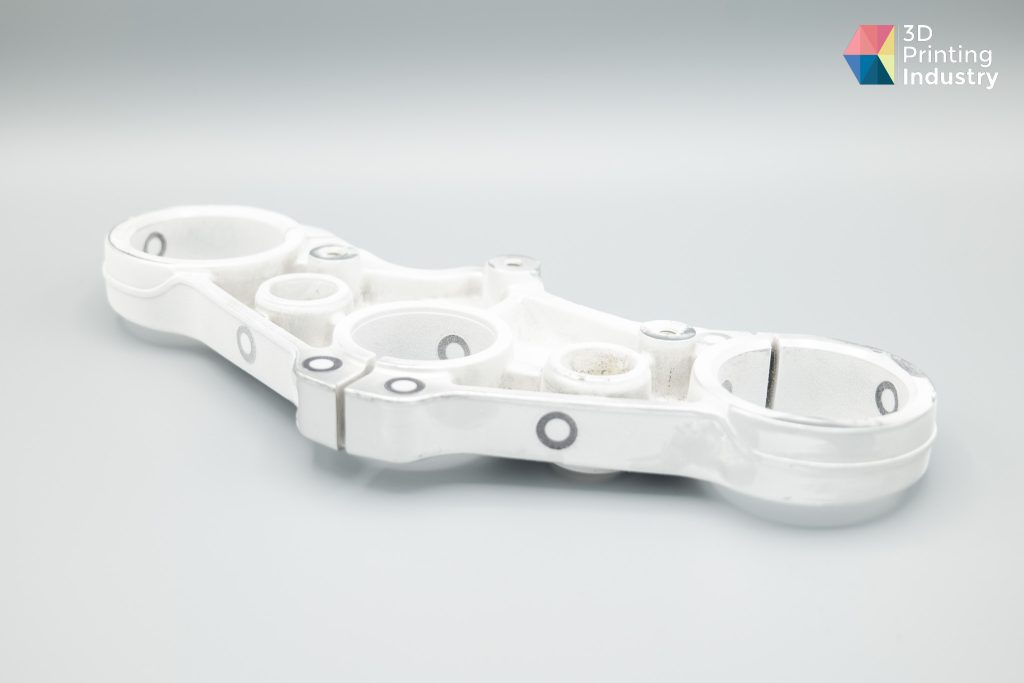
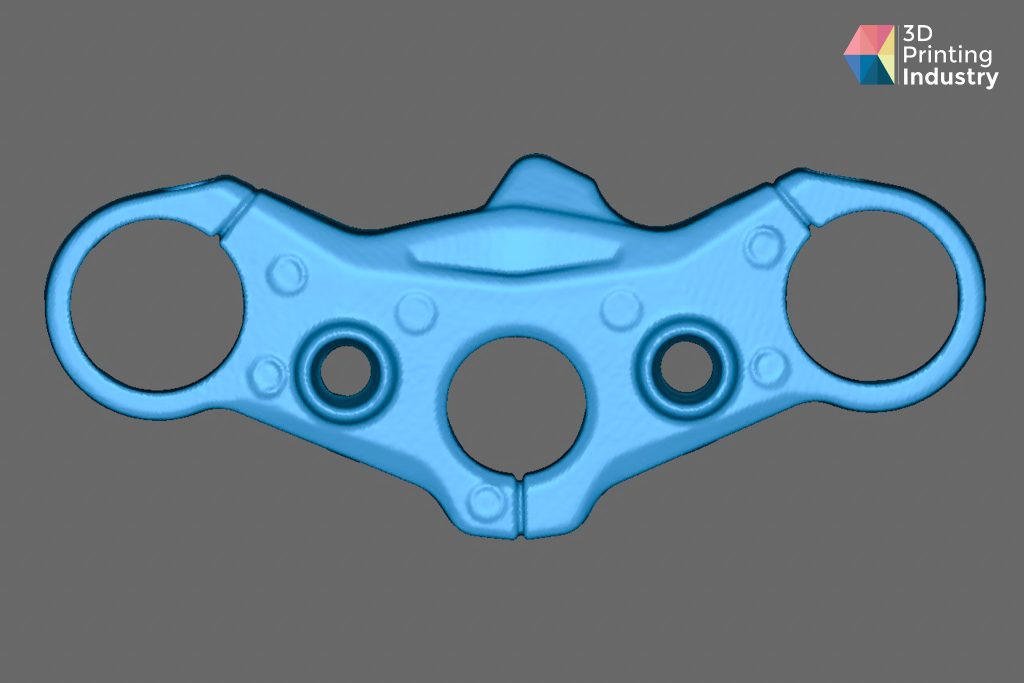


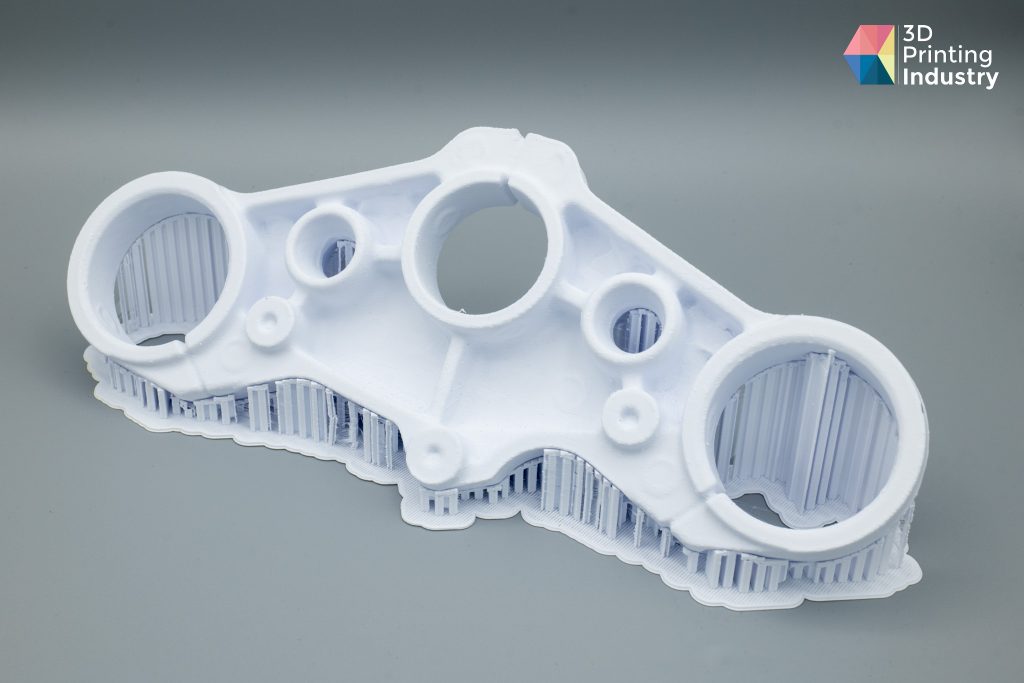
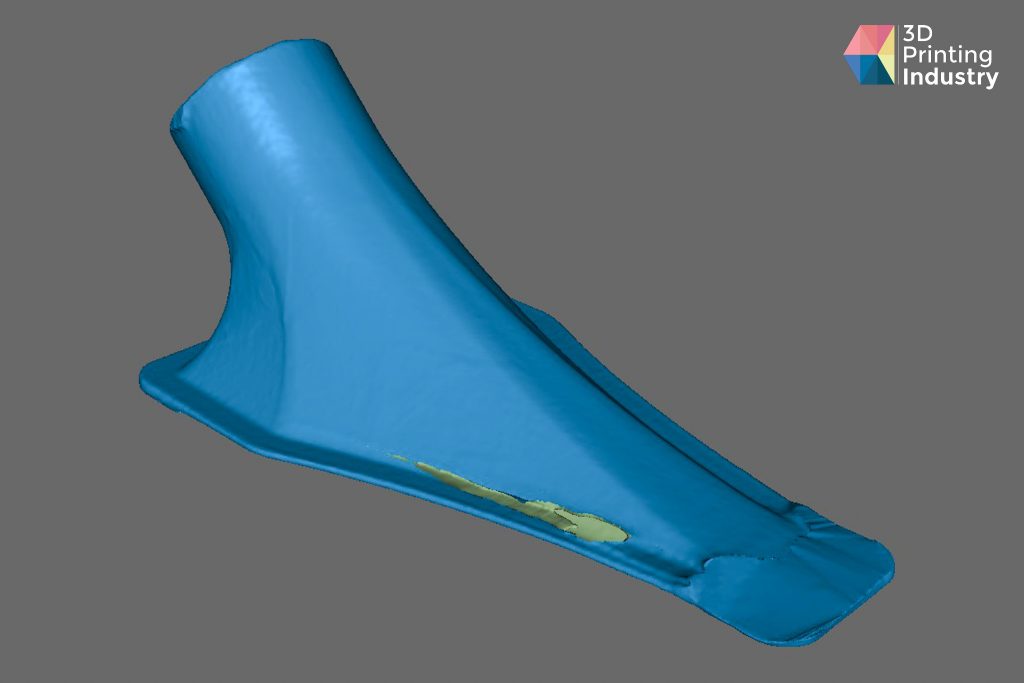
Motorbike triple clamp, 3D scans, and 3D printed part. Photos by 3D Printing Industry.
| Brightness | Sensitivity | Scan quality | Scan Mode | No. of scans |
| 2 | 6 | Fine | Geometry | 3 |
The 3D scans turned out very well, with the Mole capturing much of the geometry and the software maintaining a lot of detail after processing the point cloud. After 3D printing the scanned model and comparing it to the original motorbike part, we found that it was a good match, both visually and dimensionally.
| Feature | Large hole diameter left (mm) | Large hole diameter right (mm) | Medium hole diameter (mm) | |||
| Measurement | Original | 3D Printed | Original | 3D Printed | Original | 3D Printed |
| 1 | 49.83 | 50.00 | 49.89 | 49.99 | 39.97 | 39.93 |
| 2 | 49.88 | 49.99 | 49.94 | 49.95 | 39.98 | 40.04 |
| 3 | 49.91 | 50.01 | 49.95 | 50.02 | 39.94 | 40.02 |
| 4 | 49.89 | 49.99 | 49.93 | 49.86 | 39.99 | 40.09 |
| 5 | 49.86 | 49.90 | 49.91 | 50.03 | 39.93 | 40.03 |
| Average | 49.87 | 49.98 | 49.92 | 49.97 | 39.96 | 40.02 |
| Std Deviation | 0.027 | 0.040 | 0.022 | 0.062 | 0.023 | 0.052 |
Based on these results, the Mole 3D scanner can certainly be used for reverse engineering and similar work with a little optimization and fine-tuning.
How did the 3DMakerpro Mole 3D scanner perform in testing?
The 3DMakerpro Mole is both affordable and capable as an entry-level 3D scanner. Overall, we’ve had a positive experience while testing it, and it passed most of our tests. It handles complex geometries very well and can consistently capture black objects. The Mole 3D scanner has the potential to be a top pick at its price point, but there are a couple of flaws holding it back, such as the software performance and tracking issues.
JMStudio is easy to use and navigate, which makes the scanning process simple and straightforward for anyone who is new to 3D scanning. That being said, it lacks advanced options for point cloud processing and mesh post-processing. In addition, the auto-align feature works well most of the time, but sometimes it falters. When this happens, the user has to rely on manual alignment, which in our experience, can be inconsistent.
The other limitation of the Mole 3D scanner is the AI visual algorithm, which allows for markerless scanning. From our testing, this feature can struggle on certain models, resulting in loss of tracking and the need to start a new scan. While this can be remedied by the use of makeshift markers this isn’t an ideal solution. If these issues could be addressed, it would massively improve the appeal of the Mole 3D scanner.
Still, the Mole is a capable entry-level 3D scanner for hobbyists, makers, and educators at a competitive price.
Technical specifications for the 3DMakerpro Mole
| Accuracy | 0.05mm |
| Resolution | 0.1mm |
| Frame rate | 10fps |
| Tracking mode | Visual tracking |
| Work distance | 150-400mm |
| Single capture range | 200x100mm |
| Typical object sizes | 15-1500mm |
| Output format | OBJ/STL/PLY |
| Compatible system | Windows 10/11 64 bit, MacOS 12/13 |
| Compatible mobile | Android 10.0 or later, iOS 15.0 or later |
| Minimum computer requirements | Intel Core i5 8th, 16GB RAM, MX250 GPU with 2GB VRAM |
| Recommended computer requirements | Intel Core i7 8th, 16GB RAM, NVIDIA 1060 GPU with 4GB VRAM |
| Light source | NIR |
| Color texture | Extended support |
| USB interface | USB 2.0 |
| Dimensions | 141x80x80mm |
| Weight | 390g |
Subscribe to the 3D Printing Industry newsletter to ensure you keep up with the latest 3D printing news. You can also follow us on Twitter, like our Facebook page, and subscribe to the 3D Printing Industry Youtube channel to access more exclusive content.
Are you interested in working in the additive manufacturing industry? Visit 3D Printing Jobs to view a selection of available roles and kickstart your career.
Featured image shows the Mole 3D Scanner. Photo by 3D Printing Industry.