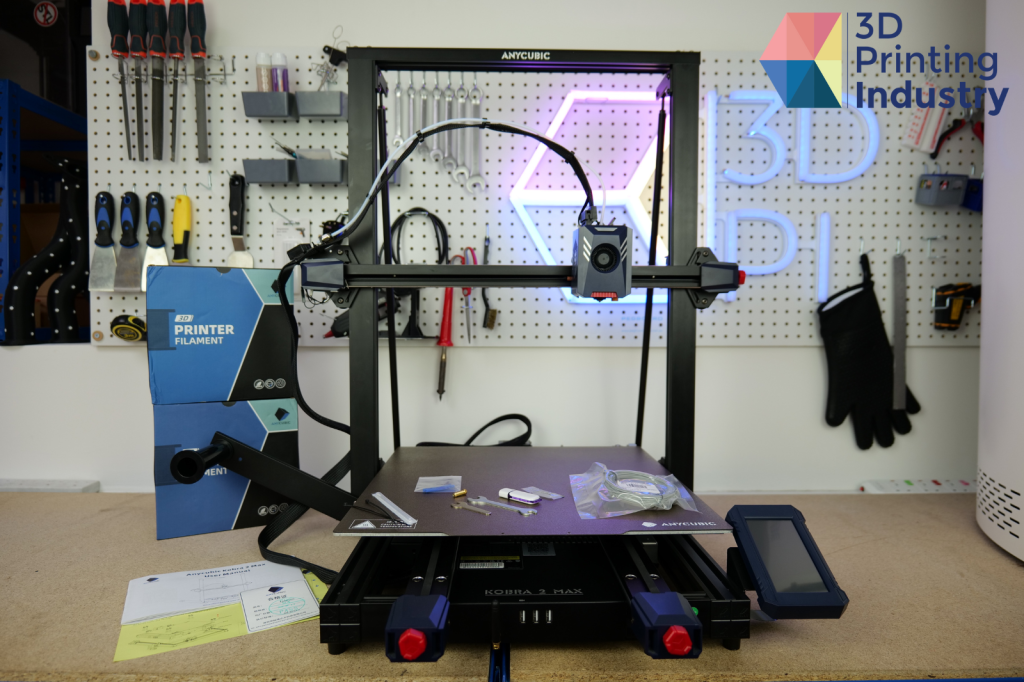
In this article, we review the Kobra 2 Max, an FDM 3D printer from Shenzhen-based company Anycubic.
An upgraded version of the firm’s Kobra 2 model, the Kobra 2 Max is an affordable offering that combines high-speed 3D printing with a sizable build volume that exceeds most other systems on the desktop 3D printer market.
Designed with ease of use in mind, the 3D printer is well suited to both beginner and prosumer users alike. The Kobra 2 Max is available to order for just $569 through the official Anycubic online store.
Why choose the Kobra 2 Max?
A single-extruder cartesian 3D printer with an open frame design, the Kobra 2 Max is compatible with PLA, ABS, TPU, and PETG materials.
A key draw of the Kobra 2 Max is its 3D printing speed. According to Anycubic, the FDM 3D printer offers maximum 3D printing speeds of 500 mm/s and 10,000mm/s² acceleration. This is enabled by the addition of a Cortex-A7 1.2GHz processor. Thanks to its strong computational power, this processor enables faster calculations, execution of commands, and motor control.
For optimal results, Anycubic recommends that users 3D print at closer to 300 mm/s. During our testing, we confirmed that the Kobra 2 Max is capable of significantly reducing 3D print times. However, this came at the cost of part accuracy which was significantly limited when using the 3D printers Sport mode. This could pose problems for users who need to produce high-quality components to tight deadlines.
Anyone familiar with high-speed 3D printing on FDM systems will know that resonance frequencies, or excessive shaking, can lead to 3D print failures. To overcome this, the Kobra 2 Max features vibration compensation.
In our experience, this feature did limit the number of defects on parts, despite the excessive movement of the 3D printer. However, in our more challenging tests, such as tall and thin parts and flexible TPU materials, prints still exhibited ringing on the surface. This was caused by the intense vibrations not being fully compensated for, suggesting that Anycubic’s vibration calibration has room for improvement.
Engineers looking to manufacture large-scale prototypes can struggle to find desktop FDM 3D printers that meet their size-based requirements. The Kobra 2 Max fills this gap in the market, boasting a substantial 500 x 420 x 420 mm, or 88-liter, build volume. This expanded size is superior to other FDM systems, which typically offer 3D print volumes between 10 to 15 liters.
An FDM 3D printer optimized for ease of use
The Kobra 2 Max has been designed with ease of use in mind, allowing users of all experience levels to access large-scale desktop 3D printing. Setting up the Kobra 2 Max is quick and easy. Anycubic’s dedicated instructional video, which can be accessed via YouTube, significantly streamlined the assembly process.
For those new to 3D printing, manual calibration can be a frustrating barrier to producing good-quality models at the first time of asking. This downtime is reduced by the Kobra 2 Max’s automatic bed leveling system, which also features Z-axis offset, a very welcome feature on a printer with a large bed to level. Automated PID calibration is also included to ensure consistent hotend and nozzle temperatures, essential for achieving good bonding between layers.
Initiated with the single click of a button, these features are ideal for entry-level users looking for a straightforward 3D printing experience. For more experienced consumers who want to further tweak their settings, custom compensation values can also be added. While the automated features did allow for most parts to be 3D printed successfully, additional fine-tuning was often implemented to achieve optimal results.
A 4.3-inch full-color touch screen is located at the front of the Kobra 2 Max. Intuitive and easy to use, the user interface offers (UI) straightforward control over bed calibration, loading filament, and beginning 3D print jobs.
The Kobra 2 Max can also be controlled remotely through the Anycubic APP. This includes live 3D printer status updates, live video monitoring, online slicing and 3D printing, and remote control and management of the 3D printer.
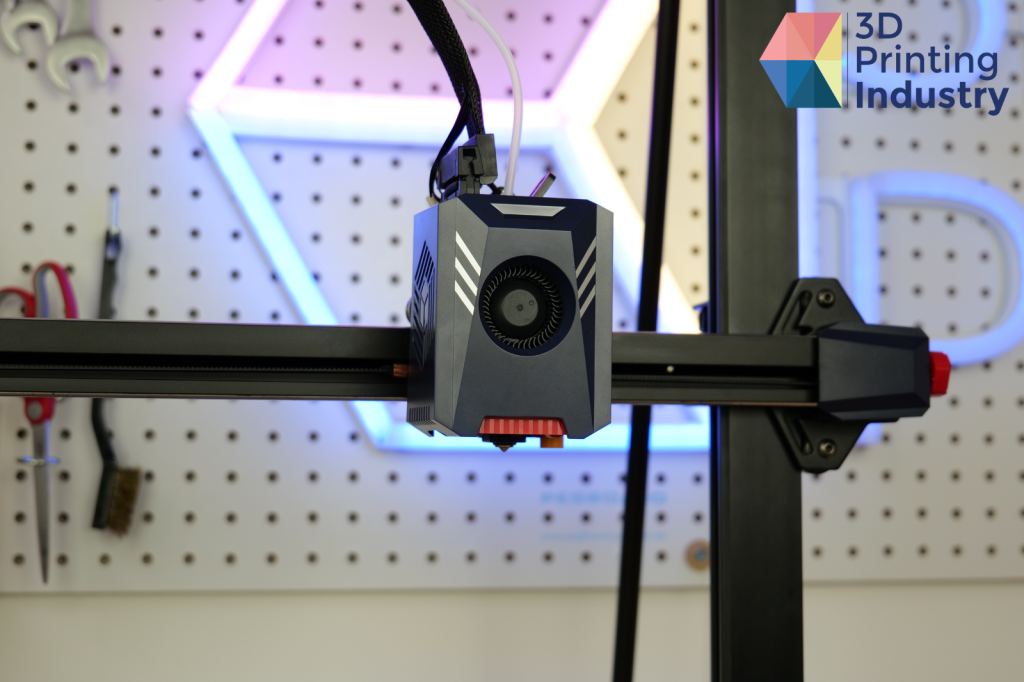
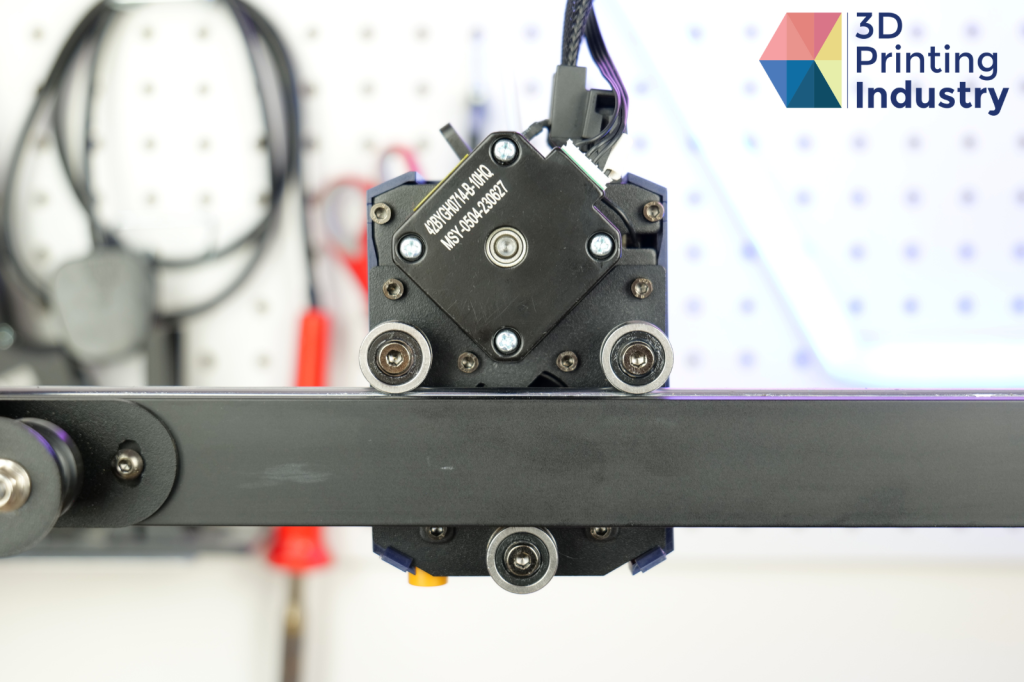
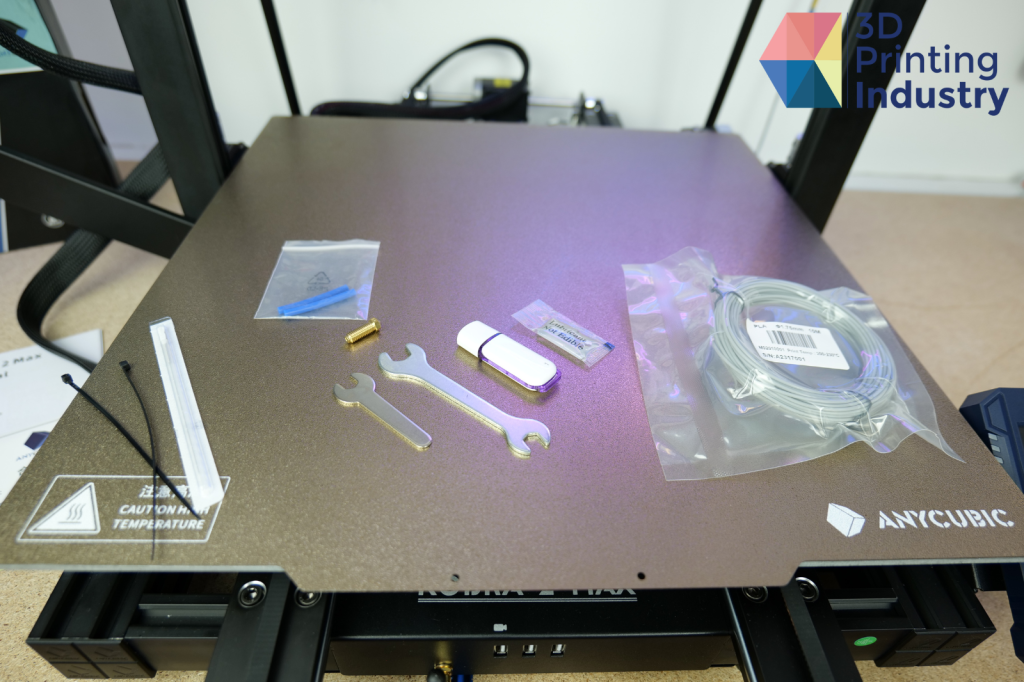
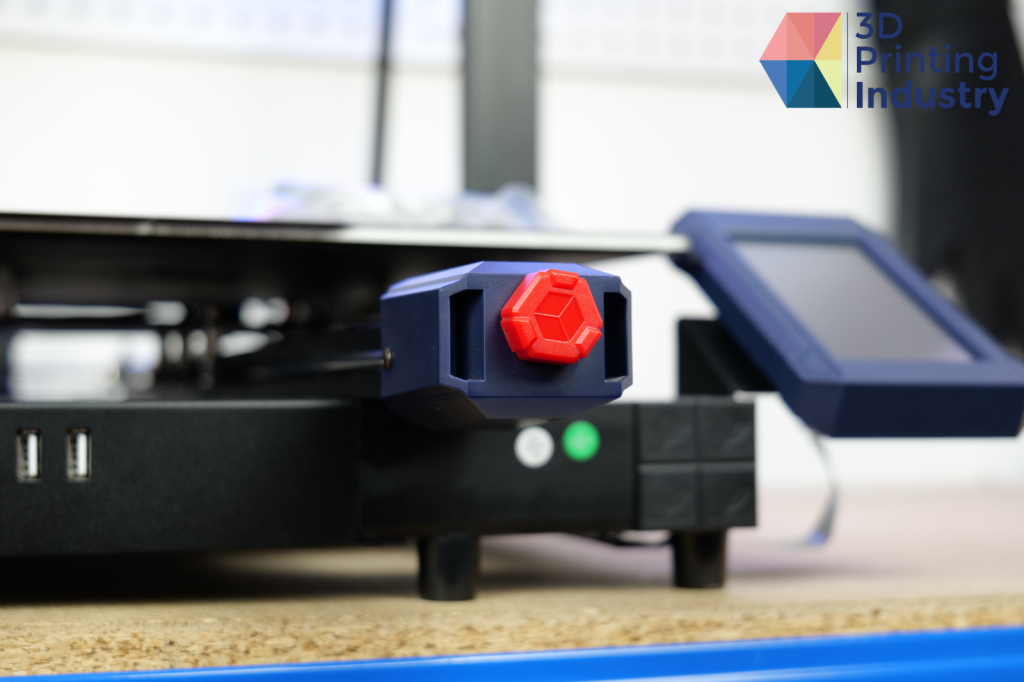
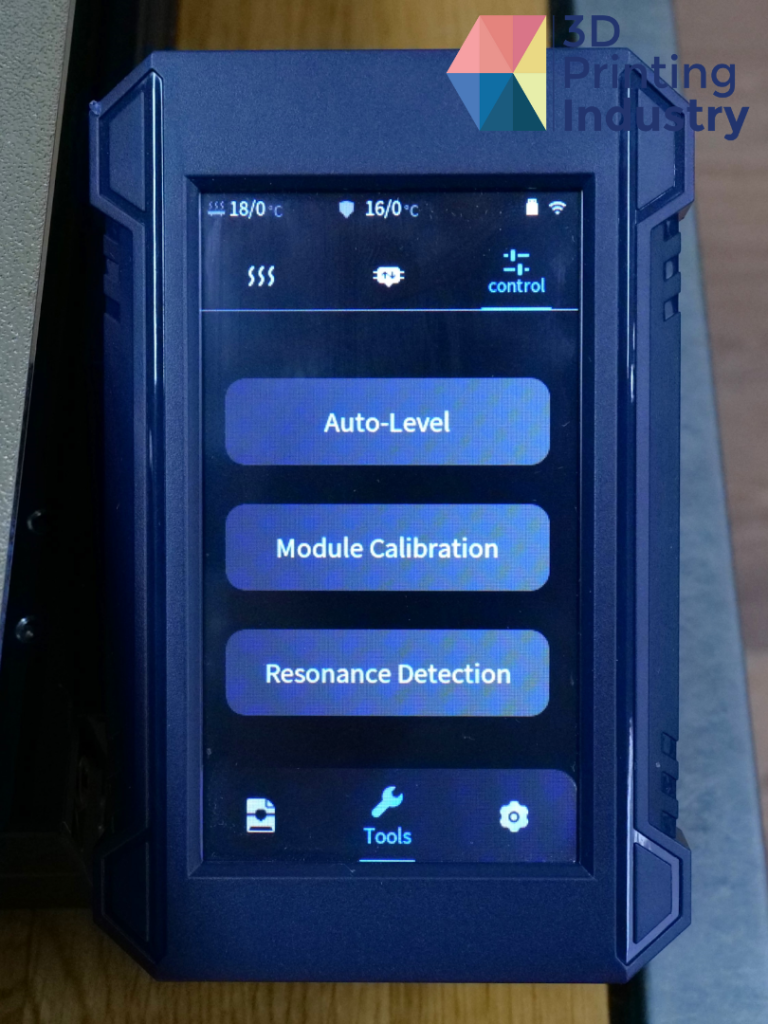
The Kobra 2 Max’s extruder, 3D print bed, and touch screen UI. Photos by 3D Printing Industry.
Kobra 2 Max: 3D printing without an enclosure
Those choosing a desktop FDM 3D printer may question whether to go for a fully enclosed or open design. Unlike many other FDM options, the Kobra 2 Max’s open architecture is unable to create a warm and stable enclosed 3D printing environment. This can cause issues relating to build quality, such as delamination and warping, which occur due to poor layer bonding, and limits the amount of materials to choose from.
In particular, high-temperature materials such as ABS experience better layer adhesion within enclosed build chambers, thanks to the warm and stable internal temperature. 3D printing this material in an open environment could produce parts that have not fused properly, resulting in poor mechanical properties.
However, the lack of an enclosure will not impact those 3D printing with PLA, TPU, and PETG filaments. Therefore, the Kobra 2 Max remains a good value option for entry-level users and those looking to 3D print large parts in materials other than ABS.
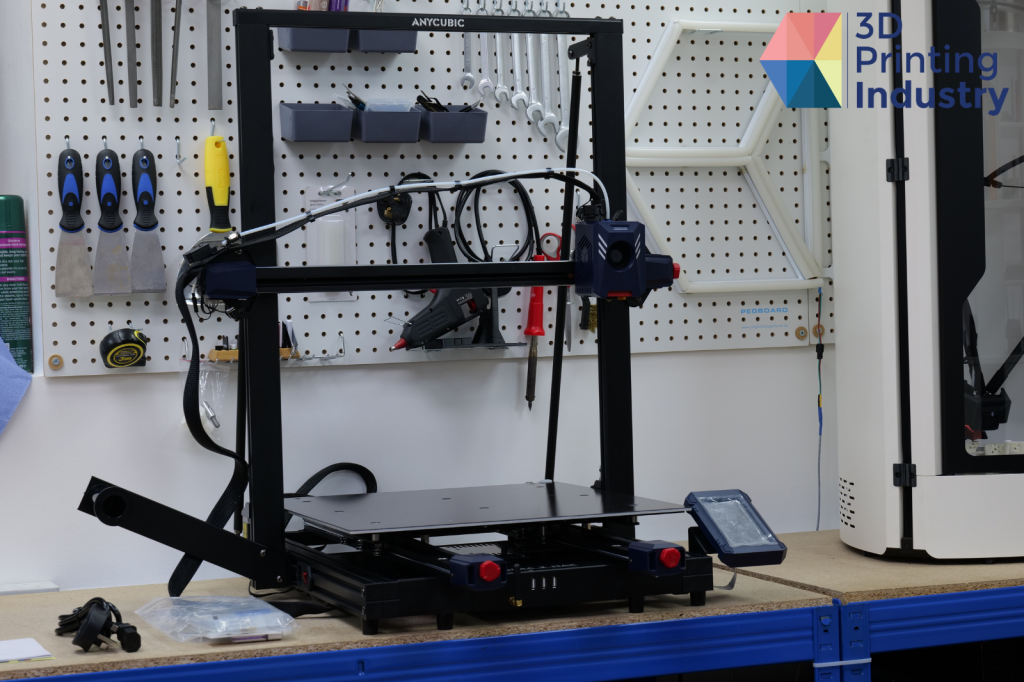
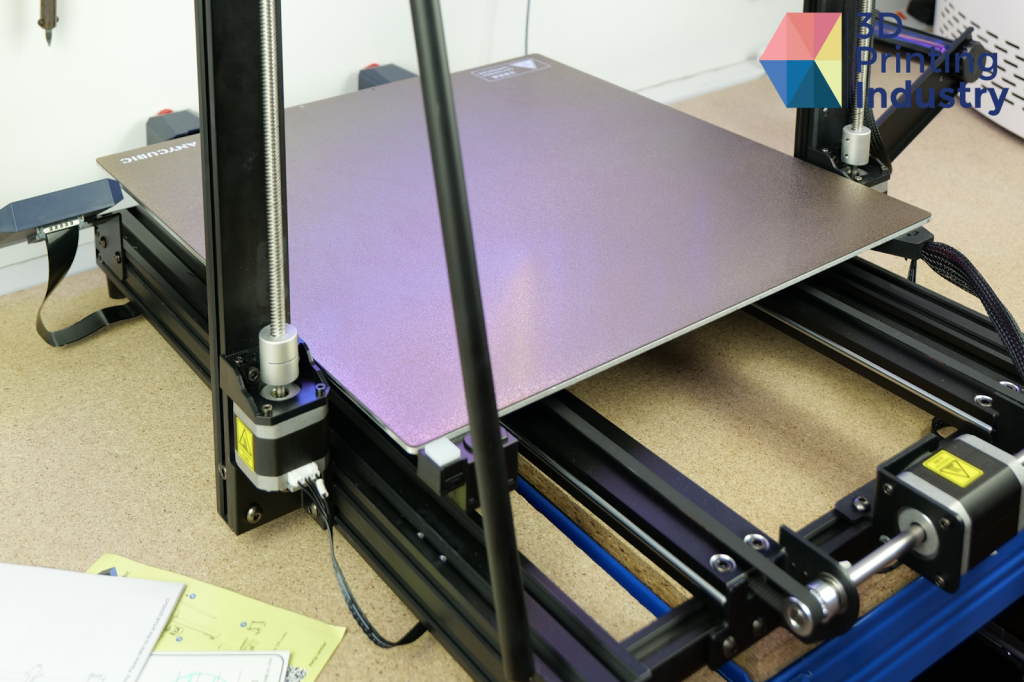
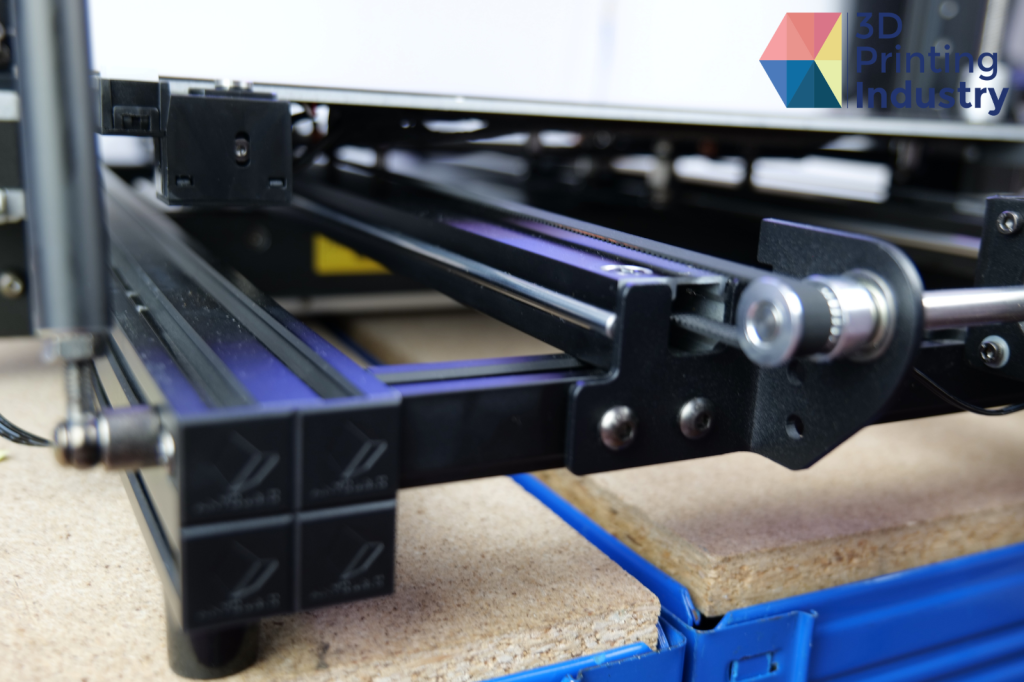
The Kobra 2 Max features an open architecture. Photos by 3D Printing Industry.
Benchmarking the Kobra 2 Max
To assess the capabilities of the Kobra 2 Max, we conducted a number of 3D printing tests using PLA filament. We began this process with the test file, a shark-shaped bottle opener, that was included with the 3D printer.
Once printed, this part featured a poor first layer, and showed some gaps between layers. This was caused by poor Z-offset calibration. Additional manual calibration was therefore needed to achieve a good first layer, this is to be expected from a 3D Printer that is assembled by the user.
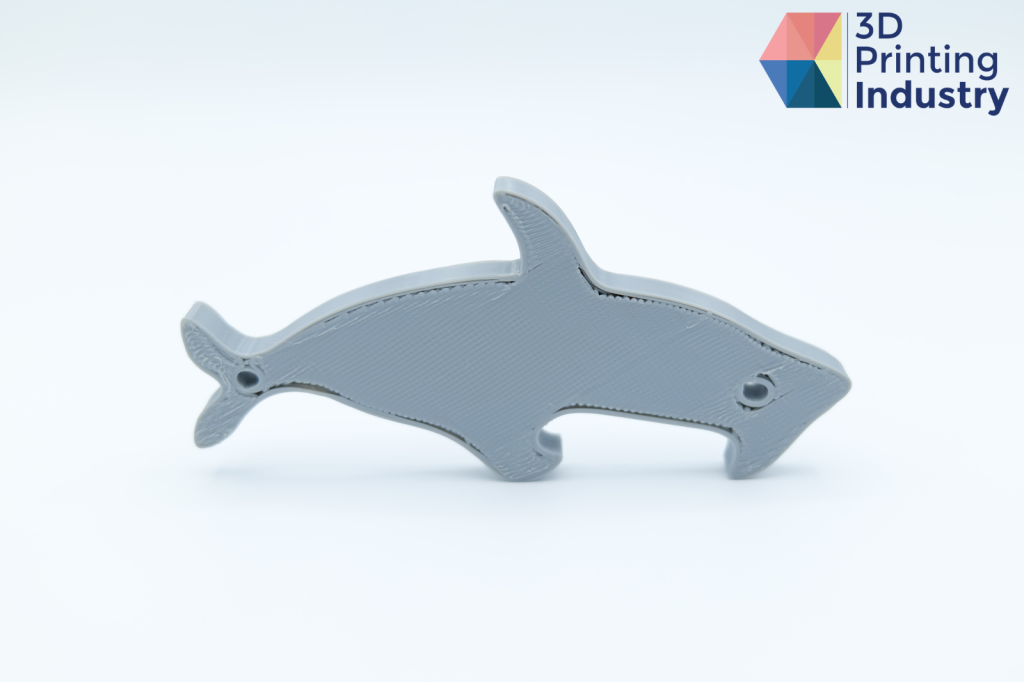

Test file shark bottle opener 3D print. Photos by 3D Printing Industry.
For prosumers wanting to 3D print batches of identical models, repeatability is key. To test how the Kobra 2 Max handles repeatability, our team 3D printed square, hexagon, and tube models 12 times each. These were then measured and compared to their original dimensions. Parts possessing an average deviation under 0.1 mm, and a standard deviation of less than 0.05 mm are viewed as successful results.
Ultimately, the mean difference for all parts was 0.156mm, with the standard deviation coming in at 0.45mm. Primarily, these results highlighted issues relating to the accuracy of the 3D printer.
The 3D printed square tests highlighted the greatest level of inaccuracy, particularly regarding the inner diameter of the hole. Across all results, the accuracy of part dimensions deviated heavily from the target measurements. However, these inaccuracies were largely consistent. Therefore, the 3D printer demonstrated good repeatability in producing inaccurate results. This inaccuracy can be tuned out with user calibration.
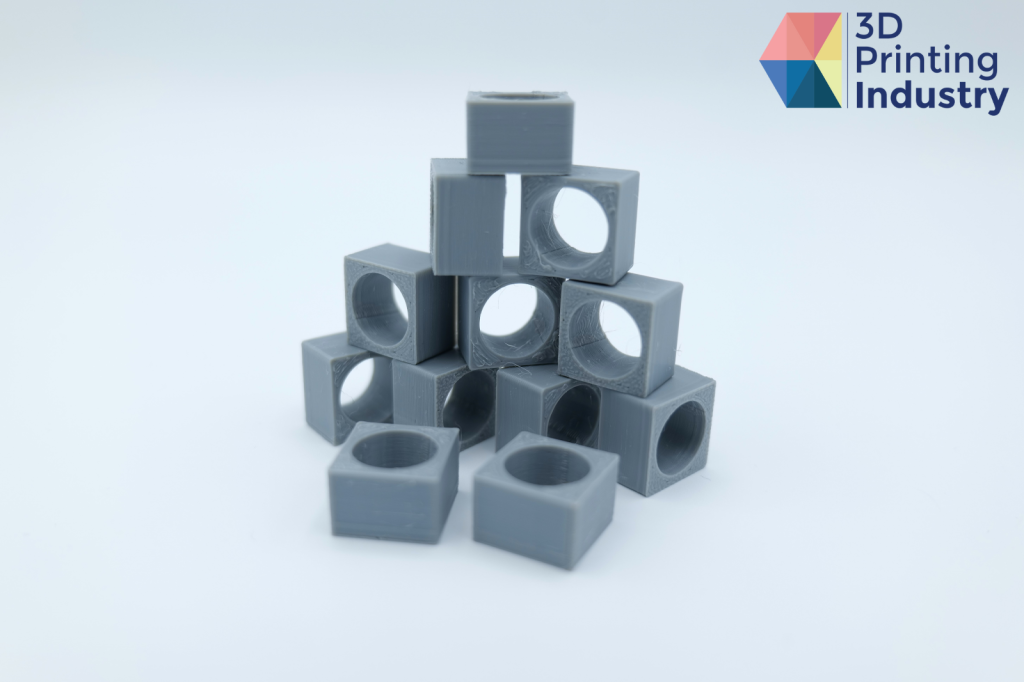
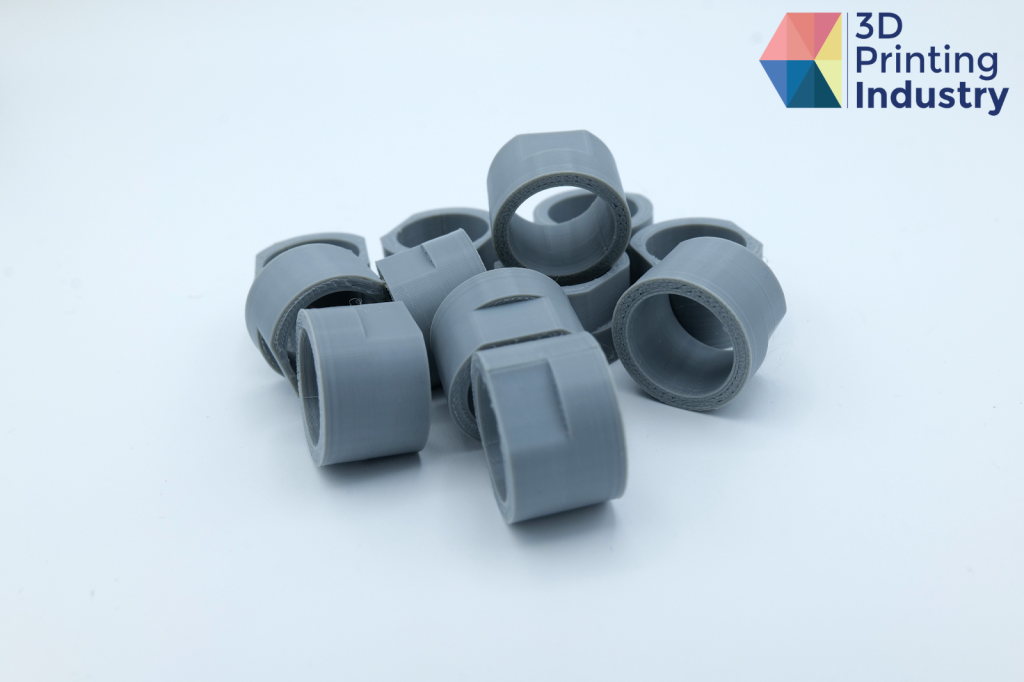
3D printed repeatability test parts. Photos by 3D Printing Industry.
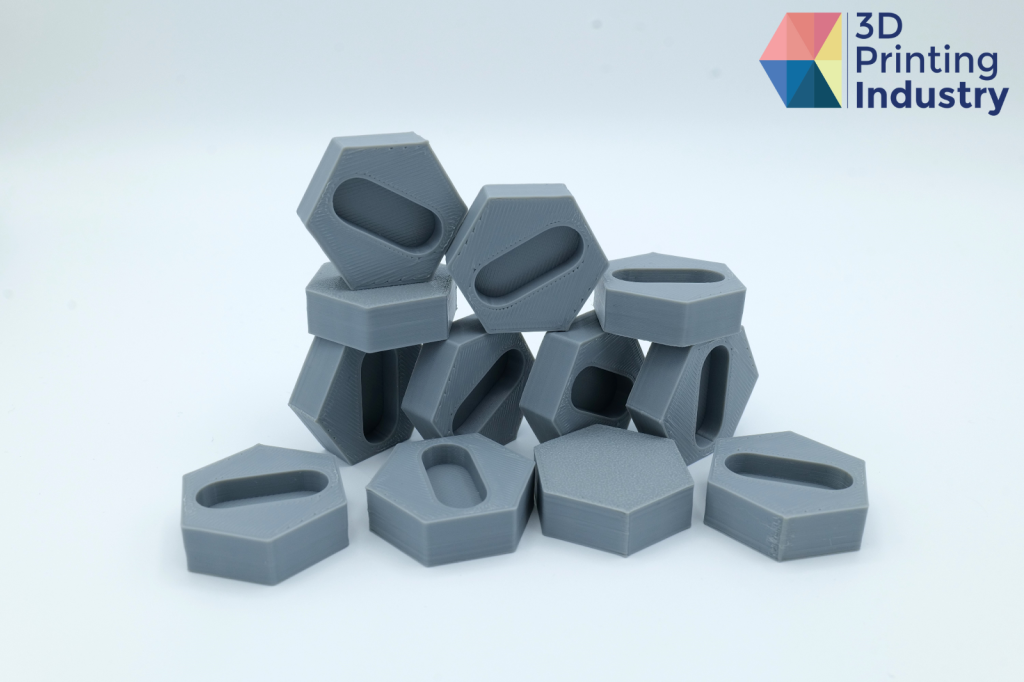
FDM 3D printers face challenges when 3D printing circular parts. This is especially prevalent for cartesian axis systems, which convert circular shapes into straight-line movements. But how does the Kobra 2 Max fare with circles? To find out, we 3D printed several models which each feature three circular sections of 100 mm, 65 mm, and 20 mm.
Our testing showed that the X-axis was close to the desired dimensions and its deviations were fairly consistent, but this was not the case for the Y-axis. This issue could be resolved by tuning the 3D printer’s XYZ-steps, which determine how far the extruder should move in a given axis.
However, users are currently unable to access and configure the firmware, meaning that the XYZ-steps cannot be changed. This limited access could certainly frustrate more experienced users wanting to tweak their 3D printer to achieve optimal results.
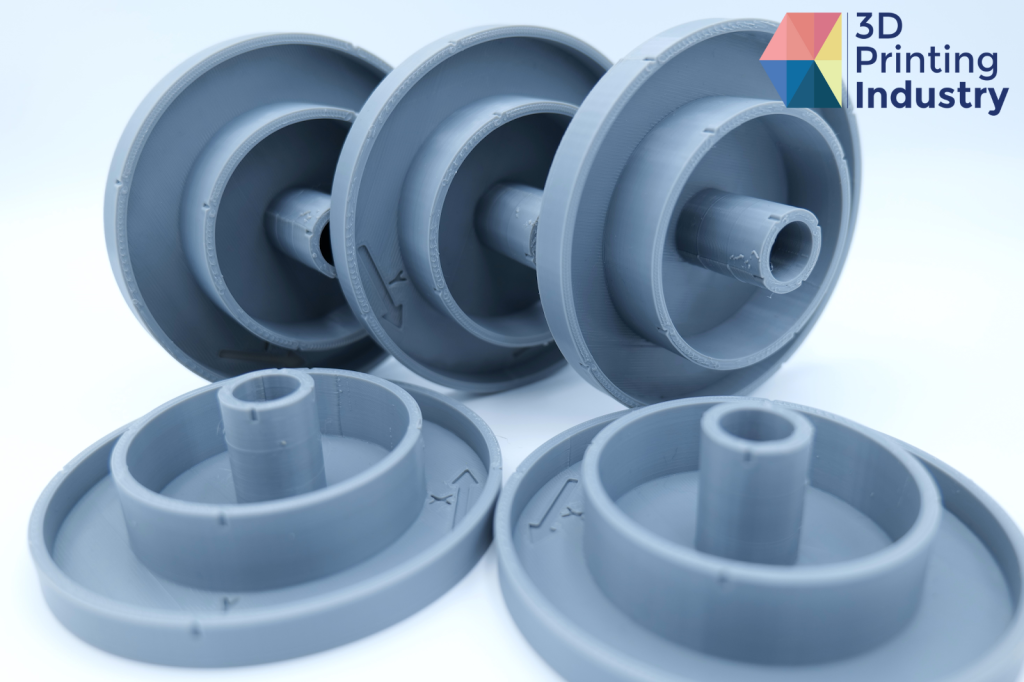
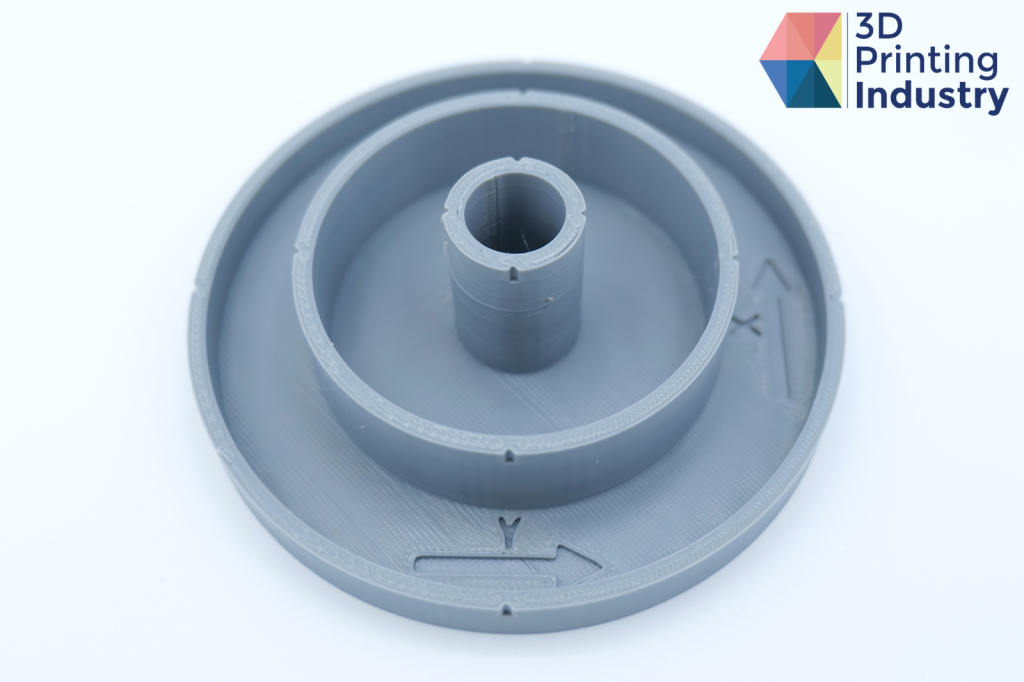
3D printed circular trajectory test parts. Photos by 3D Printing Industry.
Prospective customers may also find themselves asking whether the Kobra 2 Max can 3D print without supports. This is especially important for designers and engineers looking to produce prototype parts with significant overhangs.
To find out, we conducted a bridging test, which is a good evaluation of the 3D printer’s cooling ability, with faster cooling resulting in a better surface finish under unsupported bridges.
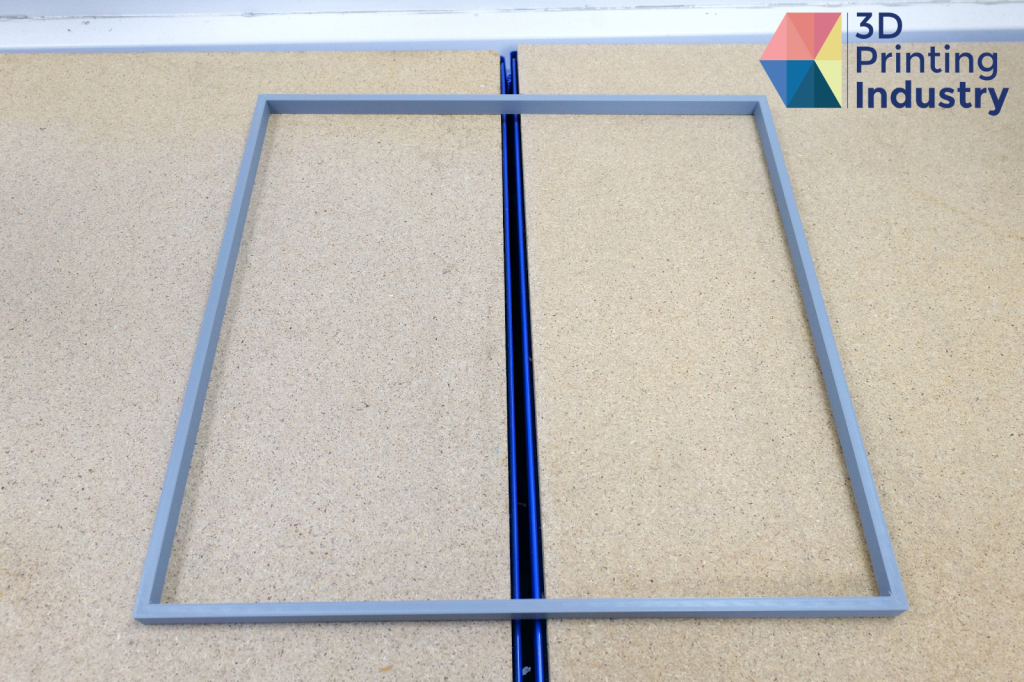
All bridges were printed successfully. While most FDM 3D printers have a 15mm limit for bridging, the Kobra 2 Max successfully achieved lengths of 25mm and 20mm on the X- and Y-axis, respectively. The cooling system is efficient, but could still be improved, with notable drooping occurring at 50mm and 60mm bridges. Overall, in terms of support-free 3D printing, this Kobra 2 Max is a stand-out option within the FDM market.
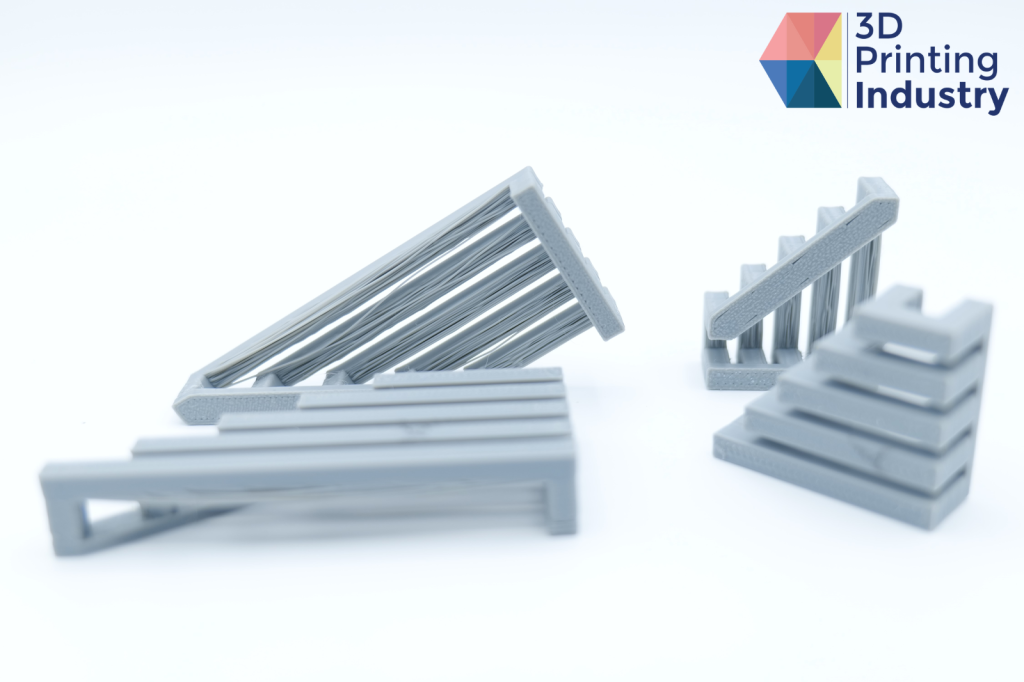
3D printed bridge test results. Photos by 3D Printing Industry.
The Kobra 2 Max also stands out in the Desktop FDM 3D printer space due to its substantial printing volume of 500 x 420 x 420 mm. Therefore, we set out to determine whether the Kobra 2 Max can successfully achieve these impressive sizes.
First, we conducted a tower test to assess the advertised Z-axis height of 500 mm. Cartesian systems often face problems when fabricating tall parts, as the inertia of the 3D print bed can cause excessive vibrations
The Kobra 2 Max successfully achieved a 3D print height of 496 mm in this test, however the final part did include noticeable ringing. These physical defects are common when 3D printing tall and thin parts. The ringing formed because the part vibrated more as it increased in height, creating worsening defects at the top of the tower.
The width test also successfully achieved the advertised 3D printing range, with dimensions of 419 mm x 419 mm. This part came out well, with no surface defects or warping.
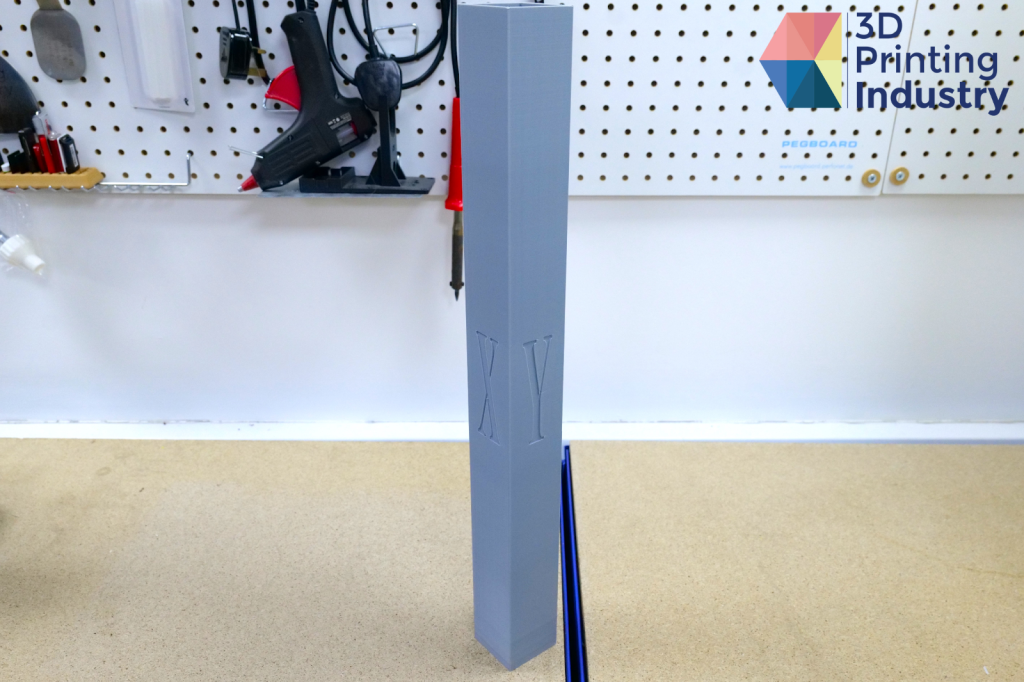
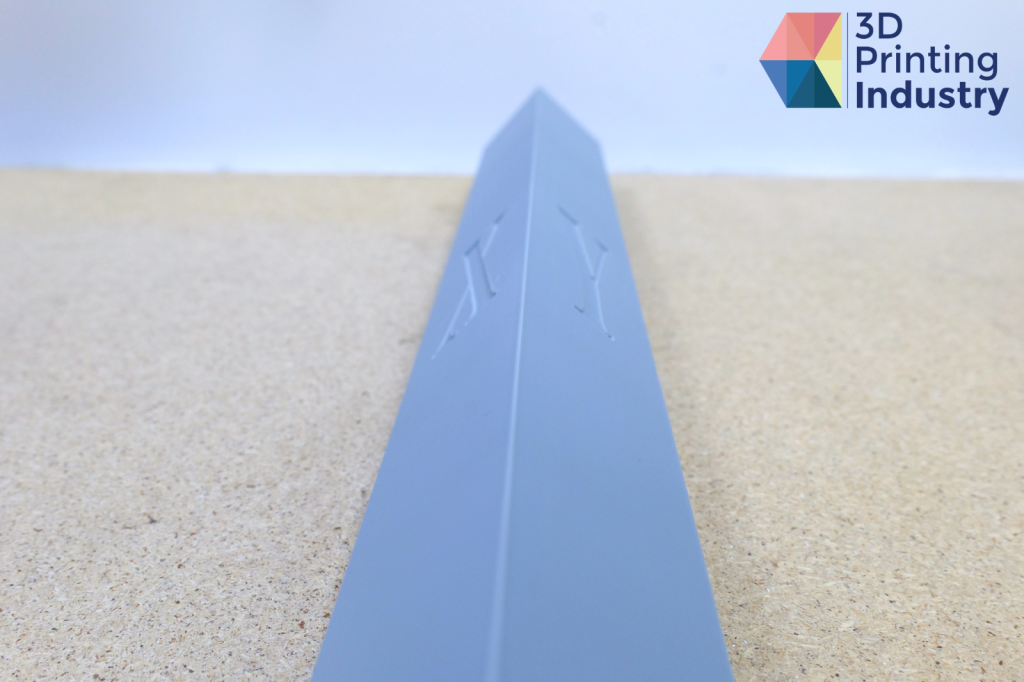
3D printed tower and width test results. Photos by 3D Printing Industry.
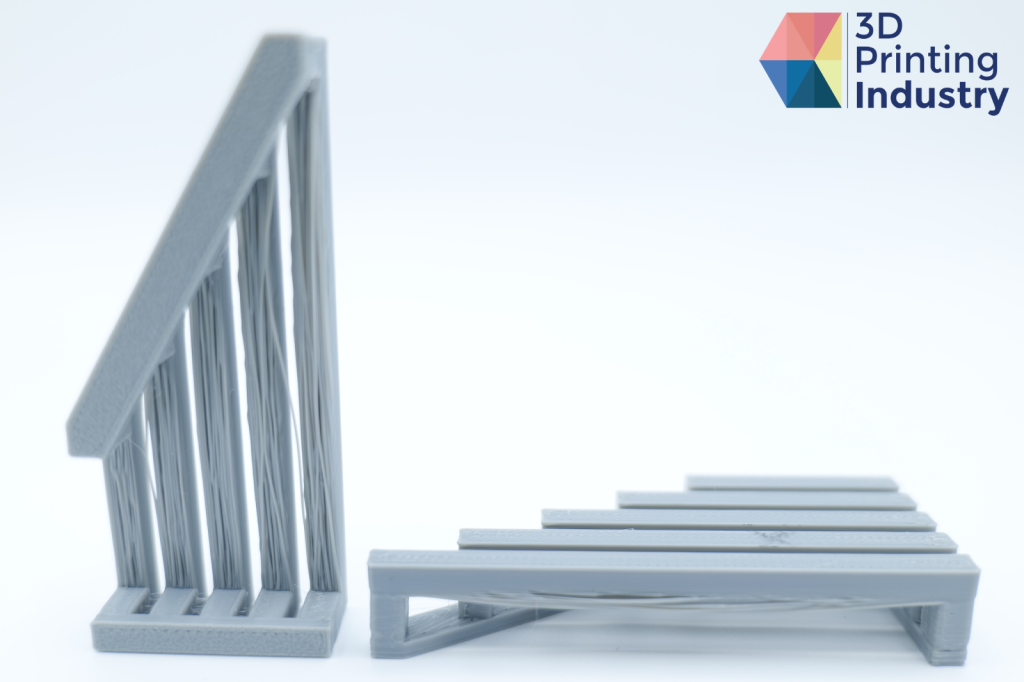
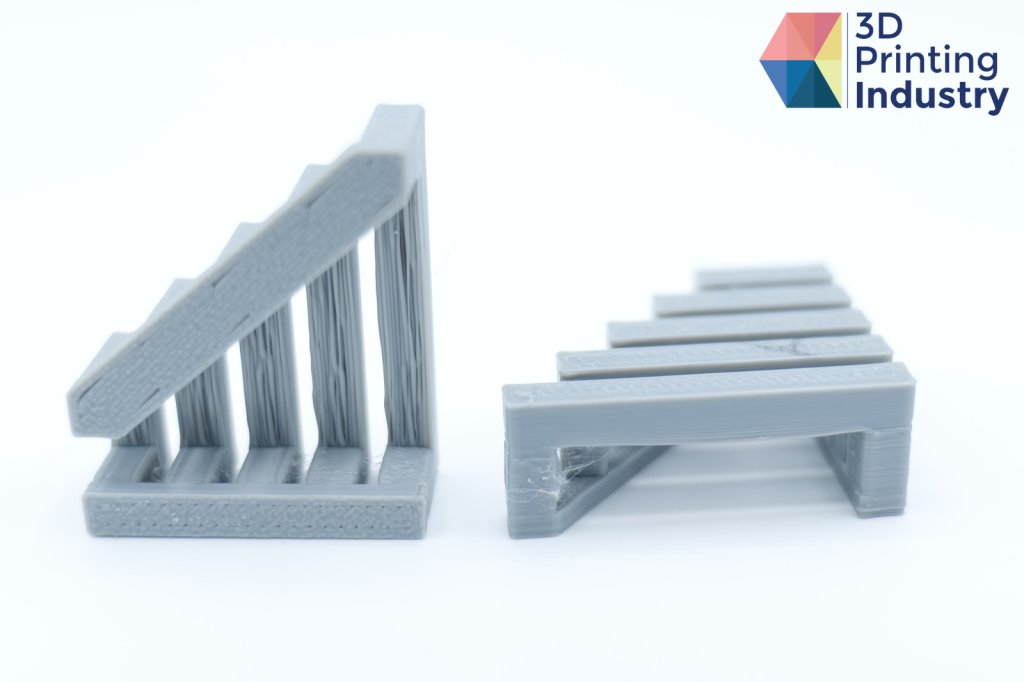
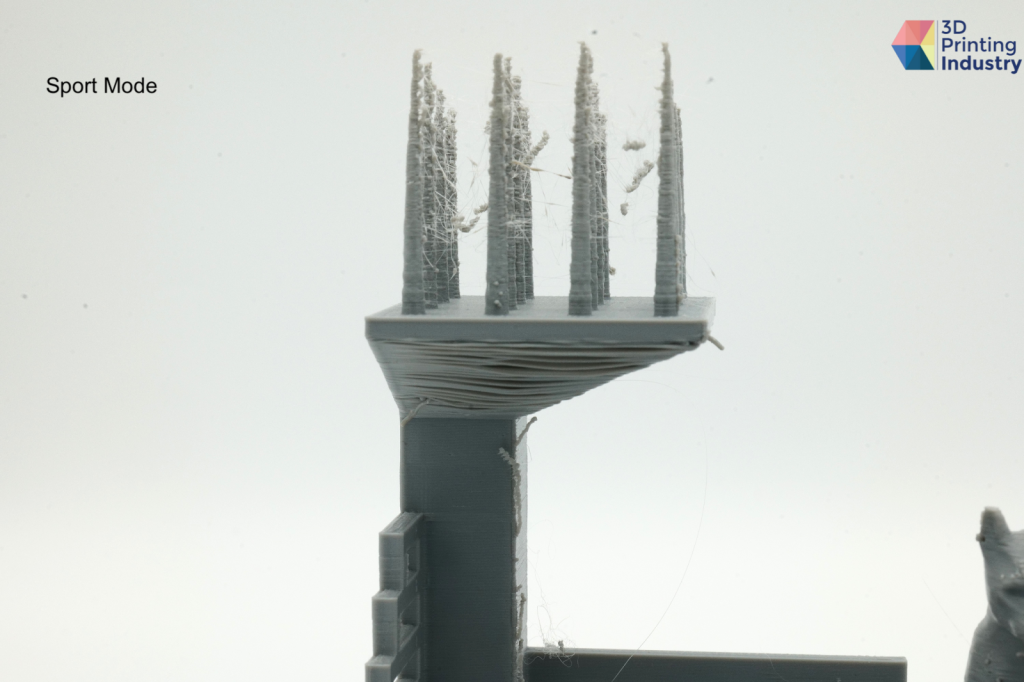
Stringing is a pet hate of many users of FDM 3D printers, with poor retraction a common cause for this especially irritating phenomenon. Stringing occurs when molten filament continues to be extruded as the nozzle moves.
Our test model featured three rows of three spikes and confirmed that the 3D printer’s retraction was well calibrated. Limited stringing was observed between the spikes. The stringing that was produced was quickly and easily removed with minimum post-processing, and the spikes were completed all the way to the top with minimal ooze on the final pass.
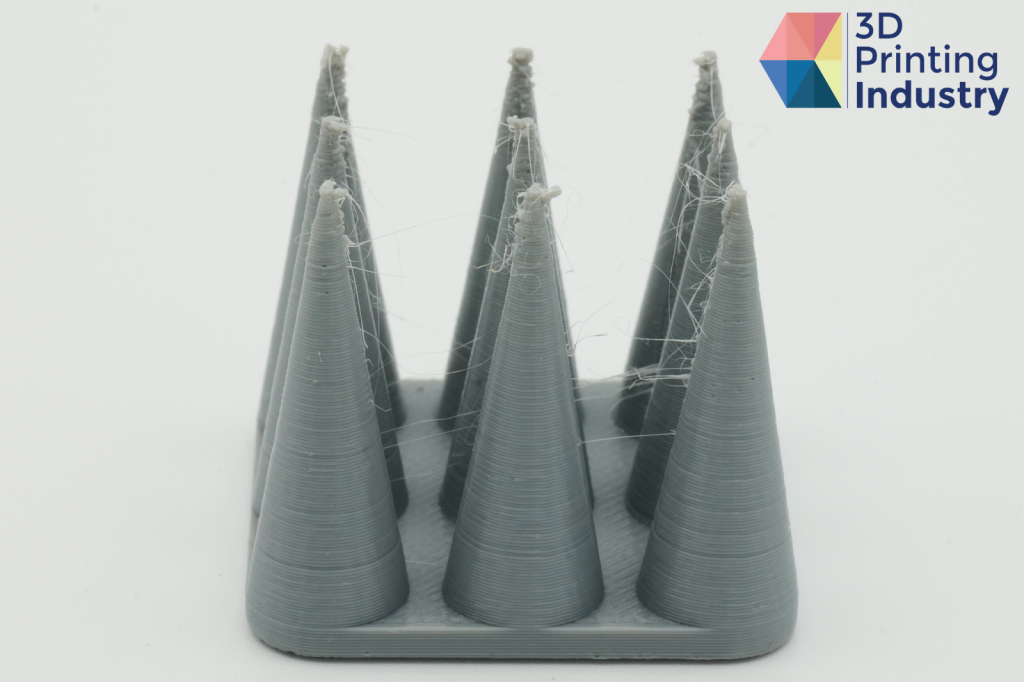
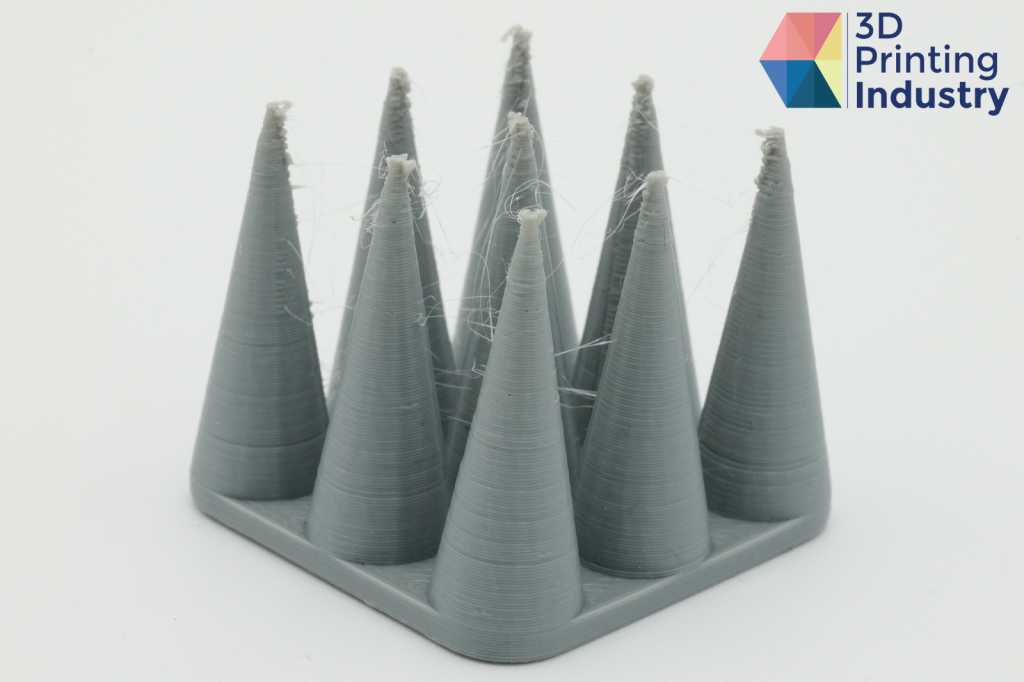
3D printed retraction test results. Photos by 3D Printing Industry
Within the FDM market, there is a clear trend towards increasing 3D printing speeds. However, those who have pushed their 3D printer to its speed limit will likely have noticed a sacrifice in quality. This can create a tricky balancing act between boosting productivity and meeting required part standards.
Is this the case on the Kobra 2 Max? To answer this question, we 3D printed our in-house 3DPI benchmarking test using the 3D printers three modes – Stable, Standard, and Sport.
The exact 3D printing speed of these modes cannot be accessed. However, they do result in a clear difference in 3D print times. The Stable mode completed the part in 6 hours 41 minutes, Standard mode in 4 hours 31 minutes, and Sport mode in just 4 hours 11 minutes.
Overall, our findings showed that increasing the Kobra 2 Max’s 3D printing speed directly correlated to a decrease in part accuracy. Using stable mode, the 3DPI test achieved a score of 56.53 out of 100, with a score of 48.41 when 3D printed in the Standard mode.
Sport mode, the fastest of the three, achieved a score of just 43.63. This was significantly lowered by poor accuracy and excessive stringing. The bridging test was the worst of the three, while the model as a whole exhibited signs of ringing in both the X and Y axes. Ultimately, the Standard mode is the most time-efficient option for 3D printing better-quality parts.
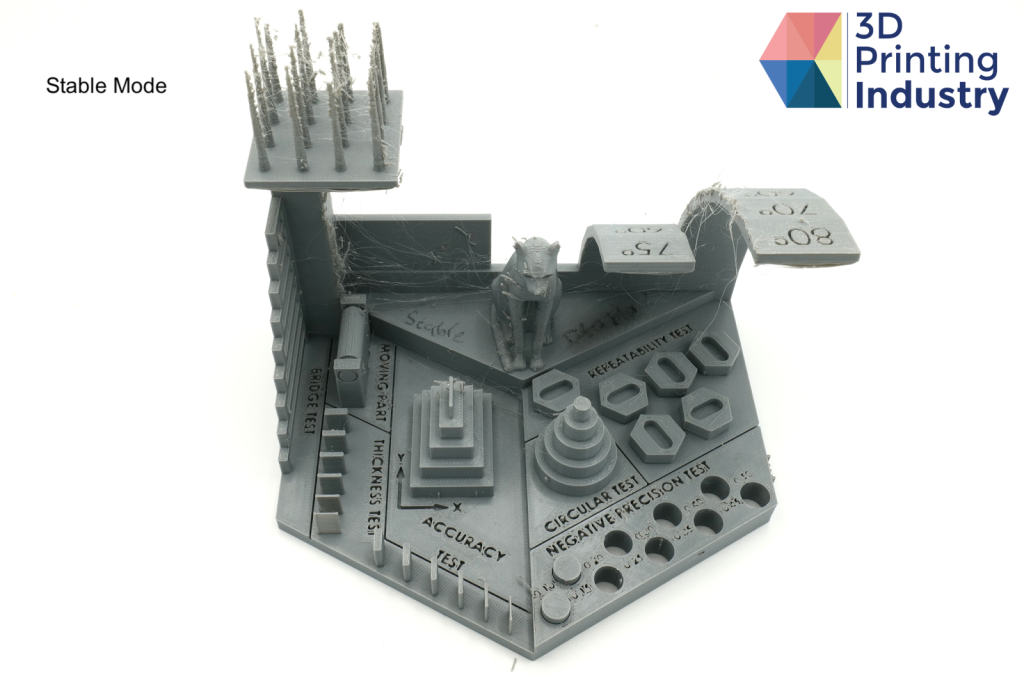
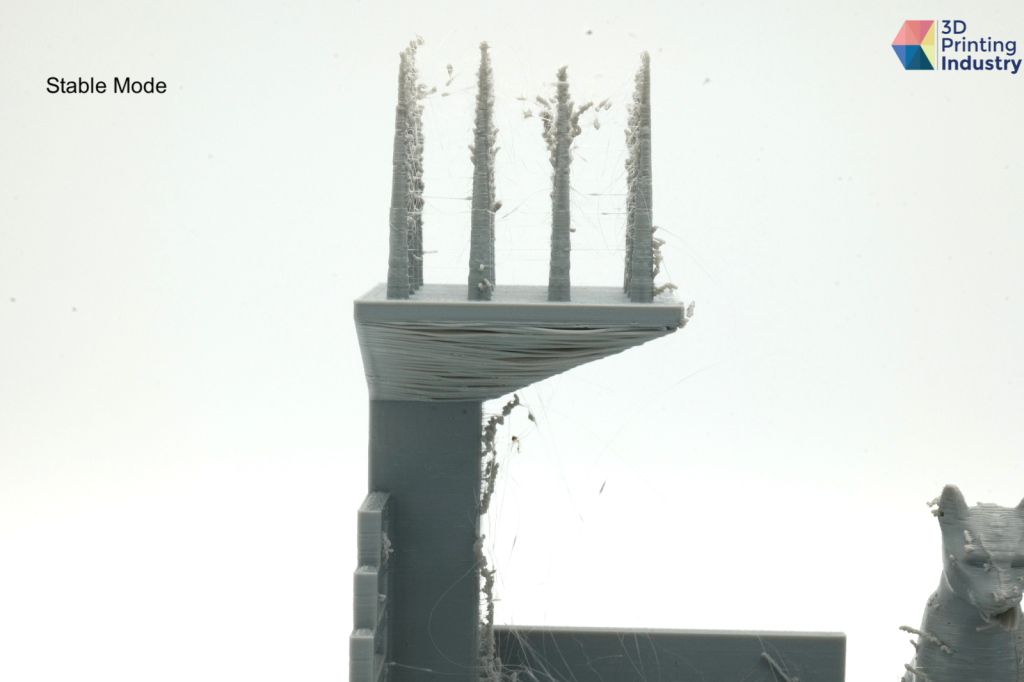
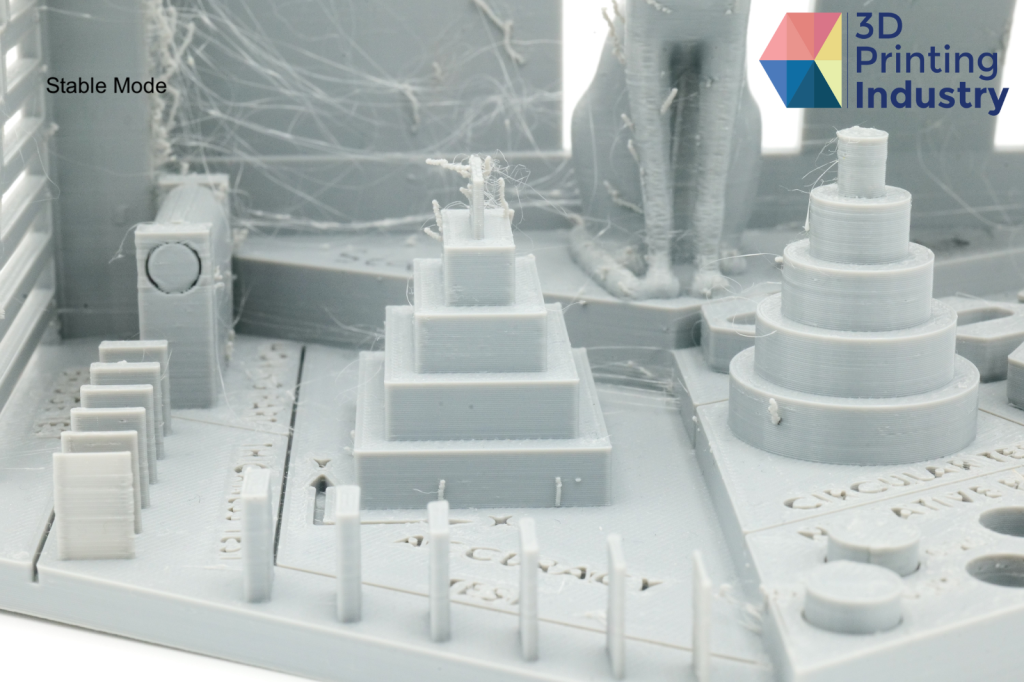

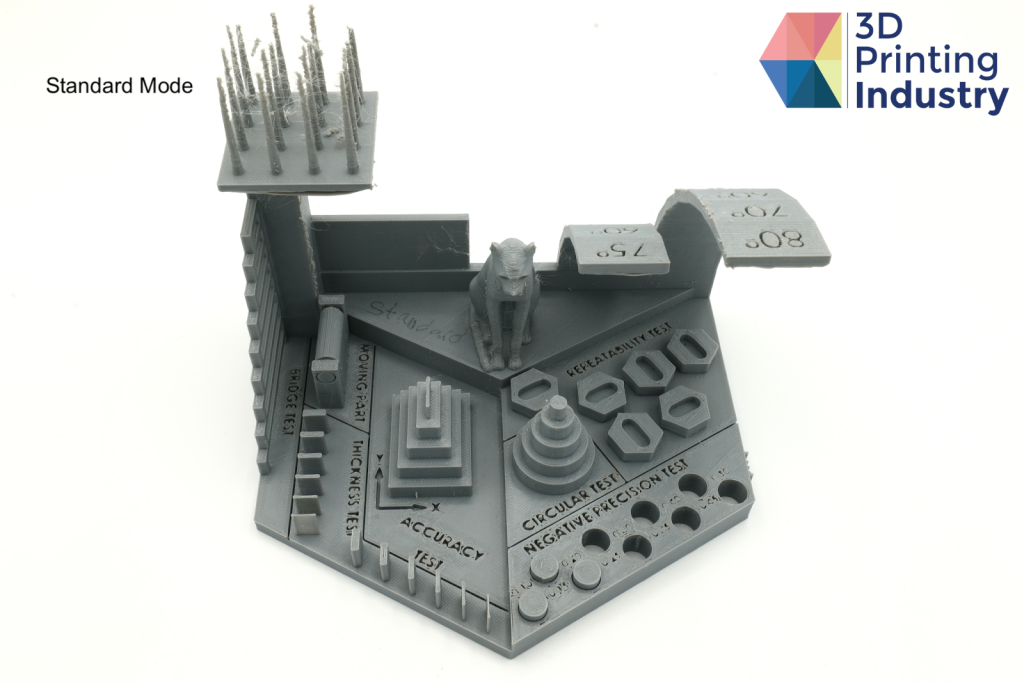
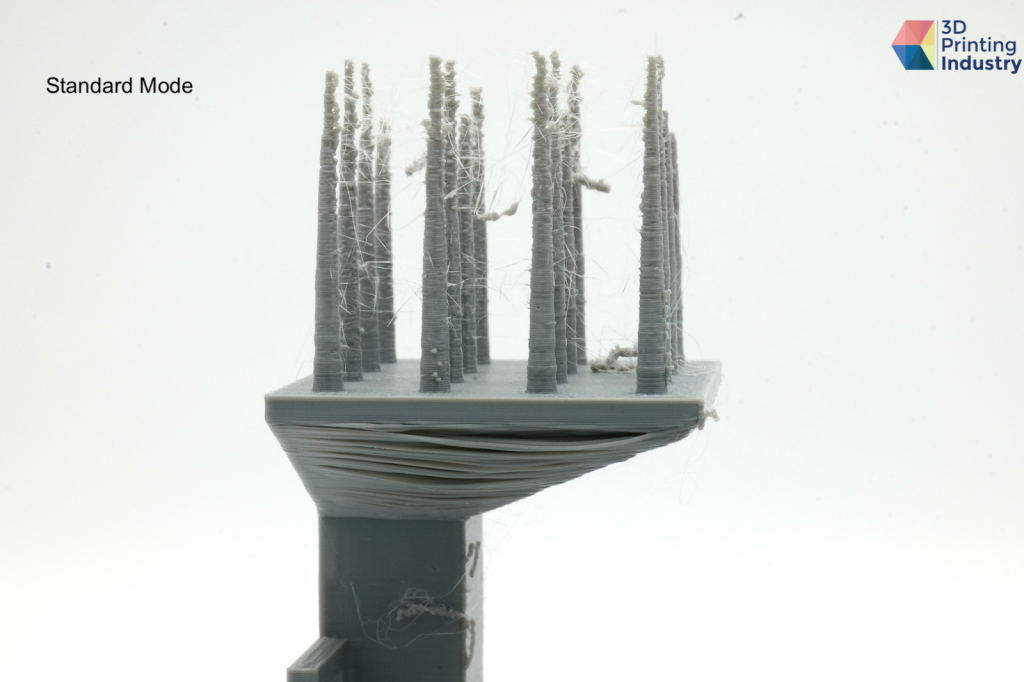
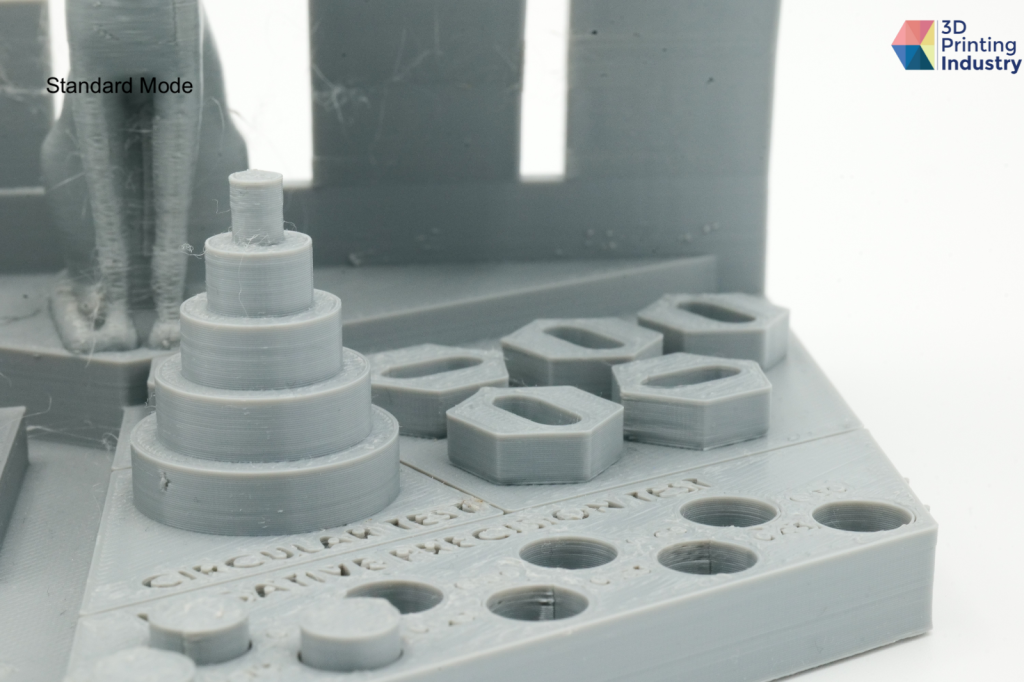
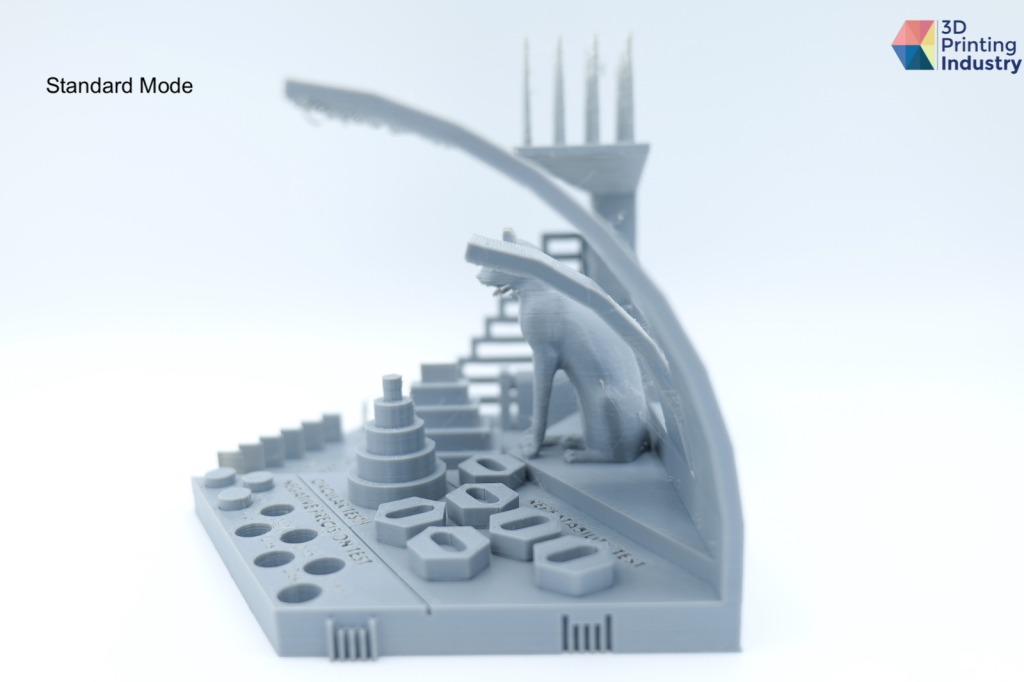
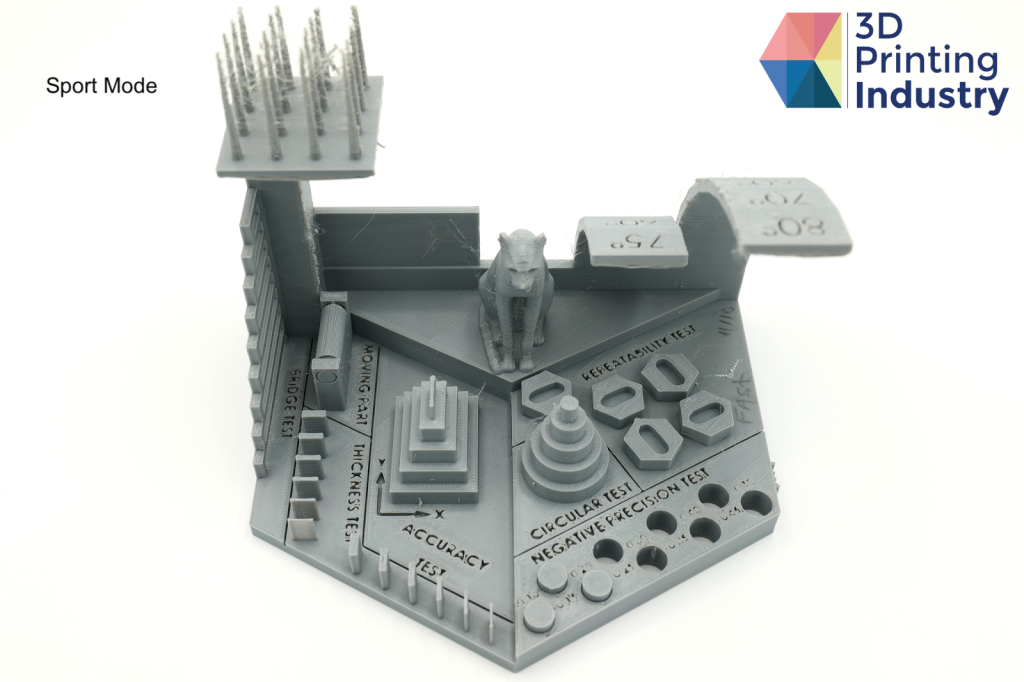
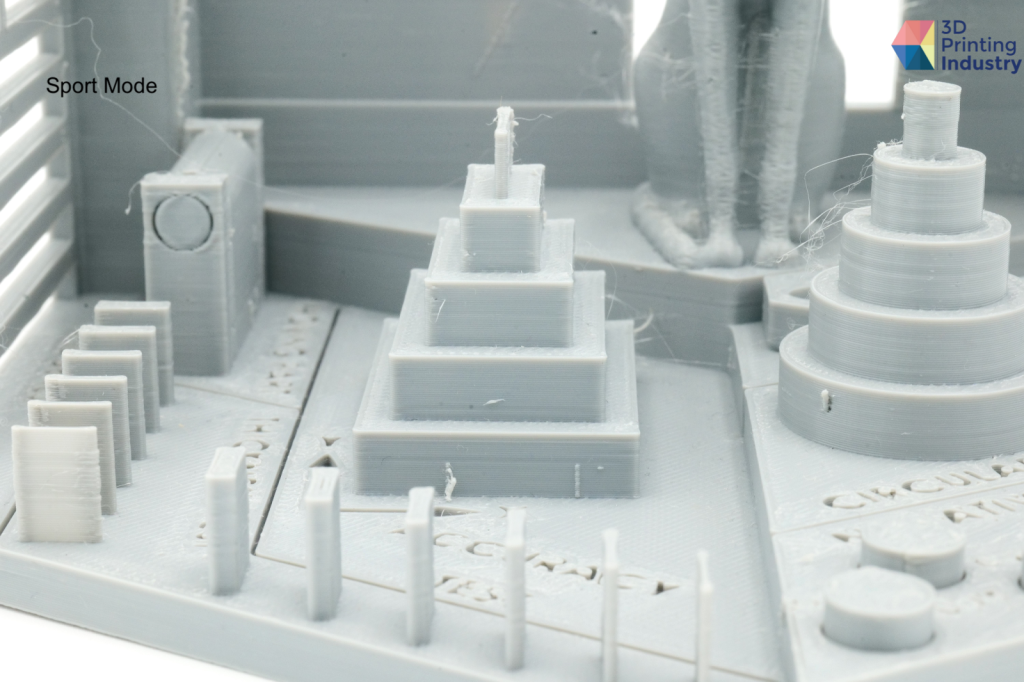
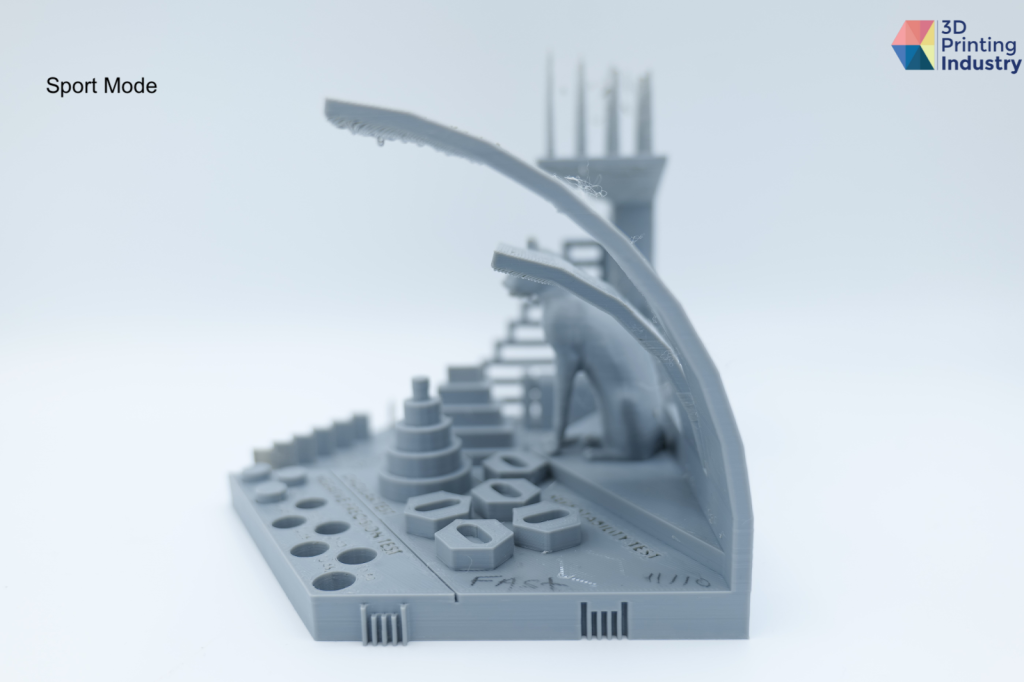
3DPI test results from left to right: Stable mode, Standard mode, and Sport mode. Photos by 3D Printing Industry.
Testing Kobra 2 Max applications
We next assessed how well the Kobra 2 Max is suited to the real world applications and use-cases of hobbyist, prosumer and engineering users. These tests also assess the 3D printers compatibility with PLA, TPU and PETG filaments.
The first of these tests was a functional nut and bolt model, designed to determine whether the 3D printer could produce components with very small dimensions and tolerances. These parts were successfully produced, featuring good detail and the intended functionality.
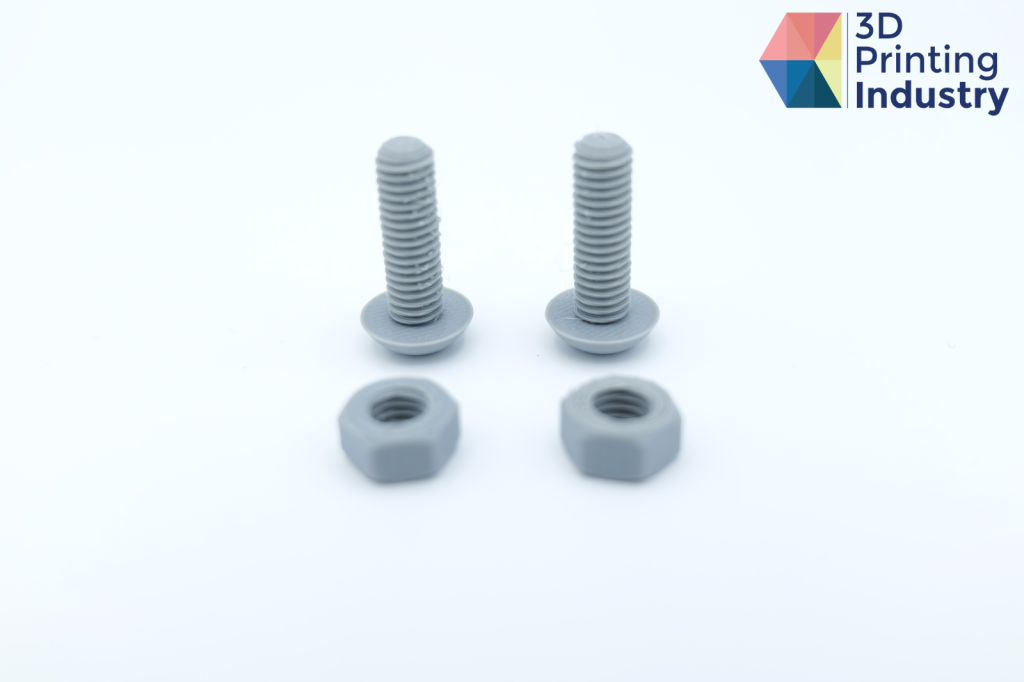
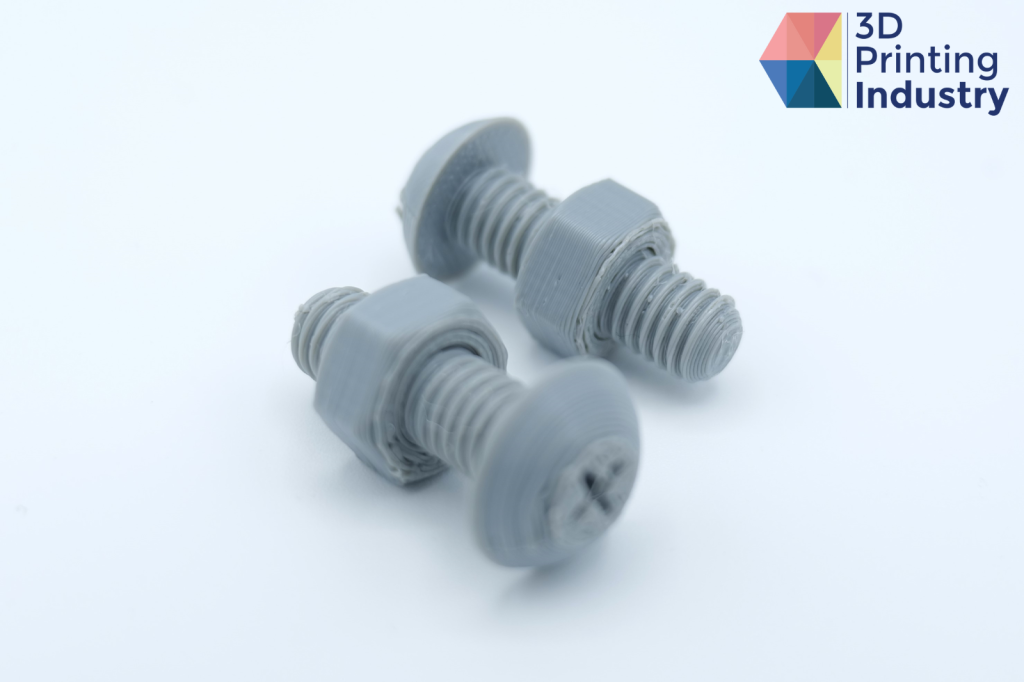
3D printed nut and bolt models. Photos by 3D Printing Industry
To assess the capability of the Kobra 2 Max with TPU, we next 3D printed footwear insoles. The surface quality of these parts was below par, featuring noticeable defects and cavities on both the first and final layers. However, the insoles were flexible enough to be functional, confirming that the 3D printer can produce prototype parts with TPU filament. However, the user should consider preventive measures to avoid gaps and inconsistent layers, like adding shells and top layers.
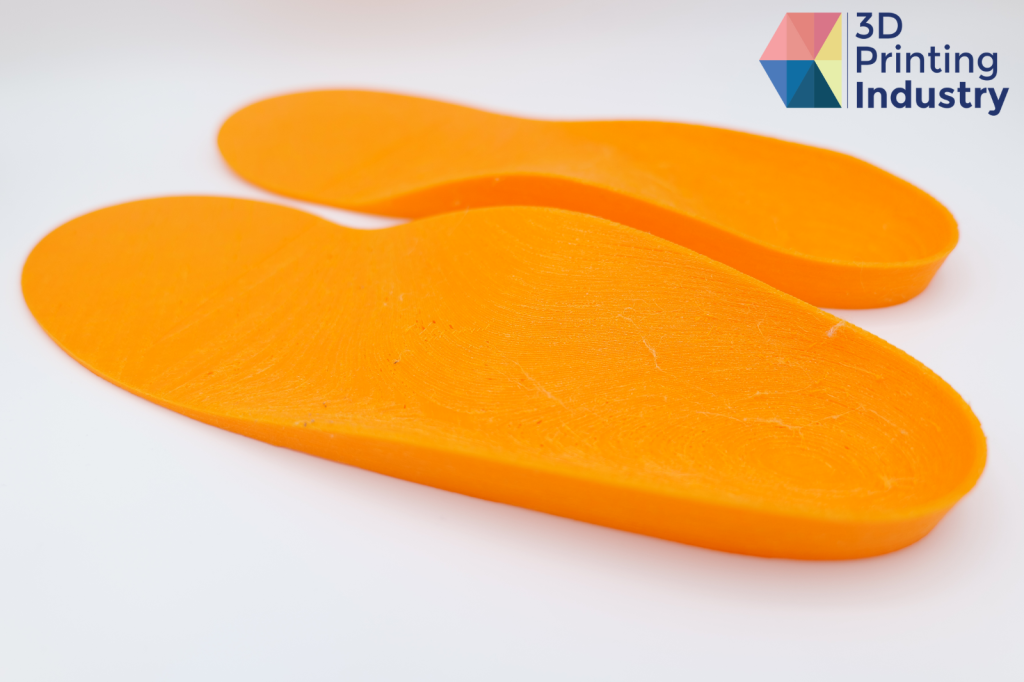
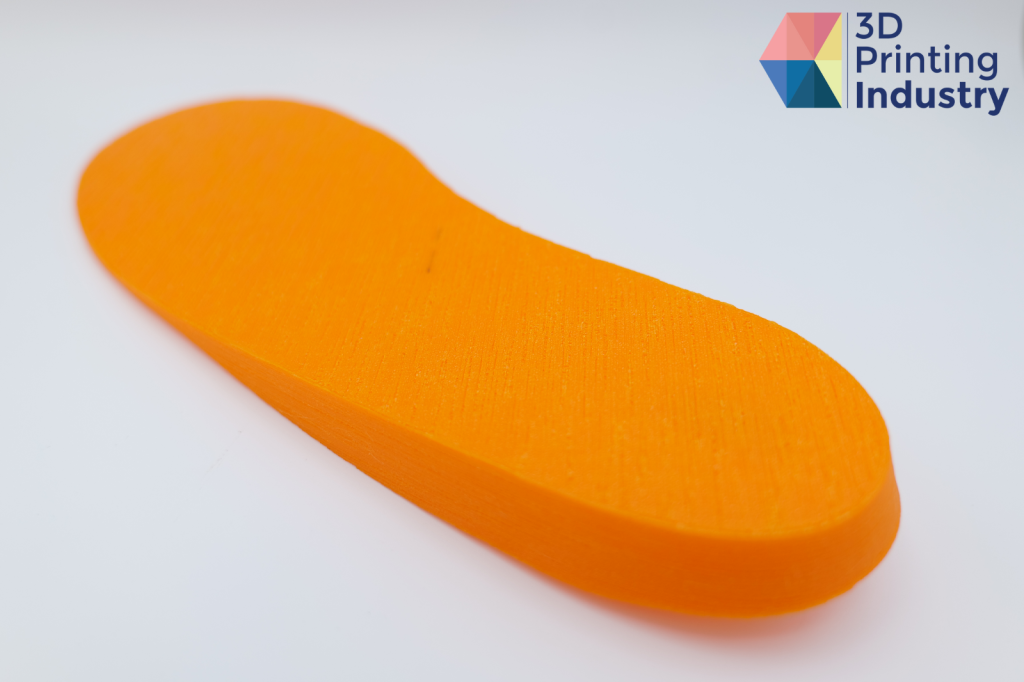
3D printed TPU insoles. Photos by 3D Printing industry.
Engineers may also want to know how the Kobra 2 Max fares when using higher-temperature, more performance-oriented materials. To assess this, we 3D printed a flag holder in PETG. This material was chosen for its heat and chemical resistance, as well as its strength. This part came out well, with a smooth surface finish and no warping or layer artifacts. The circular holes were also accurately 3D printed making the part functional. Some minor ringing was noted, highlighting the effects of vibration when producing large parts.

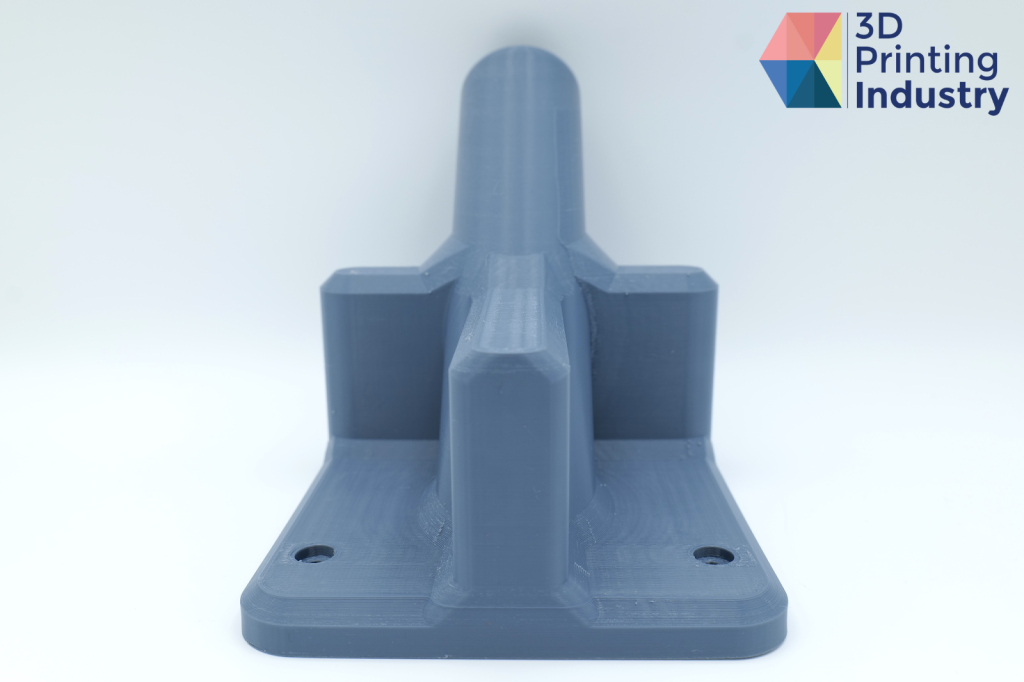
3D printed flag holder. Photos by 3D Printing Industry.
We also 3D printed a planetary gear to test whether the 3D printer can produce mechanical parts as a single print. While the surface quality of the part was good, it was unfortunately not functional due to the middle layers fusing together. Therefore, from this test, we cannot confirm the Kobra 2 Max’s ability to produce functional print-in-place models with negative vertical tolerances.

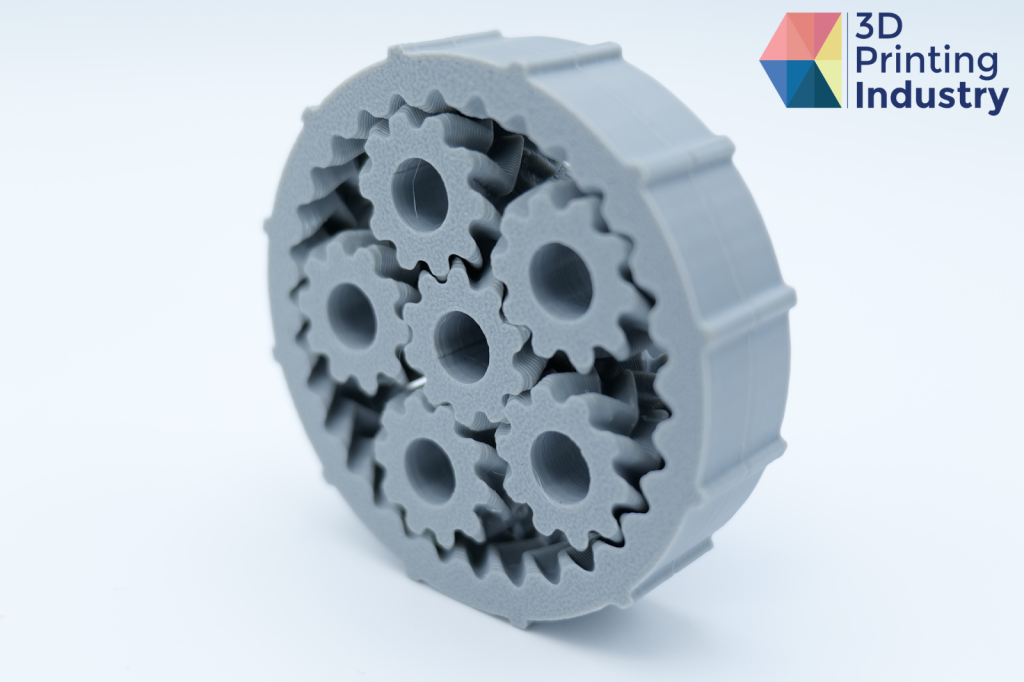
3D printed Planetary gear. Photos by 3D Printing Industry.
When 3D printing large-scale components, it is likely that the filament spool may run out before the final part has been completed. This is a common occurrence and something which a large-scale 3D printer should be able to handle. To assess this on the Kobra 2 Max, we 3D printed a large functional stool with a spool that would need to be changed mid-way through.
The filament runout sensor worked perfectly. It detected the end of the spool, paused the 3D print, and delivered a material change prompt. However, we found that the UI does not provide clear instructions on how to change the filament mid-way through printing. Inexperienced users may therefore fail to correctly remove old filament from the nozzle, resulting in clogging or inconsistent material flow.
One thing that we would have liked to see is a larger spool holder included in the box since the printer is aimed at larger builds. It is however possible to print one in the desired spec if needed.
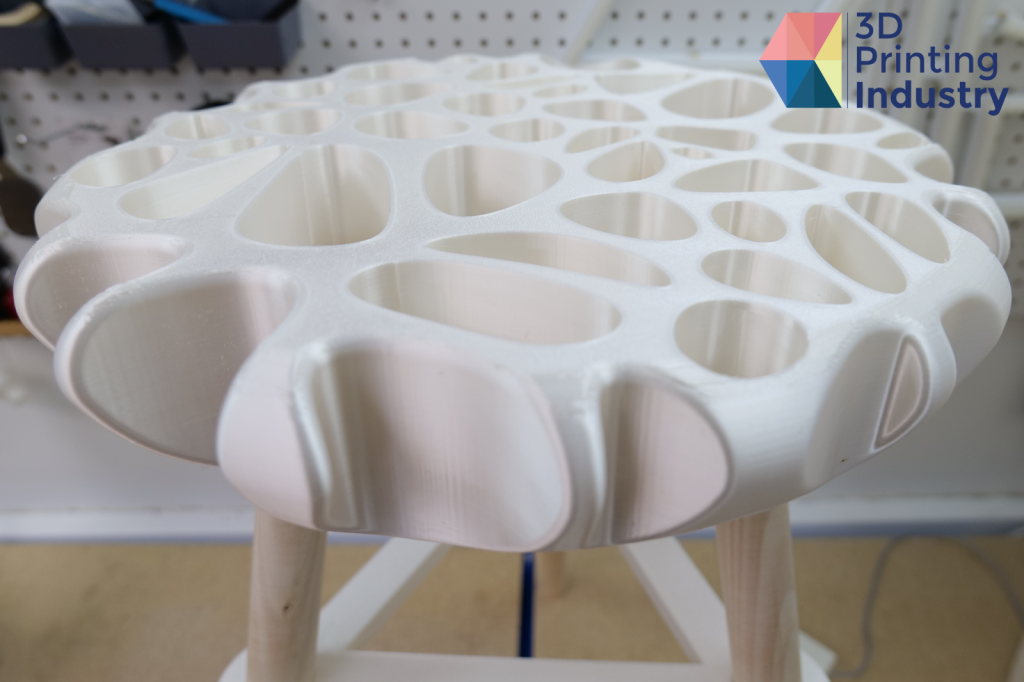
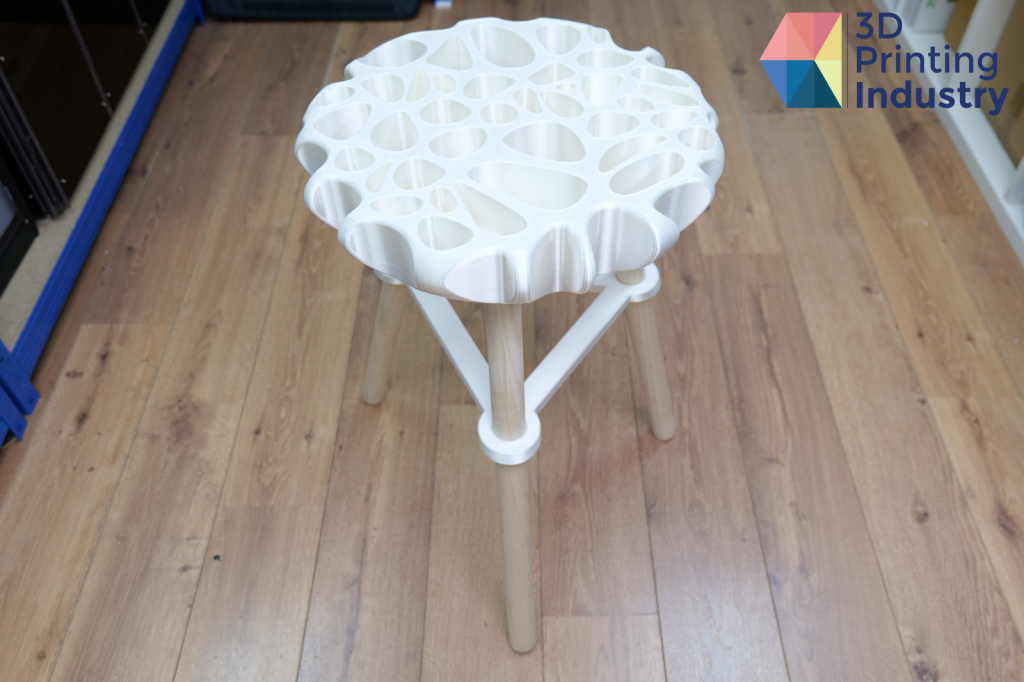
3D printed stool. Photos by 3D Printing Industry.
Finally, we assessed the Kobra 2 Max’s ability to 3D print miniature models, a popular application for those using desktop FDM 3D printers. This test produced good results, achieving incredibly fine details on our part measuring 10 cm in height. The 3D printer is therefore capable of 3D printing both large- and small-scale parts. An added benefit here is that it is capable of printing very large batches of small parts, should users desire.
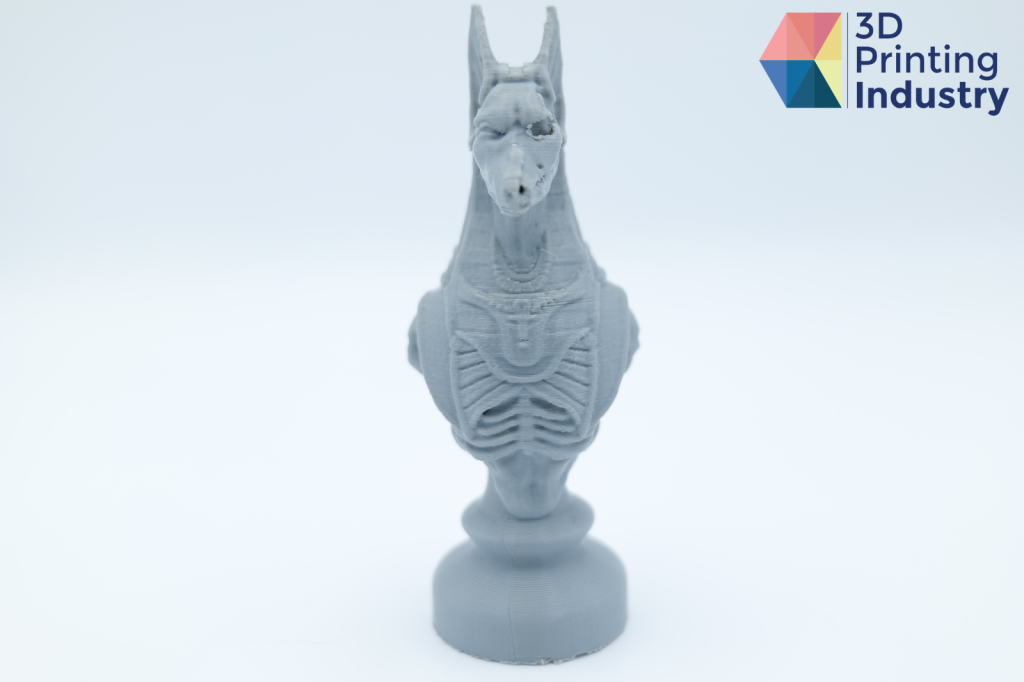

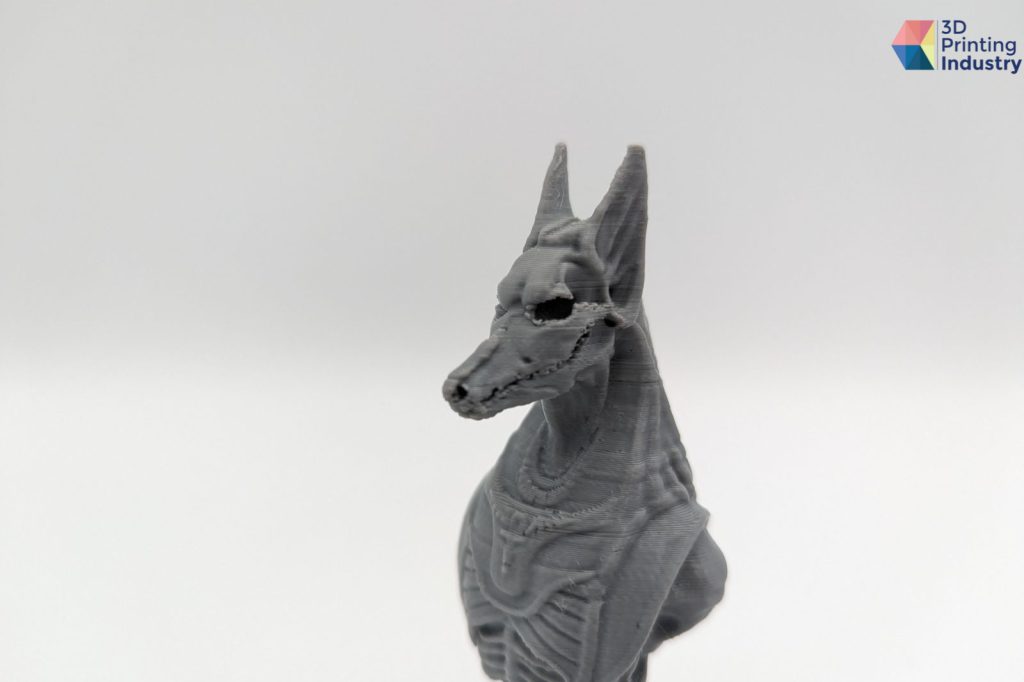
3D printed Anubis model. Photos by 3D Printing Industry.
Kobra 2 Max: filling a gap in the desktop 3D printer market
The Kobra 2 Max from Anycubic is an FDM 3D printer that offers notable 3D printing speeds and an impressive build volume at an affordable price. Its user-friendly interface and accessible design make it an ideal choice for newcomers to the industry, as well as more experienced users wanting to produce larger-scale parts.
In testing, the Kobra 2 Max held up well thanks to its decent precision, and ability to successfully 3D print without support and its effective retraction capabilities, making for tidy end parts. Large scale prints meeting the entire advertised volume can certainly be fabricated, with the Kobra 2 Max well positioned to exploit a clear gap within the ever evolving desktop FDM 3D printer market.
However, the 3D printer’s high vibration levels posed problems at speed, with Anycubic’s vibration compensation technology requiring some improvement. What’s more, an inability to access and alter the XYZ-steps through the firmware was frustrating, leading to persistent issues when testing circular trajectory. Unlocking the ability to manually change these settings would elevate the experience for advanced users and allow them to mitigate any shortcomings.
While the high 3D print speeds of the Kobra 2 Max do reduce 3D print times, they result in a notable sacrifice in part quality. As such, the 3D printer’s top-speed Sport mode is not recommended for end use parts, but serves a great purpose for larger draft or prototype models.
Despite these limitations, Anycubic’s newest 3D printer stands out as a great value-for-money option for both new and experienced users. It was easy to set up and operate and is a true jack of all trades, capable of producing good quality parts, both large and small and at considerable speeds.
Technical specifications of the Kobra 2 Max
| 3D Printing Technology | Fused Deposition Modeling (FDM) |
| Physical Dimensions | 740 x 735 x 640 mm |
| Weight | 21kg |
| Build Volume | 500 x 420 x 420 mm / 88L |
| 3D Printing Speed | 500mm/s (Maximum) 300mm/s (Typical) |
| X/Y-axis | Double Metal Spindle |
| Z-axis | Double Motor Double Z-axis |
| X/Y-axis Belt Tensioner | Included |
| Build Plate | PEl Magnetic Spring Steel |
| Hotbed Temperature | ≤194F/90°C |
| Cooling Fan RPM | 7000rpm/min |
| Compatible Materials | PLA/ABS/PETG/TPU |
| Bed Leveling | Anycubic LeviQ 2.0 Automatic Leveling System (49-point) |
| Extruder | Anycubic Self-Developed Direct Extruder + Double Gears |
| Control Panel | 4.3” LCD Touch -Control Screen |
| Data Input | USB ports x 3 |
Want to help select the winners of the 2024 3D Printing Industry Awards? Join the Expert Committee today.
What does the future of 3D printing hold?
What near-term 3D printing trends have been highlighted by industry experts?
Subscribe to the 3D Printing Industry newsletter to keep up to date with the latest 3D printing news.
You can also follow us on Twitter, like our Facebook page, and subscribe to the 3D Printing Industry Youtube channel to access more exclusive content.
Featured image shows the Anycubic Kobra 2 Max. Photo by 3D Printing Industry.