With a promise to, “turn your desktop into a workshop” Snapmaker combines a 3D printer, laser engraver and CNC carver. A hugely successful Kickstarter campaign raised $2.2 million, and now the Snapmaker 3-in-1 3D printer is available for a wider audience.
3D Printing Industry tested the Snapmaker 3-in-1 3D printer against the claims made for this low cost desktop 3D printer. Specifically this 3D printer is aimed at beginners, is designed to be easy-to-use, expandable for makers and affordable. The all metal construction is also highlighted as a bonus for reliability.
So how did the Snapmaker 3-in-1 3D printer perform in the hands of the 3D Printing Industry engineering team and does it live up to those claims?
First impressions of the Snapmaker start with packaging and assembly
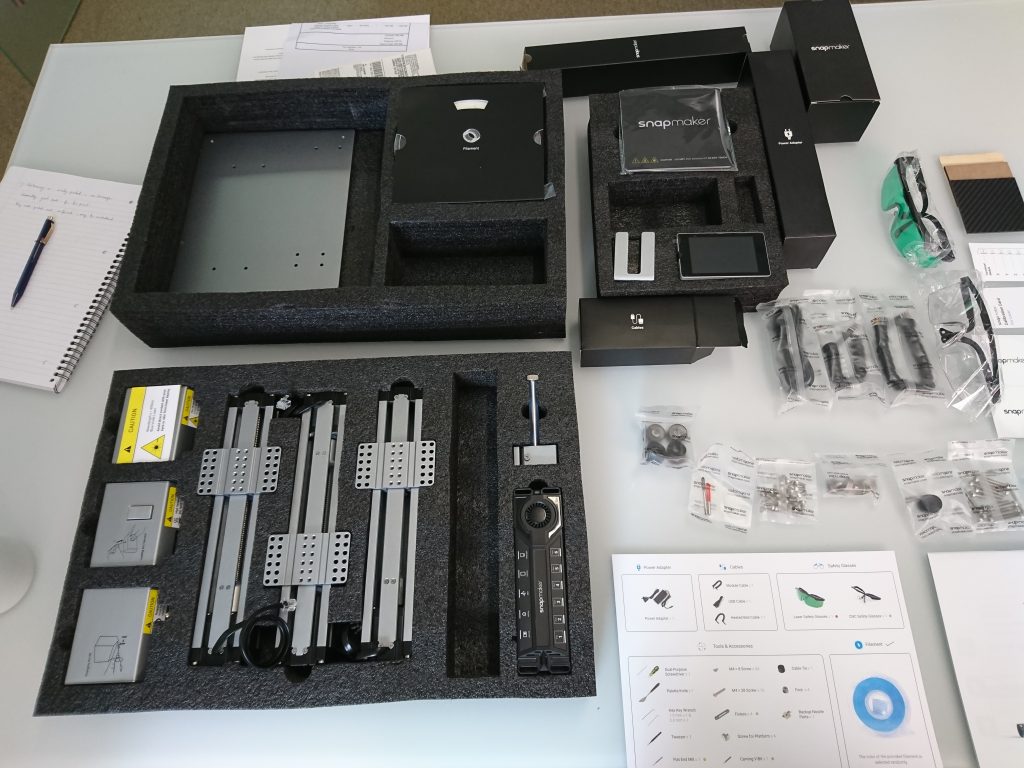
While the old adage ‘never judge a book by its cover’ should be born in mind, packaging can often provide an insight into the calibre of the company. Snapmaker clearly has experience in how to present, and deliver a product. We were impressed with the well-boxed and professional presentation – the components, tools and accessories efficiency stacked within several cardboard boxes and safely nestled in cut foam. Of course, this means that the Snapmaker ships in an unassembled form.
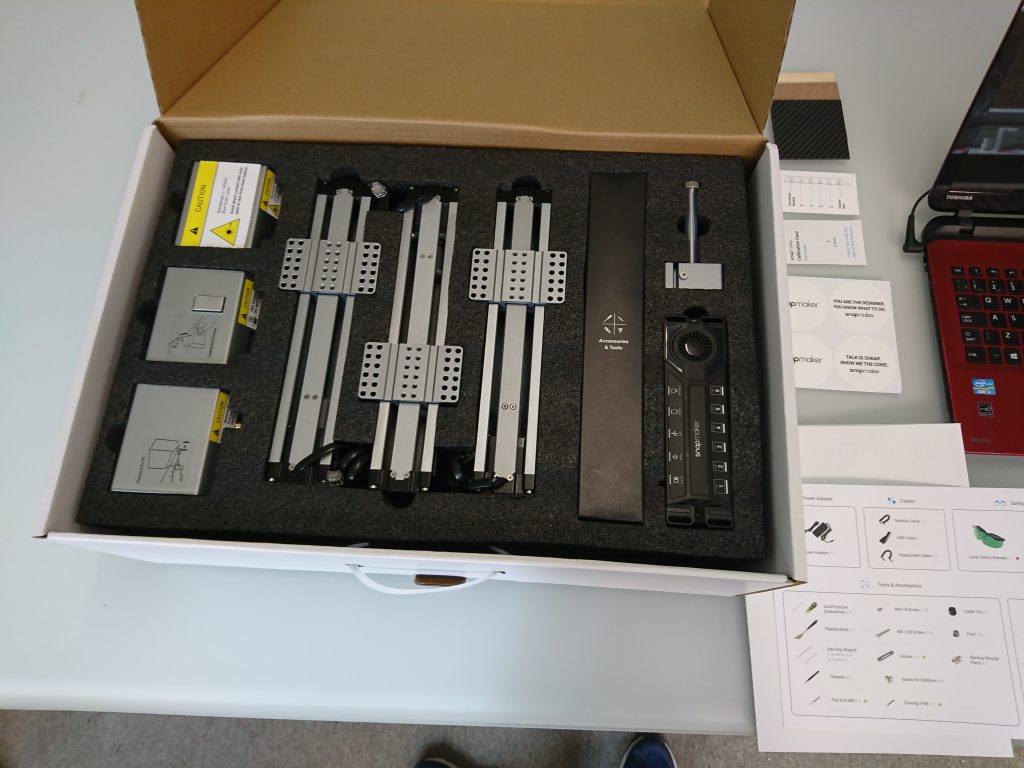
However, the assembly required is minimal. In less than 30 minutes we had a machine ready to 3D print. This is accomplished by pre-wiring the electronics within the three linear modules. In addition to these modules, the base plate, touch-screen, heated bed and control module require installation using the provided tools. While the tools are sufficient to complete the task, you may be more comfortable using your own set.
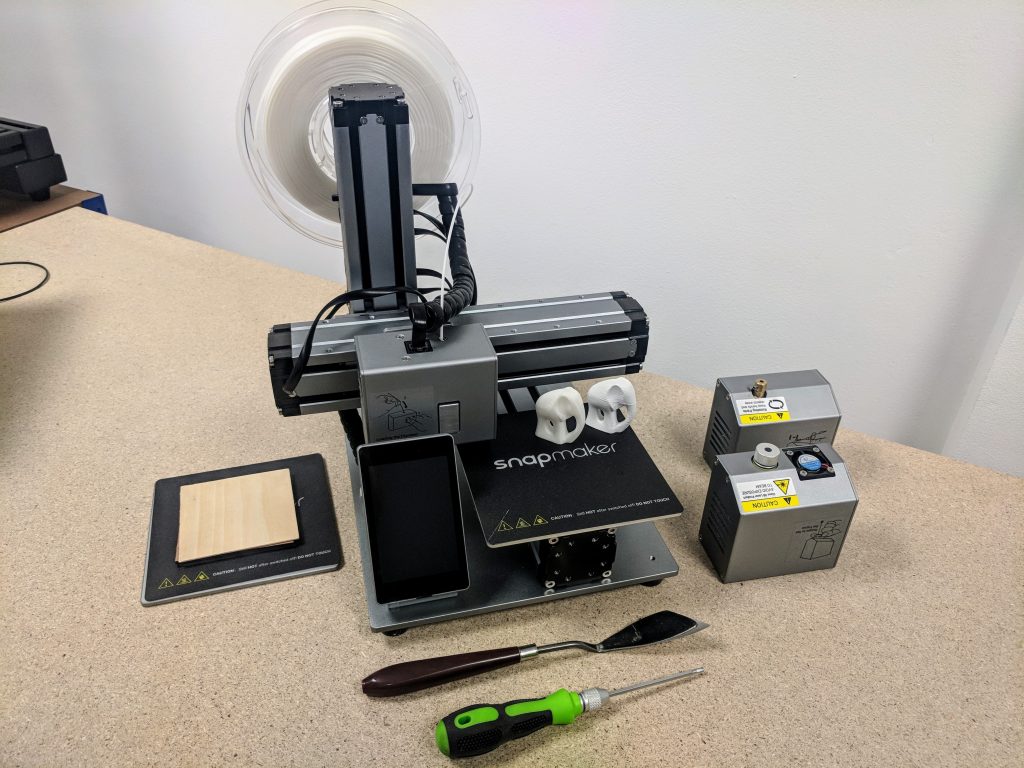
Also provided was a spool of 1.75 PLA filament, a filament holder, power pack, material for laser engraving and wrap-around safety goggles.
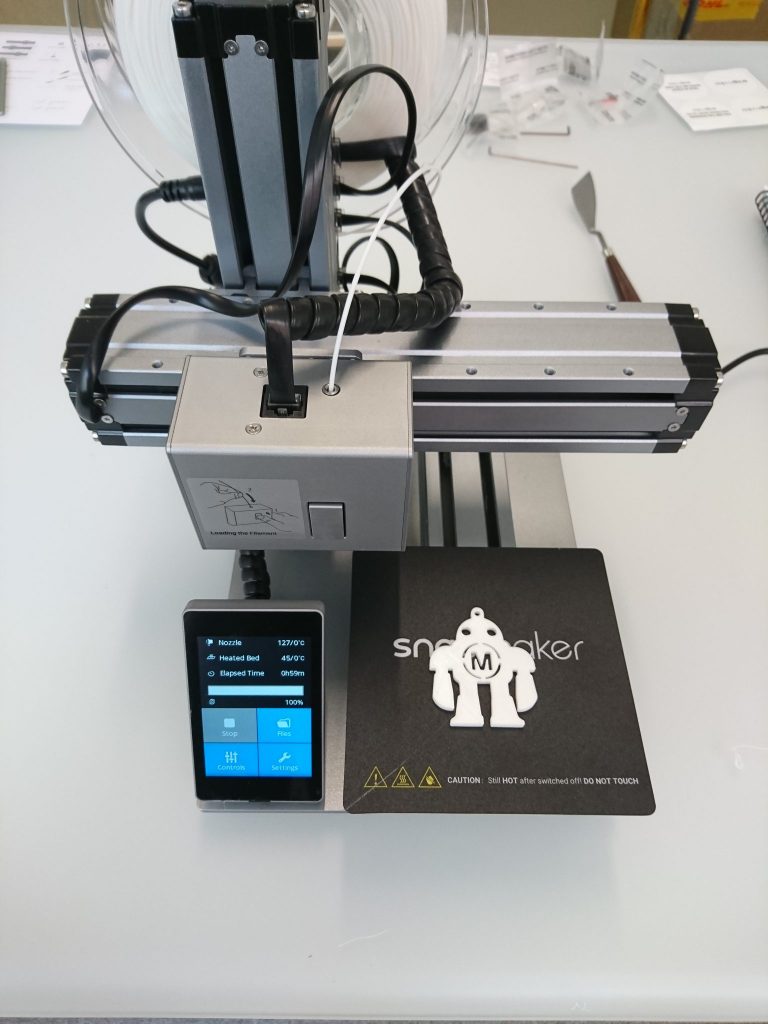
Once assembled the Snapmaker is a compact and sturdy 3D printer, enhanced by the solid metal frame. Then we began the calibration process. Bed-levelling requires a combination of manual adjustments and refinement with the provided touch-screen, the process was simple for anyone already familiar with 3D printing and unlikely to challenge a newcomer. The touchscreen is connected via an extensible cable which allows a freedom of movement not always seen in printers where controls are built into the main body.
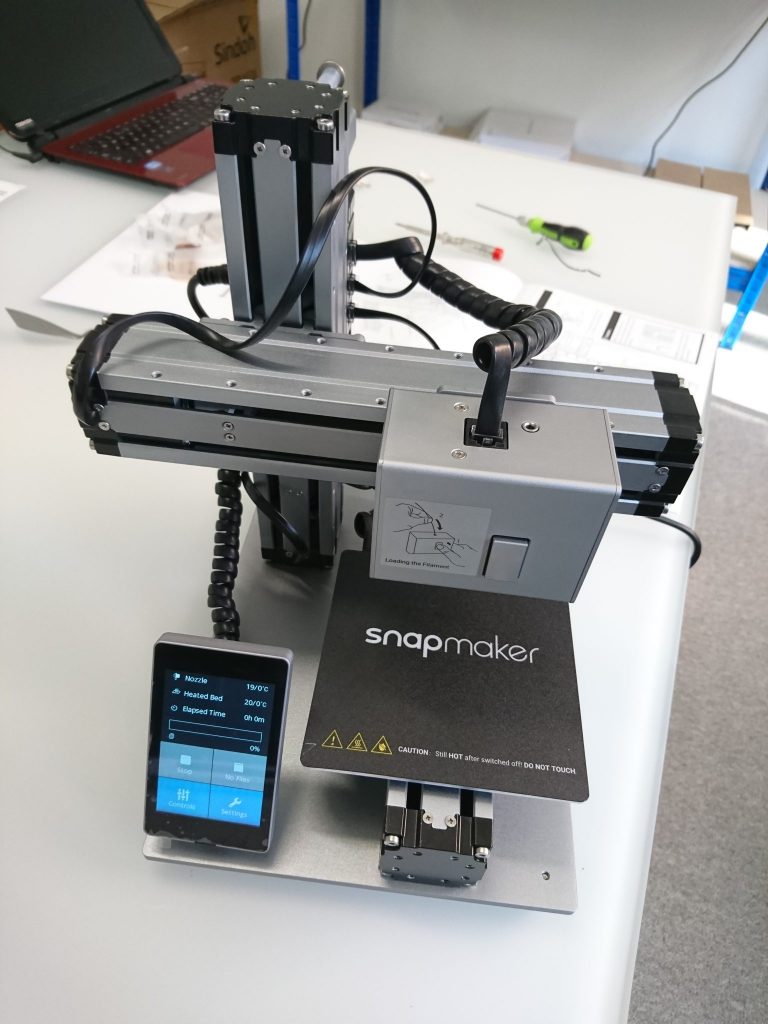
In 3D printing mode, the Snapmaker claims a heated bed temperature of 80°C, however our testing found that 100°C is achievable.
Feedstock management is handled by a direct drive system. Snapmaker has opted for an open materials policy and in addition to the provided PLA, ABS is also supported.
3D printing on the Snapmaker 3-in-1 3D printer
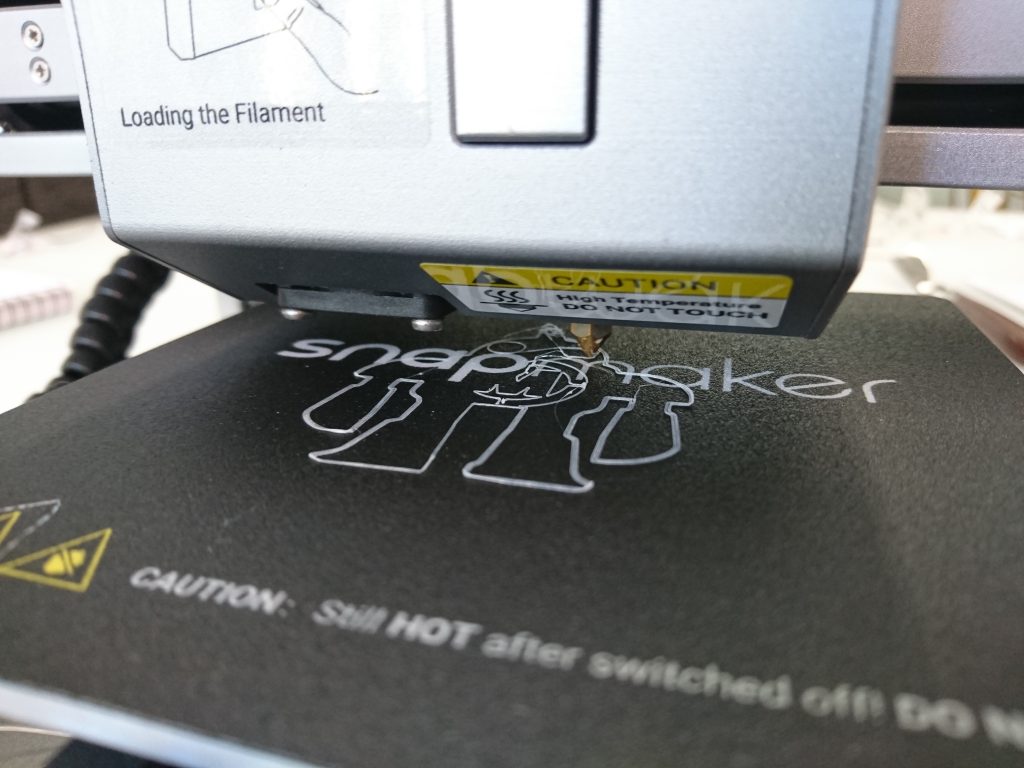
We began testing with the provided sample file, using the settings advised by the Snapmaker slicer software. On our first attempt we were not successful, however after a minor adjustment to layer height and changing the print speed to 10 mm/s for the first layer, this test print was successful.
At this stage it may be worth noting that while every stage was incredibly straightforward, we did detect an issue that may deter some users. The noise produced by the Snapmaker was distinctive. The Snapmaker certainly alerts you to its presence.
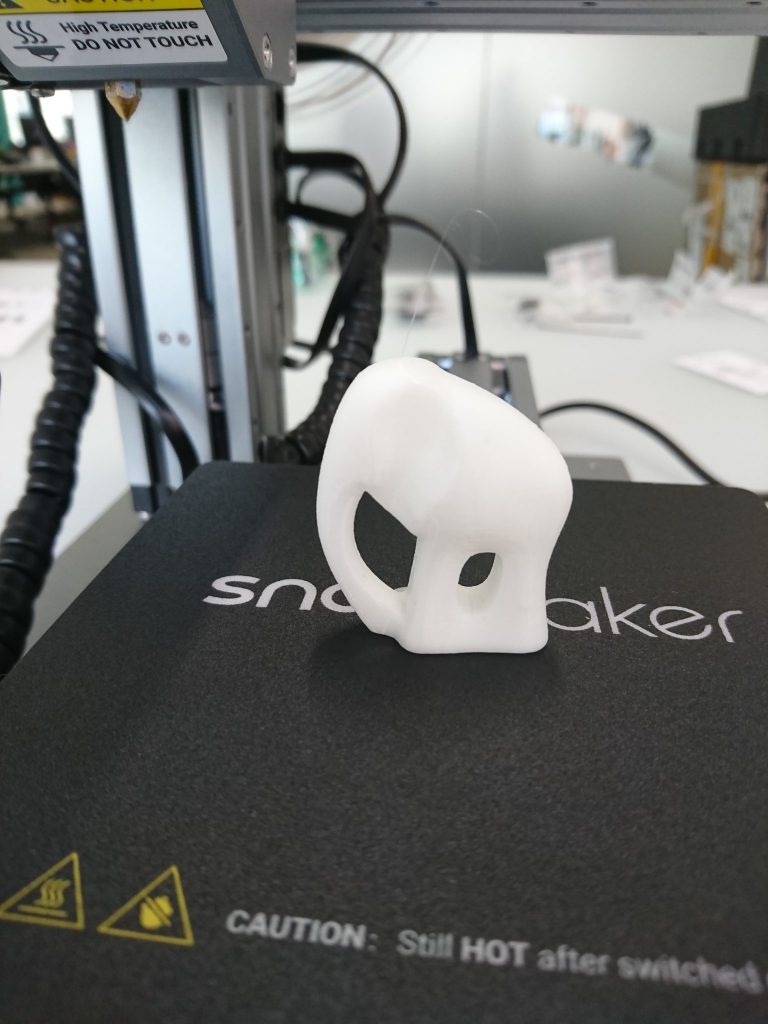
Moving on to 3D printing our own files, we began testing a model with PLA and ABS.
The Snapmaker lived up to it’s claims. It was a straightforward matter to 3D print with the test files. In both materials the resulting object was of a satisfactory quality, and both prints ran to completion with no issues. For the price, the finish on test models was good, layer adhesion on the Z axis appeared fine and there was no stringing evident. These were all positive aspects of 3D printing on the Snapmaker.
As the machine is aimed at beginners, some aspects of operation were not as straightforward as might be hoped. For example, the initial insertion of filament is a fiddly operation – however users will most likely become adept within a few prints.
Our engineering team did not experience any issues with the nozzle clogging, however the procedure for resolving a clogged nozzle is well explained. Our earlier issue with bed adhesion and how to resolve it is also covered by the FAQ.
Functional and fit-for-purpose slicing software is provided with the Snapmaker. The utilitarian software could be enhanced by extending capabilities to allow scaling of models in single direction and making it possible to add multiple objects to a print run.
Laser engraving on the Snapmaker 3-in-1 3D printer
Moving on to testing the extended functionality of the Snapmaker we tested the laser engraving module. Again, the instructions were clear and it was a simple task to change to this mode. To begin laser engraving, the 3D printing module must first be removed. This does not require the Snapmaker to be fully dismantled, in fact only 4 screws must be undone to swap out the modules.
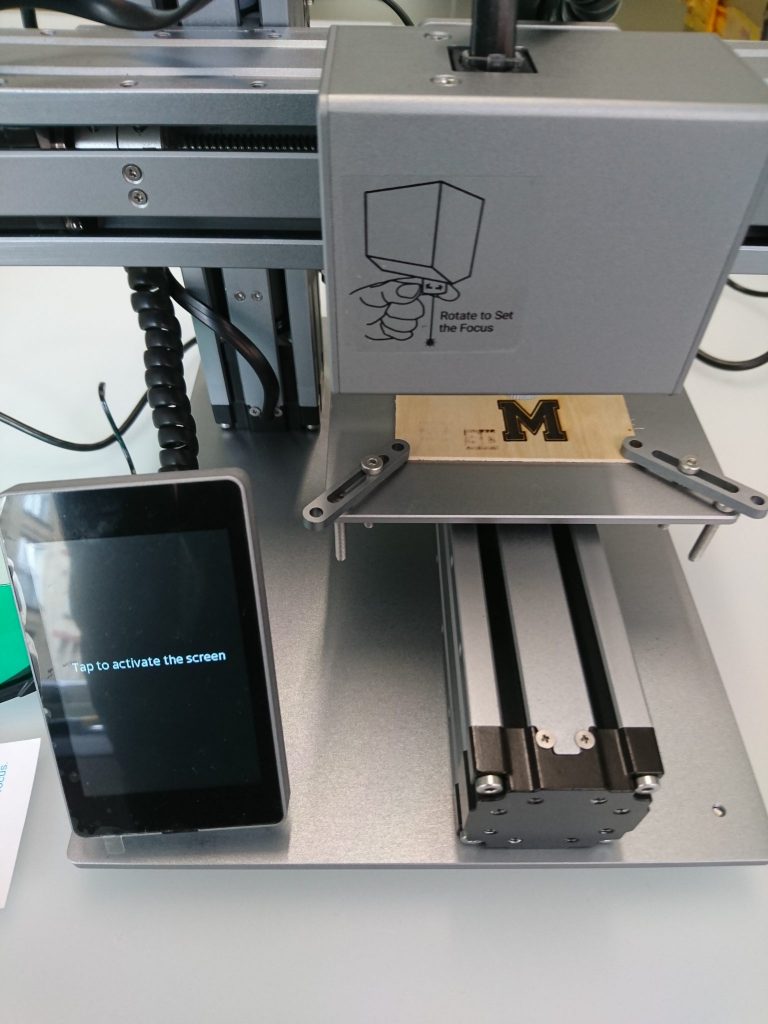
Once the laser engraving module is secured and a cable plugged in we were able to begin testing this feature. Importantly, a pair of UV protective eyewear is included in the packaging, however, we would have liked to see a UV protective casing around the printer that can be built and dismantled included. An enclosure is available from Snapmaker for this purpose.
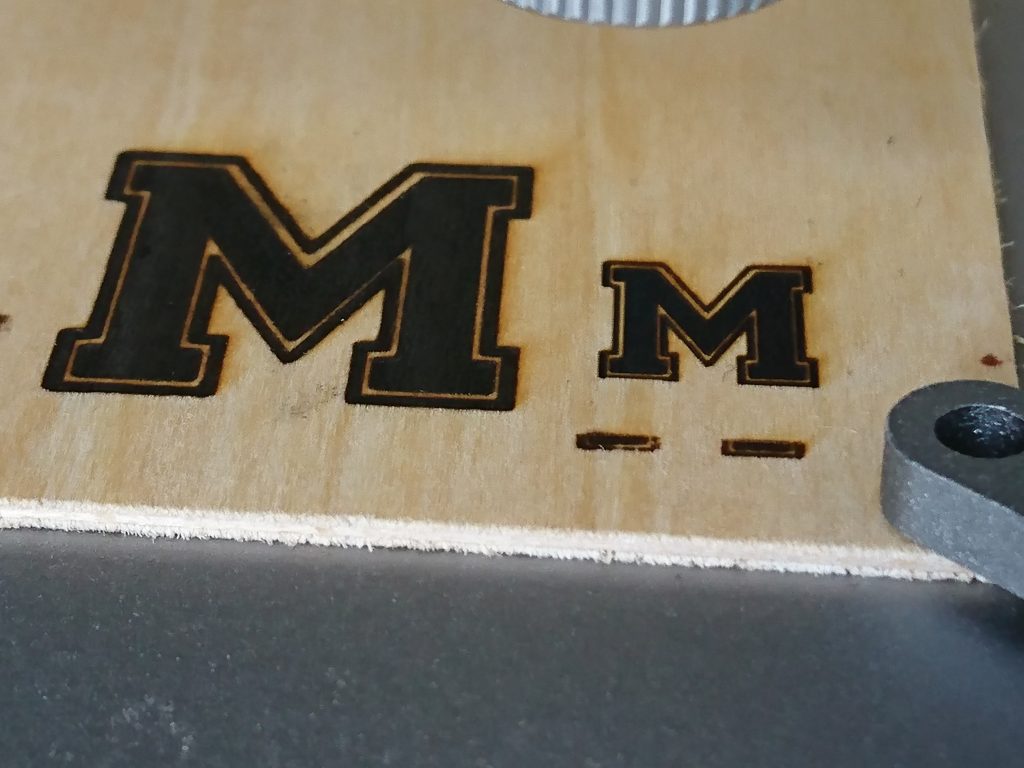
The default setting for the laser engraving seemed to err on the side of caution as the resulting pattern was not so well defined. However, by consulting the FAQ this issue was rapidly addressed.
On our second attempt the resulting engraving on the provided piece of wood was much better. When we described our initial results to Snapmaker we received a useful bit of information. The sticker on the laser engraving module for early models suggested that the focus of the laser could be be modified by rotating the knob on the module. This turned out not to be the case and this has now been rectified. Our engineers noted that during testing Snapmaker was very responsive to all questions in a way that was a pleasant surprise from an entry level printer, and customer service was even better than at some suppliers of higher quality machines!
Conclusion
The Snapmaker 3-in-1 3D printer doesn’t pretend to be anything it is not. The presentation and ease of assembly are testament to a company who is clear in their objective, to provide an entry level and affordable solution for those seeking an introduction to not only 3D printing, but the broader world of Makers. We will continue to test the Snapmaker’s functions and report on the CNC feature in the coming weeks.
For the cost, it is hard to argue that the Snapmaker does not deliver on these claims. With its minimal footprint and solid construction the Snapmaker can certainly allow the budding Maker to take the first steps towards turning a “desktop into a workshop”
The Snapmaker 3-in-1 3D printer is available online here.
For all the latest 3D printing news, subscribe to the 3D Printing Industry newsletter. Also, follow us on Twitter, and like us on Facebook.
Make your next additive manufacturing career move or hire new talent. Search and post 3D Printing Jobs on our free jobs service.
Featured image shows the Snapmaker 3-in-1 3D printer. Photo by Michael Petch.