Before going on to create the look for one of the most groundbreaking desktop 3D printers to be released this year, the Voxel8 electronics printer, Juan Carlos Noguera first designed the Nuke, a 3D printable, electric ukelele. As the culmination of his studies at the Rhode Island School of Design, the Nuke is an exercise in streamlined design specifically for desktop manufacturing, a functional object that can be made by even the most inexperienced Makers with access to relatively small printers.
After seeing Juan’s rad-looking design, and because I was recently loaned a LulzBot Mini to review, I decided that I had to print the Nuke myself, as a gift for my musical friend, Tony.
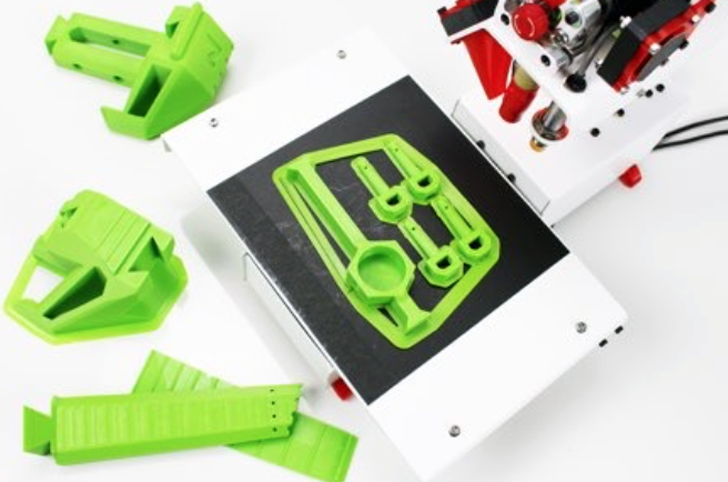
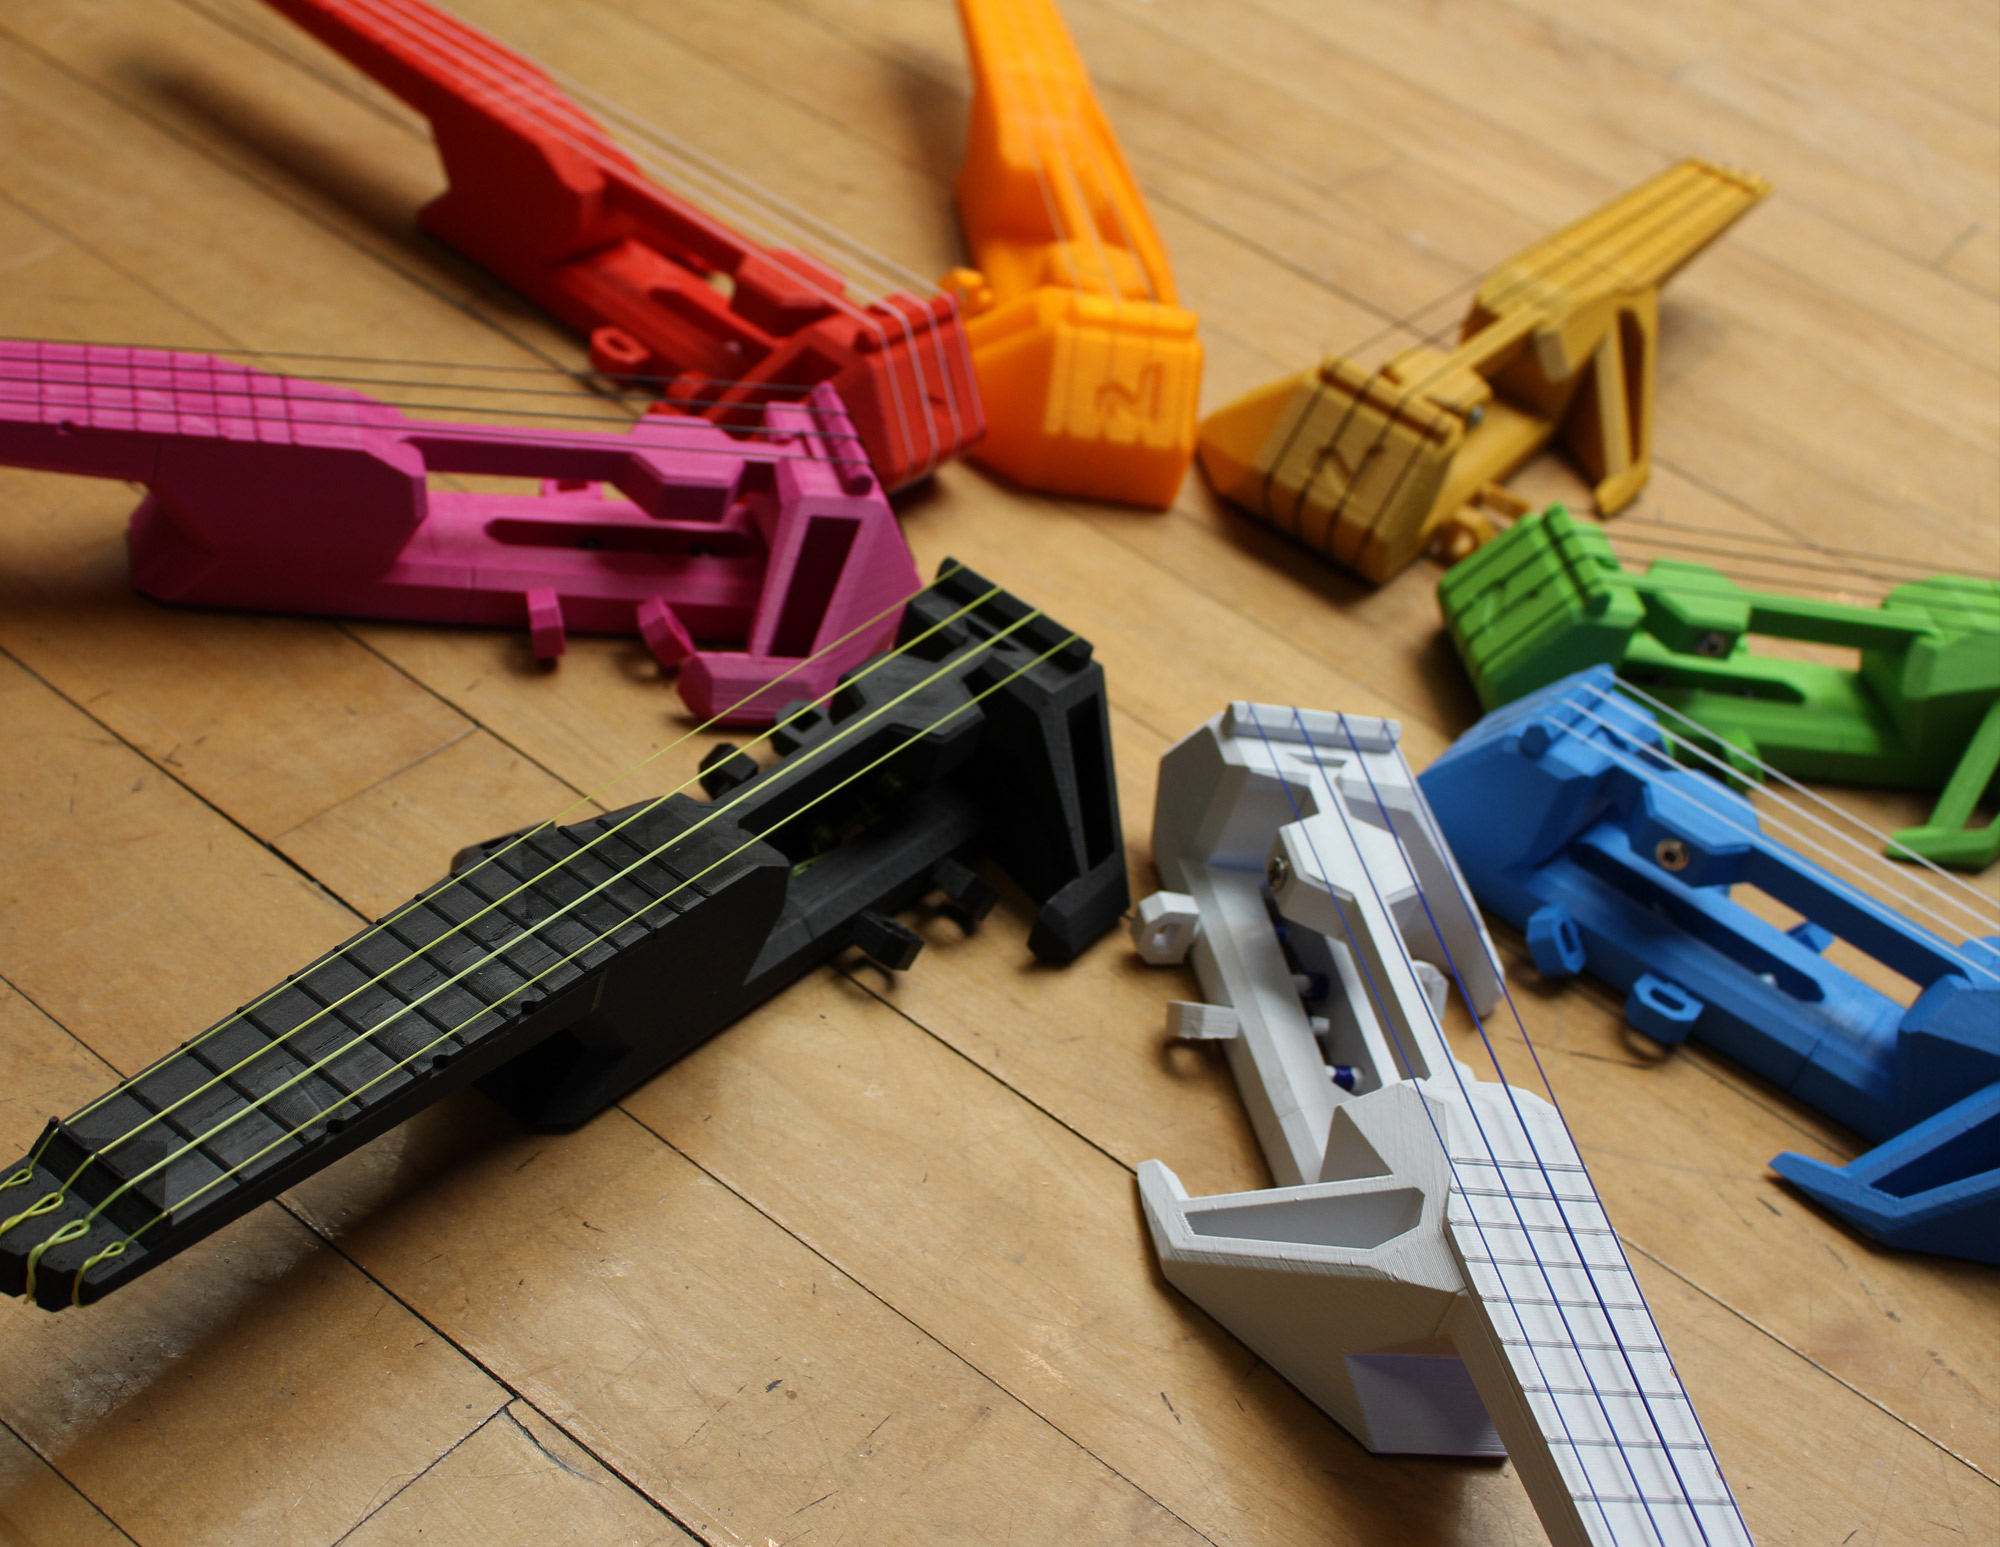
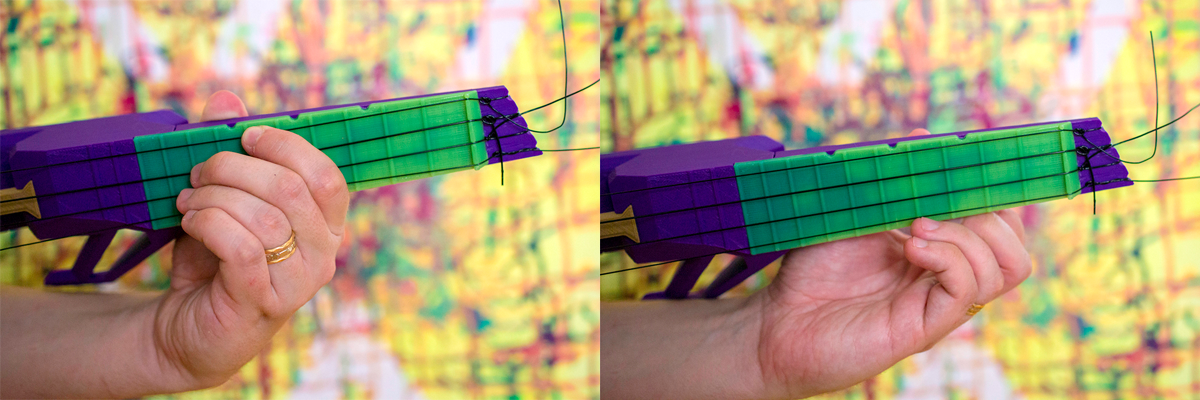
The Nuke is made up of five unique CAD files, which can be purchased as a $5 package: the body, neck, bridge, fretboard, and pegs (a single file that needs to be printed four times). Juan designed them specifically to fit into a printer with a bed of at least 6” x 6”, so that the majority of desktop printers can fabricate the Nuke without support structures. This allows for a refined, smooth look, while also ensuring the quality of the Nuke’s sound, as a rough fretboard or neck might lead to issues with the way the strings lay against the instrument. Of course, it’s also possible to print some of these parts on an even smaller bed, if they’re rotated and made with support structures. Luckily, this wasn’t an issue for me, as the Mini’s bed does meet Juan’s intended printer specs.
About the design and selling them through his own website, Juan tells me, “The Nuke ukulele is one in a series of experiments, looking into ways that product designers like myself can create completely 3d printable/3d printed products and attempt distributing them and selling them by their own merit, outside of libraries like Youmagine or Thingiverse. I believe that if we design thinking about 3D printing from the start, we can create appropriate products that are relevant and that will evolve and improve with the technology.”
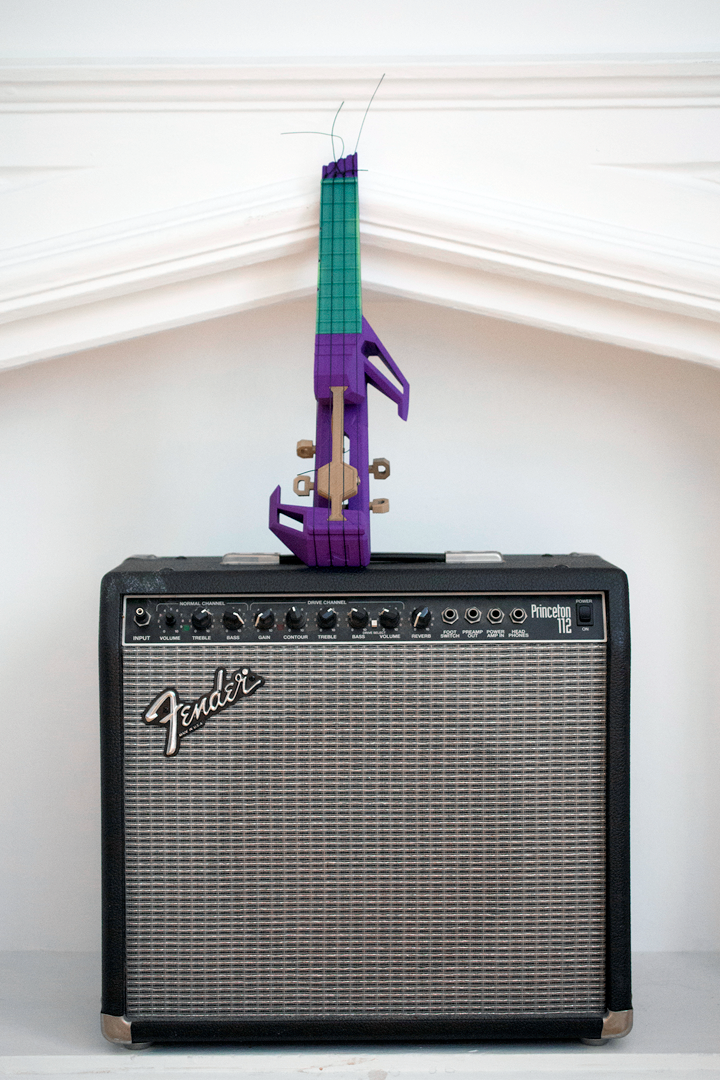 In Juan’s beautifully illustrated manual, he gives printer settings for the instrument, which include a brim, 20% rectilinear infill, 3 shell layers, and 3 top and bottom solid layers. He also states that the ideal layer thickness for the Nuke is .3mm using a .4mm nozzle. I opted for LulzBot Cura’s own settings, as Juan’s recommendations were for PLA and I was mostly printing with HIPS (which you can see in purple to the left). A combination of the Mini’s capabilities and Juan’s elegant design resulted in perfect prints for the body of the guitar. While I was using HIPS and a heated bed at this stage, Juan had accessibility in mind with the Nuke, designing the parts for PLA and saying, “I wanted something truly universal, that would print on a RepRap with no heated bed, as well as it would on a SLS machine.”
Though super glue is recommended for joining each piece – minus the pegs – most of them simply snap together with aesthetically pleasing dovetail connections. So far, I’ve only glued the fretboard to the neck of the ukulele, as it wouldn’t stay otherwise. Otherwise, it’s all snapped together pretty securely. This also gave me the ability to, at least in the case of the bridge and the pegs, try out different materials and colors to customize the Nuke to my liking.
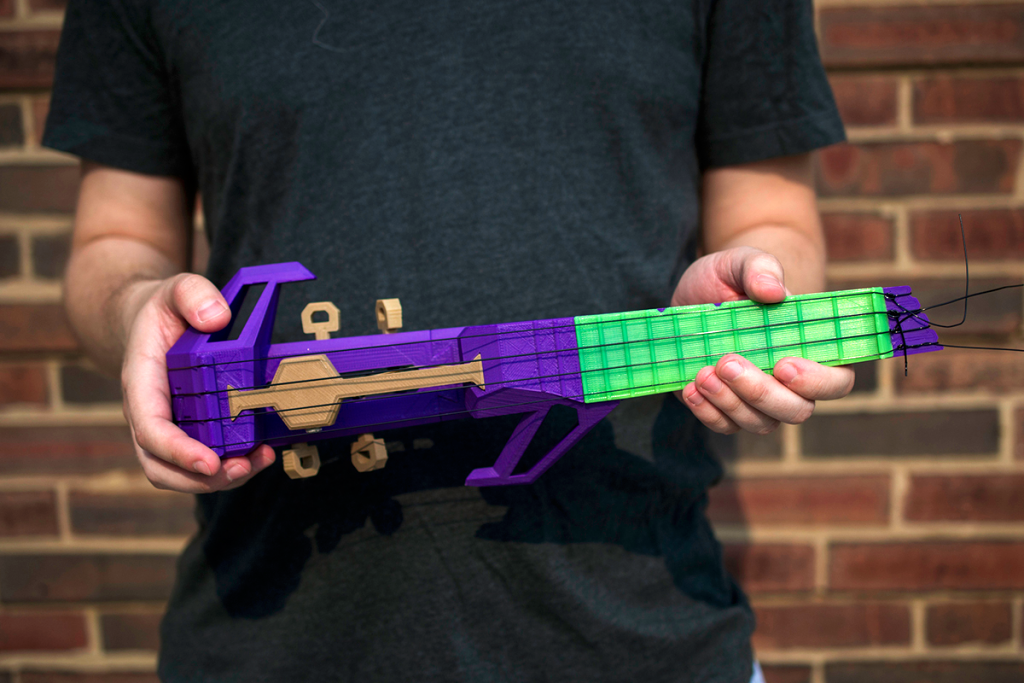
Because LulzBot printers are known for handling a wide variety of materials, I decided to try printing the Nuke’s components from materials that mass manufactured instruments might feature, so I headed to exotic filament sample provider GlobalFSD. On my guitar, I’m used to metal pegs, so I printed the tuning pegs in bronzeFill from ColorFabb, hoping for pieces with the heft and look of traditional pegs. I decided to print the bridge in bambooFill, with the hope that it might create greater resonance.
Then, with the fretboard, I thought it would be interesting to try out a color-changing filament, reasoning that the heat from a player’s fingers might cause the fretboard to change colors and indicate what notes were played. And, given the fact that the ukelele is one of the easier instruments to learn (the basics), such a feature would make this uke even better for beginners.
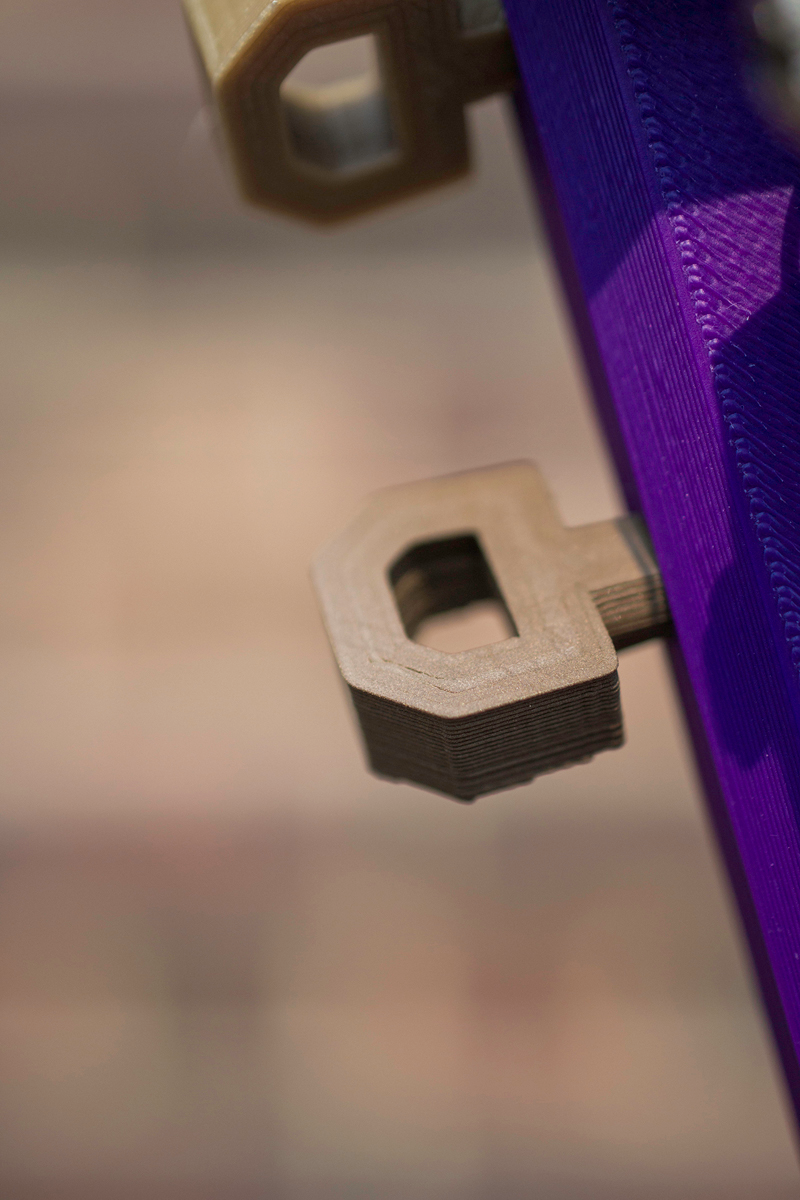
As much fun as I had printing with these specialty filaments, I’m not sure that the experiments really paid off. It’s difficult to tell if the wooden bridge is any more resonant and bronzeFill is actually a bit weaker than PLA and ABS, it turns out. As I was tuning the Nuke, all but one of my bronze pegs snapped, so I replaced them with gold ABS. The bridge, too, began to fall apart a bit. As for the color-changing bridge, I think it’s a cool element, but the changes in color last a bit too long, eventually preserving all fingerprints in a single jumble. To restore it to its former dark green glory, I would put the Nuke in the fridge. Then, when playing, it would turn bright green again, pretty much all over.
None of this is an issue with Juan’s design, which is pretty flawless. If I did have to critique one element, though, it would be the tuning set-up, which I found to be a bit cumbersome. The pegs are located right behind the bridge and are a bit difficult to reach. Nevertheless, the Nuke looks awesome and plays, once you get your electronic components from online (about $15 total).
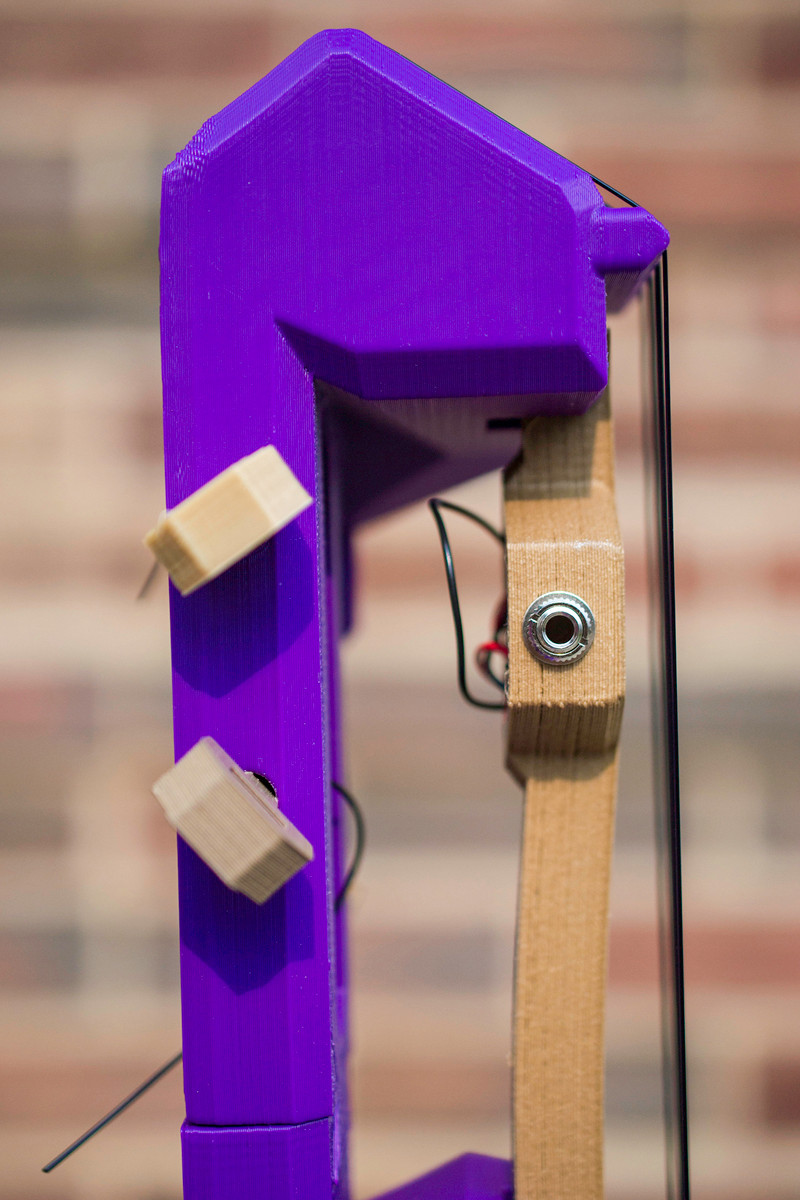 Using a piezoelectric pickup and a 3.5 mm jack, electrifying the Nuke is really simple for even the most inexperienced Makers (like me). All you need is a soldering iron and some lead paste. The wires of the pickup are easily soldered onto the positive and negative terminals of the jack and Juan has designed the pickup to fit snugly into the bridge (I didn’t use glue again, though I probably should?). Meanwhile, the jack just slips right into a hole in the side of the bridge, with a nut and washer securing it in place.
Then, you can plug it into an amp with a 3.5 mm, headphone-style cable and begin playing. Most amp owners will need a ¼” to 3.5 mm adapter for this purpose. To get it to sound nice, though, you’ll have to tune it and learn how to play it. To hear a pro play it, see the Nuke video below:
All in all, Juan’s Nuke is a stylish instrument and an easy project that is definitely worth the $5 to contribute to a talented artist. I can’t wait to see if Juan ends up printing the Nuke with the Voxel8 platform, as its simple electronics seem like the perfect fit for the electronics printer.
All photos by Danielle Matich of Volim Photography, unless otherwise noted.