Last year, the Ruiz Brothers at Adafruit celebrated the 25th birthday of the Gameboy with a complete tutorial for 3D printing and assembling your own Gameboy. The Raspberry Pi-powered project, dubbed PiGRRL, was so successful that, to kick 2015 off with a bang, they’re turning their attention to Super Nintendo (and a wide range of other consoles). For your 3D Thursday pleasure, Adafruit and the Super Ruiz Bros. are bringing you Revenge of PiGRRL. That’s right, today, they’ve published a tutorial for 3D printing your own handheld gaming system that can emulate the SNES and a range of other consoles, all powered by Pi.

In the video below, Noe and Pedro explain all that you’ll need to construct the Super Game Pi. As always, the Ruiz Bros. include helpful tips, such as how to sand and coat your PLA prints for maximum aesthetic appeal, and provide all of the necessary designs and software for constructing the device on the Adafruit Learning System.
The Super Game Pi is a big upgrade to the PiGRRL, in that it consists of a larger and crisper, 5″ HDMI TFT display; an analog 2-axis joystick; 2 mini metal speakers with a stereo 2.8W class D audio amp; a USB mini WiFi module; a bigger battery; and more (all of which you can purchase through Adafruit).
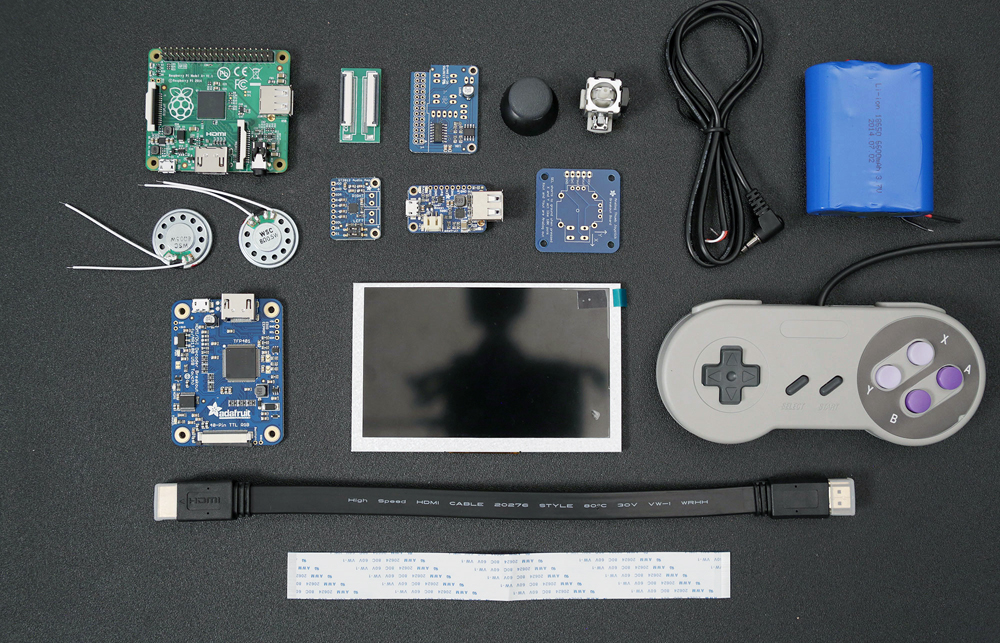
The device uses Emulationstation and the RetroPie image to emulate a broad range of gaming consoles, including NES, SNES, Apple II, PC, GB, and GBA. To construct the Super Game Pi, you’ll need to take apart your old SNES controller, wire up a number of components, and, of course, 3D print the Super Game Pi casing.
To print their handheld, DIY console, Pedro and Noe used a Lulzbot TAZ 4, as the parts require a build plate at least 226mm by 128mm in size. The case is designed in such a way that no support structures are needed and the L and R shoulder buttons are printed in Ninjaflex for a flexy, fun feel. Though the Bros. recommend coating prints in XTC-3D from Smooth-On, the printing and post-processing is the least of your worries in this project.
This is one in-depth build, so you may need some basic hacking skills. Noe, however, assures Adafruit learners that it isn’t too difficult. He tells me, “Although this one may appear like a challenging DIY project, we’ve made it very approachable for most DIYers. Our comprehensive guide is very detailed and thorough.” Regardless of its potential difficulty, this is one impressive project from Adafruit. And the year has only just begun, so we’re sure to see even more exciting stuff from the DIY company for many 3D Thursdays to come. For now, you can see Super Game Pi in more detail over at the Adafruit Learning System.