Italian researchers have published research that describes a method to improve the aerospace part validation process.
The part qualification method was tested on a 3D printed metal bracket used in satellites.

3D printing metal aerospace parts
In aerospace applications, the titanium alloy Ti-6Al-4V is a common material. Recently, BeAM and PWC partnered to qualify an airplane part made with Ti-6Al-4V using Directed Energy Deposition (DED).
Validation of such aerospace parts is based on nondestructive testing methods, using Finite Element Analysis (FEA), a numerical method to study thermal or other properties of a structure. According to the authors of the latest papers, there are no other studies which carry out tests on the actual component. And FEA does not ensure that there will be no discrepancies between the mechanical and geometrical characteristics of a CAD model and the manufactured part.
According to the paper, despite there being several experimental methods for testing 3D printed parts, “no work has been done about performing stress analysis on the actual component, in order to compare the experimental results with the expected mechanical behavior.”
This motivated the Italian researchers to investigate a nondestructive test method that could be added to existing models for aerospace part qualification.

Thermoelastic Stress Analysis
To fill the gap between digital and concrete testing, the researchers suggested adding Thermoelastic Stress Analysis (TSA) to the FEA for part validation.
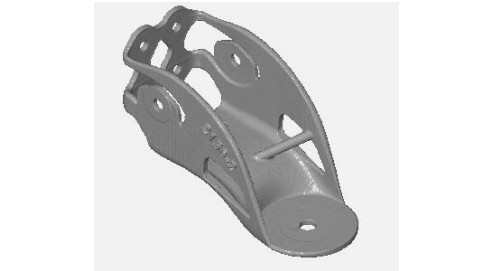
For the test case, the researchers used a 3D printed satellite bracket made with Ti-6Al-4V alloy. The bracket attaches the satellite body to the antenna and has to tolerate extreme temperatures in the space atmosphere. The part used in the study was made using an Electron Beam Melting (EBM) printer.
Furthermore, an equation was derived for thermoelastic analysis from a previously published work called Stress and strain measurements by image correlation and thermoelasticity.
Testing the satellite titanium bracket
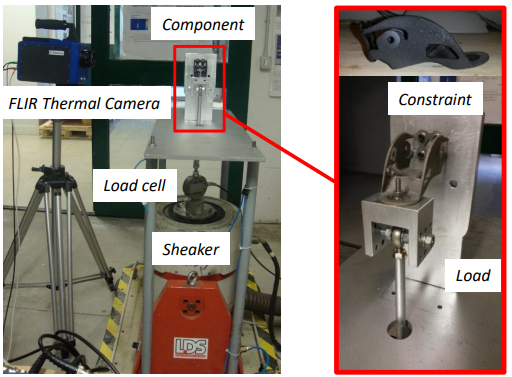
The researchers mounted the 3D printed part onto a constraint and applied stress to it. For vibration testing, a PID controlled electrodynamic shaker was placed underneath the component.
A FLIR SC7000 infrared camera for thermal imaging collected thermal data and sent straight to Altair LI, an infrared imaging software.

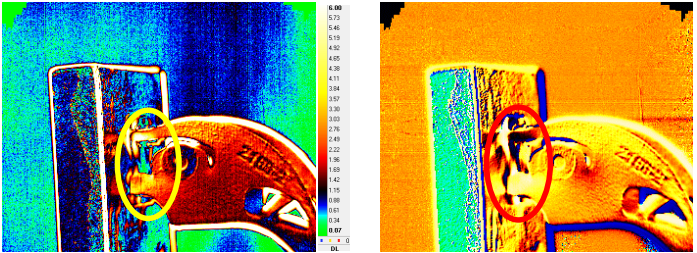
Finally, the data from FEA and TSA was compared. The dataset focused only on the spots with high stress. The results attested that TSA methodology complimented the data acquired through the CAD model using FEA.
The paper concludes: “Results show the same trends at larger scales, but smaller unexpected peaks in the TSA data and in the evaluated FEM, due to the particular micro and macro confirmation given by the Additive Manufacturing process. Hence, our measurement technique, in conjunction with usual morphological and dimensional investigation, could make available a more complete Non- Destructive qualification process for AM made aerospace brackets, giving information about the effective mechanical behavior of these structures.”
The research discussed in this article was published in a paper titled, Non-Contact Measurement Techniques for Qualification of Aerospace Brackets Made by Additive Manufacturing Technologies. It was co-authored by G. Allevi, M. Cibeca, R.Fioretti, R. Marsili, R. Montanini, G.Rossi.
For more news on the developments in the aerospace industry, subscribe to our 3D printing newsletter, and follow us on Facebook and Twitter.
If you are looking for a job, visit our 3D Printing Jobs.
Featured image shows the use of thermal imagery to test the titanium components in the study. Image via IOP Publishing


