While some 3D scanner companies are working to scale down the cost and size of 3D laser scanners, mechanical engineer Callan Mackay has decided to take matters into his own hands. Mackay, a graduate from Scotland’s Heriot Watt University, has taken onto Instrutables.com to show how to build an affordable and functional 3D Laser Scanner. Mackay’s DIY scanner is capable of scanning both indoor and outdoor environments, and seems to offer some big capabilities for a fraction of the usual cost.
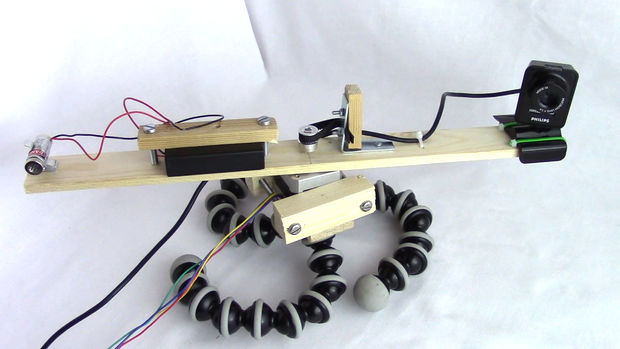
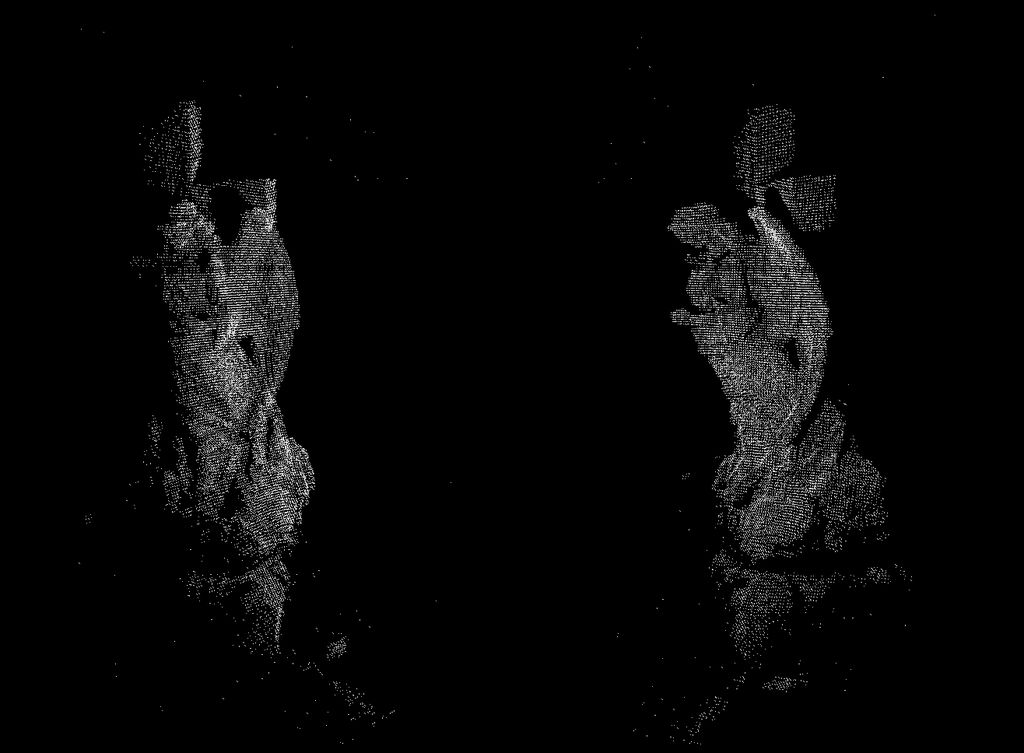
This isn’t the first laser scanner on Instructables; there have been quite a few different iterations ranging in price and quality. But, according to Mackay, there are two major factors that set his scanner apart from the rest. First, his does not utilize any 3D scanning software whatsoever and, instead, uses Arduino and Processing. Secondly, as opposed to other scanners that generally use a turntable mechanism to scan relatively small objects, Mackay’s 3D scanner turns both the camera and the laser, allowing for a 360 degree capture. Mackay claims that this feature makes his the ideal advice for video game setting design or even full-body and facial scanning.
Depending on what source you go through to buy the necessary parts, Mackay estimates that, in order to fully build the 3D Laser Scanner, it will cost you just around £20 to £30 for the parts that Makers may not already own. Here is the full list of materials, electronics, tools, and programs needed to complete the project yourself.
Materials required:
- External webcam
- Line laser module
- NEMA 16 Stepper motor and pulley
- Timing belt (~10cm)
- L-shaped bracket
- Terry tool clip (9mm)
- 3 x AA battery pack
- Tripod
- Some strips of wood
- Nuts and Bolts
- Screws
- Zip ties
Electronics Required:
- Arduino Uno
- 16×2 LCD screen (optional)
- 2 x Potentiometers (optional)
- Stepper motor Driver (A4988)
- 12v Power supply
- 100uF Capacitor
- Jumper wires
- Breadboard
- 4 x Screw terminal block connector
Tools Required:
- Drill
- Wood saw
- Screw driver
- Wire clippers
Software Required:
- Arduino
- Processing 3.05b
Aside from the lengthy, yet moderately affordable component checklist, there is a lot of drilling, fastening, and cutting involved with the build, so the project definitely seems to require a certain level of handy experience. But for those feeling capable or ambitious enough, Mackay is satisfying both the visual and textbook learners by providing full step-by-step instructions in both on YouTube and in text via Instructables. Mackay’s 3D Laser Scanner project has been submitted into the 2016 Full Spectrum Laser contest, so if you think his project is worthy of recognition, you can throw his entry a vote here!