A publication in Nature from the Micro & Nanotechnology Laboratory and Department of Mechanical Science & Engineering at the University of Illinois Urbana-Champaign gives instructions on how to 3D print, mold and seed moving bio-bots.
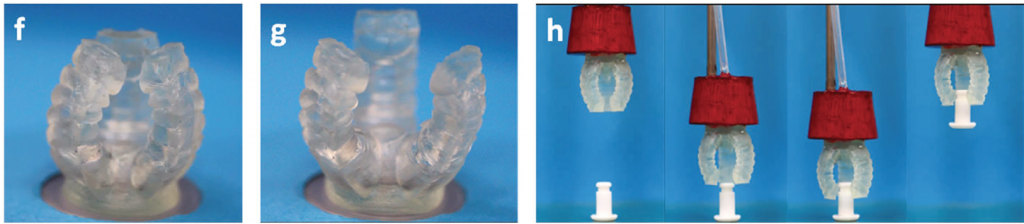
Moving gif shows a 3D printed hydrogel/muscle cell bio-bot powered by 1HZ of energy. Clip via NewsAtIllinois on YouTube
Living machines
Using live matter to create a miniature machine means that the bio-bots are sensitive to their surroundings. They can be used to record changes in the environment and have potential applications in medicine for internal examinations. It is also hoped that the research could lead to tissue engineering organs suitable for transplant into humans.
Commenting on the research study leader Rashid Bashir, the head of bioengineering at the University of Illinois says,
This work represents an important first step in the development and control of biological machines that can be stimulated, trained, or programmed to do work. It’s exciting to think that this system could eventually evolve into a generation of biological machines that could aid in drug delivery, surgical robotics, ‘smart’ implants, or mobile environmental analyzers, among countless other applications.
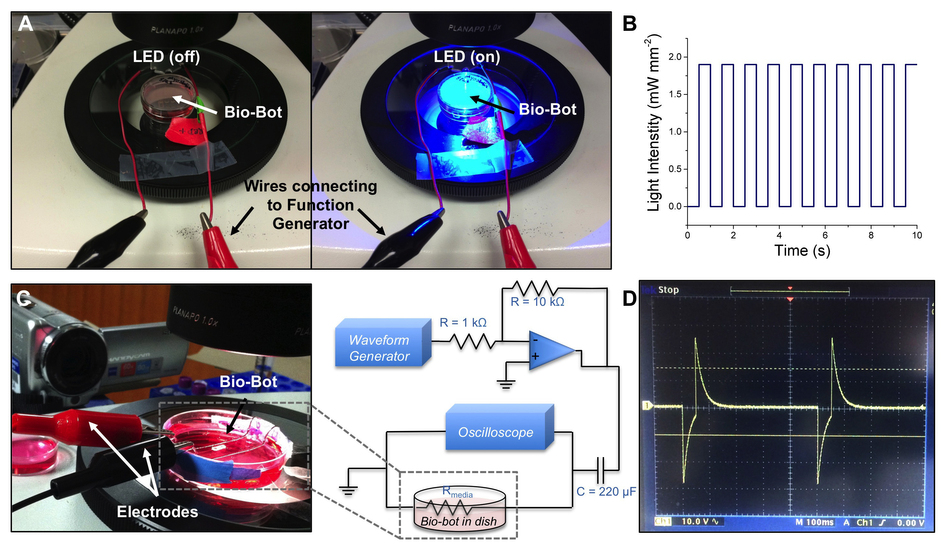
Electrically charged
The bio-bots are made in a 3D printed flexible hydrogel (stable in water), and are laced with muscle cells. Movement of the muscle cells is activated by a low-voltage electric charge (between 1 & 4 hertz).
The whole process is realised in the paper through 26 steps, from “CAD file preparation for 3D printing” in SolidWorks, to the final “Assessment of engineered muscle rings” e.g. how to quantify the DNA content of the muscle and its viability.
It also takes an approximately 8 days to complete when broken down into the three core stages:
- 3D printing of the injection molds – 3 hours
- Seeding the muscle actuators with cells – 2 hours
- Differentiating the muscle – 7 days
The transparency of the steps is to encourage other research institutions to experiment with the process, and accelerate the rate of innovation in tissue engineering. Other soft-robotics taking a similar approach operate with microfluidic or pneumatic processes.
The combined effort of researchers in Singapore and Israel has developed stretchy DLP printable materials that react to air pressure, and MIT use water pressure to move a hydrogel claw for catching fish.
A previous stage in the University of Illinois’ project included the integration of heart-tissue too, which could have application in lab-on-a-chip type investigations.
Featured image shows a graphic render of a bio-bot by Janet Sinn-Hanlon, University of Illinois