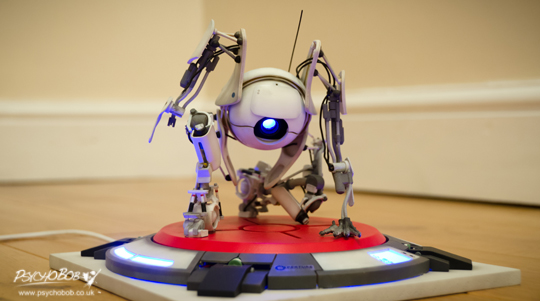
3D artist-slash-modeller Psychobob has combined his interests in 3D printing and gaming with some quite spectacular results. One of his latest creations – his third 3D printed project to be exact – is related to Portal 2 and it comes in the form of the co-op bot Atlas. It is not necessary to have any experience of playing the actual game to fully appreciate the design — the final result comes in such detail and demonstrates great complexity that it could very well be one of the most intricate and ambitious 3D printed projects coming from the consumer enthusiast segment to date.
The video below depicts the man behind the project himself explaining the main process – that of the Atlas – and the Psychobob-specific thinking on the actual execution phase and how it was done. It’s quite an interesting mix of combining the forces of his own creativity – e.g. using painted guitar strings for aerials – and Shapeways for manufacturing the majority of the larger parts. All of these parts were modelled using a DIY-ethos – by first gathering a vast collection of Atlas’ images from all different angles and distances and then creating the 3D models ready for 3D printing.
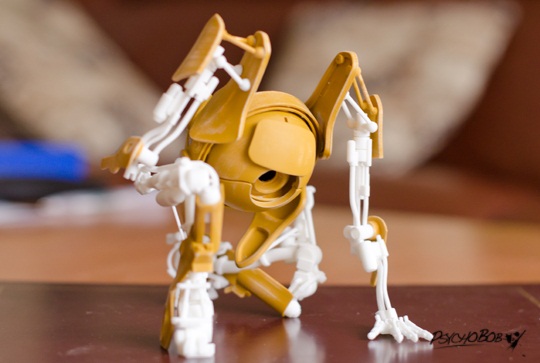
After receiving the unpolished WSF-plastic parts from Shapeways, Psychobob smoothed the pieces himself by applying filler spray and wet sanding. In the image below the parts are temporarily assembled – the white pieces being still unfinished.
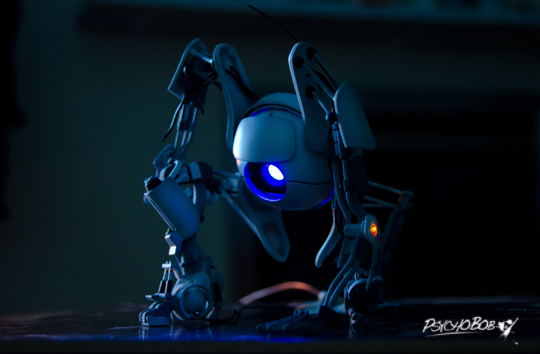
After the smoothing phase Psychobob used an airbrush and finished the parts for an even look before applying a gloss coating. Being a person unafraid of electronic challenges, he then wired up the LED circuit before finally putting the pieces together. A picture of Atlas in the assumed position in the dark is something to really feast your eyes on.
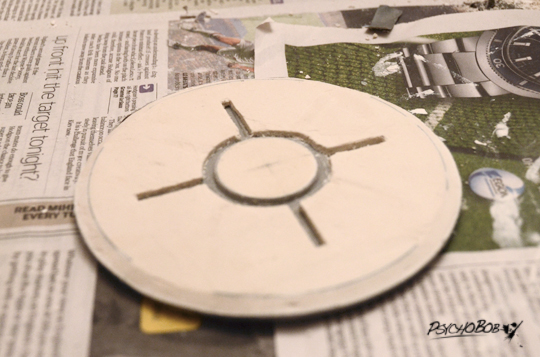
The project was still not finished, however – not without a base for Atlas to be crouching on. This latter phase of the project required a different approach and chosen to cut down some costs. Psychobob decided to go the traditional route by building the needed pieces himself using a CD spool case and some plaster. Unfortunately things didn’t exactly go as planned, as you can see from the image below of the plaster base after a good night’s setting.
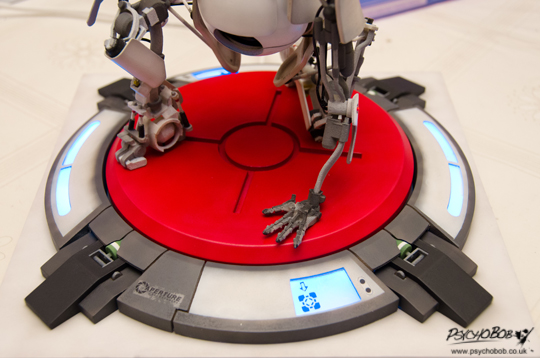
After the frustrating results from using plaster he decided to continue via the route used for the bot’s parts as well – 3D printing them via Shapeways. After the same repetitive process of smoothing, polishing, painting and of course an immense amount of love and care the base parts were ready for assembling. Psychobob mounted the base on some MDF for some added rigidity

Any model without decals is an unfinished one, so after the painting process it was time to design those using Photoshop and a special paper intended for this purpose. This phase did also witness its share of setbacks, but some ingenuity in the form of clear coating the decal papers before trying to remove the detail features themselves did the trick.
The final phase of the project was to make the circuit for the base and then putting all the pieces together. Below you can see two images of the finalized Atlas bot – astonishing would be an understatement in my opinion.
If you want to take a closer look at the base design and build, check out the designer’s later autotune-flavored video of the final part of the process below.
As this was only Psychobob’s third project using 3D printing, he is sure to face some very high expectations from all modelling, 3D printing and gaming communities and aficionados in his future projects if the wants to top this one. Amazing!
Source: Psychobob


