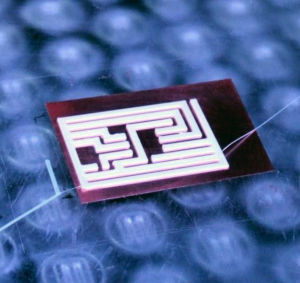
A new Instructable was just posted detailing how to use flexible 3D printing material NinjaFlex to etch circuit patterns onto copper. While the process will work for any type of copper board, it is especially useful for flexible or oddly shaped circuits.

Once the pattern is ready it should be test printed directly onto the bed, then before it is pulled off the surface, mark the edges so you know where to put the copper board. The Instructable suggests that once the test print has been cleaned away the flexible copper board should be attached to the print bead with spray-on adhesive. This is because the board needs to be completely flat, if it has any bumps or curls it will interfere with the print. Once the print bed has been leveled perfectly then the circuit pattern is ready to be printed onto the copper board.

While any material can be used to 3D print the pattern onto the circuit board, PLA, ABS and Nylon all have problems adhering to copper and would not stick on long enough to correctly etch the pattern. However NinjaFlex sticks to just about any surface quite well, and despite being flexible is actually quite durable.
This method can also be used to 3D print onto standard FR4 circuit board material as well, the print bed simply needs to be leveled correctly to compensate for the added thickness. And of course thin copper clad board isn’t the only flexible material that can be used, plated conductive fabric would work just as easily and the etching works almost the same.
If you get stuck while printing your circuit boards you could always ask mikey77 for some help, he seems very active in the Instructable comment section. And if you’re an advanced circuit maker, he’s also posted an Instructable for 3D printing solderless circuit boards.


