The Makerbot Replicator 2 3D printer has been out for a while now and yet every review I have seen has been about the same or thereabouts. There have been many that purely praise the Replicator 2 and refer to it as “the new industry standard” or “a revolutionary invention that will change the world” but without providing any solid evidence to back up these claims. Don’t mistake me here, I am a big fan of 3D printing in general and have been involved with the technology for a few years with the opportunity to handle a wide variety of machines. When looking to purchase a 3D printer of my own just over a month ago, I bit the bullet and bought a Replicator 2, at the not inconsequential cost of $2,199, not because I necessarily believed all of the marketing material but because it offered the best available option for my needs. As it transpires, my experience with this machine so far has been one of love and hate. I aim to outline why here.
First, though, some background. The Rep 2 is essentially a market-leading product from Makerbot Industries (MBI) — the company has a really great marketing team that has managed to brand the company as the leader in the 3D printing revolution. A great deal of the media coverage and reports point to the Rep 2 being a solid machine that requires little or no maintenance. From my experience, this is not true of any 3D printer on the market at the moment, but having dealt with the hardships and toils of operating a Makerbot Thing-O-Matic (TOM) in the past, the new-look, redesigned Rep 2 did and does have a certain appeal and while it is a definite upgrade in some areas, in others — not so much.
For those of you reading this that are new to the 3D printing game, the TOM was the second 3D printer offered by MBI in years past. It was sold as a kit or pre-assembled with the promise of being able to print continuously via the use of a conveyor belt platform. The conveyor belt system never really worked and most TOM operators scrapped it for the standard heated platform. From my experience, most TOM operators will tell you they spent more time calibrating and repairing than actually printing. Having come from this experience, the promise of “zero maintenance” with the Rep 2 was an attractive one. I never really expected zero maintenance, but I was expecting it to be greatly reduced in comparison with the TOM. Yet to my dismay I encountered many issues in the first couple of days after taking delivery of my Rep 2. I was able to resolve most of them with some significant hacking and performing a few modifications, but while this was not a chore or new hurdle for me after working with temperamental and experimental machines, the fact is, it was still necessary to get the Rep 2 to work properly. It certainly blew the claims of “zero maintenance” out of the water. And what about the new wave of 3D printer users, without hacking experience?
MBI has successfully marketed itself as the beacon for those interested in 3D printing but lacking in knowledge and/or experience with the tech. The company has been referred to as the ‘Apple of 3D printing’. I have spoken to a few people who have bought a Replicator 2 without any previous experience of 3D printing, including one individual who sent his back because he believed it to not be working. Upon further inquiry, it seems his issue was just a problem with extrusion, something everyone in the industry no matter the machine, experiences.
I have now spent a lot of time torture testing and learning the ins and outs of the Rep2 and here are my findings by category — like I said, some days I love it and some days I hate it. This will be reflected as I write, but I do want to share my inside knowledge and keep it real for anyone looking at or considering 3D printing for themselves.
FRAME
Makerbot has done a great job with the Rep 2 by switching to a steel frame with black (HDPE?) panels. It’s a nice redesign in terms of aesthetics and really sets this machine apart from the first Replicator. A great number of 3D printers in the wild rely on a laser cut plywood construction, which, regardless of functionality, certainly lacks a ‘professional’ appearance. And talking of functionality — the plywood construction can lead to your machine literally falling apart from vibration during high speed prints. For example, with the TOM, running sailfish accelerated firmware, the bolts will unscrew themselves! The Rep 2 running at those same speeds seems to have no trouble. The weight and solid construction of the steel frame hinders a fair amount of vibration as well as noise.
A definite improvement
XY GANTRY
With the original Replicator 1, MBI finally left behind the terrible XY gantry of the Thing-O-Matic. The TOM was different from even most DIY RepRaps. Instead of the extruder moving along XY, X, or Y, on the TOM it moved purely on the Z-axis whereas the platform moved in the XY plane. This meant your print would constantly be in motion, would often fall over or off and there was a loss of print quality. The Rep 1 actually took a hint from the Ultimaker and put the extruder on the XY plane. Not much has changed in the design and components for the gantry in the Rep 2 because of this. It is almost identical to the Replicator 1. The same injection moulded parts are used. There is one change, however, and this is in the way the Y-Axis smooth rods and idlers are held in place. There isn’t much in the way of innovation with the Replicator 2, but this part is just fantastic for its simplicity. At each corner there are injection moulded blocks that the Y-Axis rods snap into. These same blocks also hold the timing belt idlers with snap-in bearings. Why do I find this so great? With many 3D printers there are seemingly unintuitive and weak methods of accomplishing this simple task. On previous Makerbots and as well as many other printers on the market, rods are held in by a hole in the plywood frame and screw-on cover. There is more stability in this component, and to be fair this does greatly reduce maintenance time (particularly compared with the TOM). It is hard to deny that Makerbot has matured in its design process greatly.
EXTRUDER
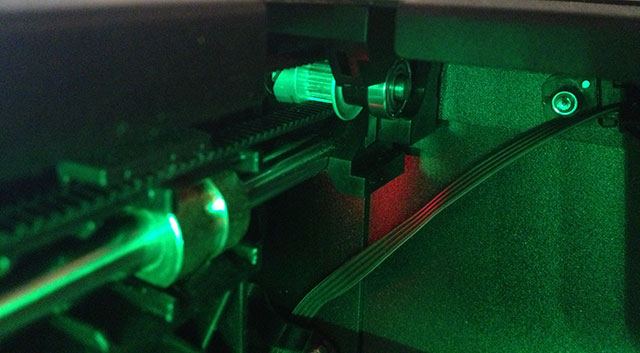
The extruder is the most crucial part of any 3D printer. Any other component can operate poorly and you can still, just about, manage a print, but without a well functioning extruder you simply cannot expect any level of success. That being said, it is troubling that little has been done to improve on the extruder on the Rep 2. The Replicator 1 and 2 have an identical component with only a slight variation in the nozzle. Also, there is a minor modification in the way the thermocouple and heater cartridge are attached and the Rep 2 also sports a secondary fan for the blower. The blower is a necessary addition that allows for better printing with PLA. It helps to reduce warping and is something I’ve seen in other machines — not an innovation and not a noteworthy change.
The extruder drive block has not changed since the MK7 extruder, which shipped with later versions of the Thing-O-Matic. This is the injection moulded block that goes between the heatsink and stepper motor on the extruder. The block houses a small grub screw that pushes the filament against a gearwheel to create tension in order to push the filament into the heated nozzle. This design had been deemed obsolete and prone to excessive failure by the community of Makerbot Operators. The delrin plunger on the grub screw quickly gets worn down and loses tension. In the past this was the reason for countless hours of time and plastic wasted on failed prints. In the first two days of using my Replicator 2, I had extruder jams constantly. I had trouble even loading and unloading filament. Eventually this caused the nozzle to jam up. So much so I had to use several chemical treatments on the nozzle followed by cooking it on the stove and cleaning it with a needle. Finally getting it to work, the nozzle wasn’t re-seated properly, causing filament leak around it. Upon tightening it I broke the nozzle, ruining the extruder block. Luckily I retrofitted parts from the QU-BD extruder and got back to printing. Fearing a repeat of my troubles, I immediately printed an upgrade for the filament drive, similar to one many TOM operators have used. It worked like a charm and I haven’t had a single extrusion problem in over 100 hours of printing since then.
Also, Makerbot is aware of this issue, and over the past weeks it has been troubling me that they haven’t made an upgrade available as standard (you could purchase one for $8) — and were seemingly turning a blind eye to it. However, even as this article was going through editing, for publication, I received an email from MBI informing me that this is precisely what they are now offering — free. This is good news as the spring loaded bearing upgrade to the extruder ensures balanced tension at all times with almost no deviation. This will almost certainly mean that less machines will get sent back and there will be less support threads flooding forums on this issue everywhere.
What I would say is that the Rep 2 is marketed at the inexperienced, yet it took quite a bit of knowledge and experience to figure out what was wrong with my machine and how to best repair it.
Ok – rant over! But the point here is that while this is not necessarily going to happen on every Rep 2, it does happen regularly, and if it happened to a newbie, they’d likely be put off 3D printing for life.
PLATFORM
One of the few big changes that distinguishes the Rep 2 from the Rep 1 is the new build platform. Instead of a heated platform, the Rep 2 has an acrylic platform that is larger than the Rep 1 by 37%. With an acrylic platform you’re limited to printing with PLA. For $600 more you can purchase a Rep 2X, which does have a heated platform allowing for the use of ABS. We’ll go more into that in the next section. Furthermore, the platform on the Rep 2 has a spring loaded quick release mechanism, making it easier to remove a print. There are also three bed levelling screws that make it quicker and easier to calibrate the Z-axis height. There is even a nifty automatic script built into the control panel that helps with this process.
Apart from limiting material use to PLA, this is all good.
MATERIAL
The standard Rep 2 prints in PLA only while the Rep 1 and Rep 2X are capable of processes both ABS and PLA. If you are unsure of the differences, ProtoParadigm, a 3D printing materials supplier, has a great article explaining this in more depth. MBI also sells its own brand of “Makerbot PLA” which will set you back about $50 per kg (2.2 lbs). I haven’t noticed any significant differences in the quality of MBI’s PLA vs PLA ordered from third party suppliers for around $34/kg.
For me, the switch to a PLA-only machine is a bit of a cop-out. Of course the Rep 2 is going to print high resolution really well. PLA is not as wild a creature as ABS. It reacts differently and prints better no matter what machine you use, but it takes away the option. It has allowed MBI to come out on top. But my conclusion here is that while the Replicator 2 is really just a prettier, bigger and generally more solid Replicator 1 that takes away some the failure points by removing the wild card that is ABS — it is a step forward in some respects but a step backwards in others.
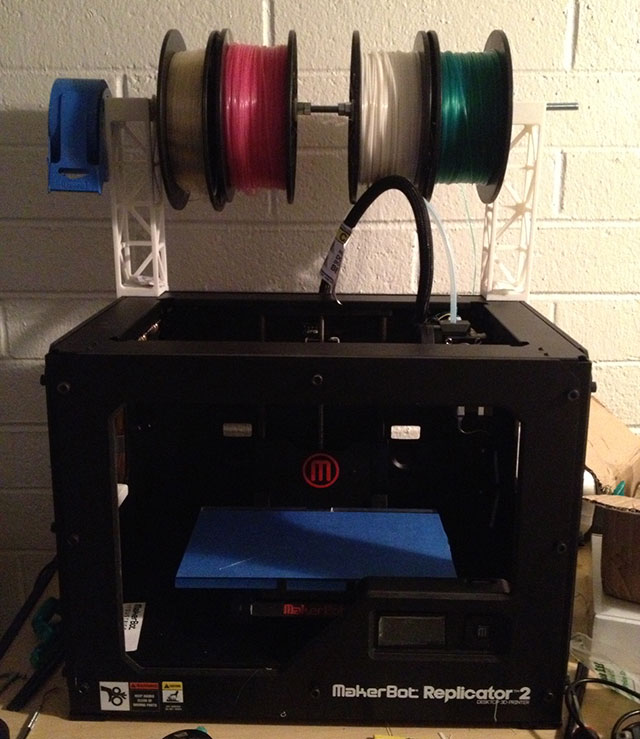
I would also suggest Replicator 2 users put together an over the top spool holder. It’ll prevent tangled spools from being a problem and will allow quick changes between filaments. The design I used, as shown, can be found here.
ELECTRONICS
Again I’ve seen no noticeable changes on the Rep 2 in this respect. The same electronics used in the Rep 1 are used in the Rep 2. From what I’ve seen in various Makerbot user forums, it seems that the Rep 2 has all the ports for upgrading to dual extrusion with a heated platform. However the power supply provided cannot support the extra load. Since the capability is there, it might not be long until some maker hacks together an upgrade. $600 (the extra cost for a Rep 2X) seems to be a steep for dualstrusion and the ability to use ABS . For $600 you could buy a lower quality printer with both features, and if you’ve already got a Rep 2 there is no way to upgrade to a 2X, so you might as well buy a second printer.
As for the control panel, I am, unashamedly, in love with this component. I have had no need to plug in my computer to my Rep 2. I can use Makerware to slice my models in low or medium setting (Makerware does have a tendency to freeze when slicing at high resolution). From there I can just print off the SD card. Nothing particularly new maybe, but a nice — and handy — feature.
Also, the control panel has cold pause built in. This is a feature that can now be achieved on other machines via Cura. If you’re worried about a print or if you want to change filament colours half way through, this is a tool worth having.
SOFTWARE
MakerWare is specific software developed by MBI specifically for Makerbot machines — used to convert 3D models into code that the 3D printer can understand. It uses Miracle Grue (MBI’s in house gcode generator) and Skeinforge, the DIY standard for years now. Like the Replicator 2, it’s developed to be user friendly. It has got a very drag and drop feel to it allowing users to import multiple models and auto-arrange them to print a plate of multiple objects with ease. You can export directly to the .x3g file format, which any recently updated Makerbot machine can print from off an SD card. It works great and the profiles are optimized for the MBI line of machines. You can even go to an advanced menu and adjust basic fill, shell and speed settings. However, try slicing (the process of converting to gcode) using the HIGH resolution profile and you’ll find yourself freezing at 33%. I’ve tested this on multiple computers with multiple different models with the same result. Another issue I’ve run in to, and I’ve heard others report similar experiences with MakerWare, is that it tends to fail when starting certain background processes, referred to as the conveyor, and the only known fix (and this is straight from MB Support) is to reinstall. This can occur pretty regularly, so don’t delete your install file! Despite those bugs, it is a nifty piece of software and even has some limited support for the TOM. But if you prefer to stick to good ol’ ReplicatorG, there are some really good premade profiles here.
SUPPORT
This is an area where MBI excels, it must be said — The Makerbot support team has always stood above all others. They’re usually quick to respond and they do their best to accommodate their customers. In the past they’ve even gone as far as to open a support ticket for me after seeing me announce my frustration on twitter. I can’t think of any other tech support service that has done that. After explaining the issue I encountered with my nozzle (explained in the extruder section), they sent me an entire replacement extruder assembly with the extruder carriage even though I did not purchase the $350 Makercare service.
Final Thoughts
I do believe that the Replicator 2 has been falsely advertised in many ways and has been put on a pedestal as something it is not. It is not a revolutionary printer and has not innovated significantly in any functional way even though the design aesthetic is a big improvement. There are numerous variations of RepRap printers that have accomplished a similarly large print volume at 100 microns. This misrepresentation is due in no small way to widespread ignorance among the general public. MBI has just done a good job of marketing, design, implementation and packaging. It is a great branding exercise and has done a great deal to help bring 3D printing to the general public, however, the Replicator 2 is not as user-friendly as it claims. While Makerbot has done a lot to make the process easier but I would still advise new users to learn and understand the process and the technicalities before jumping in the ring — it’s worth it overall — it can produce great prints, just don’t expect to plug ‘n’ print.
To conclude, on balance there are probably more pros than cons to the Replicator 2 for me. The majority of the cons lie around the misleading public perception of MBI products, the hefty price and the issue I had with the extruder design, but which just yesterday, MBI has seemingly addressed. If you do buy, make sure to run consistent maintenance after long builds — and enjoy.