The DOBOT MOOZ taps into a trend of multifunctional, low cost desktop 3D printers aimed at those who want an introduction to these processes.
Our 3D Printing Industry engineering team tested the DOBOT MOOZ 3D printer based upon its intended use. The desktop FFF/FDM machine makes several specific claims. These are related to the all metal design, the transformable nature of the device, that speedy assembly is possible and that the DOBOT is suitable for beginners, makers and educators.
Unboxing and assembly
We had no complaints about the packaging, and after spending 5 minutes unpacking the 3D printer and checking the contents it was time for assembly.
Our review unit arrived in an efficiency packaged and securely fastened box. Inside the components are nestled tightly in cut out foam, designed to ensure the contents arrives in good condition.
DOBOT claims that their MOOZ can be assembled in 10 minutes. While our team has a certain level of experience in putting together 3D printers, they were unable to match this time. It took us 45 minutes to assemble the DOBOT 3D printer. In total approximately 1 hour passed between opening the box and beginning the first 3D print by following the instructions spanning 6 pages.
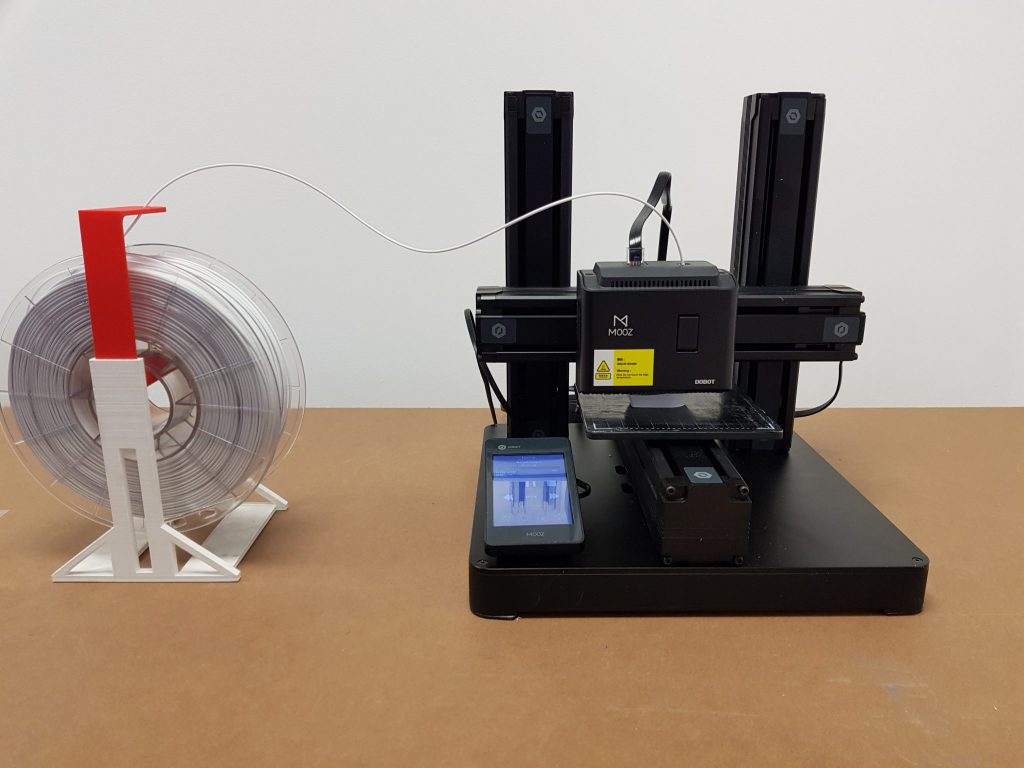
The components were certainly of a good quality. Rather than opting for a frame made from a mix of materials, the all metal build of the DOBOT means that the MOOZ machine is designed for more rigorous processes including the CNC Carving tool. The fully assembled 3D printer has a small footprint, but is satisfyingly sturdy.
Once assembled, switching between the functions (3D printing, CNC machining & Laser Engraving) modules is done by swapping out the modules, this operation can be accomplished by removing 4 short hex head screws at the rear of the module. Once the module is unfastened it is a simple matter to replace the module and snap the ethernet style cable into the new module and continue operation.
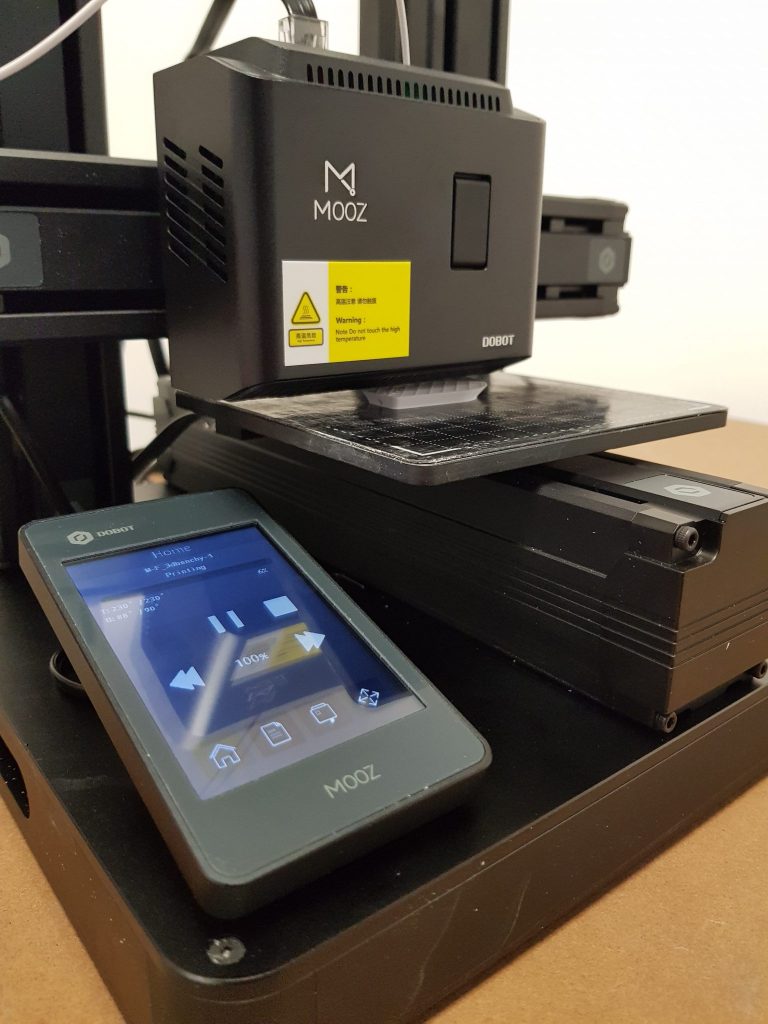
The accompanying 3.5″ color touchscreen is a nice touch and is clear and easy to use.
Testing 3D printing on the Dobot Mooz
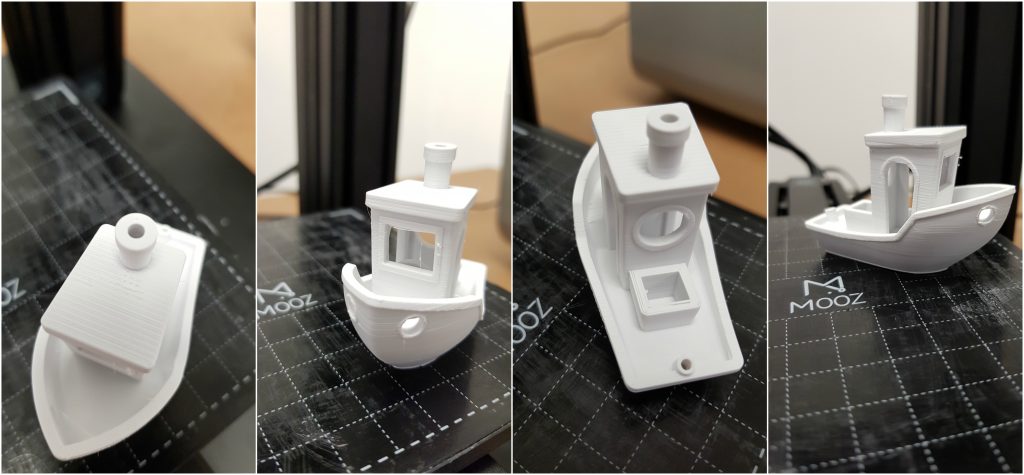
The DOBOT MOOZ can 3D print using PLA, ABS PC and flexible filaments. We began our testing using one of the 5 files provided, the Great Wall. A brim layer was added to the print and once successful completed we found that removal of the brim was easy, and left only minimal residue on the finished part. Having confirmed a straightforward PLA 3D print was possible, a Benchy file was prepared for printing.
The Benchy was successfully printed with white ABS in the centre without any Brim or supports. The printing platform had to be heated to 90 ˚C for the ABS to adhere to the surface. Our engineers were satisfied with the quality of the Benchy test. The features were well defined and with only a minimal amount of stringing visible in the areas where with is commonly seen, for example the windows of the Benchy.
We performed additional test 3D prints using ABS to test the max build size. The full bed square print was expected to be 130 mm x 130 mm in size, but the slicer software Cura, as recommended by DOBOT, was only able to reach up to 128.6 mm x 128.6 mm. We found that the full bed square was not printable at all at a print platform temperature of 80 ˚C. However, the manual provides clear instructions on how to change process parameters and we raised the temperature to 90 ˚C. The heated bed can be raised to 100˚C.
At the increased temperature we still had an a issue printing on the full bed, it was only partially printable due to an issue we had in leveling the print bed. Calibration of the review unit we received is via adjustments to the 4 screws on which the printing platform is mounted, this determines the degree of leveling possible on the surface during calibration.
Our engineering team generally prefers a three-point leveling system for 3D printers. During testing we found that the suggested z-calibration process in the DOBOT MOOZ manual is very relative to the user. It suggests that the platform is leveled if the user finds some friction on the paper between the extruder and the platform. The step sizes suggested at this step are 0.1 mm and thus there is friction at multiple heights. Also, even if there is friction at a single point and we consider that point leveled, we can not say that the rest of the platform is leveled. These difficulties in leveling resulting in the full print bed test failing.
However, a much smaller (20 mm x 20 mm) square bed file with brim support was successfully printed due to centre of the platform being less affected by the levelling issue.
In terms of cleaning the print bed, we found that acetone was sufficient to remove residue between prints. However, the unclogging procedure was more involved than some other 3D printers. Specifically, the process requires unplugging of important and sensitive circuitry and removing a spring in the centre of the module. DOBOT does provide tutorial videos that cover this, and while unclogging is a time consuming procedure the instructions are clear.
During our testing of the 3D printer, DOBOT were quick to respond to queries and very helpful with suggestions on how to improve the user experience. Regarding our calibration issues, DOBOT explained that our review unit could be experiencing an issue with the X/Y offsets. To resolve this an update to the main circuit firmware was required.
Laser engraving on the Dobot Mooz
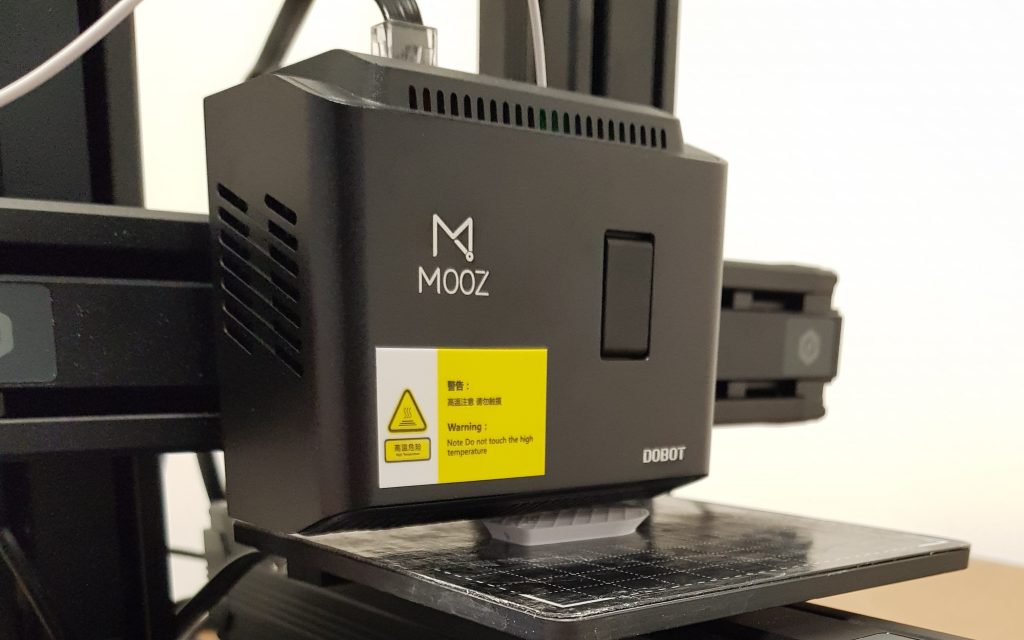
3D printing is just one of the processes available on the DOBOT MOOZ. To test the Laser Engraving function our engineer swapped out the 3D printing module. This was a simple operation and quickly performed. The laser power is 500 mW.
When working with lasers, even when of low power, it is always important to take the appropriate safety measures. We liked the provided safety glasses and also the laser protection walls designed to minimize risk of accidental exposure to the laser.
Several sample patterns with provided for testing the Laser Engraving function on the Dobot Mooz. We began testing with a pattern of 60 mm x 60 mm, modifications to the scale of the pattern must be made using the Laser and CNC slicing software provided, rather than via the touch pad.
There is not much to say about the laser engraving process, other than it worked well. This function was very simple and easy to use and our engineers were quickly engraving at range of intensities. Of the three processes available on the Dobot Mooz, Laser Engraving was deemed to be the task it performed the best by our team.
Testing CNC Carving on the Dobot Mooz
The CNC carving module provided is capable of 12,000 rpm. Installation is again a straightforward task that can be quickly accomplished. Likewise, the CNC platform is also simply mounted with 4 screws similar to the printing platform. Following a tutorial video from DOBOT made the calibration process was easy, and our engineer recommends using the videos to supplement the information provided in the instruction manual.
The tutorial video also provides an example of useful accessory, a dust-proof pad that can be purchased separately for $5. This is a useful addition when using the CNC Carving tool as it may prevent a build up of dust and debris. While the tutorial video shows the demonstrator mounting the cutter tip on the already attached module, we found that for ease that the cutter tip should be mounted on to the module first and then the complete module with the tip mounted to the system.
Once assembled we began testing the CNC Carving feature. The process was simple and easy. A small wood piece of thickness of just under 4 mm was used for carving a simple S shape of depth 2 mm. The S shape was carved successfully without going completely through the wood piece.
The carving process does produce quite a striking noise, and this may deter users from running the machine in certain environments. However, the CNC Carving tool was able to accomplish the tasks we set it.
Conclusion
The DOBOT MOOZ is a sleek looking and study desktop device. We liked the ease of assembly and quality feel to the unit. Our testing found that the machine lives up to its claims and was able to perform the majority of tests with ease. The noted issue with levelling during 3D printing was one that may be resolved with a firmware update, and by supplementing the instruction manual with tutorial videos users should have no problem making use of the machine.
For the DOBOT MOOZ’s target market of students and beginners, the DOBOT MOOZ offers and affordable introduction to a range of processes. The safety features such as keeping wiring containing in the internal structure and the shielding from the laser are welcome features.
For someone looking to take early steps with 3D Printing, Laser Engraving and CNC Carving the DOBOT MOOZ will certainly serve to enable this.
More information about the DOBOT MOOZ is available here.
For exclusive news and reviews subscribe to the 3D Printing Industry newsletter, like us on Facebook and follow us on Twitter.
Got your own ideas for innovation? Apply them to a new role with 3D Printing Jobs here.
Featured image shows the DOBOT MOOZ 3D printer at 3D Printing Industry HQ.