3D-printable file repositories by now hold many a gem of innovation and design. The largest repository, MakerBot’s Thingiverse, holds a fair share of these. One such innovation is Rob Martin’s thing 53321: A Dual Axis Solar Tracker. Whether the weather confuses you into casting aside climate chaos, or you comprehend that mankind requires a fundamental shift in energy consumption behaviours, this is cool 3D-printable kit.
There is an increasing range of 3D printable, open source and upcycled solar power solutions for home assembly, and more importantly, applications for the developing world. Let’s remember that Africa alone is projected to have a population of some two billion by the middle of this century. This is simply unsustainable on current trajectories. Although estimates suggest a plateau around the 9,100,000,000 mark for the world population of Homo Sapien Sapien, the essence is very much still ‘Go forth and multiply’ — with no indication of when to stop…
Rob’s Dual Axis Solar Tracker is a neat example of just what can be achieved with a bit of know-how, a fair bit of innovation and a lot of dedication. No longer is the answer to the wide range of global problems only in the hands of giant corporations and the policy / decision making of government officials. More and more we are seeing every day people take the initiative and show that it certainly doesn’t take billions of pounds/dollars/euros to make a difference in the world. Quite the opposite.
As the trend for open source hardware takes a firmer hold, in an analogous way to the trend for open source software, large corporations as well as SMEs will feed on the innovations of the individual: otherwise known as crowd-sourcing. This is not a negative, it is a highly productive synergy, so long as Intellectual Property orientated big business does not become parasitic upon the open source designer and maker – and, indeed, it has to be said: the other way around.
But here, before the technical info on the Dual Axis Solar Tracker, we highlight a couple of other truly inspiring solar projects:

The SunSaluter won the Westly Prize, the Mashable-UN Foundation Startups for Social Good Challenge, second prize at the Postcode Lottery Green Challenge, and the grand prize at the Staples-Ashoka Youth Social Entrepreneurship Challenge.
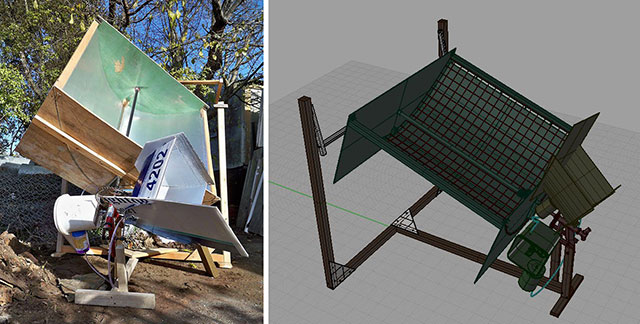
The Solarflower is an open source solar energy collector which tracks the sun automatically through a simple non-electrical mechanism.
It can be made almost anywhere from common recycled and salvaged materials using basic tools and skills, is portable, has no running costs or emissions, and can produce up to kilowatts of power per device.
Depending on available resources it should take one to three unskilled people less than a week to build, and cost under USD$100.
Potential examples of use could include:
- Electrical production with simple steam turbine/piston, with waste heat going to oven or hot water system.
- Dome oven with integrated water system for temperature regulation and hot/pasteurized water.
- Steam distillation of water for removal of chemical, heavy metal, and biological toxins.
- Medium to large scale food dehydration, processing, and roasting.
- Conversion of fibrous organic waste into charcoal for energy storage and low smoke cooking, with coproduction of bio-oil and bio-gas.
- And any other application utilizing heat.
On to the technical instructions for the Dual Axis Solar Tracker, followed by some videos to make sense of it all:
- You need: Arduino Uno, (2) SG90 Micro servo motors, (4) LDRs, breadboard, wires, rainbow ribbon cable for LDRs, 4″ long 1/4″ bolt and nut.
- Print all parts.
- Attach horizontal servo motor to tracker base before attaching the horizontal gear or you will have trouble with tool access to get the motor mounted. The vertical servo gear should be ok to assemble first due to the smaller size. To mount the gears to the servo motors, I cut tiny brass nails just a bit smaller than the thickness of the gears and made little groves on the nail to give a rough surface for the plastic to bond to. I then used a soldering iron to heat the nail and fuse it through the white servo gear attachment and then into the plastic gear. Makes for a nice, clean installation. Just make sure that your gear is exactly centered when you mount it to the servo.
- Attach motors, gears, and panel mount.
- Hook up wires according to schematic.
- Load program into Arduino and test it out.
- Depending on the light that you use to move your tracker around, you might need to change the resistor size on breadboard (they should all be equal value, higher value resistors for less light).


