One issue that many 3D printers (intended as those who experiment with 3D printing) have to face is the final objects’ exterior appearance, more so with regard to objects that are to be used — and worn — especially when made with FFF machines.
LeFabShop, one of France’s main 3D printing online retailers (distributor for both Makerbot and Mcor) discovered, or actually re-discovered a solution that seems to be a perfect fit to give a colour / decorative finish to 3D printed creations, without having to resort to full color printing.
At this moment, colour printing is limited to Stratasys’ high end Object 500 Connex3 and 3D Systems’ Projet 4500. 3D Systems’ Projet X60 series and Mcor’s IRIS also do full colour printing but only on sandstone and paper respectively and thus can only make rigid models.
 Bertier Luyt, LeFabShop’s president demonstrated that printed FFF items can (relatively) easily get a full colour finish using the Hydrographic process, an amazing technique for coating any plastic object. Hydrographics (also know as immersion printing, water transfer printing, water transfer imaging, hydro dipping and hydrocoating) is a technique that has been used at an industrial level for decades.
The process consists of applying a new finish to an existing part or product using a hydro tank to place a graphic film over the entire piece. Most camouflage wood, carbon fibre, metal or stone looking patterns you have see around applied on plastic items, such as helmets or motorcycle parts, are applied using this method.
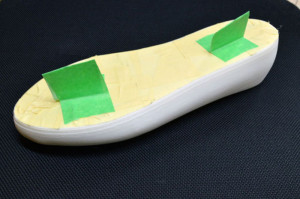
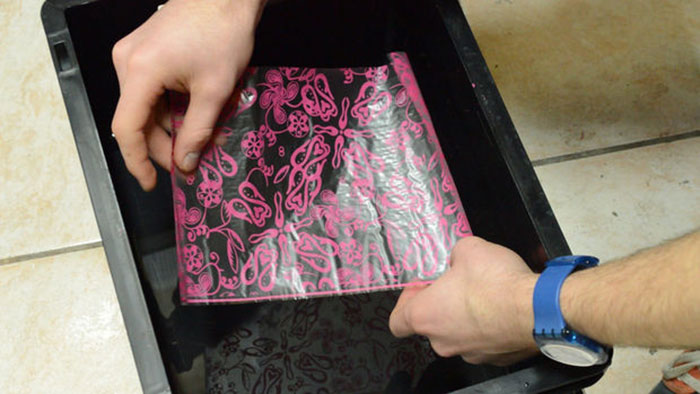
The process starts with preparing your piece for the refinishing. In the case of FFF 3D printed items this means sanding it and covering the parts not to be painted. A polyvinyl film containing the pattern is floated on top of a water-filled container. The water acts as the medium to transfer the 2D print pattern onto the form of your 3D printed product. Upon placement of the film in the water, an activator is applied to release the print overlay from the polyvinyl backing. The 3D printed item is then “dipped” into the water and film, thus transferring the pattern onto it.
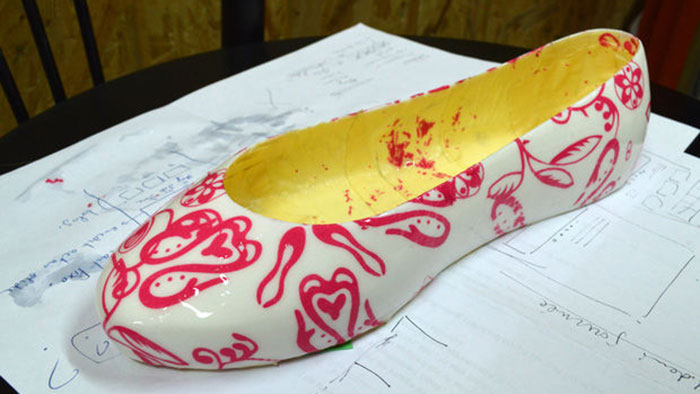
The guys from LeFabShop found a basic DIY hydrographic kit on the internet and experimented with a pair of 3D printed shoes. The results, as you can see from the video, are quite amazing. But, before trying it at home, there are a few things to keep in mind.
Hydrographic design for 3D printing from le FabShop on Vimeo.
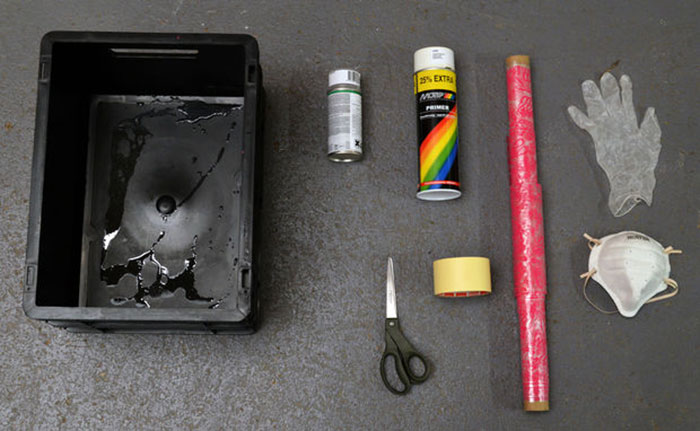
All you need to start is the hydrographic film kit (usually with a few different pattern options included in the kit). The kit will also generally include the Activator and the Primer. At this point you will need a container deep enough to immerse the object completely and protections such as gloves and masks, as the Activator is toxic and corrosive. Scissors and masking tape will be needed to cover some parts of the object and a clear coating spray can be used to protect and fix the graphic.
The entire process (excluding additive manufacturing of the object) should take around 3-4 hours, mostly for preparing the piece and letting the item dry after applying the primer (before dipping it). LeFabShop suggests practicing the technique a couple of times not to risk getting bubbles, cracks and folds. Full instructions have been published by LeFabShop on… Instructables (of course).