This is an article in our series looking at how 3D printing is used around the world and at ways to get involved with 3D printing. You can read more articles in this series here, get in contact if you would like to give us your own perspective.

My name is Greg Zumwalt, aka “gzumwalt” on MyMiniFactory, Instructables, YouMagine and YouTube.
That’s me in the photo above with my wonderful wife Lora (and yes, I’m on the right in the photo). You may have seen some of my mechanical 3D printed models in videos, on blogs, at trade shows, or on social media as over the past four years I have designed, printed, tested and published over 100 3D printed models in order to learn about 3D printing, encourage and inspire others to learn how to design and print 3D models of their own, and hopefully to generate smiles.
Having spent most of my career in electronic, computer and software design for the aviation (flight and flight training) and entertainment (video game) industries, I had virtually zero experience in mechanical design. Upon my retirement, I purchased a CNC mill and lathe package and began the process of learning how to design, machine, assemble and test the mechanical designs I had always wanted to create but had never found the time to do so. Having both a CNC mill and lathe did indeed allow me to create most of the parts I needed for my designs, however as I soon discovered, even though I was retired the time required to machine the individual parts for my designs was far more time than I had available. Furthermore, after a year or so of watching waste aluminum shavings hit the floor, it began to appear to me that what I was actually watching was hard earned money hit the floor. Even though I could switch to acrylic or some other rigid plastic for my parts in order to save money, I just couldn’t figure out a manner in which to save time.
Then I read about 3D printers. Rapid design and prototype, virtually no waste, and, in general, unattended overnight printing (while I slept of course) convinced me to give one a try. Now, after four years of designing, printing, assembling and testing 3D printed mechanical models, I have accumulated a collection of over 100 3D printed mechanical models including automata, cars, trains, toys, marble machines, domino machines, feeble attempts at artistic / organic mechanisms, and even flying pumpkins (well, pumpkin balloons), which I could have never accomplished with the CNC mill and lathe. I present a small sampling of my favorite designs and models in this article.
Most of my 3D printed models can be viewed and downloaded on MyMiniFactory, Instructables, YouMagine and YouTube. These models tend towards motion and usually incorporate gears, yokes, cams and / or some other mechanism involving moving components.
And yes, more often than not, some assembly is required.
Some of these designs push the limits of current 3D printing, and some simply illustrate the various means and methods I utilize for a successful 3D print that transforms a CAD design into a working model. For example, some of the designs require brims, rafts and/or support, and for some brims, rafts and/or support are optional or even not required at all.
The brim, raft and support features 3D printer designers have incorporated into their 3D printers include these features for a reason; and my experiences in using them has resulted in cleaner, smoother, no-warp parts, as well as parts that could not be 3D printed at all without them. For me, the ultimate goal for my designs is a successful working model that brings smiles to those who view them, and I enthusiastically utilize all features available from design through printing and assembly to obtain that goal.
The tools I use
My current design tool of choice is Autodesk Fusion 360. While Fusion 360 has a steeper learning curve than some other CAD programs, I’ve found the learning process was worth it due to some of the outstanding features it incorporates.
My 3D printers are from Ultimaker, an Ultimaker 2+ Extended and a dual extrusion Ultimaker 3 Extended. The models appearing below were most often printed on both printers; however, some parts requiring dual extrusion were only printed on the Ultimaker 3. The Ultimaker 2+ Extended is a wonderful 3D printer, however, the dual extrusion Ultimaker 3 Extended with active leveling and auto material sense combine to make 3D printing as fool proof as I’ve seen to date.
As an Ultimaker printer user, I slice the models using Cura 2.7.0.
First up, Marble Machines
I like marble machines. I previously created marble machines using MDF for the base, brass wire for the track, threaded rod for the supports, CNC machined ties and couplers, and weeks of part manufacturing and assembly. When I discovered 3D printing, I realized I could make more complicated marble machine designs, and print and assemble them in far less time. My first 3D printed marble machine, the original “Marblevator”, was designed with an expandable marble track that would allow an almost enumerable number of track layouts. The track sections snap together, and the two trestle styles (short and long) provided adjustable track height support. A simple motorized stair case mechanism elevated each marble from the track end to the track start.
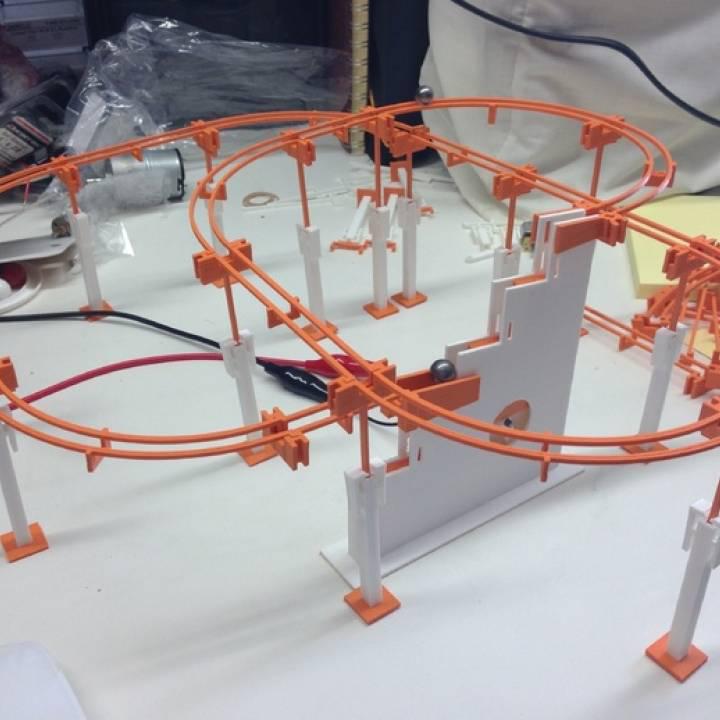
Many people liked the original Marblevator, so much so that I was continuously disassembling, transporting and reassembling the model just to show it. Obviously the original Marblevator was only “portable” in pieces, so my next Marblevator design was the “Marblevator Mini, Bowl Edition”, a more portable Marblevator.
The footprint of this model is the size of a business card, and within the base I fit a battery, motor, power switch and external power connector. With external power connected the battery was preserved. With external power removed, the battery provides a truly portable Marblevator. And while the marble track is short, this marble machine would fit in my coat pocket, was very portable, and generated lots of smiles.
Staying with the portable marble machine series, I designed “Marblevator, Baby Steps”. While very simple in operation, the parts themselves were larger and as such easier for some to print than those found in “Marblevator Mini, Bowl Edition”. This model also includes a storage drawer for marbles during transit, which eliminates my tendency to forget to bring marbles along with the Marblevator.

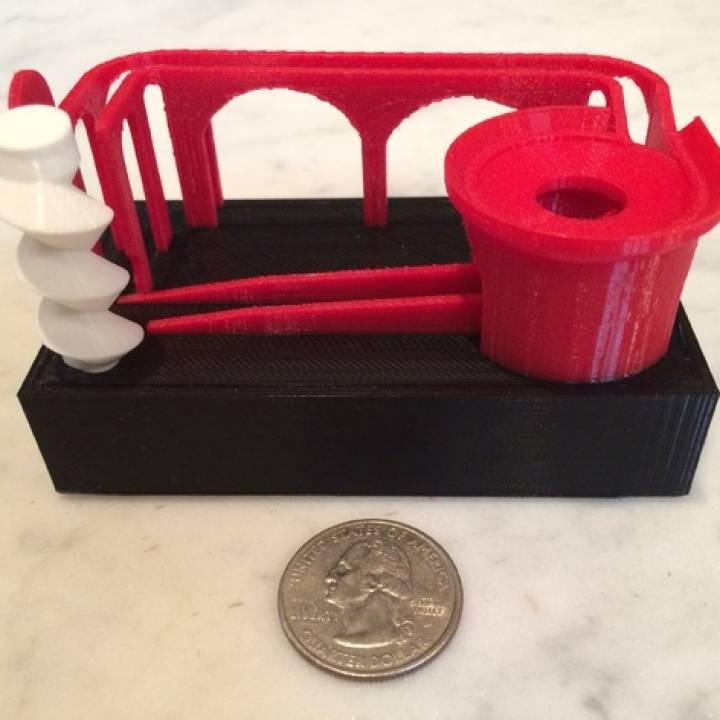
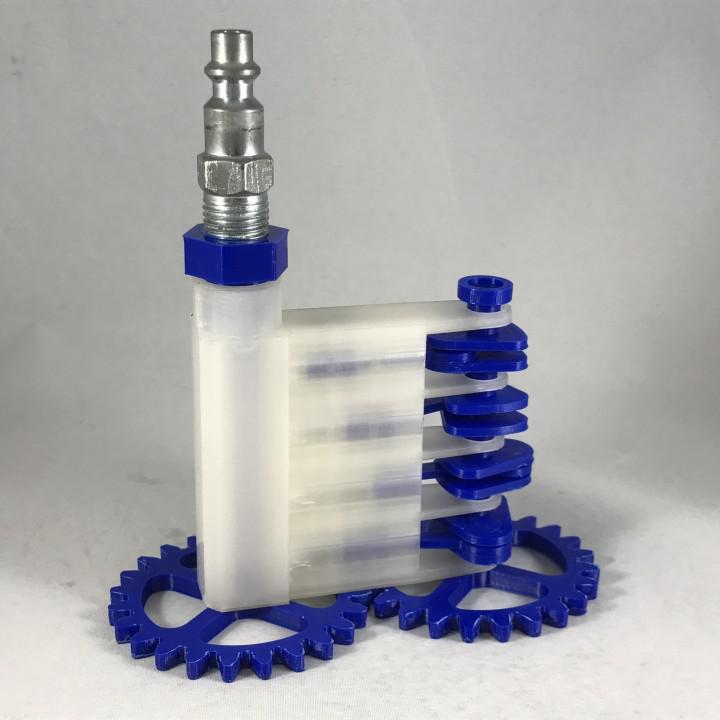
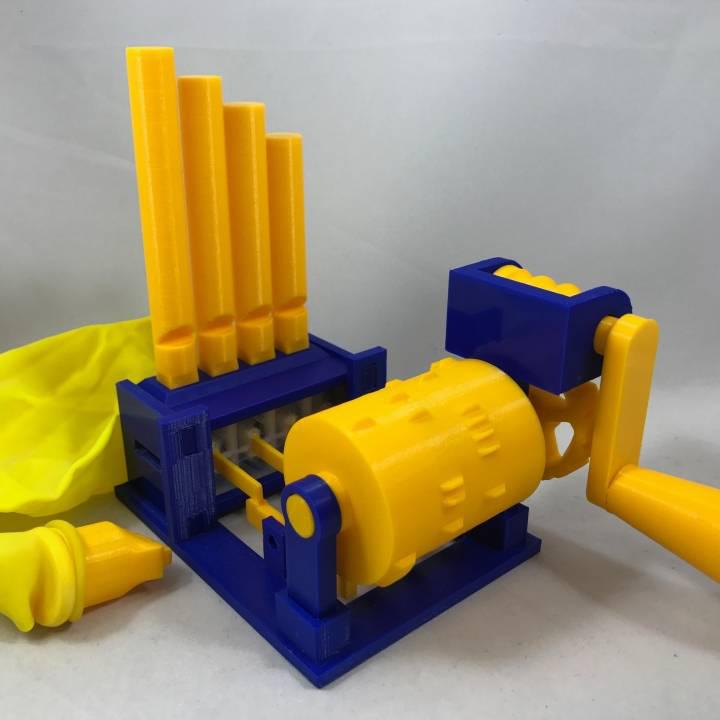
My latest marble machine design, “Marblevator Air” is also portable, although not pocket sized. The goal of this design was an experiment in physics and the reflex of 3D printed drumhead materials.
This model elevates a marble up a central tower via a motorized auger, and then drops the marble to the surface of the first of a trio of 3D printed drumheads. Thanks to the height of the drop, the mass of the marble and the reflex of the drumheads, when properly aligned, the marbles will bounce from the first drumhead to the second, from the second drumhead to the third, and finally from the third drumhead to the feeding funnel, where the process repeats.
The marbles bounce from drumhead to drumhead generating a rhythmic beat. This marble machine has generated by far the most smiles.

On to Automata
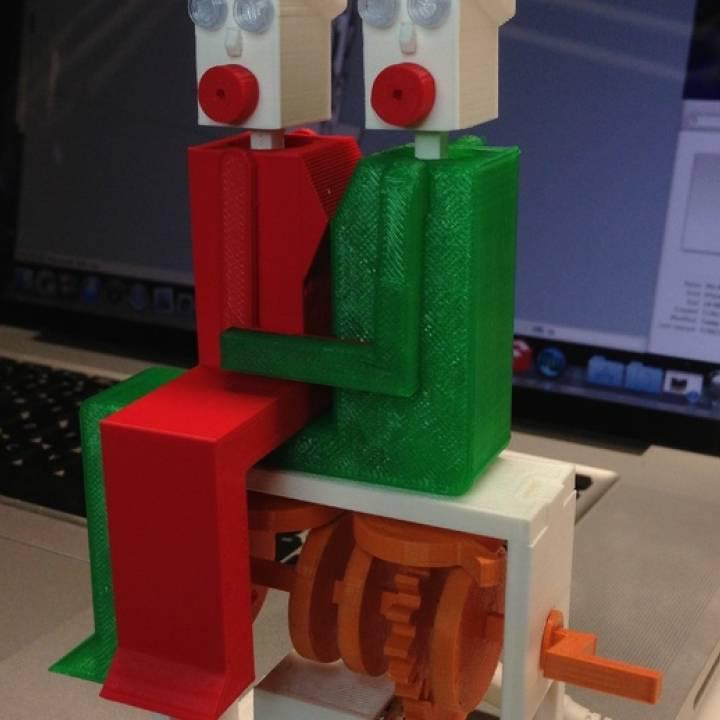
Along with marble machines, I also like automata. I truly enjoy machines that move, and those that tell a story, as so many do, is of great interest to me. One of the first automata I designed was “Kissing Couple”, my version of an automata made of wood many, many years ago.
I built in a little “nervous, shaky” movement for the figurines in this model that I thought gave the design a little extra realism.
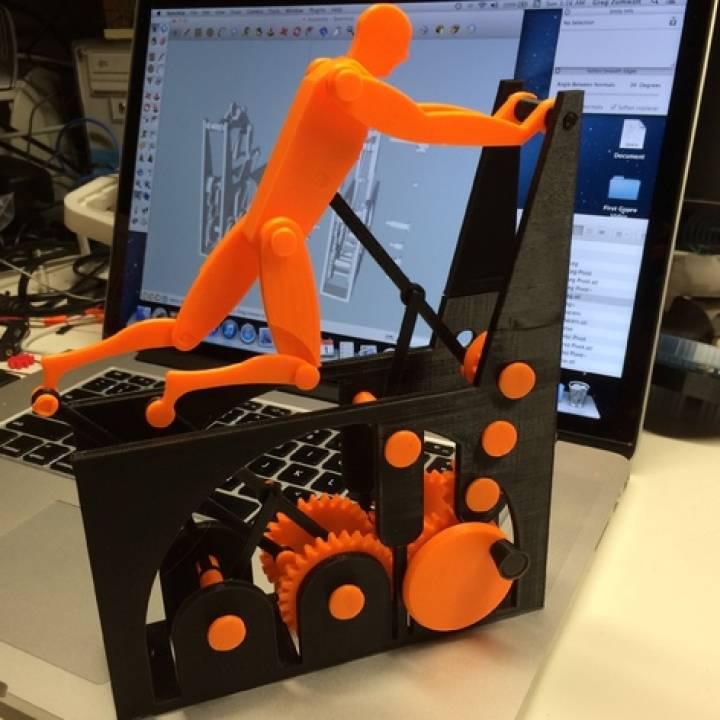
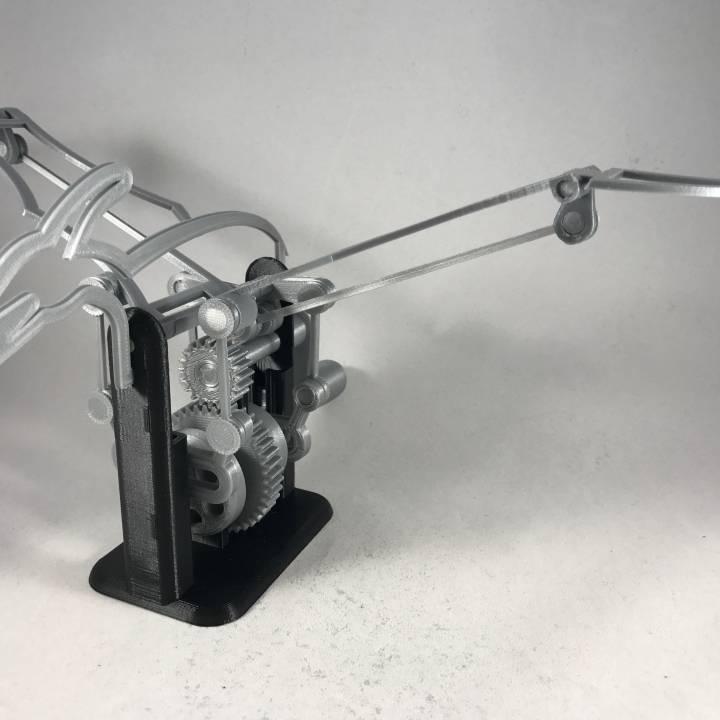
Another of my automata designs, “Perseverance”, was inspired by the Greek mythology character “Sisyphus”, and by the Sisyphus style automata appearing in the Disney video “Cyber Tiger”.
At the time I designed it, was one of the most complicated 3D printable designs I had created. Designed in both motorized and hand operated versions, I wrote my own software that allowed me to fine tune various parameters in order to determine the size, location and movement of the various arm and gear mechanisms required to design both versions.
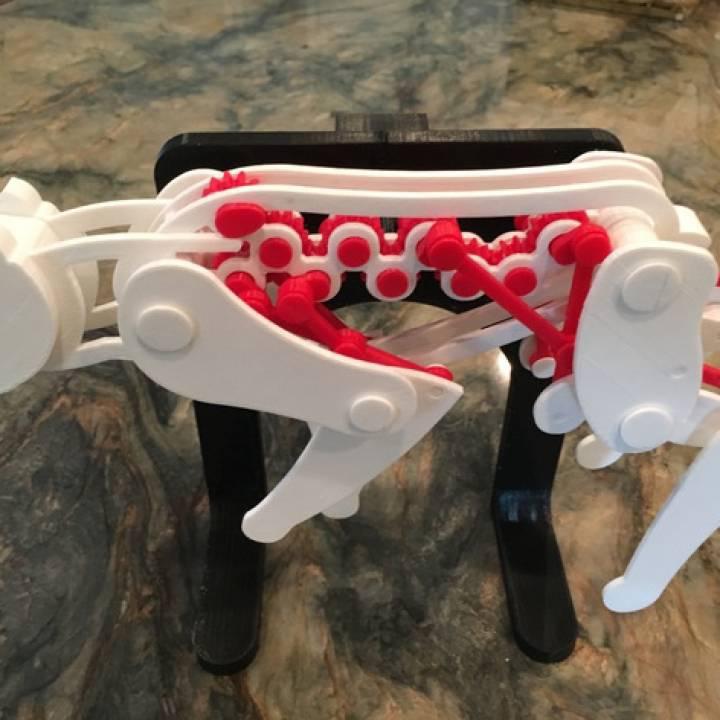
Another of my automata designs, also inspired by the Disney “Cyber Tiger” video, is “Saber”. After publishing “Perseverance”, numerous friends and followers saw the “Cyber Tiger” automata in the Disney video and suggested I design a 3D printable version.
When my design for Saber was completed, it easily eclipsed Perseverance in size and parts count. While quite the attention grabber at trade shows and parties, Saber also became my personal endurance test model to see just how long slower speed 3D printed automata could run without breaking down. After nearly 3 years, the original Saber is still operational in my workshop, and by my calculations, this Saber has “walked” over two thousand miles during that time.
“Pterodactyl, Pseudo Style” is my latest automata design and was inspired by the wonderful work of Paul Boyer. While I took a number of liberties in the implementation of this design to facilitate 3D printing, I feel I pretty well captured the elegant movement of his version of a pterodactyl in flight.
Moving models for moving models: PLA spring motors and air engines
Still being interested in things that move, I began series of spring motor and air engines designs with the intent that they would be the source of motion in future moving model designs.
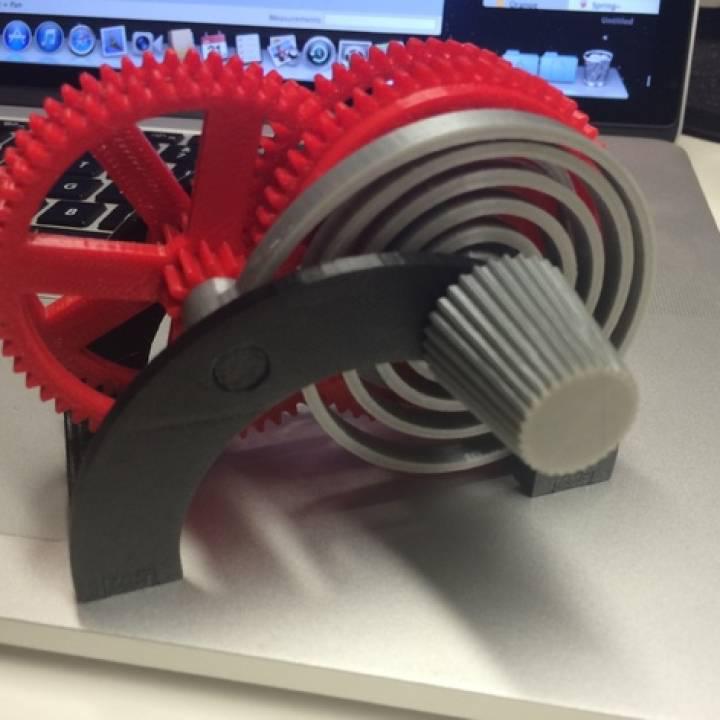
My first spring motor design, “PLA Spring Motor Demonstrator” was used to test whether or not a PLA spring motor would even operate. The results were yes, and the PLA spring motor was incorporated in a number of my designs from windup bunnies and snowmen to windup trains and cars. I was indeed surprised that a 3D printed spring could power such a wide range of designs including those presented below. The PLA spring motor will most certainly re-appear in upcoming designs.
The PLA spring motor was great for producing high energy, but only for a short period of time. In searching for a longer running energy source to power upcoming designs, I turned to compressed air, and for storing compressed air, balloons.
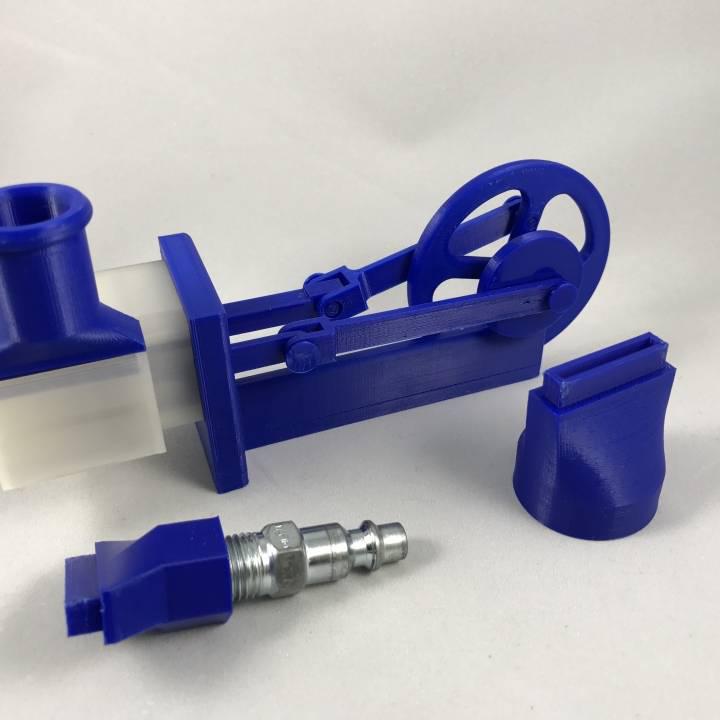
My first compressed air engine design, “Single Cylinder Air Engine”, performed surprisingly well. It required only a small volume of air at reasonably low air pressure in order for it to operate, which made it ideal for using it in a balloon powered moving model.
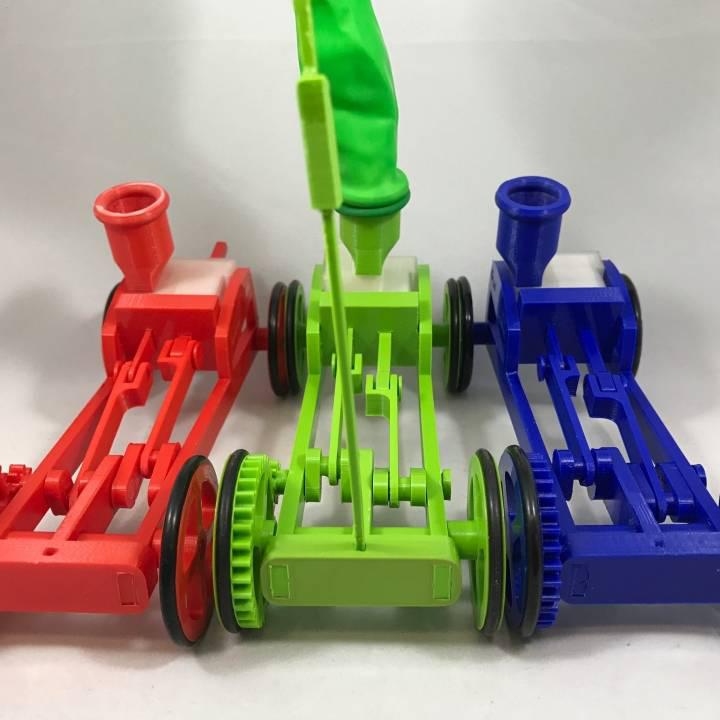
I have implemented a slightly more compact version of this design in both “Balloon Powered Single Cylinder Air Engine Toy Train“ and “Balloon Powered Single Cylinder Air Engine Open Chassis” moving models that follow below.
Searching for more air engine torque, my second air engine design was “Four Cylinder Air Engine, Experimental”. Having four larger cylinders instead of one smaller cylinder indeed produced the increased level of torque I was looking for. However the size, air volume and air pressure requirements were too high for my anticipated moving model designs, and too high for balloon power.
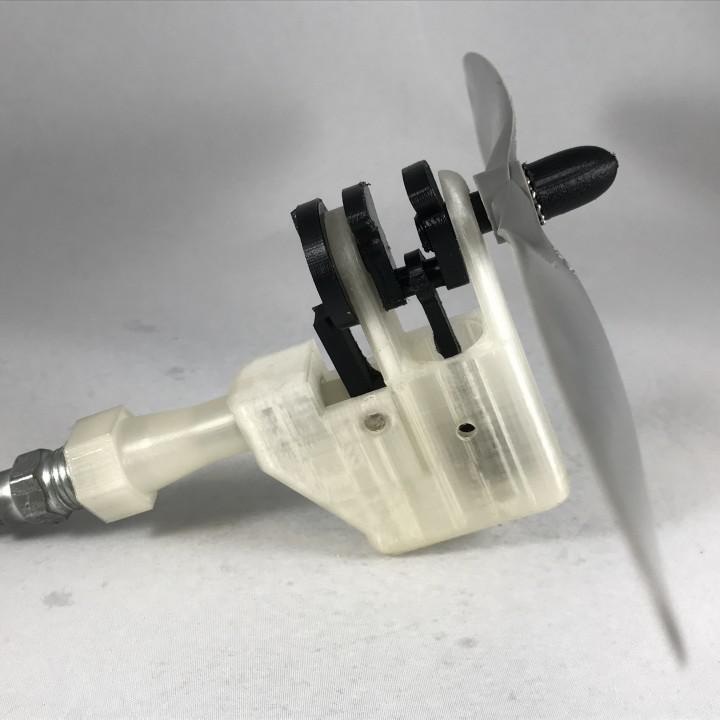
“Single Cylinder Air Engine, Experimental” is my latest air engine design. Returning to a single cylinder design to reduce the air volume requirements, and a re-design of the air valve for simpler construction, this air engine does provide the increased torque and reduced air volume that I was searching for, but with an increase in size and weight over my original design. This engine easily operates on less than 1PSI of air pressure and sounds quite like a steam engine when doing so. However, this engine will also run at 3,000 RPM at around 15PSI of air pressure. I may use this engine in an upcoming moving (perhaps flying?) design.
Moving models: planes, trains and automobiles
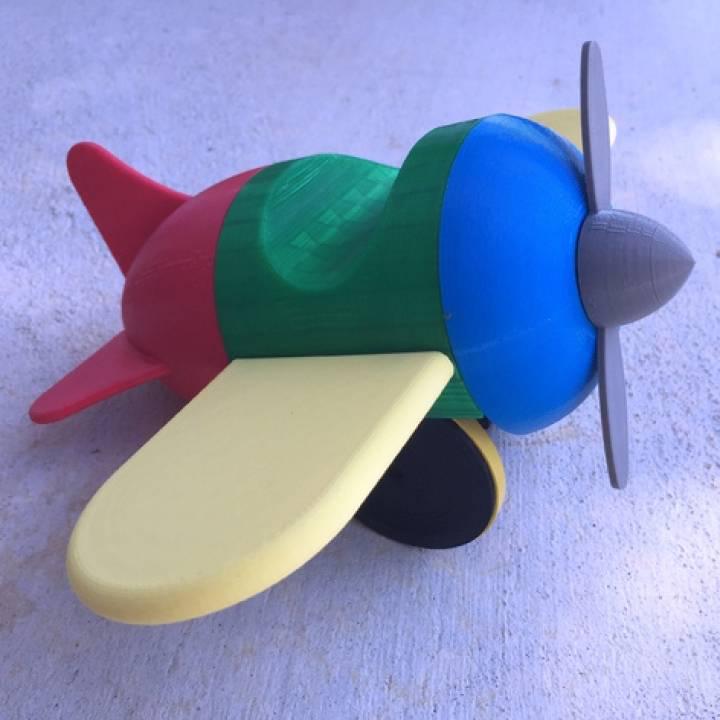
One of my early moving model designs, “Push Toy, Airplane” was a simple push style toy that when rolled, spun its propeller. Designed for the grandson, this model is large enough for the younger ones to handle, and durable enough for most “rough landings” that it would encounter.
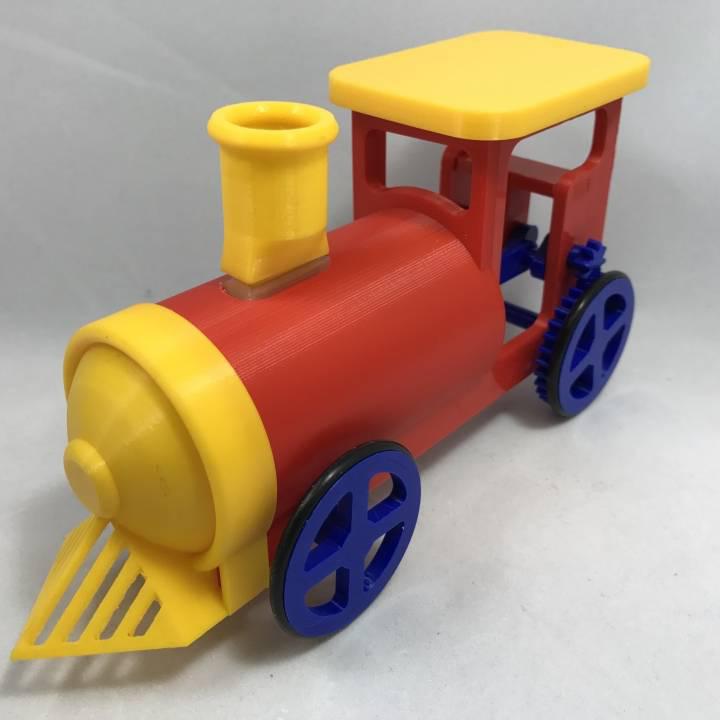
Another of my moving model designs is “Balloon Powered Single Cylinder Air Engine Toy Train”. Using a reduced size version of “Single Cylinder Air Engine”, this model moves using balloon power and sounds quite similar to a steam train engine when in motion. Due to its weight, it was slow, and didn’t move too far.
“Balloon Powered Single Cylinder Air Engine Open Chassis” is yet another of my moving model designs incorporating a reduced size version of “Single Cylinder Air Engine”. My goal for this design was distance, and this model easily travels over 50 feet on balloon power.
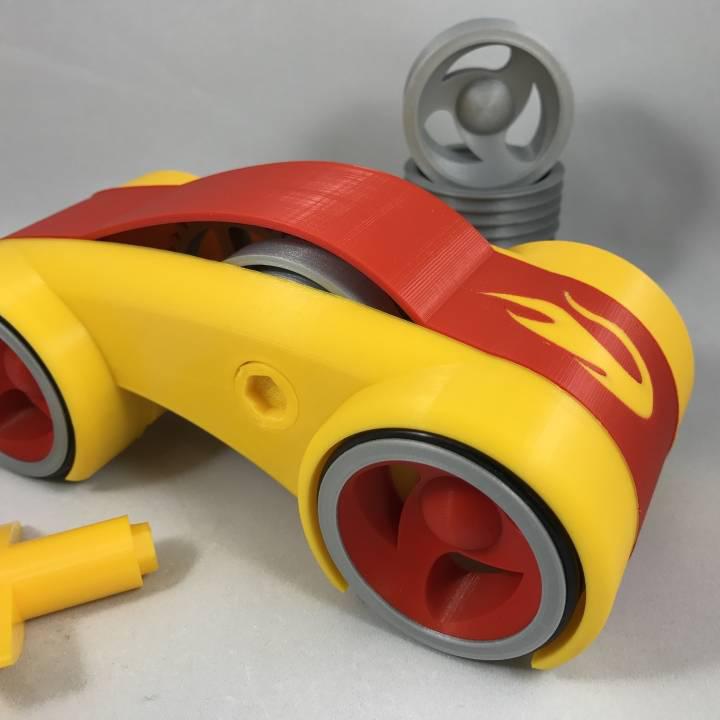
“Dual Mode Windup Car” was my first attempt at an enclosed automobile style vehicle using the PLA spring motor. This model incorporates a reduced sized increased torque version of the PLA spring motor. While this model only travels around 40 feet, it does so looking much better than the open chassis designs.
Moving models – miscellaneous
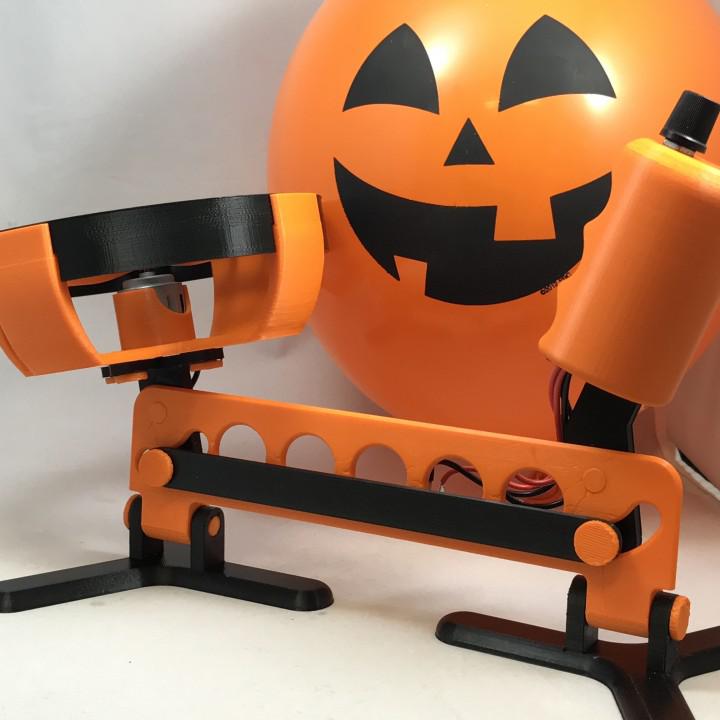
“Flying Pumpkin, Balloon” is one of my more recent designs. Inspired by the “Jonny Astro” toy introduced in the late 1960’s, this was the technology of the day for “indoor flight” when I was young. While today’s indoor quad and helicopters are perhaps just a little bit more modern than Jonny Astro, unlike the quad and helicopters, you simply cannot crash a Flying Pumpkin Balloon, no matter how hard you try.
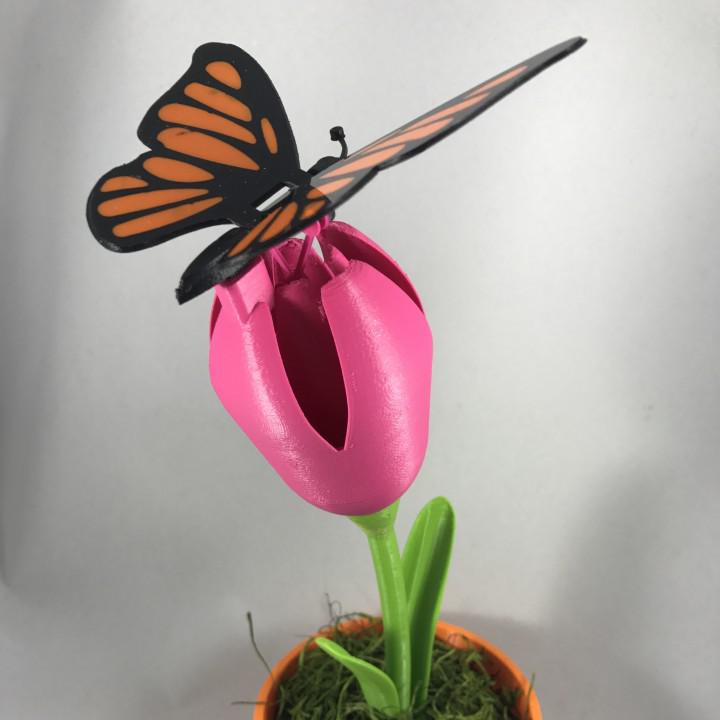
“Butterfly, Animated” was one of a number of my attempts at an “artistic” model. While I’m neither an artist, lepidopterist nor botanist, this model causes more “double take” looks than any other I’ve designed. The dual extrusion butterfly in this design slowly and quietly flaps its wings while resting on a tulip style flower. I also designed a container for this model, printed in orange at low resolution, and added Spanish moss to add additional realism.
“Four Whistles Version 2” is yet another of my attempts at an “artistic” model, this time musical. Who doesn’t enjoy the short song “Mary Had a Little Lamb”? If you enjoy it, after hearing this implementation, over and over and over again, you may change your mind. The challenge in designing this balloon / hand cranked model was to make it as air tight as possible between the four whistles and the valve control mechanism in order to maximize playing time. I chose to use a thin PLA membrane mounted valve arm, which ultimately worked better than I expected. There are also downloads at the sites mentioned above detailing how I designed the cylinder that controls the operation of the valves that in turn generate the music through the whistles. On a single balloon full of air, “Mary Had a Little Lamb” can be played four times at normal cylinder cranking speeds.
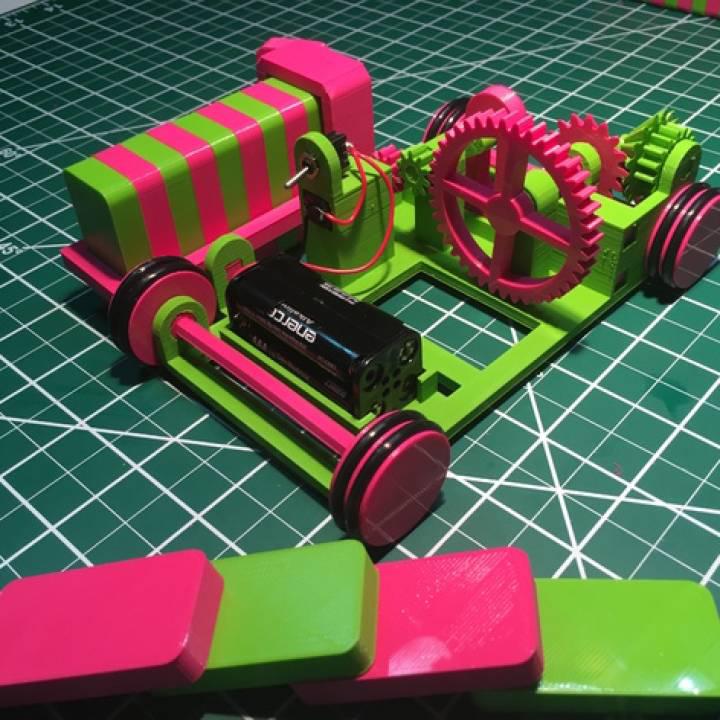
And finally, “The Pink and Green Domino Machine” inspired by Mathias Wandel’s “Lego domino row building machine“, he is an excellent woodworker and has designed a number of intriguing and unusual wooden models.). Again designed for the kids and grandkids, this moving model dispenses rows of 3D printed “dominos”, and as such removes the “tedious” part of building and subsequently knocking down domino mazes. This model is one of many models appearing in the MyMiniFactory “MyMiniFactory: The Community for 3D Printing Creators” video.
The End
Well, not quite yet. I have had countless visitors, followers and 3D printing enthusiasts ask how I design models that always work the very first time. My answer is, well, I don’t. I then proceed to point out my “mistakes” box that I keep under my desk. This box is filled with parts and pieces from gears and cams to pumpkins, ghosts and flowers that just didn’t quite work the first time.
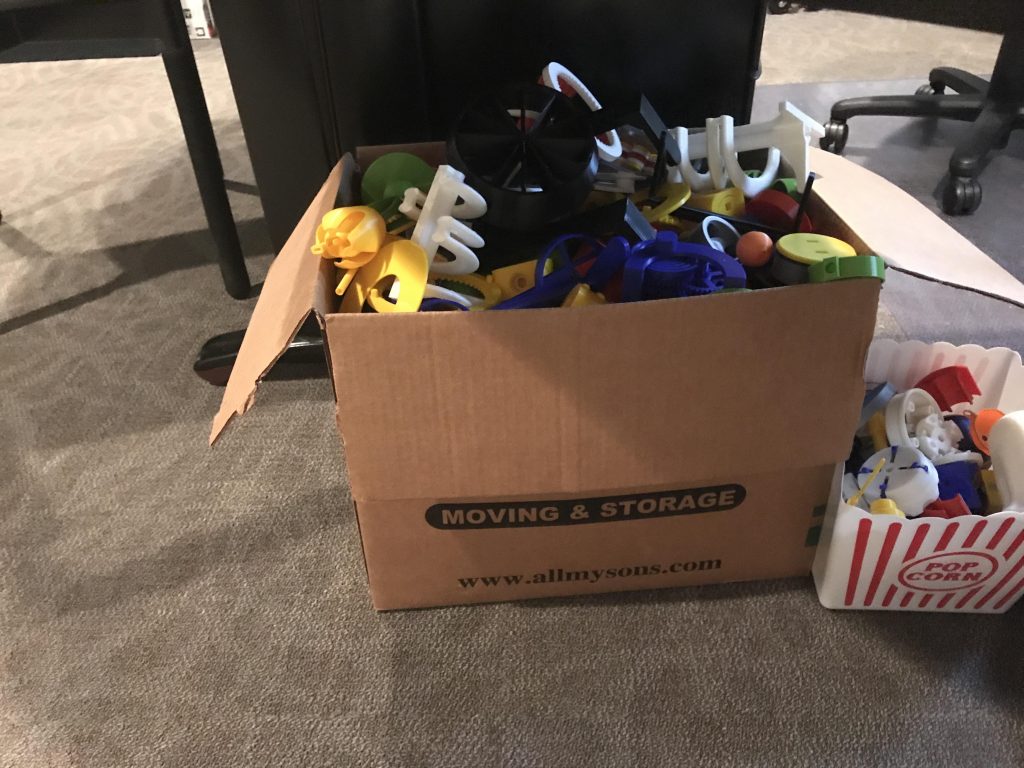
My dad, as well as an engineering friend of mine Jim, theorized that if one is not making mistakes, one is not learning anything new. My mistakes box is an indication that I for one believe in their theory. Don’t be afraid to learn something new, and never let mistakes, setbacks or failures stop you from reaching your goals. I always learn something new from them, so I keep my box of mistakes handy and within reach, just in case I forget that I’m always learning.
If you enjoyed this insight into how Greg Zumwalt is using 3D printing, then why not subscribe to our newsletter and follow us on social media.
We want to hear more about how our readers are using 3D printing. Get in touch if you’d like to share your insights.
