3D Printing Industry reviews the peel 2 3D Scanner.
Backed by over a decade of research and development in the 3D scanning market, the peel 2 3D scanner is peel 3D’s latest handheld system. Priced at $7,890, the affordable professional-grade machine is intended as an alternative to the pricier industrial devices retailing at $15,000+. As such, it’s suitable for newcomers as well as artists, designers, and engineers looking for a capable piece of kit.
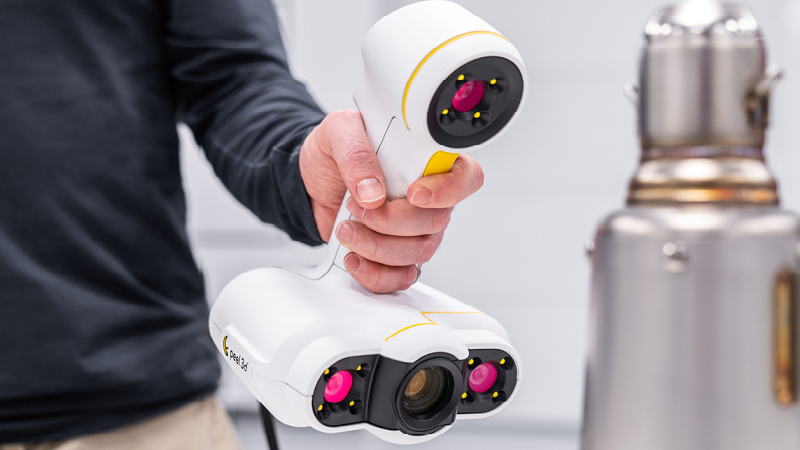
Much like the company’s debut peel scanner, the peel 2 is powered by metrology specialist Creaform and electronics provider AMETEK. In line with its predecessor, it operates on the same structured light technology using white LEDs, which is safe for the eyes unlike laser-based scanning technologies. The device features three individual cameras, each bounded by an array of four LEDs and an additional white light projector to deliver full-color, textured 3D scans.
Lightweight and ergonomic seem to be the name of the game here, as the peel 2’s body only weighs 950g and measures 150 x 171 x 251mm. This makes the scanner feel at home in the hands of the user during those longer scanning sessions, whether it be for a demonstration or a hardcore reverse engineering project.
The machine is generally designed to do its job without the need for targeting points at a scanning range of 0.3m – 3m, although exceptionally smooth or flat surfaces may require them. While the peel 2 also has trouble with objects that are translucent, completely pitch black, mirrors, thin walls, and hair, its limitations are absolutely normal for any scanner in its category and price range. The device has a volumetric accuracy of up to 0.5mm/m and is capable of taking 550,000 measurements a second. The scanning area is an industry standard 380 x 380mm.
The calibration and setup process
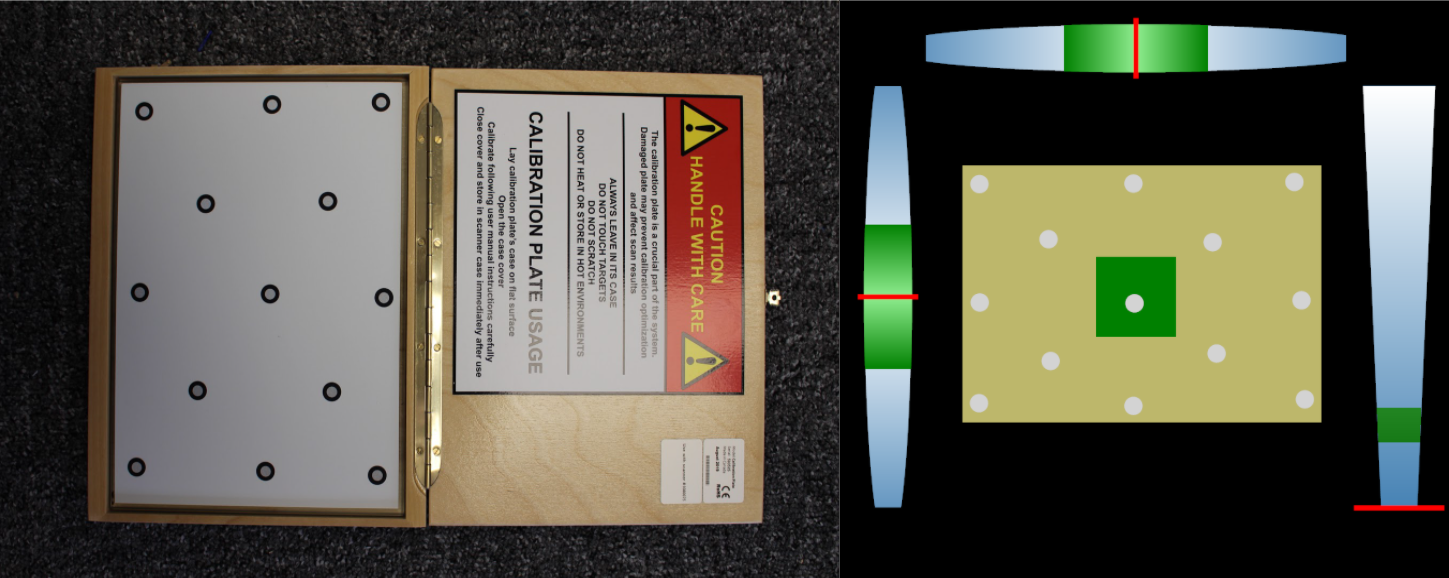
Packaged in the box is everything you need to start 3D scanning, including a calibration plate, positioning targets, a power supply, and a USB stick containing the manual and software installer.
The calibration process is fairly intuitive, and is recommended (but not essential) before every object scan. Users are required to place the dotted calibration plate on a flat horizontal surface such as a table and scan it in ten different positions. Starting at a perpendicular angle and a distance of approximately 20cm, the scanner is slowly moved away from the plate until it is able to scan the whole thing, taking the necessary snapshots along the way.
Taking around two minutes, this setup stage is quite difficult to mess up but we still thought an absolute beginner could benefit from a quick instructional video. That being said, unlike many other competing scanners, the calibration plate doesn’t need to be slanted and positioned at various obscure angles for the device to get a comprehensive set of readings. This makes the whole experience significantly more user-friendly.
We were also delighted to find that the complementary peel 3D software housed on the USB was easy to get to grips with. The program not only aids users in selecting the optimal scanning parameters such as the resolution, but also guides them through the post-processing stage with clear, defined functions. These include the ability to remove unwanted background elements, plug up holes, and align and merge multiple scans in an assembly.
Benchmarking the peel 2
It’s time to see what the peel 2 is really made of. Our in-house team of engineers put the 3D scanner through its paces with a wide variety of scan tests, ranging from artistic pieces to functional parts (we even threw a human into the mix!). Each and every one of the tests was performed three times with varying resolutions (2mm, 1mm, 0.5mm) in an open space with plenty of lighting for the best results. First up: the torso of Diadumenos found in the Louvre.
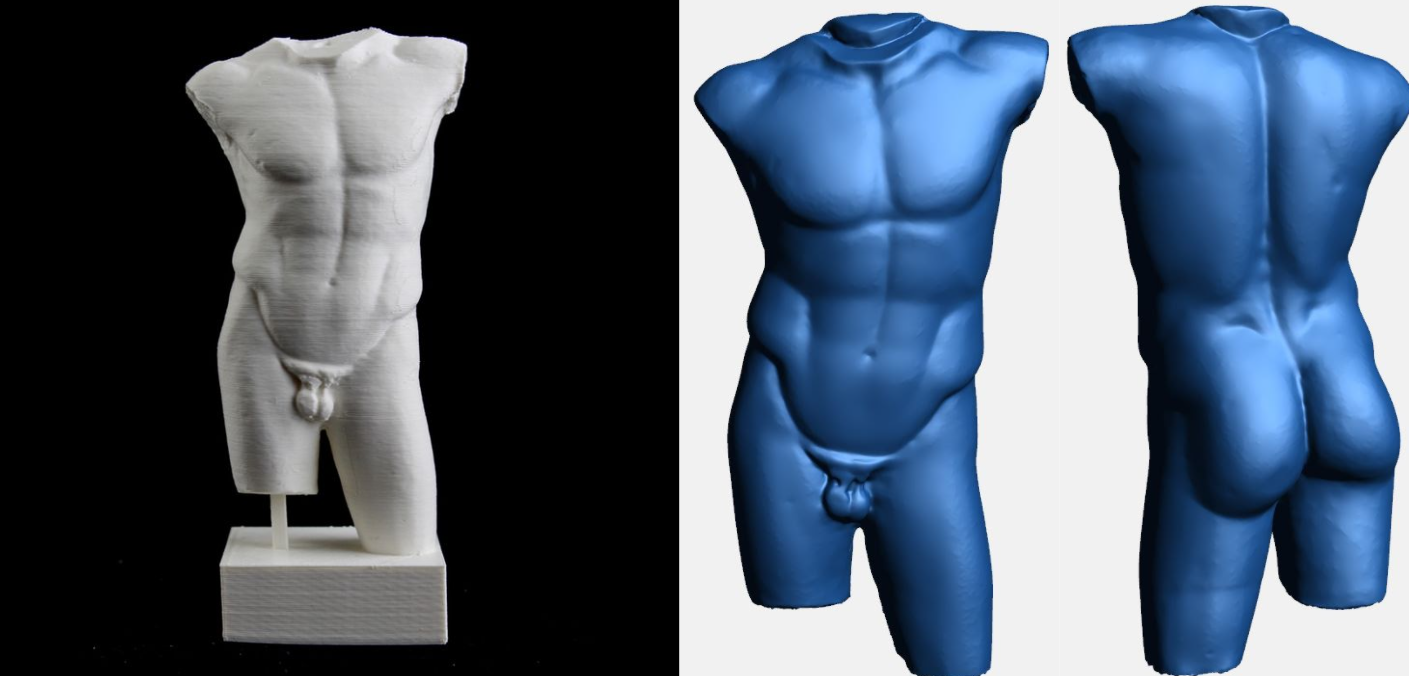
Much to our dismay, we didn’t have the original at our disposal so we settled for a white 35cm tall 3D printed replica instead. Even still, the peel 2 delivered on all three scans, each of which took a little under three minutes to complete, and a further three minutes in post-processing. We were impressed by how easy it was to capture the whole thing in a single run and just how little of the background the scanner accidentally caught. Furthermore, we noticed a real difference in quality between the resolutions as 2mm yielded 65,936 faces while 0.5mm yielded a whopping 1,992,116 faces. Overall, a fantastic scan.
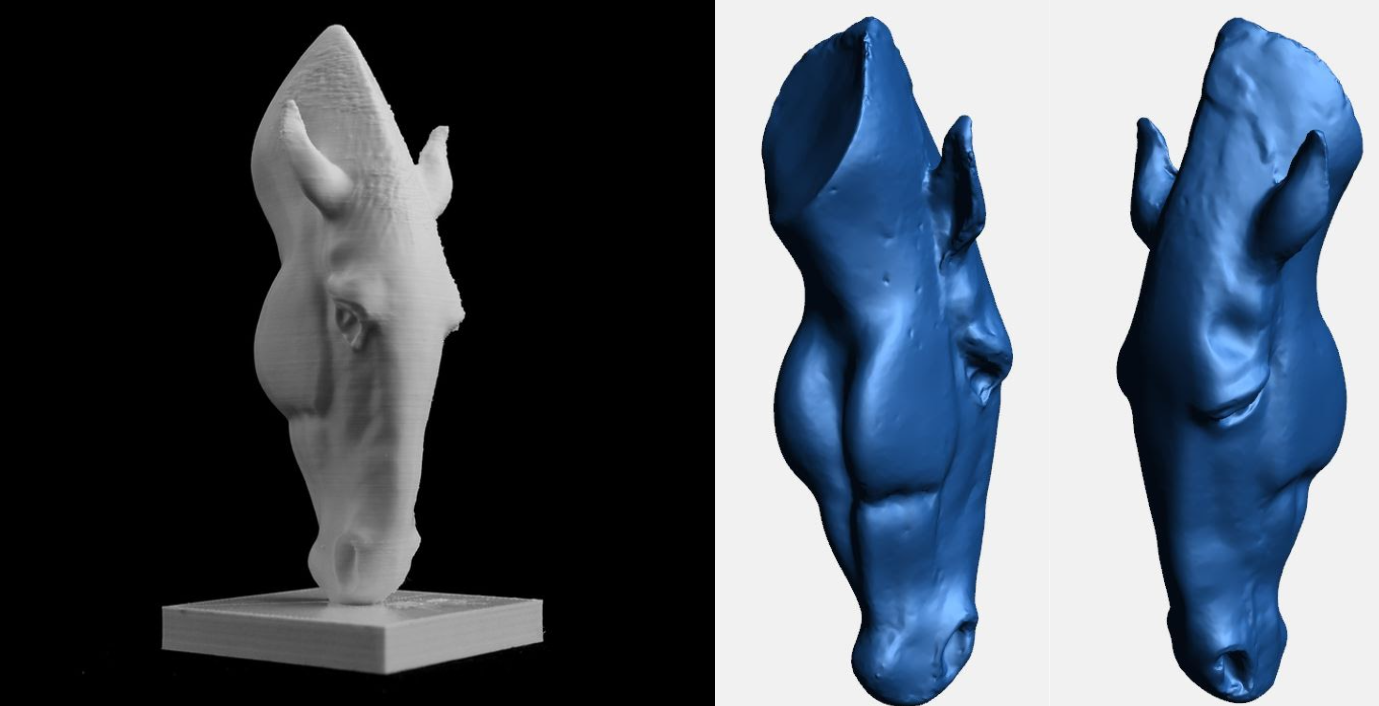
Next up was our 30cm tall silver spray painted replica of the Still Water horse sculpture. Again, the fact that the object was simple in its geometry meant the average scan time was no more than three minutes, with a further two minutes in post-processing. The more sensitive 0.5mm resolution run captured a significant amount of unwanted table, but it was nothing the peel 3D software couldn’t purge away in a matter of seconds. The curves of the model were emulated beautifully and the scanner even managed to track the crevices of the ears.
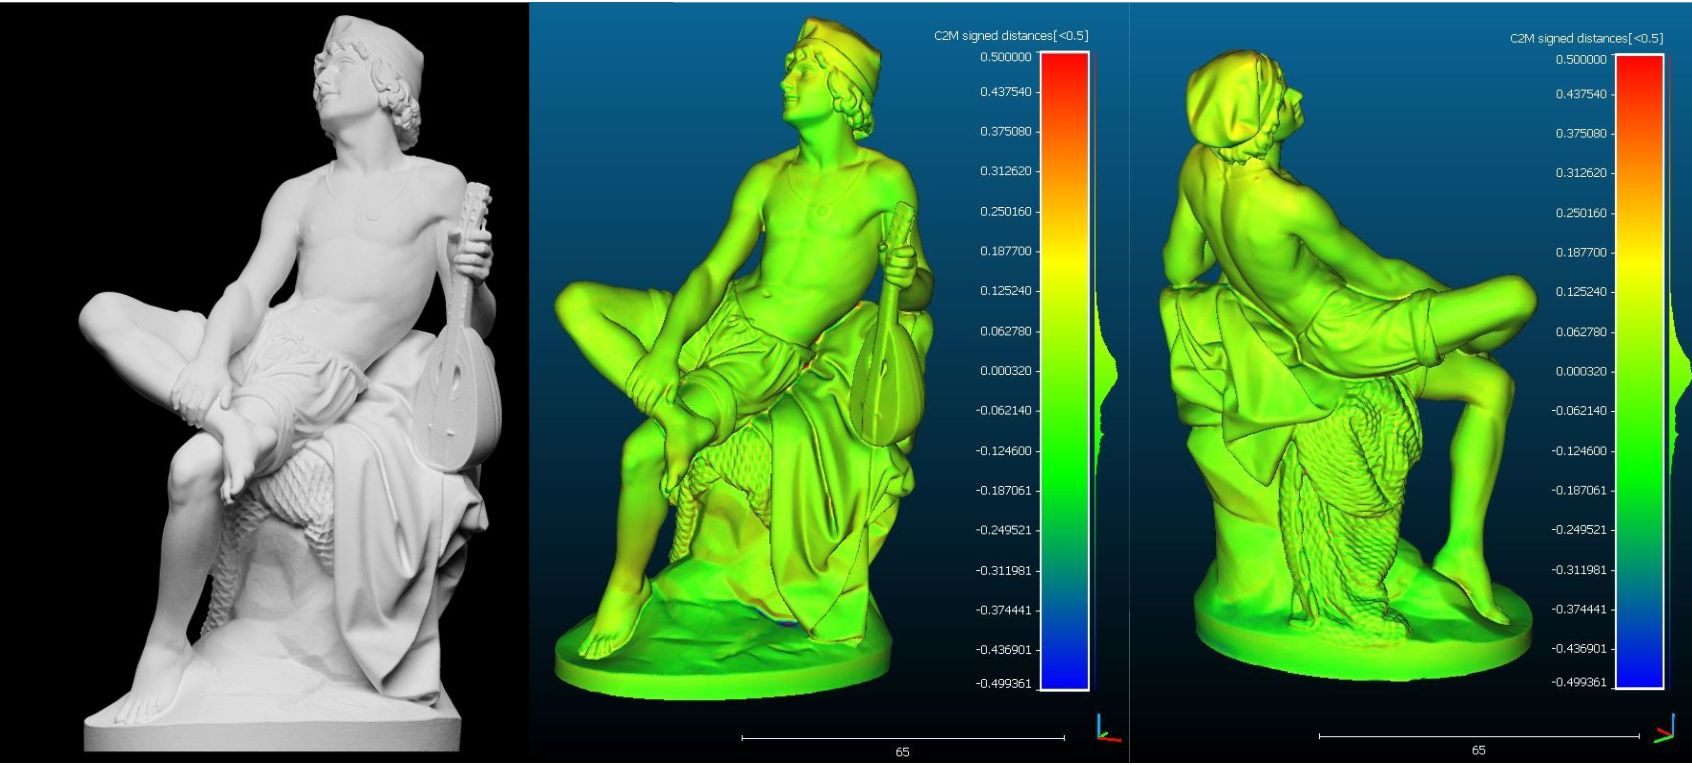
Our third object was a white 3D printed Neapolitan Fisherman sculpture – about 50cm tall. We thought this might finally be the test to trip up the peel 2, but the device held its own admirably despite the complexity of the model. His hair, the fine creases of his rags, and even the detailing on the lute resembled the real thing, albeit after some cleaning up. Naturally, the scanning and post-processing times on this model were a little longer than the previous models, averaging five minutes and four minutes respectively. The 2mm scan comprised 177,758 faces while the 0.5mm scan consisted of 2,837,197 faces.
We also compared the 3D scans to the original STL of the part to test the scanner’s dimensional precision. Impressively, each of the scans were within 0.5mm of the STL’s intended dimensions when looking at all points, with an average discrepancy of about 0.25mm. For a handheld scanner at this price point, we deem this highly accurate.
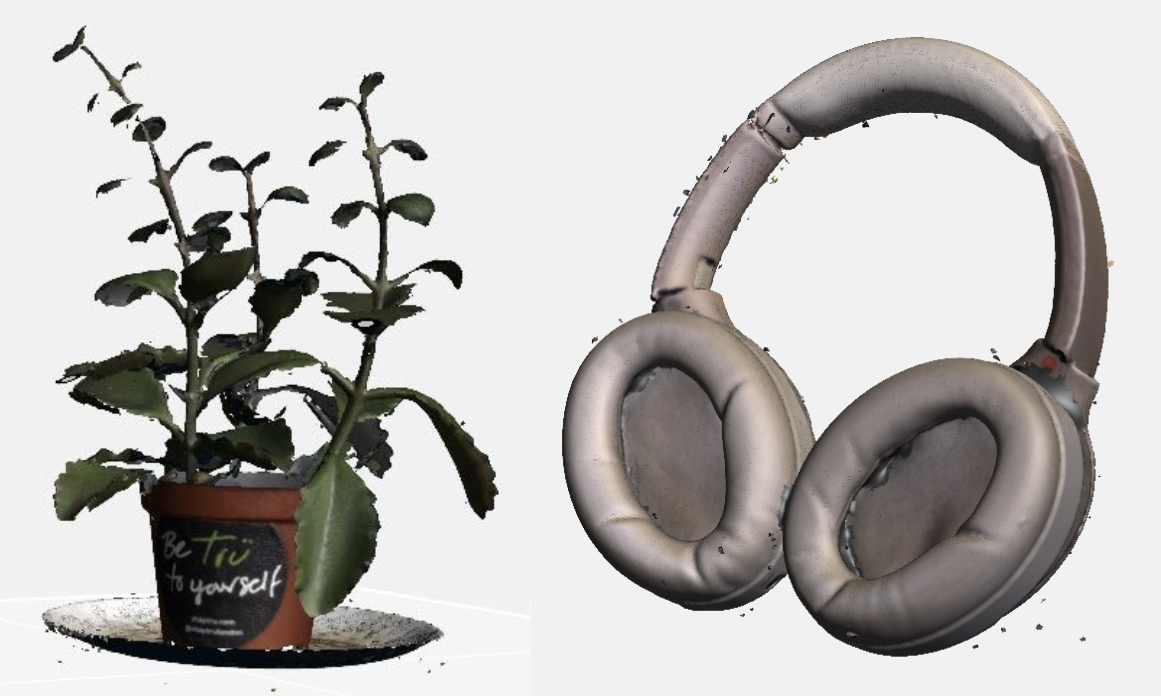
Moving on, we tried our hand at some everyday items around the office. Both the plant and headphones were scanned at a standard resolution of 1mm and produced precise digital copies. A few minutes of clean-up were required for both objects but the scans only took around 3 minutes each and really only struggled in heavily shaded areas.
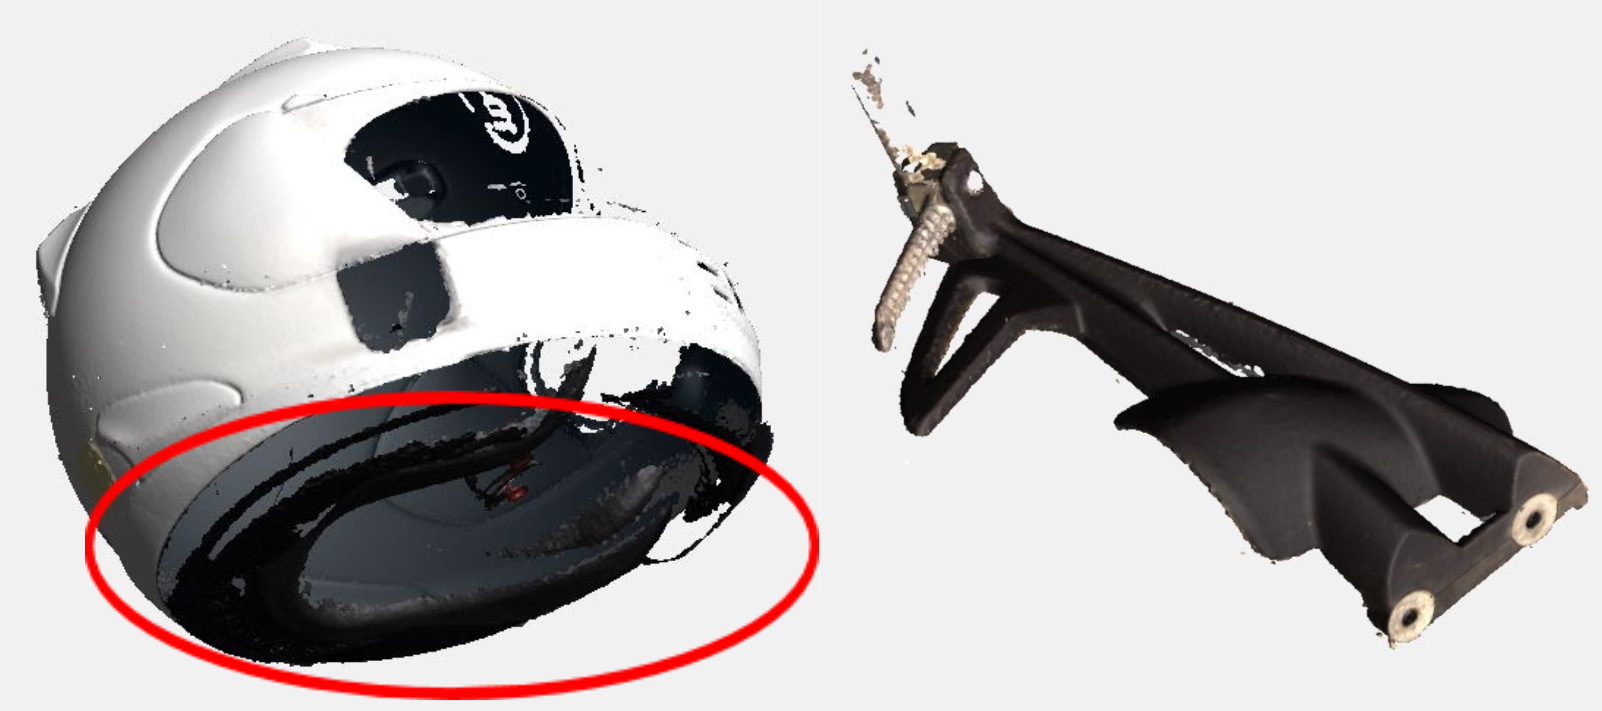
For the penultimate scanning round, we tested the peel 2 with a helmet and a rear motorbike footpeg hanger, both at a resolution of 1mm. The helmet was generally successful apart from the pitch black padding on the interior, which can be fixed with some additional work in a program such as ZBrush. The footpeg hanger, on the other hand, came out great. Despite the part being a dark grey, the scanner was able to recreate a solid model. It could certainly be used for reverse engineering purposes or even as a basis for a spare part redesign.
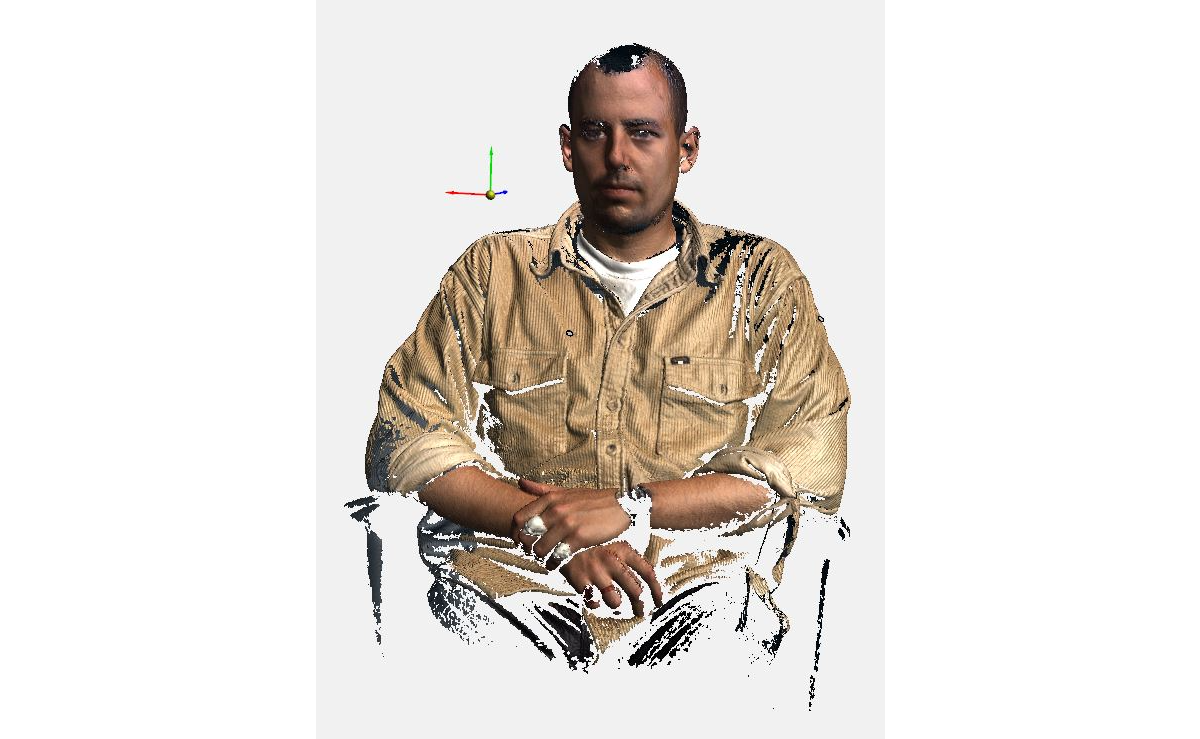
Finally, the human scan. While the final model did end up with plenty of holes, a cleaning session in ZBrush would be enough to make it printable. The scan could also do with the addition of a base to eliminate the messiness of the lower half, although this would be necessary anyway.
When it comes to the textures and color capturing, however, the peel 2 certainly performs. The face is recognizable and the finer details deliver a healthy does of realism. It’s worth noting here that human scans are always among the most difficult to get right, and will inevitably need a considerable amount of post-processing before they are ready for the slicer.
The verdict
When all is said and done, we have here one of the most cost-effective texture recording 3D scanners on the market. Everything from the hardware to the software – even the way it’s packaged – is great for the price point. The peel team has very thoughtfully streamlined the calibration process, the scanner feels great in the hands, and the software makes cleaning and merging as easy as pie.
While we found that the device wasn’t ideal for objects under 30cm in length, and often lost tracking on exceptionally small, large, or dark surfaces, these are ultimately minor gripes with what is otherwise a fantastic product. The peel 2 is undoubtedly one of the strongest contenders in its class, and makes for a great 3D scanner regardless of the user’s experience level.
Subscribe to the 3D Printing Industry newsletter for the latest news in additive manufacturing. You can also stay connected by following us on Twitter and liking us on Facebook.
Looking for a career in additive manufacturing? Visit 3D Printing Jobs for a selection of roles in the industry.
Featured image shows the peel 2 3D scanner. Photo via peel 3D.