There are many things to take into consideration when looking to cast 3D prints into metals. Here’s a breakdown of the process, from Design to Print to Cast.
It is no longer the case that the jewellery designer is necessarily doing this with his/her hands because designing a piece of jewellery no longer requires us to consider or to have any knowledge of its material counterpart. In fact, the new age jewellery designer often sits about as far away from the production of that piece of jewellery as is feasibly possible. However, understanding the complex process that turns your STL file into a shiny piece of finished jewellery is quite literally the key to great design. Below is a brief outline of some crucial things to consider when designing a piece of jewellery that you aim to 3D print and cast into metal, followed by a short summary of the casting process itself. Let’s start by considering the…
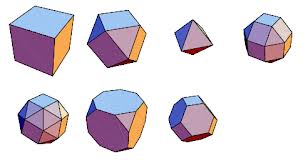
Shape: How complex is the shape? Is it a solid shape, or is it hollow, is it like a sphere or square, or does it have under-cuts or voids, or areas which are disconnected from the main shape. Objects that have lots of small holes or voids can be difficult to polish, so it may be worth considering slicing the model in two (or three, etc) and casting these parts separately, so that access to the interior of the finished model for polishing is easier. Some designs include shapes that are more easily added in by a skilled jeweller; rods and cylindrical shapes are standard shapes that can be bought and soldered in place post-casting, and are far more likely to retain their true shape than if they are printed and cast.
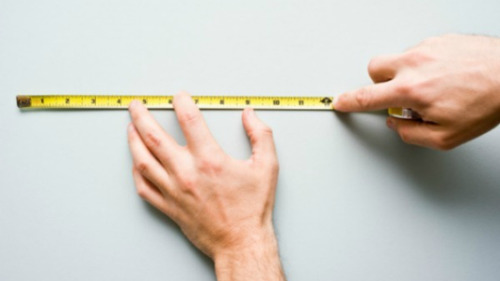
Size: How large is your piece of jewellery? This can be measured a number of ways, by volume, or by length, width etc. Shapes that are too large often require a flask of their own when it comes to casting. Shapes of similar size and volume are usually lumped together in the same flask so that the caster can control the speed and temperature of the metal needed for each flask. Extra flasks cost extra money..and lets face it no one has extra money.
Weight: It is important to consider the weight of the finished piece of jewellery when cast in the metal. It is possible to calculate the weight in your chosen metal using a simple conversion, however, checking the volume this way is never completely accurate, unless you know the exact weight to volume ratio of your chosen metal, but it helps to give some idea of the end weight.
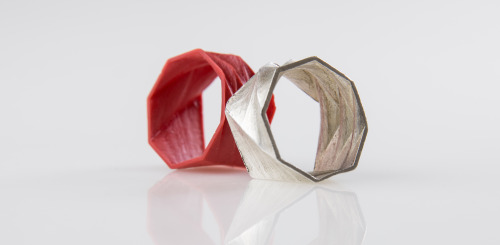
Thickness: What is the maximum and minimum cross-sectional thickness of your object? It is not advisable to design anything with under 1mm of cross sectional thickness, as you are likely to encounter problems during casting. Allowing a little extra thickness improves the chances of good metal flow. Imagine that the metal has to squeeze through those thin areas, at speed whilst cooling, like an artery pumping blood through the body, the wider the artery, the easier the blood flows. Metals also shrink as they cool, so a 1.5mm thick area in your 3D print could come out closer to 1mm in finished metal, making it too weak to wear.

Yer Twisted Heart by Mr Lugs
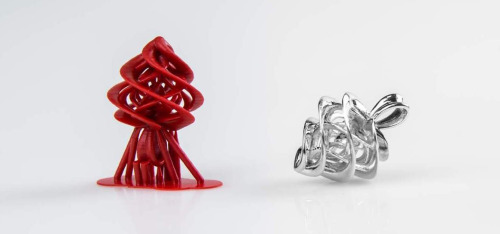
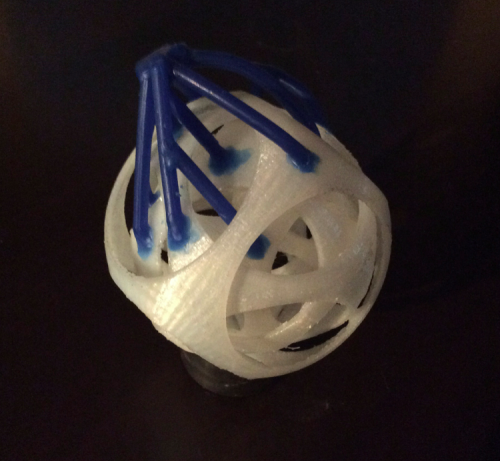
Designing in Sprues: Sprues are usually wax rods that are added to a wax model or 3D print, acting like a tunnel in which the liquid metal can travel down to get to the 3D print. Every caster will tell you something different when it comes to designing sprues into your models before printing. The up-side to designing them into your model is that there is less work for the individual building the tree; they only need to connect your object to their wax sprue at one point, saving time. The flip-side is that incorrect sprue placement can hinder the flow of metal and cause loss of detail, forcing the finisher to re-sculpt the details back into the finished metal. Being able to show your casting specialist an image of your 3D model could be the key to solving this problem. Getting the resin to bond to the wax sprue is another issue entirely, as resins don’t melt..they burn.

Printing and curing 3D Prints
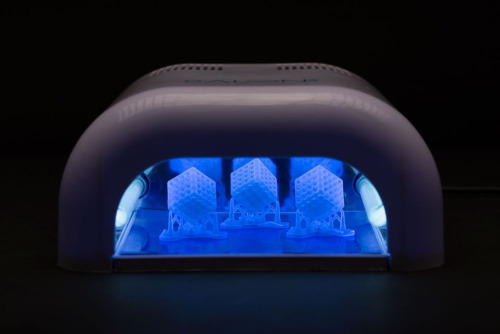
If working with a resin DLP or SLA 3D printer, such as a B9 Creator, Miicraft, or Pegasus, first make sure you choose a castable resin to print with. Follow the printing guidelines for optimum print resolution; the better the resolution, the finer the print, the finer the print, the finer the cast. Once the object has finished printing, remove it from the print bed carefully, using a sharp spatula, being careful not to damage the surface of the print bed. Clean the resin 3D print with an alcohol solution such as Isoproyl to remove any residual un-catalysed resin. The type of resins used for direct casting are numerous to say the least, but they can all be described as photosensitive resins or light-activated resins, because their chemical structure is altered under UV light turning them from a liquid into a solid. You can use a UV light box to continue curing the prints once they have been printed. Often a “smell test” can be the best way to determine whether the print has been cured properly. We have found that curing prints for up to 8 hours after printing can massively improve the quality of the casting. You also want to carefully remove any supports (structures designed to help grow the 3D print) connected to the 3D print.
Preparing the Tree
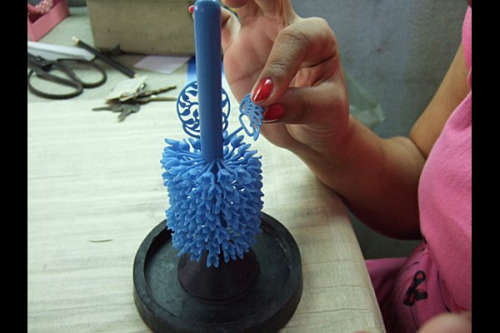
Next, take your finished, cured, and cleaned 3D print to your casting professional who will begin by adding your 3D prints to a wax tree. The tree is built in such a way as to maximise the amount of objects that can be cast at one time. The tree is built as you would imagine with a base (connected to a heat-resistant rubber flask cap) attached to a thicker trunk section, and off that many sprues connecting the main sprue (or trunk) to the 3D prints. This tree is then surrounded by a steel flask and an investment material (a highly heat resistant ceramic compound) is then mixed, vacuumed (to remove air) and poured into the flask to cover all of the wax tree and all the resin 3D prints. The flask and investment material are then left to cool and set around the tree capturing all the beautiful surface detail of your 3D prints.
Building the tree…

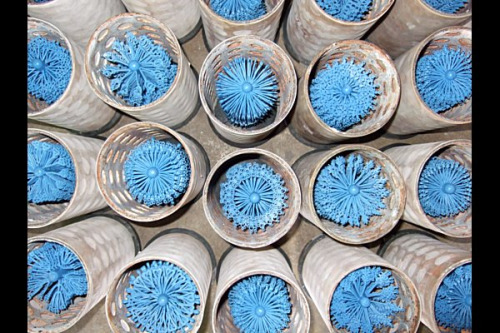
Trees inside flasks, ready for investment…
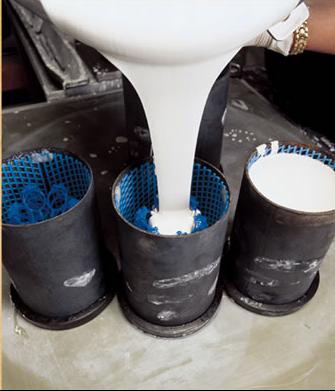
Pouring investment material into flasks..
Burnout
Once the investment has hardened, it is added to a furnace or oven. The temperature is slowly raised in increments until all the resin and wax has melted and burnt out of the investment, leaving a void (empty space) where the resin 3D Prints and wax tree used to be. This process is called the burnout. This is a fundamental stage, and there is a plethora of blogs and forums online, dedicated to the subject, but the truth is that there’s no one rule that can be applied here. Every object is different, every furnace behaves differently, every mix and brand of investment is slightly different, every burnout schedule is different, and the composition of every metal is different. The key to successful castings is through systematic trial and experimentation. I recommend the B9Forum in particular as a place with paralleled advice and scientific discussion on the subject. In short, the aim of the burnout is to get rid of any trace of the original 3D printed object. A burnout that is too quick can cause the resin to expand and combust fiercely damaging the surface of the investment and in turn the detail of the finished castings. A burnout that does not reach high enough temperatures can leave resin or ash inside the investment, affecting metal flow and the surface finish of your metal part.
Casting
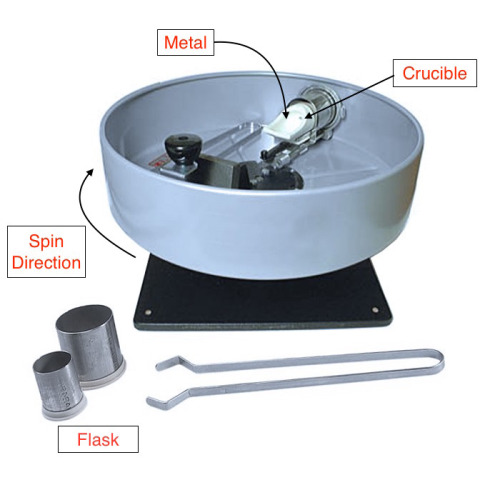
It’s getting hot in here!..so put your damn clothes back on you fool! The oven temperature is gently lowered so that the investment material is the required casting temperature. The chosen metal is then heated in the crucible to the required temperature. A centrifugal casting system is often used to literally throw the liquid metal into the void of the investment. Below is an image of a centrifugal casting system, ideal for small objects like jewellery.
Soham Harrison’s video demonstrates the centrifugal process in action. Check out his YouTube channel for more jewellery related tutorials.
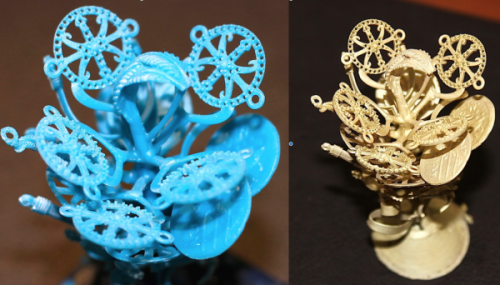
A wax tree before and after the casting process…
Stay tuned for more helpful tips on designing, printing, cleaning, curing, casting, and finishing your 3D prints. In the meantime check out our YouTube channel for more videos and tutorials and the MyMiniFactory Jewellery Shop, where you can get your hands on some incredible 3D Printed Jewellery cast in Sterling Silver.