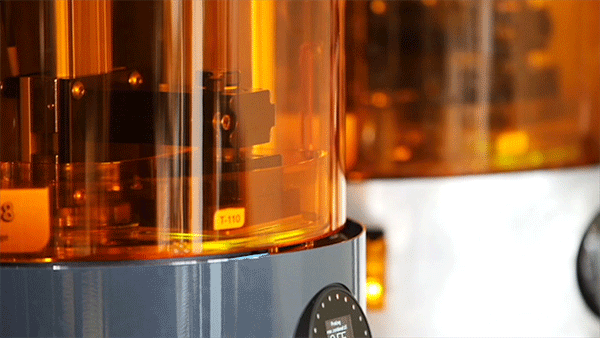
Among the many big announcements Autodesk made ahead of its REAL 2016 event, one important development may have been overshadowed by news of the software company’s investment in XJet and their Project Escher platform. Autodesk has engineered its Ember DLP SLA 3D printer to be 24-times faster than it was, significant progress over the existing speed limitations of many desktop technologies. And, because Ember is open source, the Autodesk team outlines just how they did it in a detailed Instructable so that, no matter what kind of DLP machine you own, you can implement similar changes.
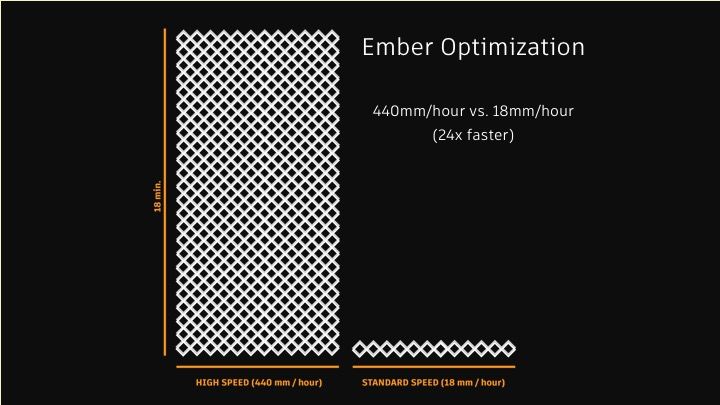
All of the techniques used to increase the Ember from printing at just 18mm/hr to a whopping 440mm/hr were associated with tinkering with the print settings, the software, and the material, meaning that there actually no hardware changes made at all. With the stated good intentions of advancing DLP technology for all, the engineers behind Ember lay out step-by-step the tweaks that are needed to increase the speed of Ember, as well as the mechanics of the printer overall. The biggest factor related to speeding up the printer is how Ember reduces suction forces associated with top-down DLP printing.
To decrease the amount of suction force between the optical window, through which the lighting masks from the overhead projector are emitted, and the resin, the resin tray is rotated by 60 degrees with each layer. Though this layer separation process reduces the suction force by 200 times, it takes about two to three seconds per layer to perform, accounting for 50% of the print time and limiting the speed to 188 mm/hr for 25-micron layers. To jack up the speed to 440mm/hr, the Autodesk team had to remove this step. And they did so all without changing the hardware. The Instructable explains the three-part process involved:
440mm/hour is 24 times greater than Ember’s typically printer speed and we achieve this through optimization of three things:
Material – we’ve designed a resin that cures quicker and at thicker layers
Process – we’ve changed the print process by eliminating the separation step and printing at 250micron layers
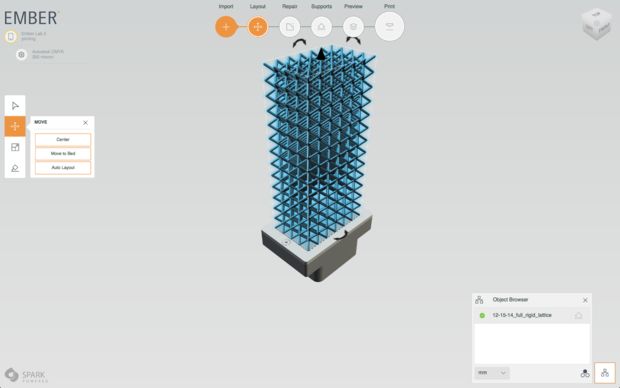
Geometry – we’ve chosen a lattice structure that reduces the surface area per layer
By decreasing the UV blocker concentration in the printer’s resin, the UV light was able to cure prints quicker and to a deeper depth. Then, by using a specific geometry, with the least amount of surface area possible (below 15%), the suction forces were decreased significantly. A combination of these two steps allowed the team to perform the third, removing the layer separation step altogether. And printing in 250-micron layers further increased the speed by a factor of 10.
This process, of course, has its drawbacks. The surface area of the entire object and of each individual part must be limited, as is the rate of change of each layer position and the strength of the material. To overcome these obstacles, Autodesk proposes making the Ember stiffer, making the initial inhibition layer thicker, and creating a resin that cures even more quickly and has a lower viscosity.
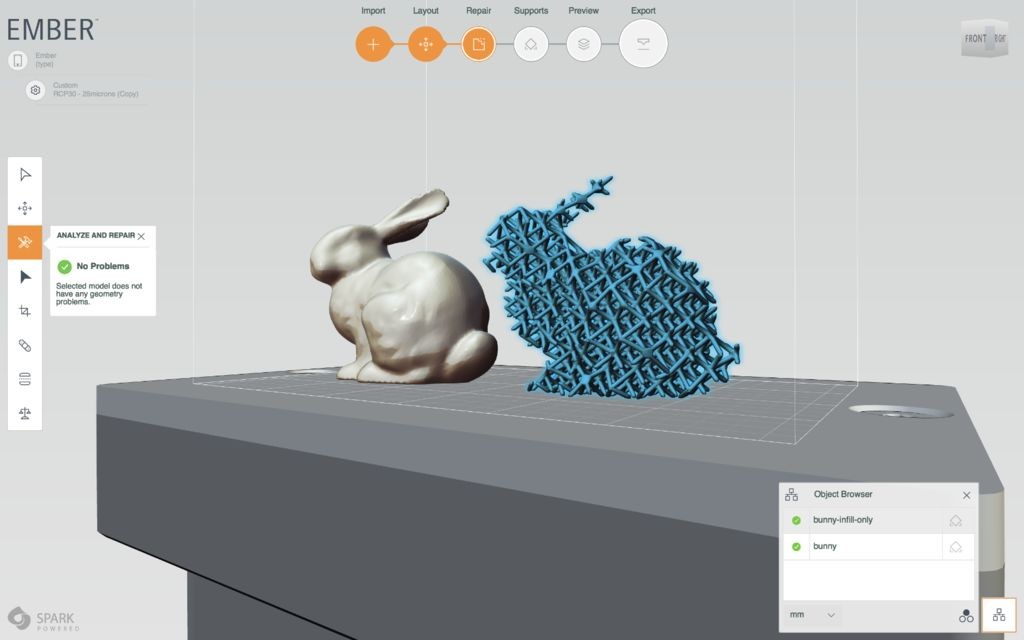
While these drawbacks may make it difficult to use high-speed printing for the dental, jewelry, and hearing aid industries, Autodesk believes that software could also be the solution. Using a software like Dreamcatcher, which allows users to input design objectives and generate models that meet those objectives with unique geometries, the team envisions applying the lattice structures used in this experiment to a variety of CAD models for possible high-speed printing.
I’ve only given a very cursory summary of the project, so if you want to get into the nitty-gritty of this fascinating experiment, head over to the Instructable here.